Thread的基本操作
目录
一 . 创建线程
1) 继承Thread类
2) 使用Runnable 来创建线程
3) 继承Thread , 使用匿名内部类
4) 实现Runnable , 使用匿名内部类
5) lambda 表达式 创建线程(常用)
二 . Thread 构造方法 与 常用方法
1. 无参构造 Thread()
2. 只有Runnable 参数 Thread(Runnable)
3. 带有Runnable 与 String 的构造方法 Thread(Runnable,String)
4. 只带有String 参数的构造方法 Thread(String)
Thread 常见属性
1) 获得当前线程的引用
2) 获取ID
3) 获取名称
4) 获取优先级
5) 获取线程的状态
6) 是否存活
7) 是否被中断
8) 是否后台线程
关于线程中的 run() 方法
三 . 线程的状态
1) 线程休眠
2) 线程中断
3) 线程等待
总结 :
一 . 创建线程
1) 继承Thread类
class MyThread extends Thread {
    @Override
    public void run() {
        System.out.println("通过继承来创建线程");
    }
}
public class Demo1 {
    public static void main(String[] args) {
        Thread t = new MyThread();
        t.start();
    }
}
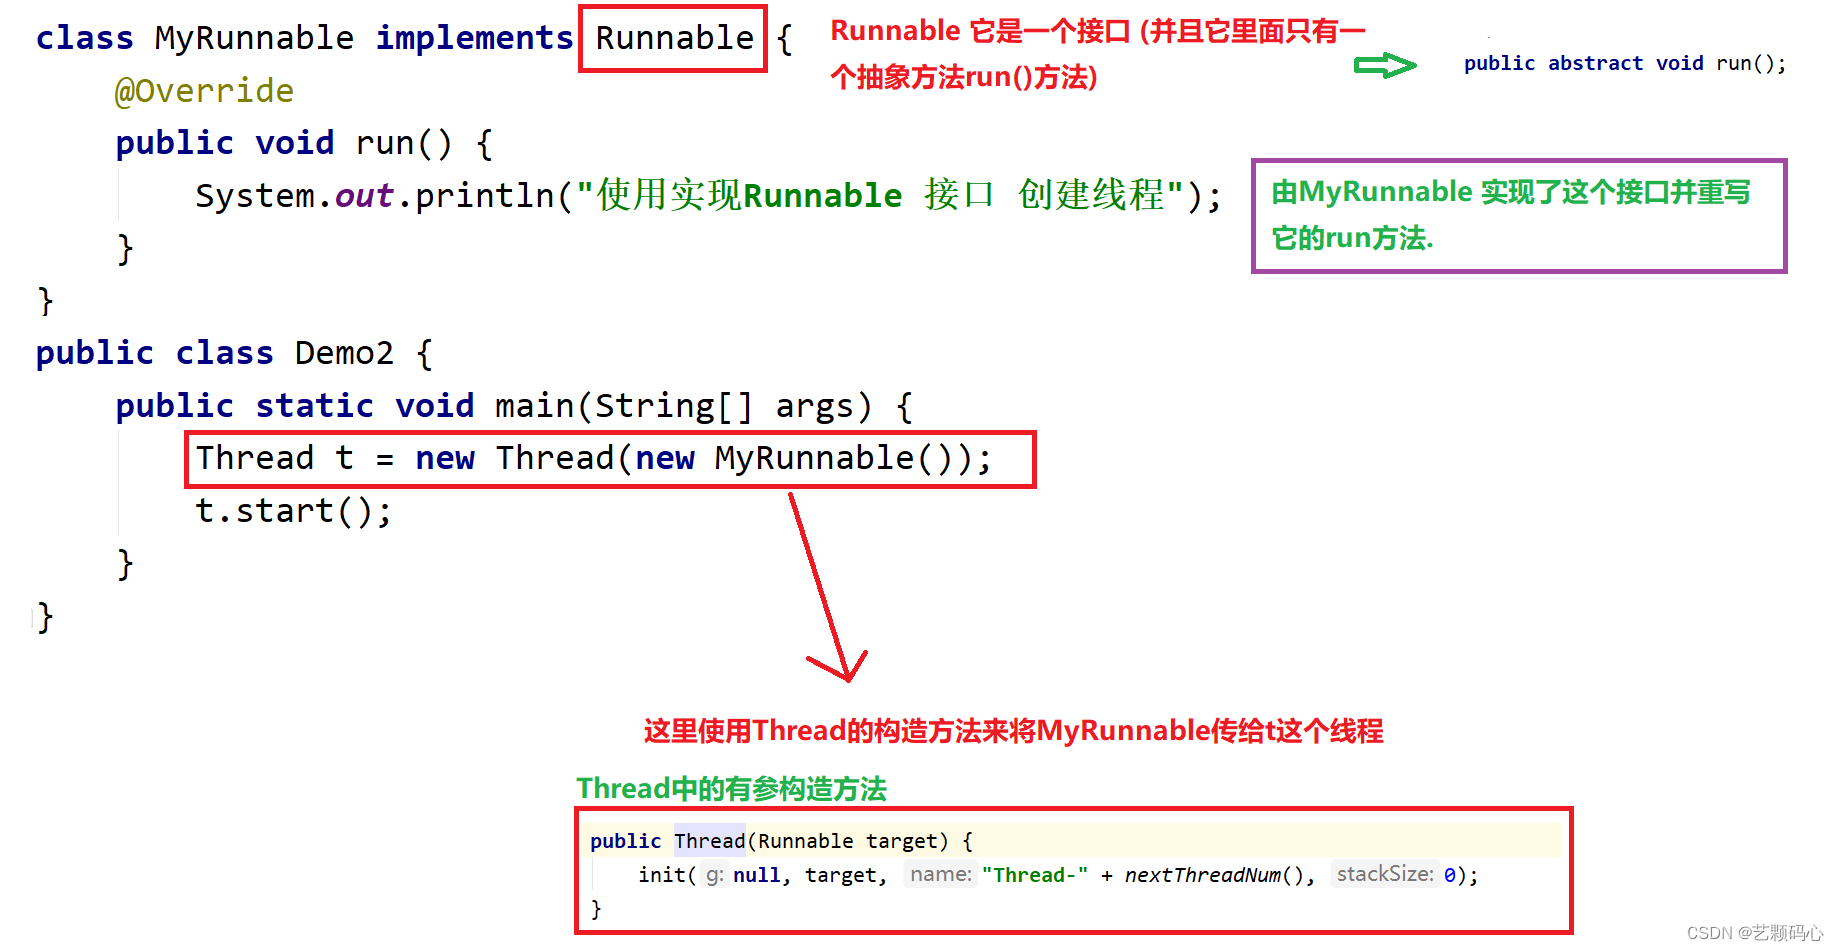
2) 使用Runnable 来创建线程
这种写法通过实现Runnable , 来描述线程中要执行的任务
class MyRunnable implements Runnable {
    @Override
    public void run() {
        System.out.println("使用实现Runnable 接口 创建线程");
    }
}
public class Demo2 {
    public static void main(String[] args) {
        Thread t = new Thread(new MyRunnable());
        t.start();
    }
}
3) 继承Thread , 使用匿名内部类
public class Demo3 {
    public static void main(String[] args) {
        Thread t = new Thread() {
            @Override
            public void run() {
                System.out.println("继承Thread,匿名内部类");
            }
        };
        t.start();
    }
}
4) 实现Runnable , 使用匿名内部类
实现方法跟上面相同.(实现了Runnable,重写了run()方法)
public class Demo4 {
    public static void main(String[] args) {
        Thread t = new Thread(new Runnable() {
            @Override
            public void run() {
                System.out.println("实现Runnable 接口,匿名内部类");
            }
        });
        t.start();
    }
}
5) lambda 表达式 创建线程(常用)
public class Demo5 {
    public static void main(String[] args) {
        Thread t = new Thread(() -> {
            System.out.println("lambda表达式");
        });
    }
}
总结 : 通常认为Runnable 这种写法更好一点 ~~ 能够做到让线程和线程执行的任务, 更好的进行解耦. (写代码希望 : 高内聚, 底耦合)
Runnable 单纯的只是描述了一个任务 ~ 至于这个任务是要通过一个进程来执行,还是线程执行,或者是线程池来执行,还是协程来执行, Runnable本身别不关心,Runnable里面的代码也不关心.
二 . Thread 构造方法 与 常用方法
在这里主要将一下几个构造方法 :
1. 无参构造 Thread()

2. 只有Runnable 参数 Thread(Runnable)

3. 带有Runnable 与 String 的构造方法 Thread(Runnable,String)

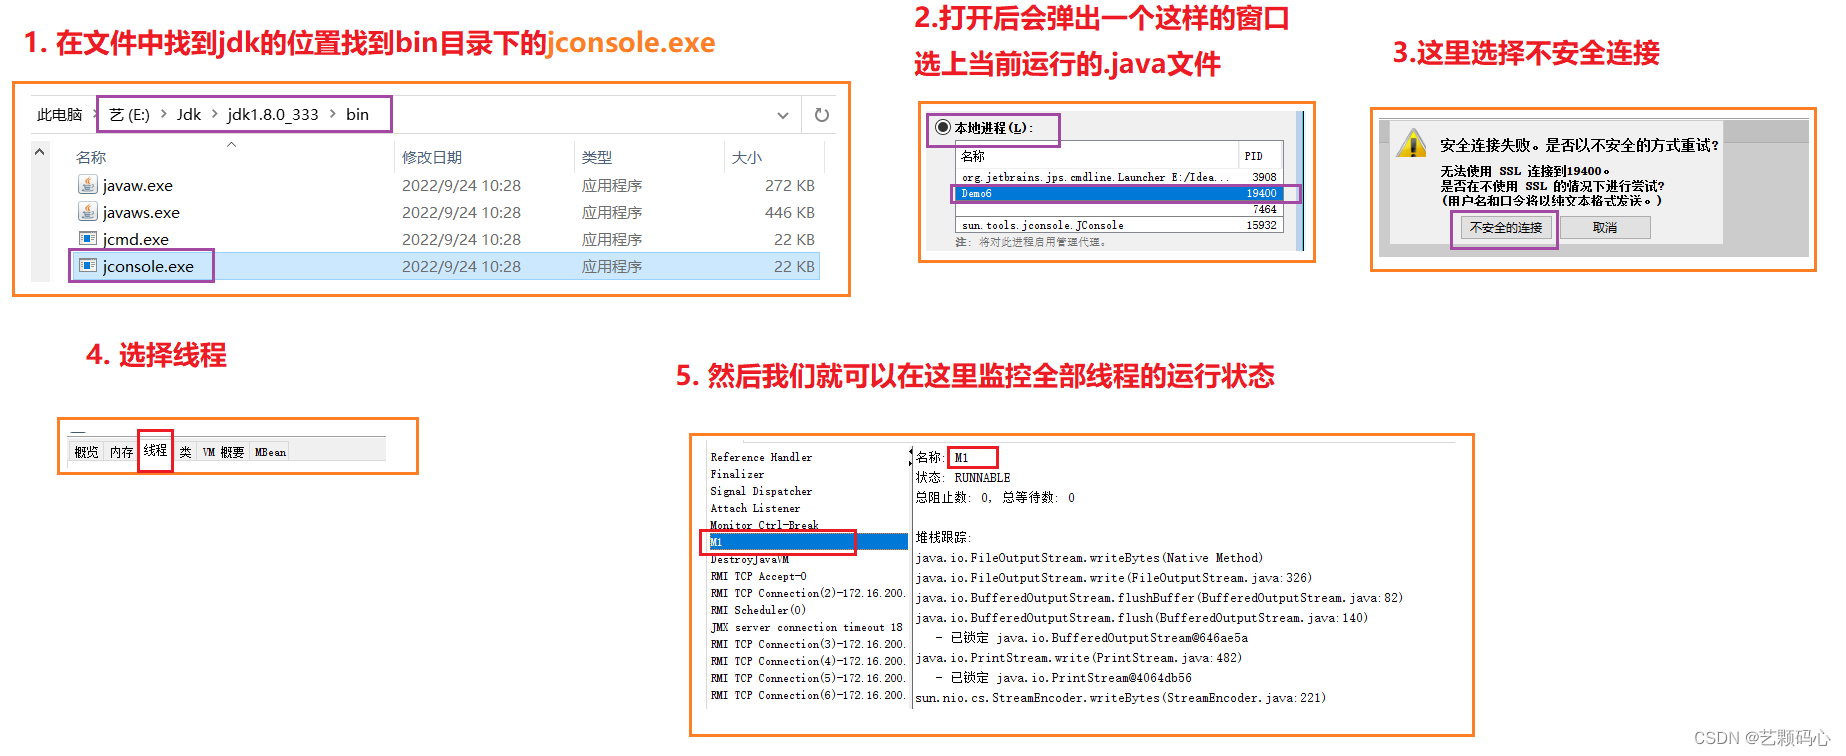
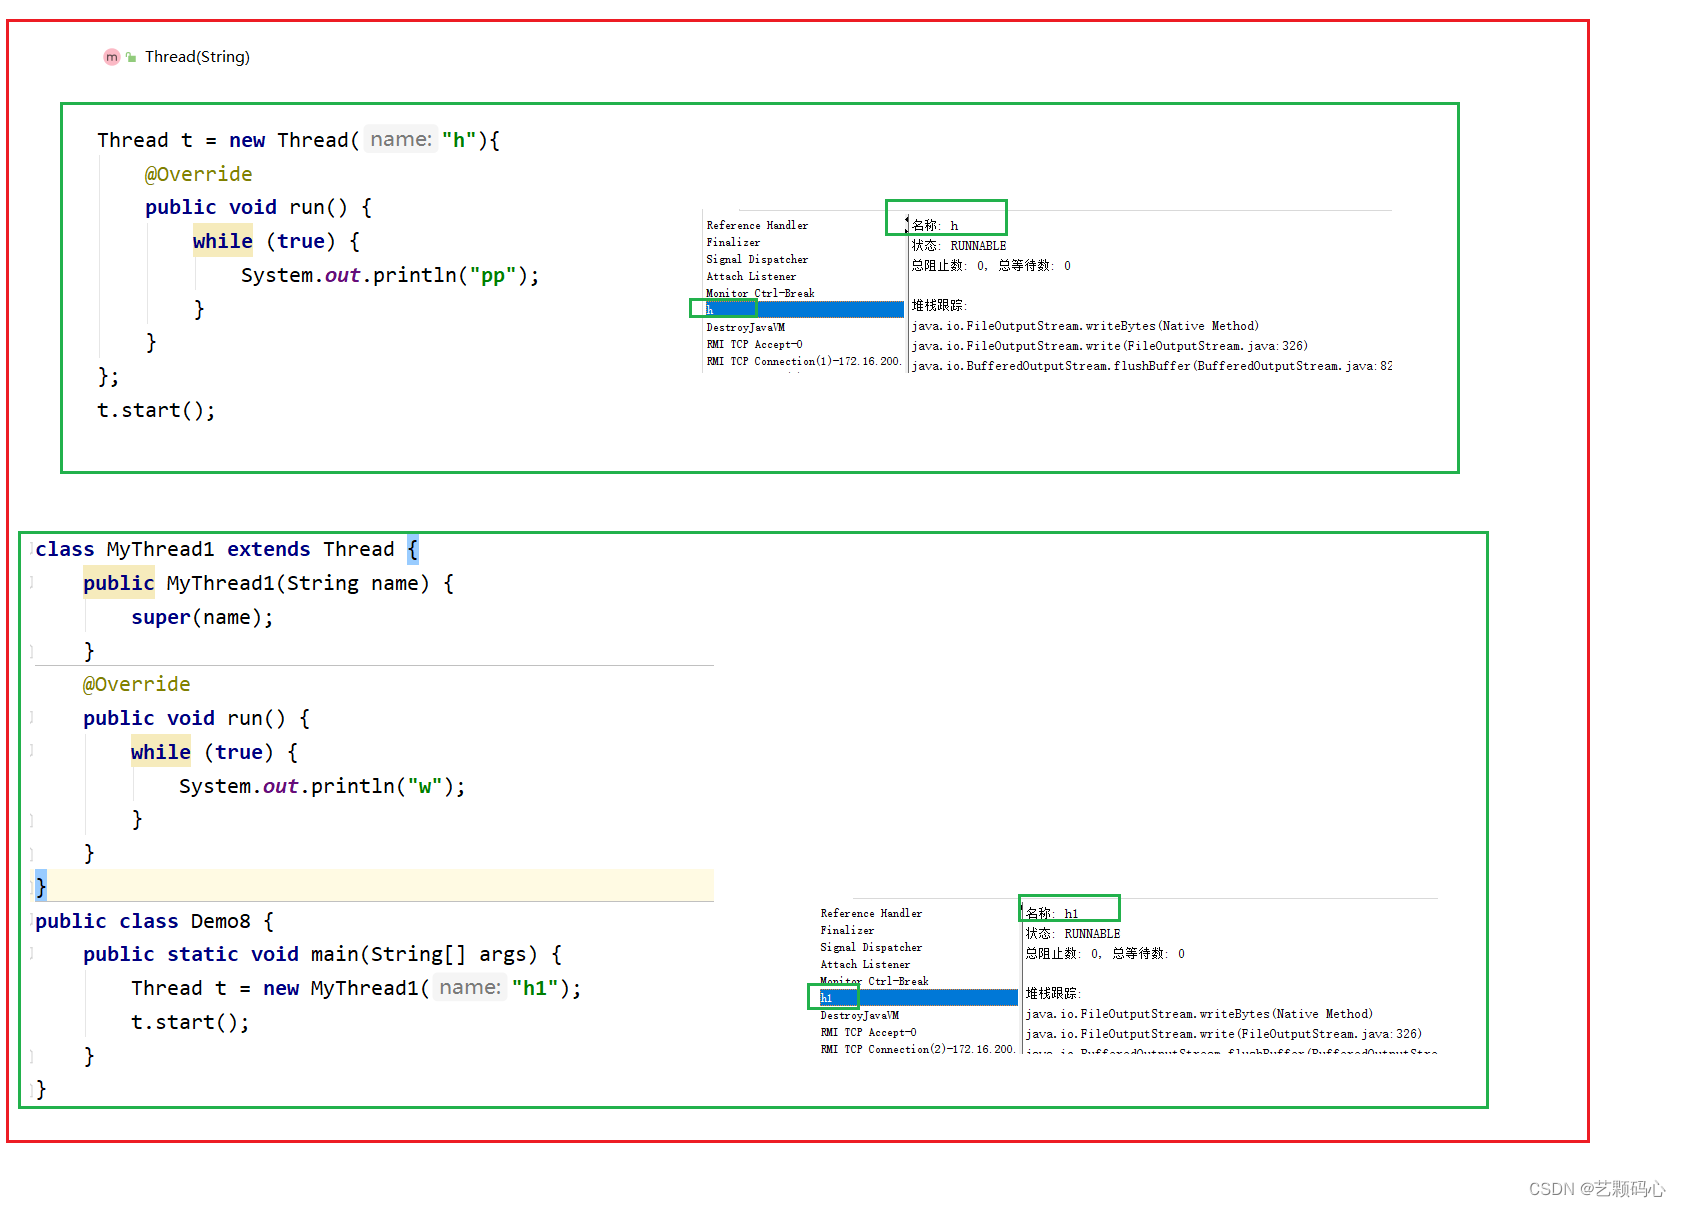
4. 只带有String 参数的构造方法 Thread(String)
Thread 常见属性
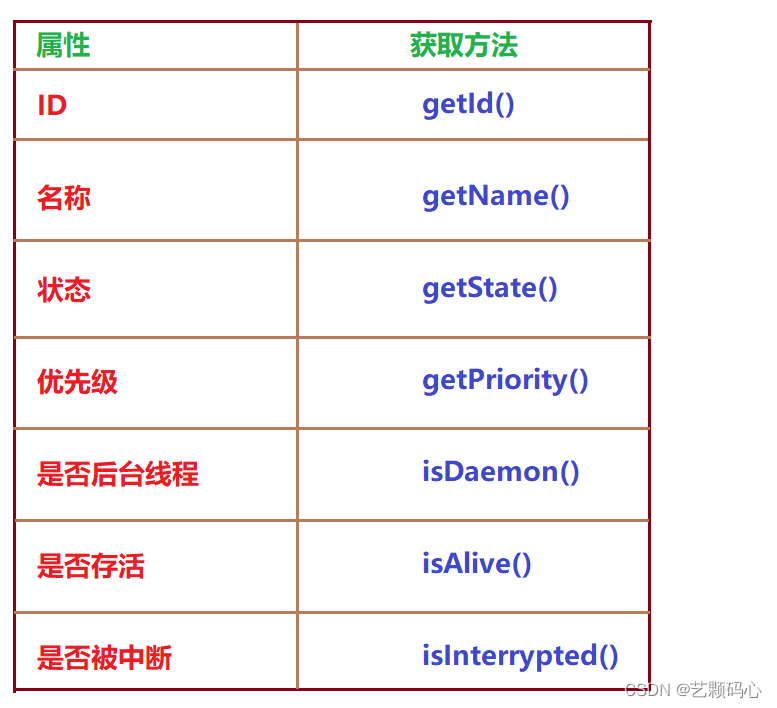
Thread 的几个常见属性
1) 获得当前线程的引用
Thread.currentThread();
2) 获取ID
3) 获取名称
4) 获取优先级
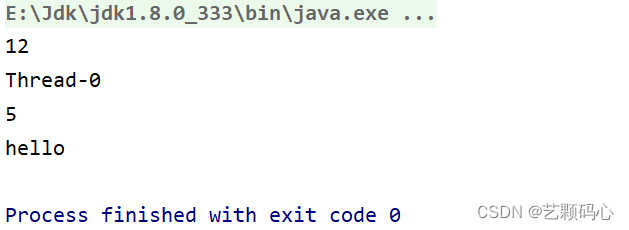
public static void main(String[] args) {
        Thread t = new Thread(() -> {
            //获取当前线程的ID
            System.out.println(Thread.currentThread().getId());
            //获取当前线程的名称
            System.out.println(Thread.currentThread().getName());
            //获取当前线程的优先级
            System.out.println(Thread.currentThread().getPriority());
            System.out.println("hello");
        });
        t.start();
    }
5) 获取线程的状态
这里的状态会分为很多种,在后面会重点介绍.
6) 是否存活
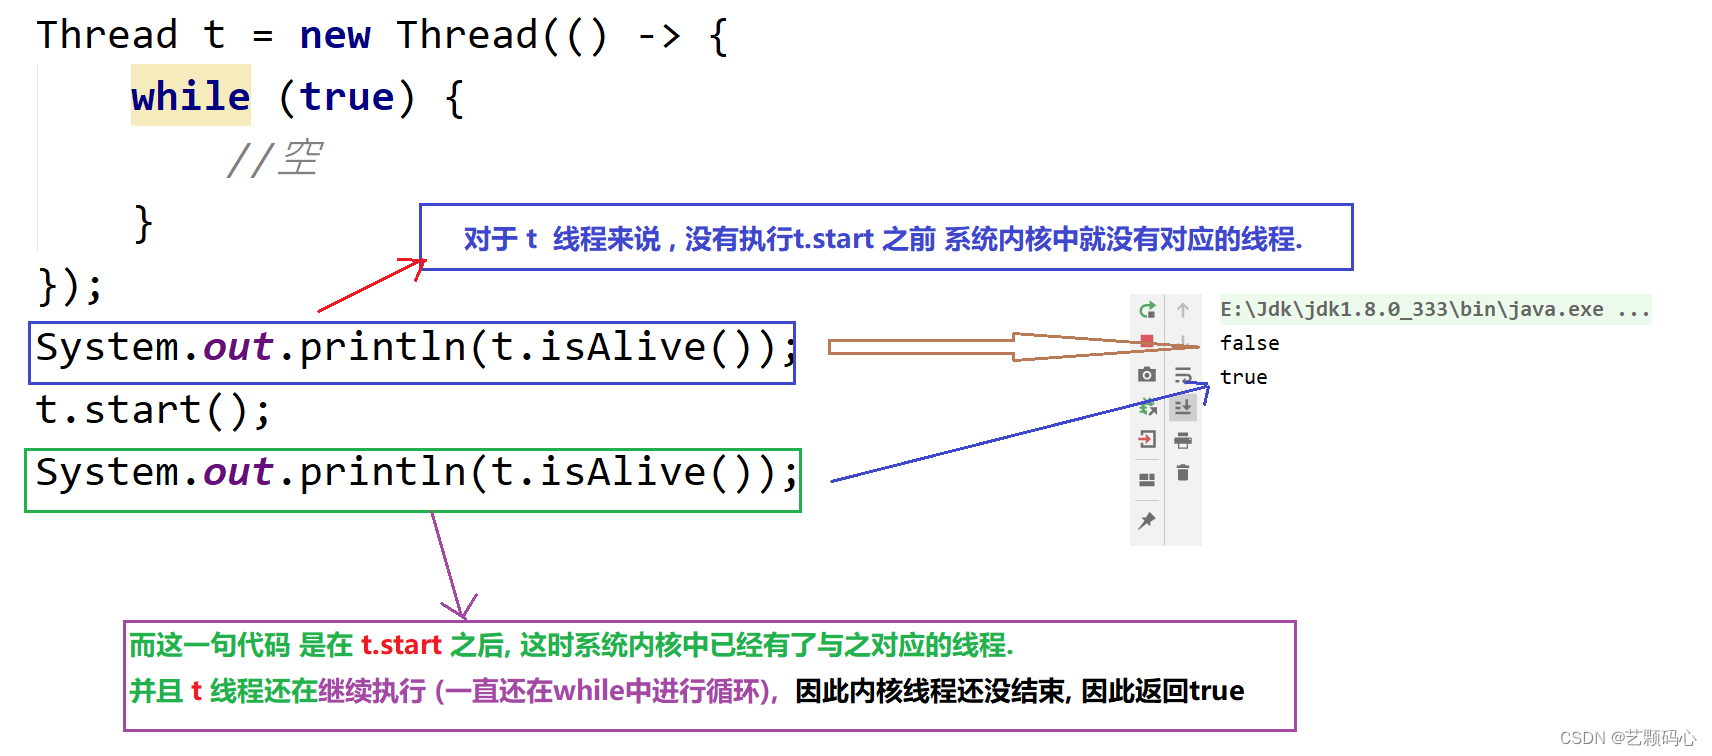
这里的线程存活指的是系统内核里的那个线程,是否存活的
public static void main(String[] args) {
        Thread t = new Thread(() -> {
            while (true) {
                //空
            }
        });
        System.out.println(t.isAlive());
        t.start();
        System.out.println(t.isAlive());
    }
7) 是否被中断
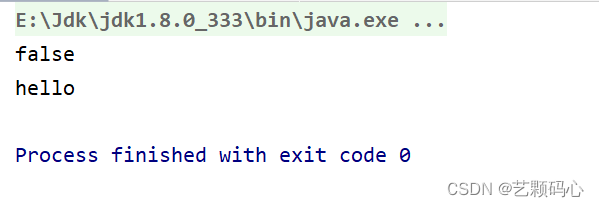
这是线程中的一个标志位 默认值为false.
public class Demo11 {
    public static void main(String[] args) {
        Thread t = new Thread(() -> {
            System.out.println("hello");
        });
        t.start();
        System.out.println(t.isInterrupted());
    }
}
我们通过interrupt() 方法就可以将这个标志位由false 变为 true;
public static void main(String[] args) {
        Thread t = new Thread(() -> {
            System.out.println("hello");
        });
        t.start();
        System.out.println(t.isInterrupted());
        t.interrupt();
        System.out.println(t.isInterrupted());
    }
8) 是否后台线程
什么是前台线程 ?? 什么是后台线程??
后台线程不阻止java进程结束.
即使后线程还没执行完, java进程该结束就结束了~~
前台线程更好相反
前台线程会阻止java线程结束, 必须得java进程中所有的前台线程都执行完 java进程才结束.
通过Thread 创建出来的线程都是前台线程,
可以通过setDaemon() 将前台设置为后台
public static void main(String[] args) {
        Thread t = new Thread(() -> {
            while (true) {
                //空
            }
        });
        t.start();
        System.out.println(t.isDaemon());
    }
调用setDaemon()
public static void main(String[] args) {
        Thread t = new Thread(() -> {
            while (true) {
                //空
            }
        });
        System.out.println(t.isDaemon());
        //注意这里在设置前后台线程时
        //这个语句要放在t.start()之前
        t.setDaemon(true);
        t.start();
        System.out.println("结束");
    }
关于线程中的 run() 方法
如果通过 t.run() 去调用 , 那么它会是一个普通的方法去执行, 存在main线程中
public static void main(String[] args) {
        Thread t = new Thread(() -> {
            int j = 5;
            while (j-- > 0) {
                System.out.println("t:" + j);
            }
        });
        t.run();
        int i = 10;
        while (i-- > 0) {
            System.out.println("main :" + i);
        }
    }
通过上述的运行结果我们可以看出,先执行完run()方法,然后再向后执行
如果将t.run() 转换为 t.start()

run() 方法补充 :

多线程如何执行 (补充):

三 . 线程的状态
1) 线程休眠
Thread.sleep() : 让当前线程进入休眠 , 括号里面放入休眠的时间
Thread.sleep(1000) : 让当前线程休眠1秒
public static void main(String[] args) {
        Thread t = new Thread(() -> {
            while (true) {
                System.out.println("hello");
                try {
                    Thread.sleep(1000);
                } catch (InterruptedException e) {
                    e.printStackTrace();
                }
            }
        });
        t.start();
        System.out.println("------");
    }
hello在打印的时候也是 1秒打印一个

2) 线程中断
两种方式 : 1. 自己设立一个标志 来控制线程的运行
2. 使用线程中的isInterrupted()
1. 手动设置一个标志位 , 来控制线程是否要结束执行~~
t 线程 与 main 线程 都是在一个进程内, 因此它们用了同一份虚拟地址空间.
因此 , 在main线程中修改的isQuit 就会该变 t 线程中的isQuit.
public class Demo15 {
    public static boolean isQuit = false;
    public static void main(String[] args) {
        Thread t = new Thread(() -> {
            while (!isQuit) {
                System.out.println("hello");
                try {
                    Thread.sleep(1000);
                } catch (InterruptedException e) {
                    e.printStackTrace();
                }
            }
        });
        t.start();
        try {
            Thread.sleep(3000);
        } catch (InterruptedException e) {
            e.printStackTrace();
        }
        isQuit = true;
        System.out.println("中断t线程");
    }
}
2. 使用isInterrupted() 来修改线程的标志位
public class Demo16 {
    public static void main(String[] args) {
        Thread t = new Thread(() -> {
            while (!Thread.currentThread().isInterrupted()) {
                System.out.println("hello");
                try {
                    Thread.sleep(1000);
                } catch (InterruptedException e) {
                    e.printStackTrace();
                }
            }
        });
        t.start();
        try {
            Thread.sleep(2000);
        } catch (InterruptedException e) {
            e.printStackTrace();
        }
        t.interrupt();
        System.out.println("-----");
    }
}
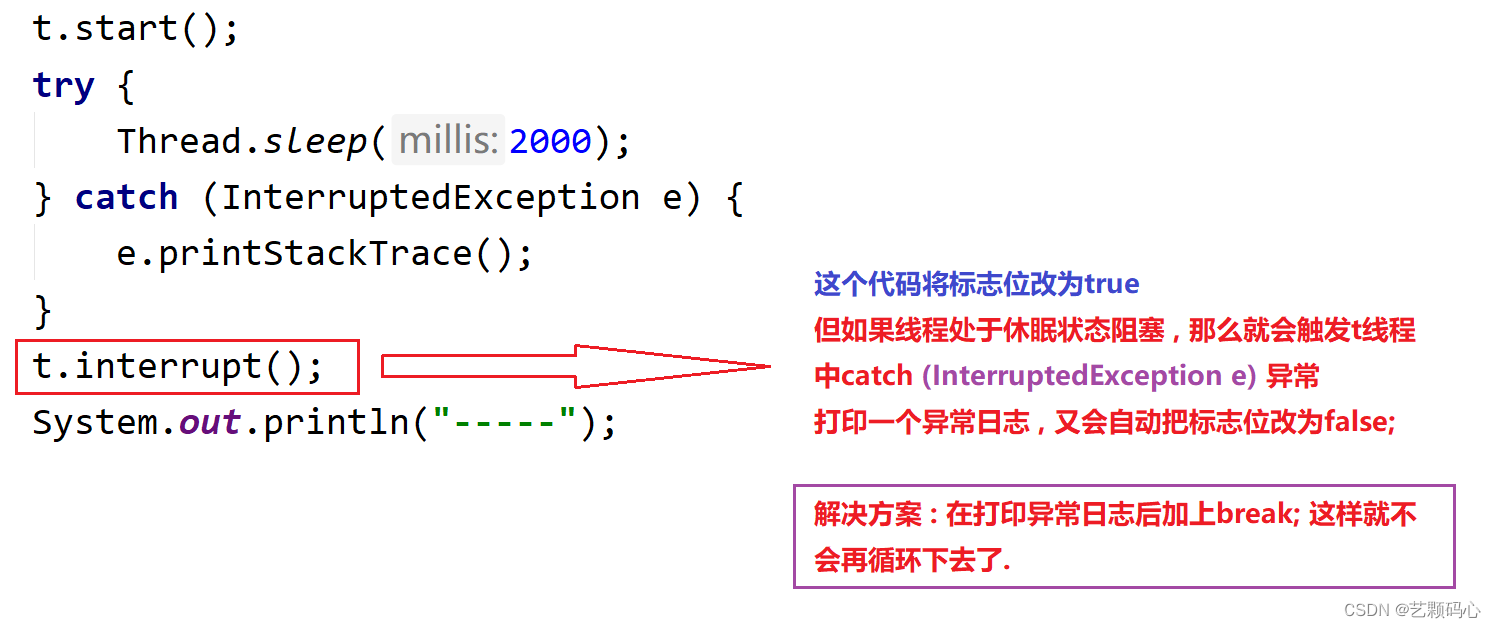
通过上述的输出结果 : 代码报错之后 , 没有中断 t 线程,还是在继续的执行程序
问题如下 :
修改后的代码 :
public class Demo16 {
    public static void main(String[] args) {
        Thread t = new Thread(() -> {
            while (!Thread.currentThread().isInterrupted()) {
                System.out.println("hello");
                try {
                    Thread.sleep(1000);
                } catch (InterruptedException e) {
                    e.printStackTrace();
                    break;
                }
            }
        });
        t.start();
        try {
            Thread.sleep(2000);
        } catch (InterruptedException e) {
            e.printStackTrace();
        }
        t.interrupt();
        System.out.println("-----");
    }
} 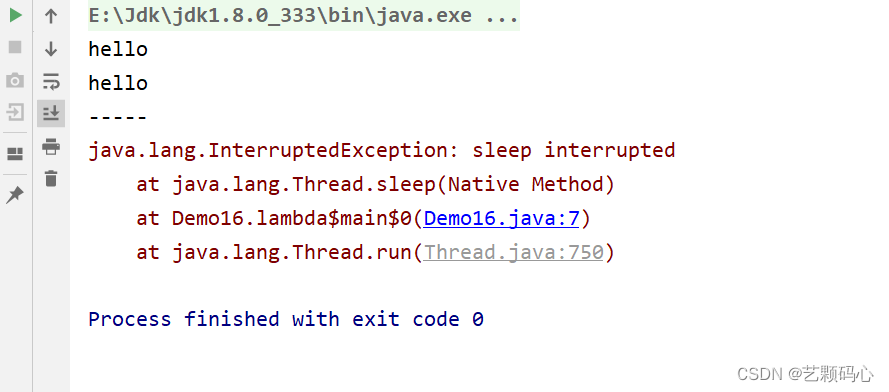
这样当它打印完异常日志后 , 我们直接让它break 退出循环.
3) 线程等待
实现一个代码通过 t 线程让i 自增10次
public class Demo17 {
    private static int i = 0;
    public static void main(String[] args) {
        Thread t = new Thread(() -> {
            for (int j = 0; j < 10; j++) {
                i++;
            }
        });
        t.start();
        System.out.println(i);
        System.out.println("main线程结束");
    }
}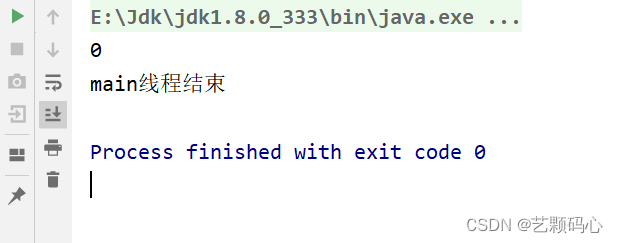
输出结果为 0
问题如下 :

修改代码 :
public class Demo17 {
    private static int i = 0;
    public static void main(String[] args) {
        Thread t = new Thread(() -> {
            for (int j = 0; j < 10; j++) {
                i++;
            }
        });
        t.start();
        try {
            t.join();
        } catch (InterruptedException e) {
            e.printStackTrace();
        }
        System.out.println(i);
        System.out.println("main线程结束");
    }
}
对于线程等待的补充 :
上述 t.join() 这句代码是在main线程中, 因此就是让main线程等待 t 线程执行完成.
要注意这里的等待与被等待对象.
另外我们还可以设置等待的时间
t.join(2000) : 表示main线程只等待 t 线程2秒钟. 然后就继续去执行main方法其余语句.
总结 :
综上的线程的状态, 我们可以构造一个图

