Week-T11-优化器对比试验
文章目录
- 一、准备环境
- 二、准备数据
- 三、搭建训练网络
- 三、训练模型
- (1)VSCode训练情况:
- (2)`jupyter notebook`训练情况:
- 四、模型评估 & 模型预测
- 1、绘制Accuracy-Loss图
- 2、显示model2的预测效果
- 五、总结
- 1、`plt.savefig("./数据展示.jpg")`保存的图片在文件夹内打开是空白的,如下图所示:
- 2. 优化器是什么?包括哪些?
- 🍨 本文为🔗365天深度学习训练营 中的学习记录博客
- 🍖 原作者:K同学啊 | 接辅导、项目定制
本文主要探究不同优化器、以及不同参数配置对模型的影响,最终对Adam、SGD优化器进行比较,并绘制比较结果。
使用的数据集为咖啡豆数据集,共有四类。
优化器常用的有Adam、SGD。优化器的归纳将放在文末的总结部分。
本文将使用Adam优化器的模型命名为"model1",使用SGD优化器的模型命名为"model2",然后根据模型训练结果绘制各自的Accuracy-Loss图。比较得出,在运行环境、epoch次数相同、模型结构相同等条件下,Adam优化器的整体情况要优于SGD优化器。
一、准备环境
# 1. 设置环境
import sys
import tensorflow as tf
from datetime import datetime

from tensorflow          import keras
import matplotlib.pyplot as plt
import pandas            as pd
import numpy             as np
import warnings,os,PIL,pathlib

print("---------------------1.配置环境------------------")
print("Start time: ", datetime.today())
print("tensorflow version: " + tf.__version__)
print("Python version: " + sys.version)

gpus = tf.config.list_physical_devices("GPU")

if gpus:
    gpu0 = gpus[0] #如果有多个GPU,仅使用第0个GPU
    tf.config.experimental.set_memory_growth(gpu0, True) #设置GPU显存用量按需使用
    tf.config.set_visible_devices([gpu0],"GPU")
        # 打印显卡信息,确认GPU可用
    print("GPU: " + gpus)
else:
    print("Using CPU")

warnings.filterwarnings("ignore")             #忽略警告信息
plt.rcParams['font.sans-serif']    = ['SimHei']  # 用来正常显示中文标签
plt.rcParams['axes.unicode_minus'] = False    # 用来正常显示负号

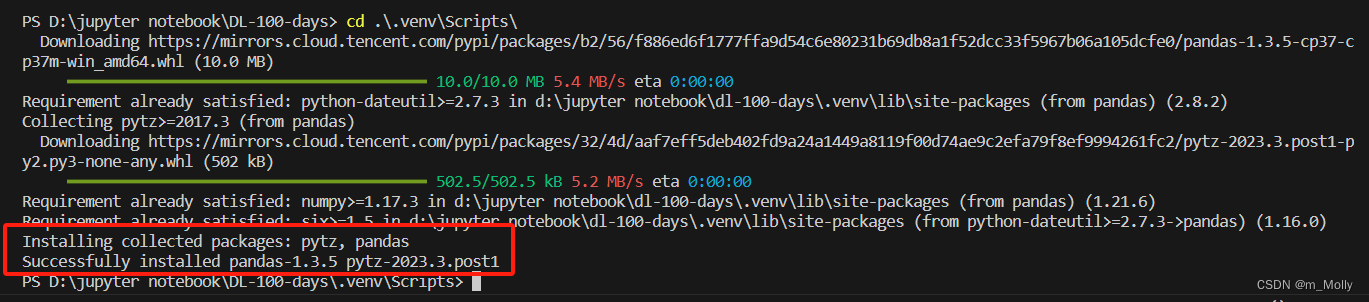
Q1: VSCode虚拟环境安装
pandas
二、准备数据
# 2.导入数据
# 本次使用咖啡豆数据集(共4类)
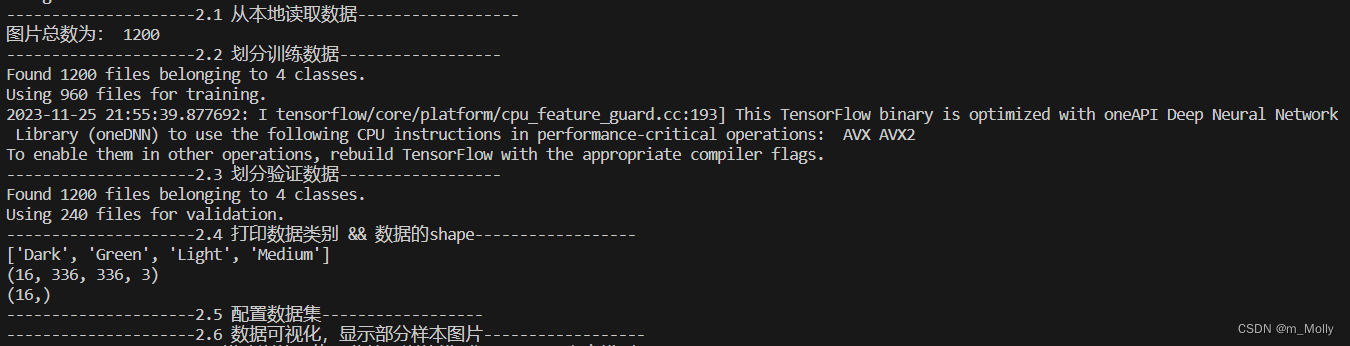
print("---------------------2.1 从本地读取数据------------------")
data_dir = "D:/jupyter notebook/DL-100-days/datasets/coffebeans-data"
data_dir = pathlib.Path(data_dir)
image_count = len(list(data_dir.glob('*/*')))
print("图片总数为:",image_count)
batch_size = 16
img_height = 336
img_width = 336
"""
关于image_dataset_from_directory()的详细介绍可以参考文章:https://mtyjkh.blog.csdn.net/article/details/117018789
"""
print("---------------------2.2 划分训练数据------------------")
train_ds = tf.keras.preprocessing.image_dataset_from_directory(
data_dir,
validation_split=0.2,
subset="training",
seed=12,
image_size=(img_height, img_width),
batch_size=batch_size)
"""
关于image_dataset_from_directory()的详细介绍可以参考文章:https://mtyjkh.blog.csdn.net/article/details/117018789
"""
print("---------------------2.3 划分验证数据------------------")
val_ds = tf.keras.preprocessing.image_dataset_from_directory(
data_dir,
validation_split=0.2,
subset="validation",
seed=12,
image_size=(img_height, img_width),
batch_size=batch_size)
print("---------------------2.4 打印数据类别 && 数据的shape------------------")
class_names = train_ds.class_names
print(class_names)
for image_batch, labels_batch in train_ds:
print(image_batch.shape)
print(labels_batch.shape)
break
print("---------------------2.5 配置数据集------------------")
AUTOTUNE = tf.data.AUTOTUNE
def train_preprocessing(image,label):
return (image/255.0,label)
train_ds = (
train_ds.cache()
.shuffle(1000)
.map(train_preprocessing) # 这里可以设置预处理函数
# .batch(batch_size) # 在image_dataset_from_directory处已经设置了batch_size
.prefetch(buffer_size=AUTOTUNE)
)
val_ds = (
val_ds.cache()
.shuffle(1000)
.map(train_preprocessing) # 这里可以设置预处理函数
# .batch(batch_size) # 在image_dataset_from_directory处已经设置了batch_size
.prefetch(buffer_size=AUTOTUNE)
)
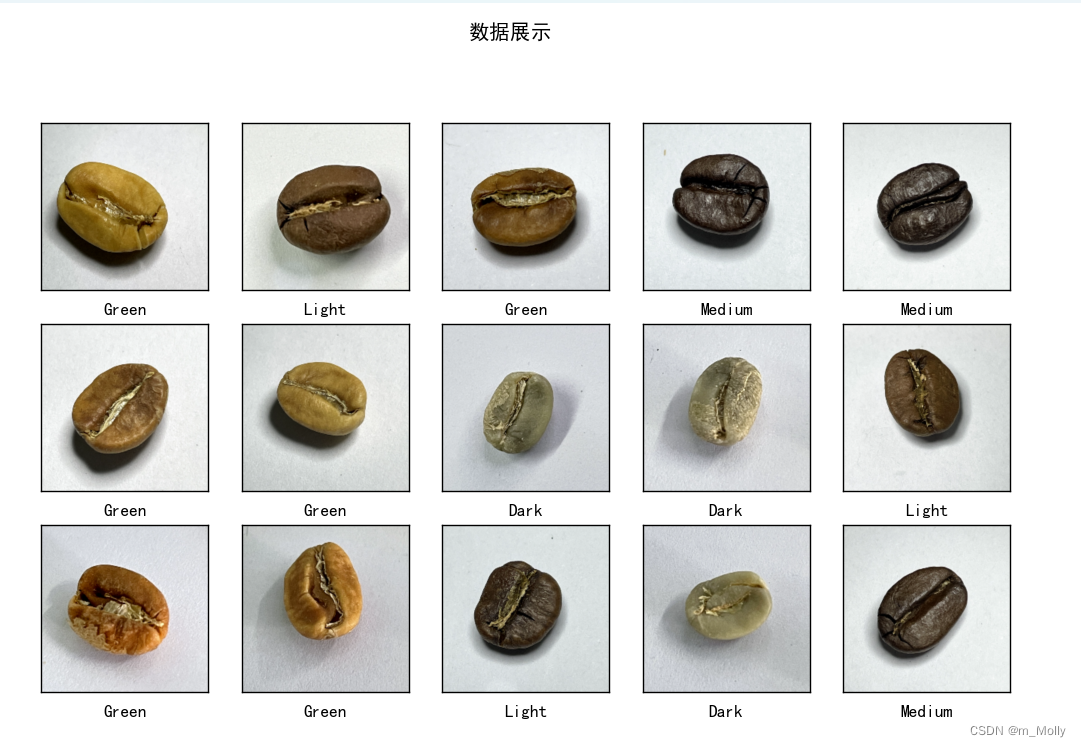
print("---------------------2.6 数据可视化,显示部分样本图片------------------")
plt.figure(figsize=(10, 8)) # 图形的宽为10高为5
plt.suptitle("数据展示")
for images, labels in train_ds.take(1):
for i in range(15):
plt.subplot(4, 5, i + 1)
plt.xticks([])
plt.yticks([])
plt.grid(False)
# 显示图片
plt.imshow(images[i])
# 显示标签
plt.xlabel(class_names[labels[i]-1])
plt.show()
plt.savefig("./数据展示.jpg")
Q2:
plt.savefig("./数据展示.jpg")保存的图片在文件夹内打开是空白的
三、搭建训练网络
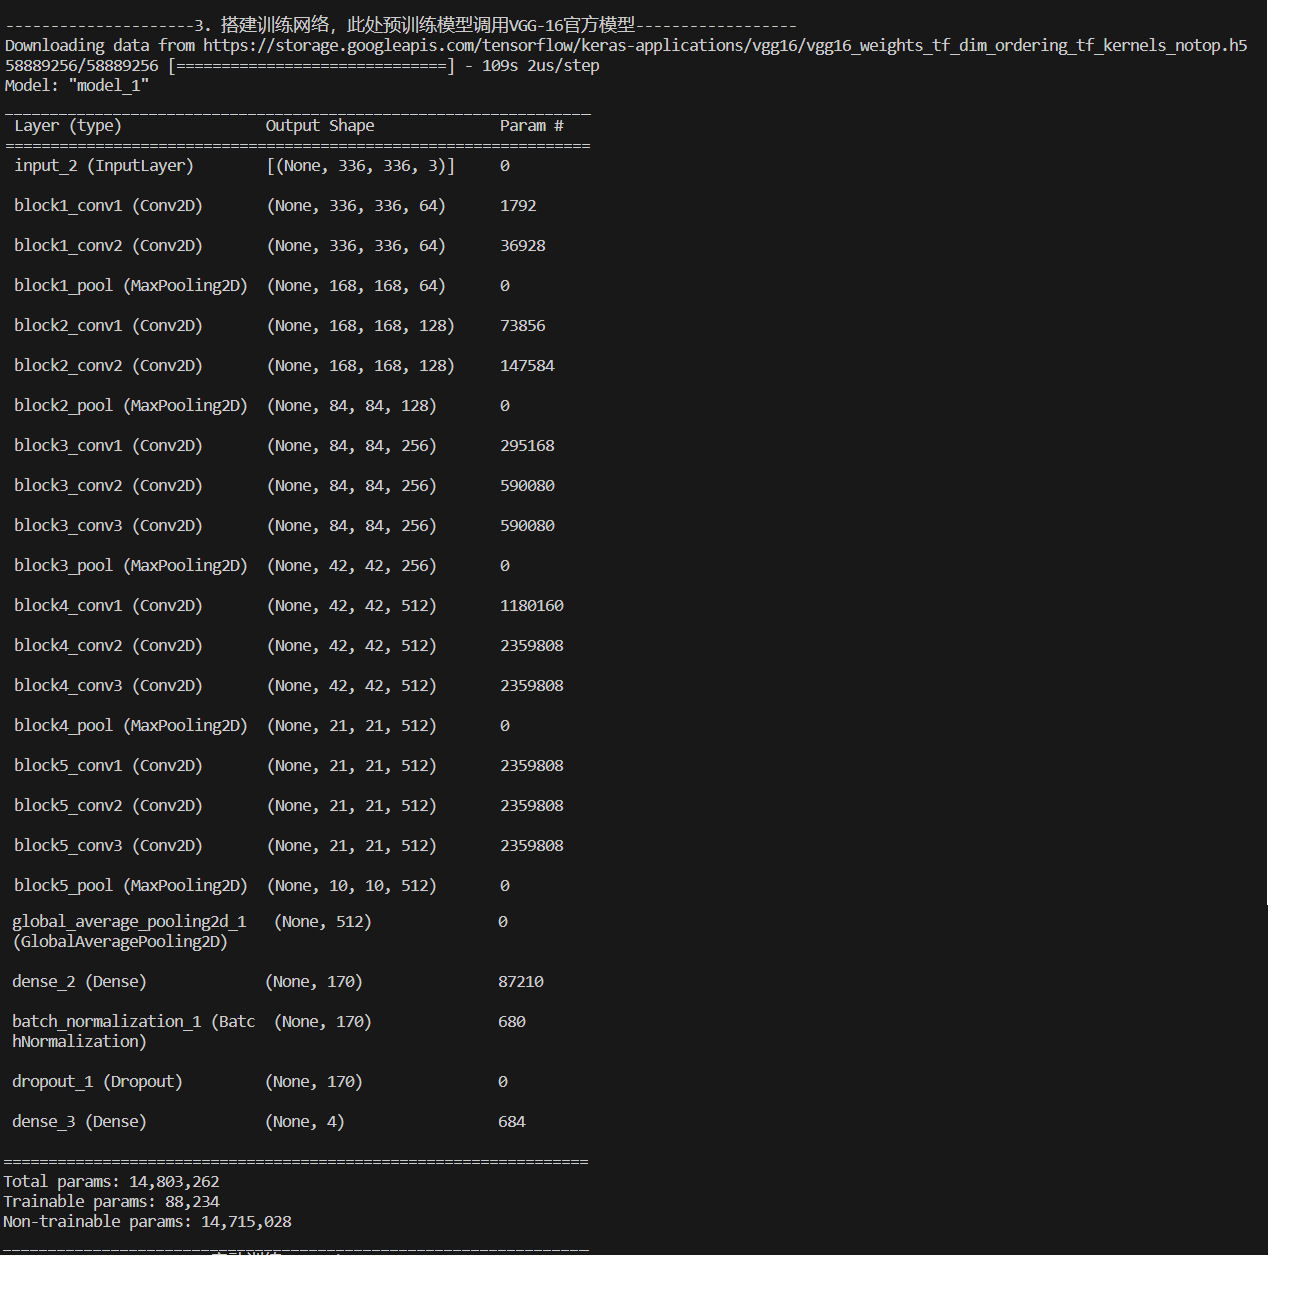
print("---------------------3. 搭建训练网络,此处预训练模型调用VGG-16官方模型------------------")
# 自定义一个创建模型的函数,形参是优化器类型,预训练模型是VGG-16,但屏蔽了自带的训练部分以及顶层,然后对输出进行处理
# 在此处创建了两个网络,拥有不同的优化器类型
from tensorflow.keras.layers import Dropout,Dense,BatchNormalization
from tensorflow.keras.models import Model

def create_model(optimizer='adam'):
    # 加载预训练模型
    vgg16_base_model = tf.keras.applications.vgg16.VGG16(weights='imagenet',
                                                                include_top=False,
                                                                input_shape=(img_width, img_height, 3),
                                                                pooling='avg')
    for layer in vgg16_base_model.layers:
        layer.trainable = False

    X = vgg16_base_model.output

    X = Dense(170, activation='relu')(X)
    X = BatchNormalization()(X)
    X = Dropout(0.5)(X)

    output = Dense(len(class_names), activation='softmax')(X)
    vgg16_model = Model(inputs=vgg16_base_model.input, outputs=output)

    vgg16_model.compile(optimizer=optimizer,
                        loss='sparse_categorical_crossentropy',
                        metrics=['accuracy'])
    return vgg16_model

model1 = create_model(optimizer=tf.keras.optimizers.Adam())
model2 = create_model(optimizer=tf.keras.optimizers.SGD())
model2.summary()
三、训练模型
print("---------------------4.启动训练,epoch==50------------------")
# try:加入早停试一下,一个epoch跑完要220s,时间还是有点久
NO_EPOCHS = 50

history_model1  = model1.fit(train_ds, epochs=NO_EPOCHS, verbose=1, validation_data=val_ds)
history_model2  = model2.fit(train_ds, epochs=NO_EPOCHS, verbose=1, validation_data=val_ds)
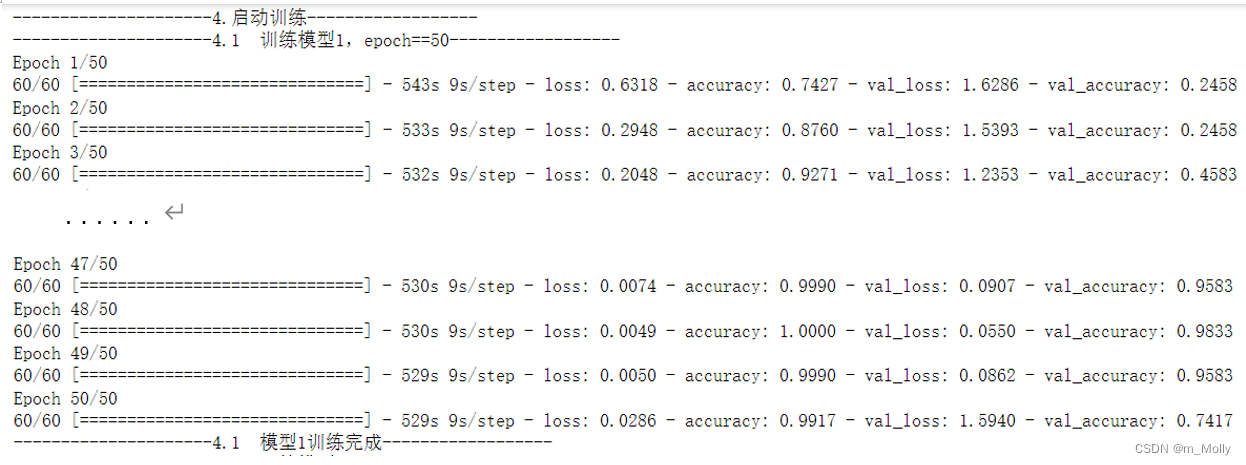
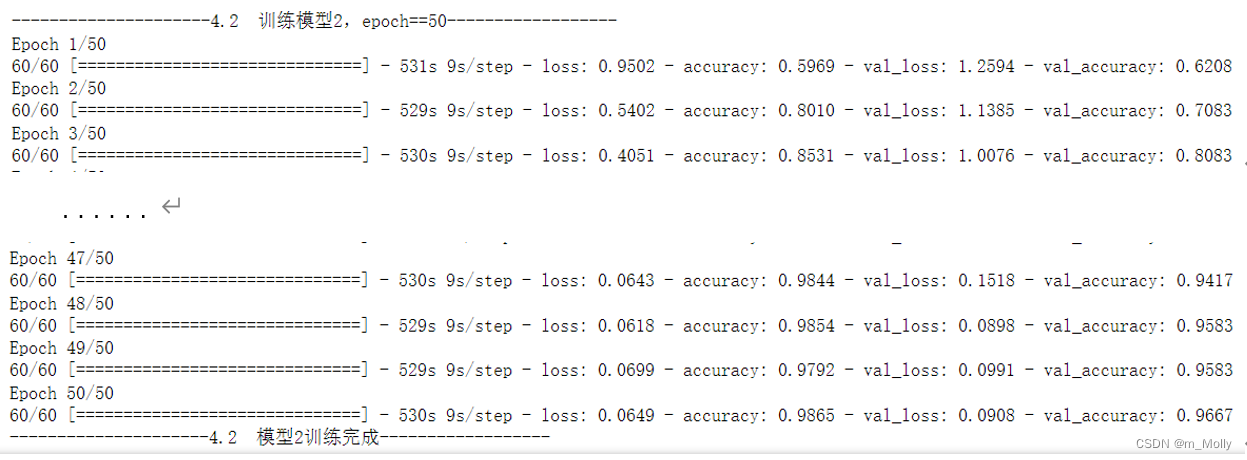
(1)VSCode训练情况:
model1.fit():Adam优化器
model2.fit():SGD优化器

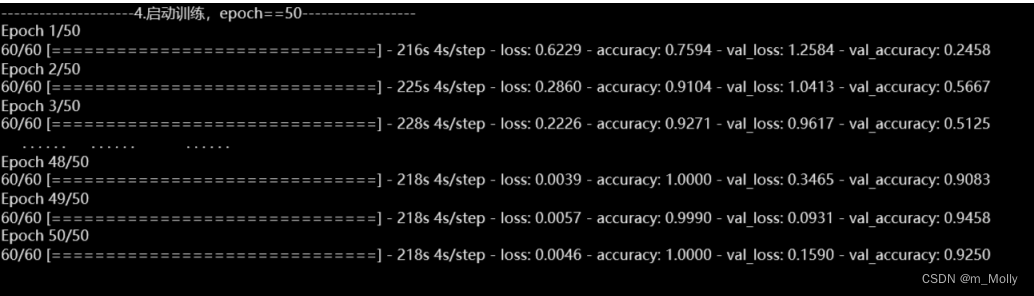
(2)jupyter notebook训练情况:
model1.fit():即Adam优化器
model2.fit():即SGD优化器
四、模型评估 & 模型预测
1、绘制Accuracy-Loss图
print("---------------------5.1 模型评估,绘制Accuracy-Loss图------------------")
from matplotlib.ticker import MultipleLocator
plt.rcParams['savefig.dpi'] = 300 #图片像素
plt.rcParams['figure.dpi'] = 300 #分辨率
acc1 = history_model1.history['accuracy']
acc2 = history_model2.history['accuracy']
val_acc1 = history_model1.history['val_accuracy']
val_acc2 = history_model2.history['val_accuracy']
loss1 = history_model1.history['loss']
loss2 = history_model2.history['loss']
val_loss1 = history_model1.history['val_loss']
val_loss2 = history_model2.history['val_loss']
epochs_range = range(len(acc1))
plt.figure(figsize=(16, 4))
plt.subplot(1, 2, 1)
plt.plot(epochs_range, acc1, label='Training Accuracy-Adam')
plt.plot(epochs_range, acc2, label='Training Accuracy-SGD')
plt.plot(epochs_range, val_acc1, label='Validation Accuracy-Adam')
plt.plot(epochs_range, val_acc2, label='Validation Accuracy-SGD')
plt.legend(loc='lower right')
plt.title('Training and Validation Accuracy')
# 设置刻度间隔,x轴每1一个刻度
ax = plt.gca()
ax.xaxis.set_major_locator(MultipleLocator(1))
plt.subplot(1, 2, 2)
plt.plot(epochs_range, loss1, label='Training Loss-Adam')
plt.plot(epochs_range, loss2, label='Training Loss-SGD')
plt.plot(epochs_range, val_loss1, label='Validation Loss-Adam')
plt.plot(epochs_range, val_loss2, label='Validation Loss-SGD')
plt.legend(loc='upper right')
plt.title('Training and Validation Loss')
# 设置刻度间隔,x轴每1一个刻度
ax = plt.gca()
ax.xaxis.set_major_locator(MultipleLocator(1))
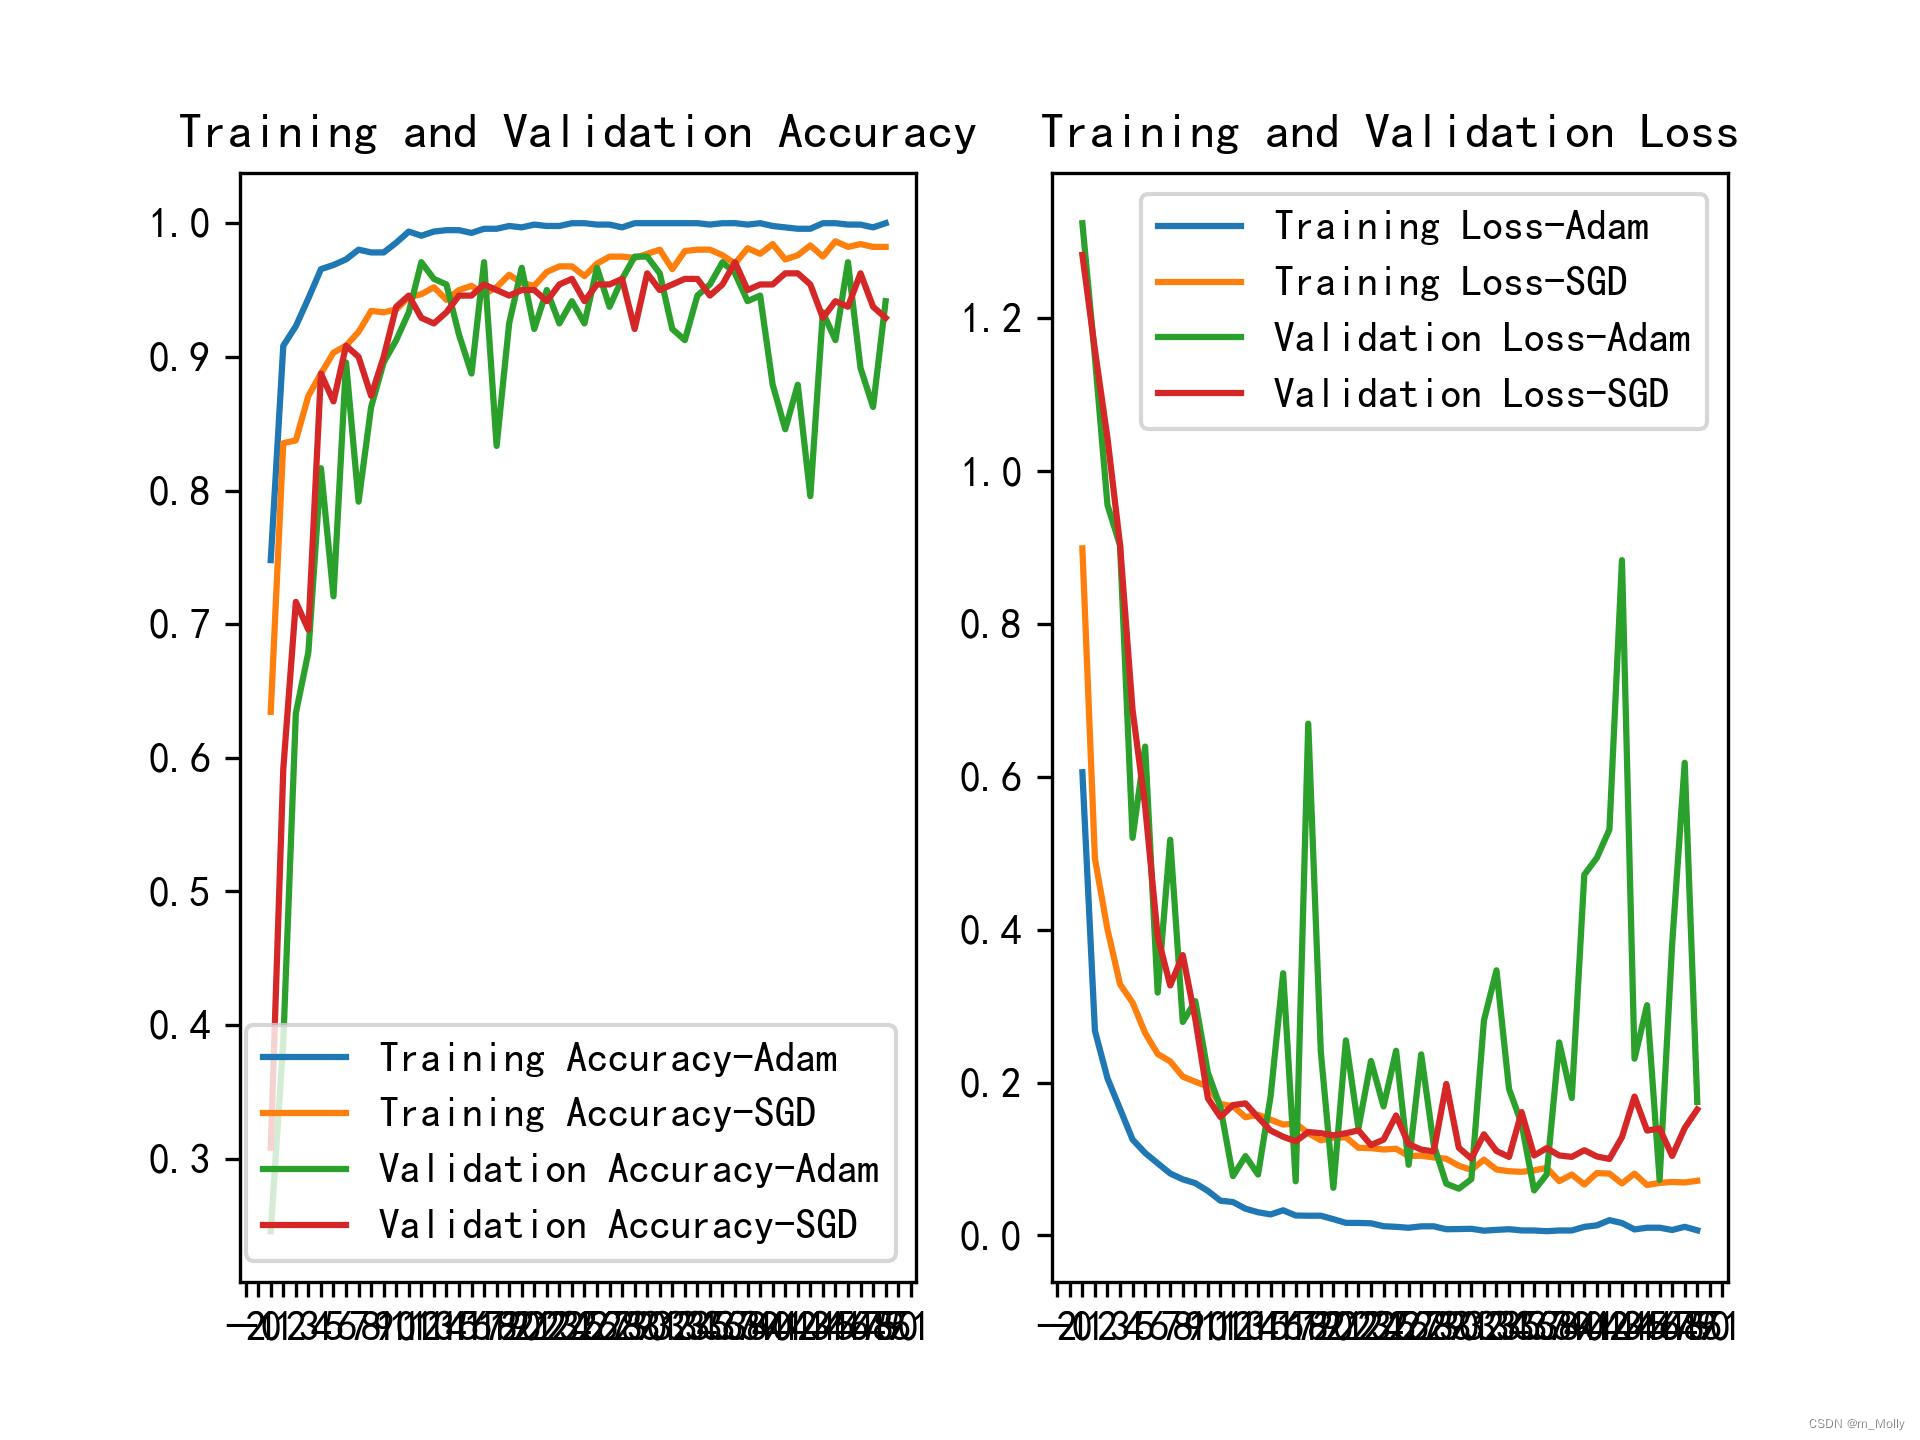
plt.savefig("./Accuracy-Loss图.jpg")
plt.show()
plt.show()显示的图片:
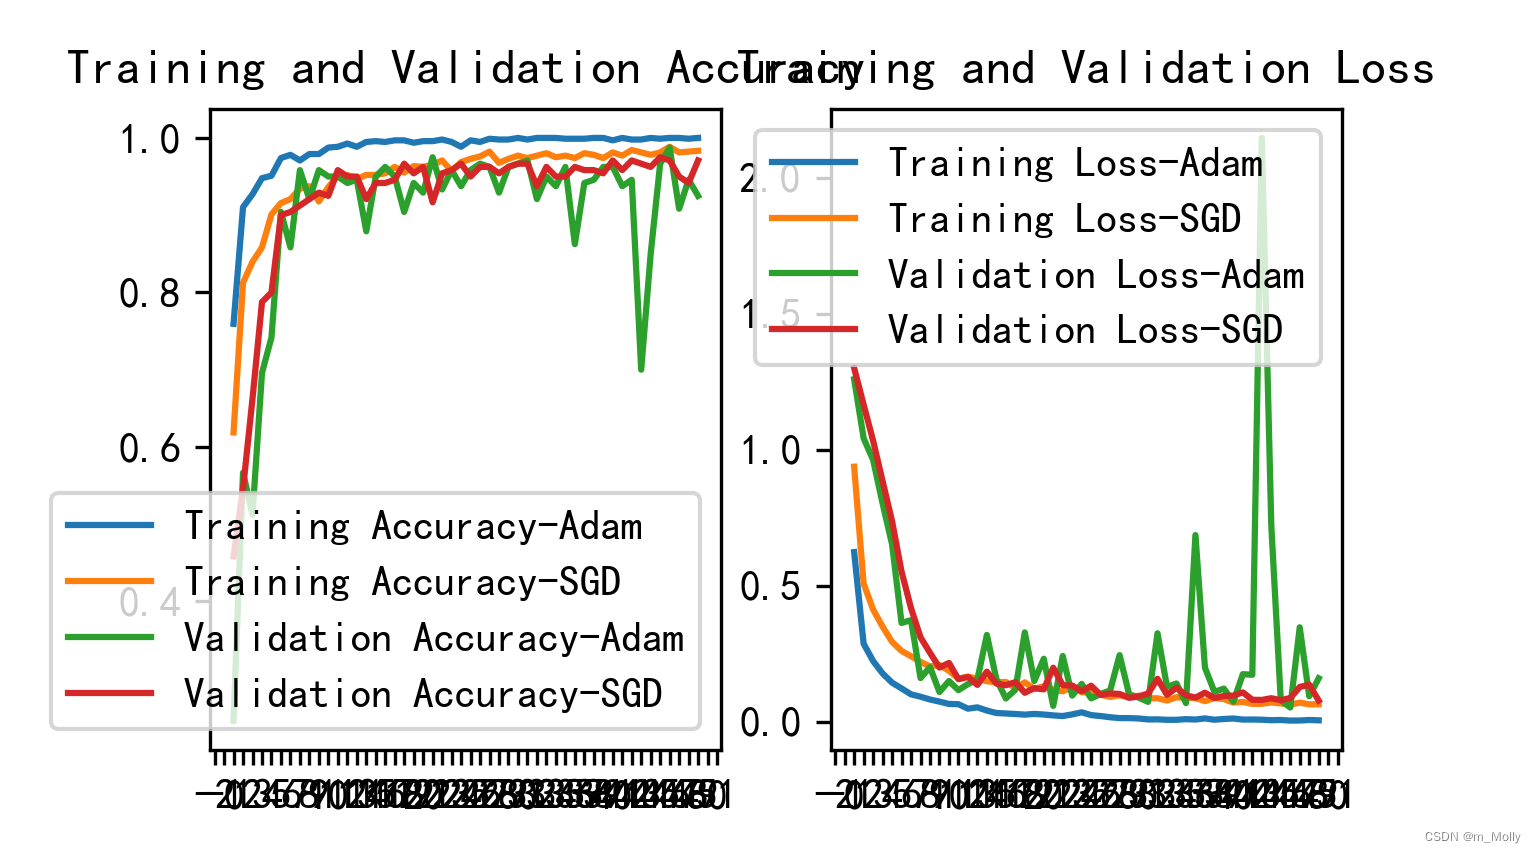
比较Accuracy图表,可以看出训练时Adam优化器的表现要稍优于SGD优化器,而验证时则相反。
Q: VSCode绘制出来的图咋这么奇怪?
改变plt.savefig("./Accuracy-Loss图.jpg")的位置后所保存的图片,比直接plt.show()的图片比例要好些。
2、显示model2的预测效果
print("---------------------5.2 模型预测------------------")
def test_accuracy_report(model):
    score = model.evaluate(val_ds, verbose=0)
    print('Loss function: %s, accuracy:' % score[0], score[1])

test_accuracy_report(model2)
VSCode环境下的预测结果:

jupyter notebook环境下的预测结果:

五、总结
1、plt.savefig("./数据展示.jpg")保存的图片在文件夹内打开是空白的,如下图所示:

将保存的语句放在plt.show()之前,因为plt.show()之后会默认打开一个空白画板。
2. 优化器是什么?包括哪些?
(参考文章也是来自训练营文章)
优化器是什么?
- 优化器是一种算法,它在模型优化过程中,动态地调整梯度的大小和方向,使模型能够收敛到更好的位置,或者用更快的速度进行收敛。
- 各类优化器方法总结如下:
