PyQt基础_011_对话框类控件QMessage
基本功能

import sys
from PyQt5.QtCore import *
from PyQt5.QtGui import *
from PyQt5.QtWidgets import *

class WinForm( QWidget):
    def __init__(self):
        super(WinForm,self).__init__()
        self.setWindowTitle("QMessageBox")
        self.resize(300, 100)
        self.myButton = QPushButton(self)
        self.myButton.setText("点击弹出消息框")
        self.myButton.clicked.connect(self.msg)

    def msg(self):
        # 使用infomation信息框
        reply = QMessageBox.information(self, "title", "hello world", QMessageBox.Yes | QMessageBox.No , QMessageBox.Yes )
        print( reply )

if __name__ == '__main__':
    app= QApplication(sys.argv)
    demo = WinForm()
    demo.show()
    sys.exit(app.exec_())
增加图标显示

import sys

from PyQt5.Qt import *

"""
QMessageBox.Icon
QMessageBox.NoIcon
QMessageBox.Question
QMessageBox.Information
QMessageBox.Warning
QMessageBox.Critical
"""

class Window(QWidget):
    def __init__(self):
        super().__init__()
        self.setWindowTitle("QMessageBox")
        self.resize(500, 500)
        self.move(400, 250)
        self.setup_ui()

    def setup_ui(self):
        mb = QMessageBox(self)
        # mb = QMessageBox(QMessageBox.Critical, '窗口标题', '主标题', QMessageBox.Ok | QMessageBox.Discard, self)
        # mb.setModal(False)  # 强行设置为非模态
        # mb.setWindowModality(Qt.NonModal)  # 强行设置为非模态
         # mb.show()  # 一定为模态,即使使用show()方法也仍为模态

        mb.setWindowTitle("message")

        # 设置图标
        # mb.setIcon(QMessageBox.Information)  # 设置标准图标
        mb.setIconPixmap(QPixmap("./resource/python_96px.ico").scaled(40, 40)) # 设置自定义图标

        # 设置主标题
        mb.setText("<h3>hello world</h3>") # 设置主标题
        # mb.setTextFormat(Qt.PlainText)  # 设置主标题文本格式
        # mb.setTextFormat(Qt.RichText)
        mb.setTextFormat(Qt.AutoText)

        # 设置提示文本(副标题)
        mb.setInformativeText("tips") # 设置副标题
        # print(mb.informativeText())

        # 设置详细文本
        mb.setDetailedText("this is a message") # 设置详情(不支持富文本)
        # print(mb.detailedText())

        # 设置复选框
        mb.setCheckBox(QCheckBox("下次不再提醒", mb)) # 设置复选框
        mb.checkBox().toggled.connect(lambda: print("clicked"))

        mb.open()

if __name__ == "__main__":
    app = QApplication(sys.argv)

    window = Window()
    window.show()

    sys.exit(app.exec_())
按钮事件
import sys
from PyQt5.Qt import *
class Window(QWidget):
def __init__(self):
super().__init__()
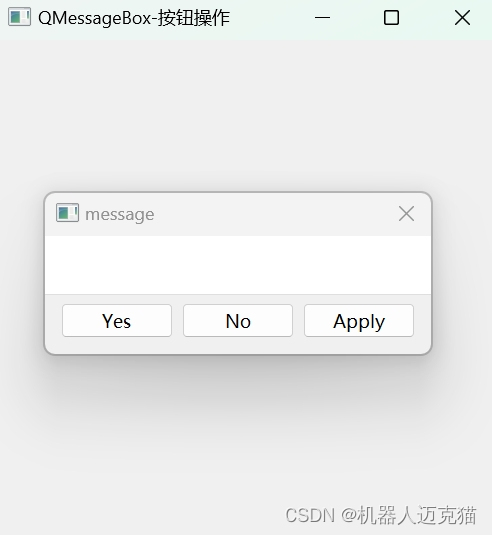
self.setWindowTitle("QMessageBox-按钮操作")
self.resize(500, 500)
self.move(400, 250)
self.setup_ui()
def setup_ui(self):
mb = QMessageBox(self)
mb.setWindowTitle("message")
# 添加移除按钮
# mb.addButton(QPushButton("Yes!Yes!Yes!", mb), QMessageBox.YesRole)
yes_btn = mb.addButton("Yes", QMessageBox.YesRole)
# mb.removeButton(yes_btn) # 移除按钮
# 设置标准按钮
mb.setStandardButtons(QMessageBox.Apply | QMessageBox.No)
# 默认按钮(默认哪个按钮获取到焦点)
mb.setDefaultButton(QMessageBox.Apply)
# 退出按钮(按下键盘Esc键时激活的按钮)
mb.setEscapeButton(QMessageBox.No)
# 按钮信号槽
apply_btn = mb.button(QMessageBox.Apply) # 获取按钮对象
def test(btn):
if btn == yes_btn:
print("yes clicked")
elif btn == apply_btn:
print("apply clicked")
role = mb.buttonRole(btn)
if role == QMessageBox.YesRole:
print("yes clicked")
elif role == QMessageBox.NoRole:
print("no clicked")
mb.buttonClicked.connect(test)
mb.open()
if __name__ == "__main__":
app = QApplication(sys.argv)
window = Window()
window.show()
sys.exit(app.exec_())