文章目录
- 1.JDBC + HikariDataSource(SpringBoot2默认数据源)
- 1.数据库表设计
- 2.引入依赖 pom.xml
- 3.配置数据源参数 application.yml
- 4.编写一个bean,映射表
- 5.编写测试类来完成测试
- 1.引入依赖 pom.xml
- 2.使用JdbcTemplate进行测试
- 3.成功!
- 2.整合Druid到SpringBoot
- 1.基本介绍
- 2.Druid基本使用
- 1.引入德鲁伊依赖 pom.xml
- 2.使用配置类注入DruidDataSource
- 3.测试
- 4.细节说明
- 3.Druid监控功能
- 1.SQL监控
- 1.配置类中配置
- 2.浏览器输入http://localhost:8080/druid/index.html查看监控页面
- 3.配置类注入数据源时开启sql监控
- 4.编写Controller进行测试
- 5.浏览器请求Controller进行测试
- 6.关于区间分布
- 2.Web关联监控
-
- 3.SQL防火墙
-
- 4.Session监控(默认开启)
-
- 4.目前阶段完整配置文件
- 1.pom.xml
- 2.application.yml 配置数据源信息
- 3.DruidDataSourceConfig.java 配置类
- 5.使用starter方式整合druid
- 1.取消之前对druid的配置
- 1.修改pom.xml注销druid的依赖
- 2.注销整个DruidDataSourceConfig.java
- 3.测试
- 2.pom.xml 引入依赖
- 3.application.yml 配置数据源和druid监控
1.JDBC + HikariDataSource(SpringBoot2默认数据源)
1.数据库表设计
DROP DATABASE IF EXISTS spring_boot;
CREATE DATABASE spring_boot;
USE spring_boot;
CREATE TABLE furn(
`id` INT(11) PRIMARY KEY AUTO_INCREMENT,
`name` VARCHAR(64) NOT NULL,
`maker` VARCHAR(64) NOT NULL,
`price` DECIMAL(11,2) NOT NULL,
`sales` INT(11) NOT NULL,
`stock` INT(11) NOT NULL,
`img_path` VARCHAR(256) NOT NULL
);
INSERT INTO furn(`id` , `name` , `maker` , `price` , `sales` , `stock` , `img_path`)
VALUES(NULL , ' 北 欧 风 格 小 桌 子 ' , ' 熊 猫 家 居 ' , 180 , 666 , 7 ,
'assets/images/product-image/1.jpg');
INSERT INTO furn(`id` , `name` , `maker` , `price` , `sales` , `stock` , `img_path`)
VALUES(NULL , ' 简 约 风 格 小 椅 子 ' , ' 熊 猫 家 居 ' , 180 , 666 , 7 ,
'assets/images/product-image/2.jpg');
INSERT INTO furn(`id` , `name` , `maker` , `price` , `sales` , `stock` , `img_path`)
VALUES(NULL , ' 典 雅 风 格 小 台 灯 ' , ' 蚂 蚁 家 居 ' , 180 , 666 , 7 ,
'assets/images/product-image/3.jpg');
INSERT INTO furn(`id` , `name` , `maker` , `price` , `sales` , `stock` , `img_path`)
VALUES(NULL , ' 温 馨 风 格 盆 景 架 ' , ' 蚂 蚁 家 居 ' , 180 , 666 , 7 ,
'assets/images/product-image/4.jpg');
2.引入依赖 pom.xml
<dependency>
<groupId>org.springframework.boot</groupId>
<artifactId>spring-boot-starter-data-jdbc</artifactId>
</dependency>
<dependency>
<groupId>mysql</groupId>
<artifactId>mysql-connector-java</artifactId>
<version>5.1.49</version>
</dependency>
3.配置数据源参数 application.yml
spring:
datasource:
url: jdbc:mysql://localhost:3306/spring_boot?useSSL=false&useUnicode=true&characterEncoding=UTF-8
username: root
password: root
driver-class-name: com.mysql.jdbc.Driver
4.编写一个bean,映射表
package com.sun.springboot.bean;
import lombok.Data;
import java.math.BigDecimal;
@Data
public class Furn {
private Integer id;
private String name;
private String maker;
private BigDecimal price;
private Integer sales;
private Integer stock;
private String imgPath;
}
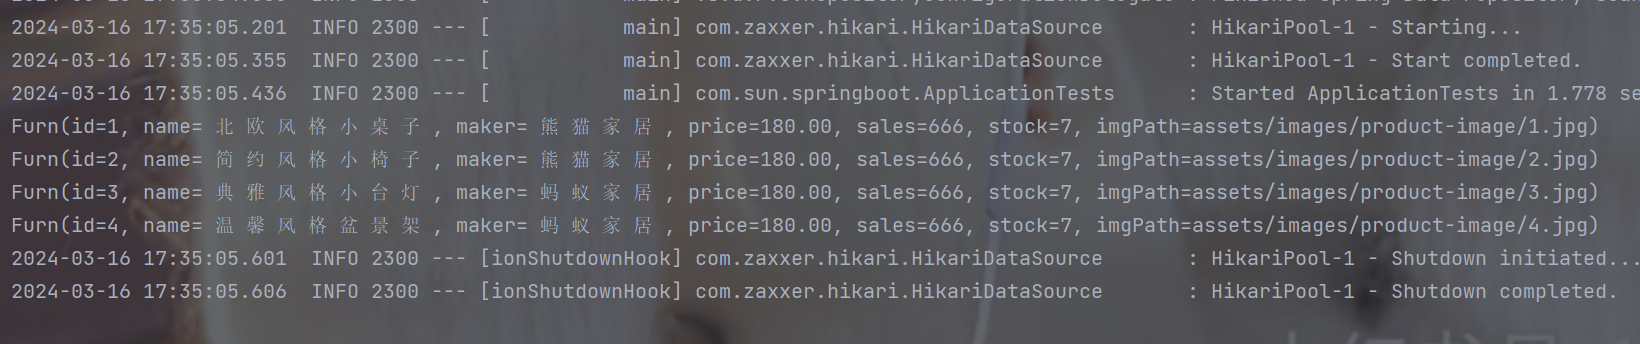
5.编写测试类来完成测试
1.引入依赖 pom.xml
<dependency>
<groupId>org.springframework.boot</groupId>
<artifactId>spring-boot-starter-test</artifactId>
</dependency>
2.使用JdbcTemplate进行测试
package com.sun.springboot;
import com.sun.springboot.bean.Furn;
import org.junit.jupiter.api.Test;
import org.springframework.boot.test.context.SpringBootTest;
import org.springframework.jdbc.core.BeanPropertyRowMapper;
import org.springframework.jdbc.core.JdbcTemplate;
import javax.annotation.Resource;
import java.util.List;
@SpringBootTest
public class ApplicationTests {
@Resource
private JdbcTemplate jdbcTemplate;
@Test
public void contextLoads() {
BeanPropertyRowMapper<Furn> furnBeanPropertyRowMapper = new BeanPropertyRowMapper<>(Furn.class);
List<Furn> query = jdbcTemplate.query("select * from `furn`", furnBeanPropertyRowMapper);
for (Furn furn : query) {
System.out.println(furn);
}
}
}
3.成功!
2.整合Druid到SpringBoot
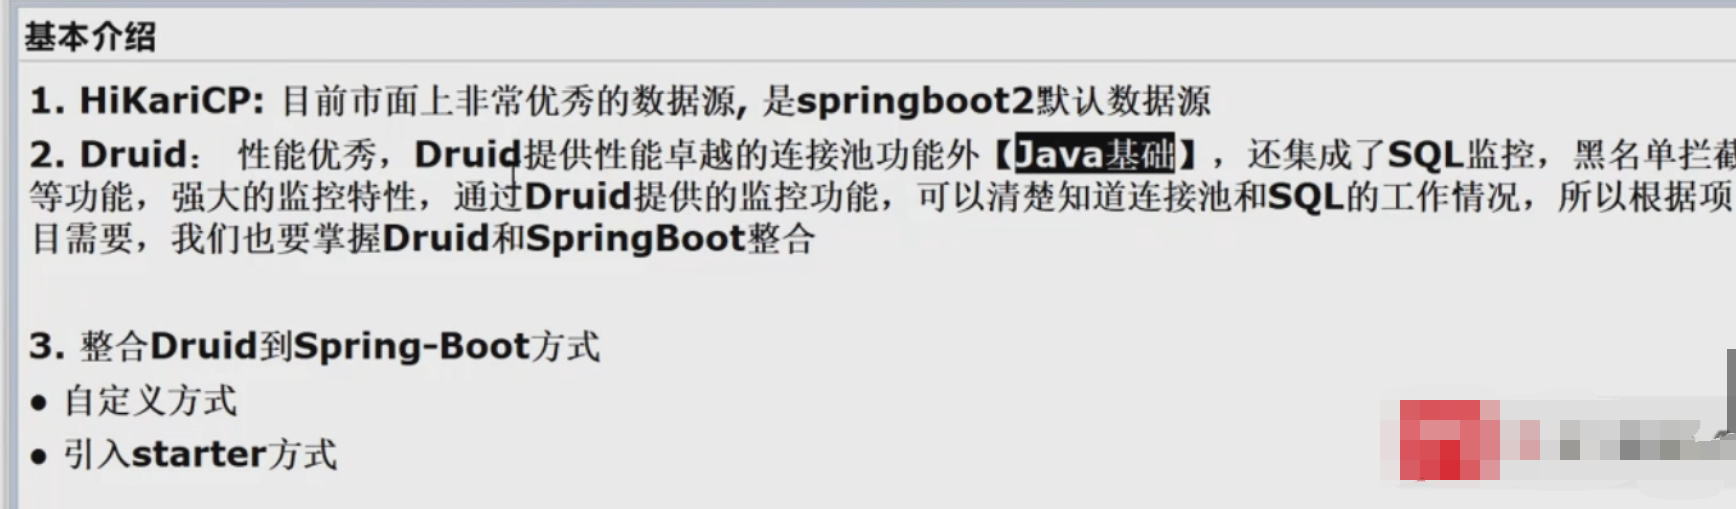
1.基本介绍
2.Druid基本使用
1.引入德鲁伊依赖 pom.xml
<dependency>
<groupId>com.alibaba</groupId>
<artifactId>druid</artifactId>
<version>1.1.17</version>
</dependency>
2.使用配置类注入DruidDataSource
package com.sun.springboot.config;
import com.alibaba.druid.pool.DruidDataSource;
import org.springframework.boot.context.properties.ConfigurationProperties;
import org.springframework.context.annotation.Bean;
import org.springframework.context.annotation.Configuration;
import javax.sql.DataSource;
@Configuration
public class DruidDataSourceConfig {
@ConfigurationProperties("spring.datasource")
@Bean
public DataSource dataSource() {
return new DruidDataSource();
}
}
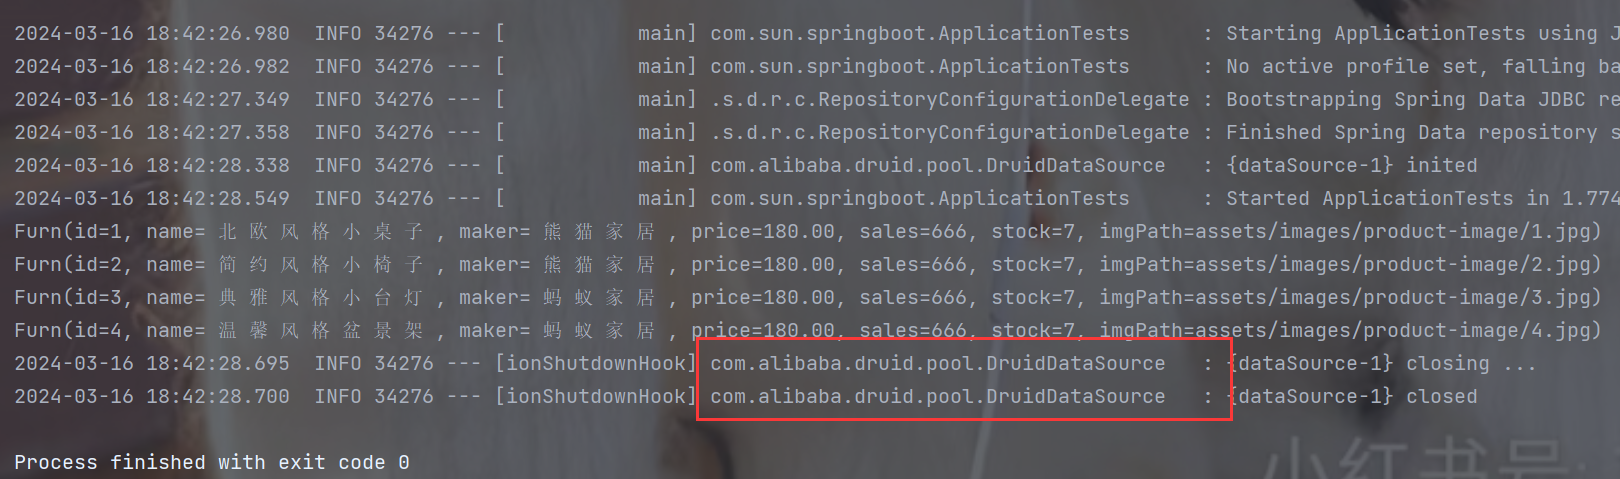
3.测试
4.细节说明
- @ConfigurationProperties(“spring.datasource”)只要配置了这个,就会自动读取yaml配置文件中配置的数据源信息
- 只要注入了德鲁伊的数据源,则原来默认的数据源将不会被注入因为默认数据源的注入有条件注入的注解,只有在没有配置数据源的时候才会被注入
3.Druid监控功能
1.SQL监控
1.配置类中配置
@Bean
public ServletRegistrationBean statViewServlet() {
StatViewServlet statViewServlet = new StatViewServlet();
ServletRegistrationBean<StatViewServlet> registrationBean =
new ServletRegistrationBean<>(statViewServlet, "/druid/*");
registrationBean.addInitParameter("loginUsername", "root");
registrationBean.addInitParameter("loginPassword", "root");
return registrationBean;
}
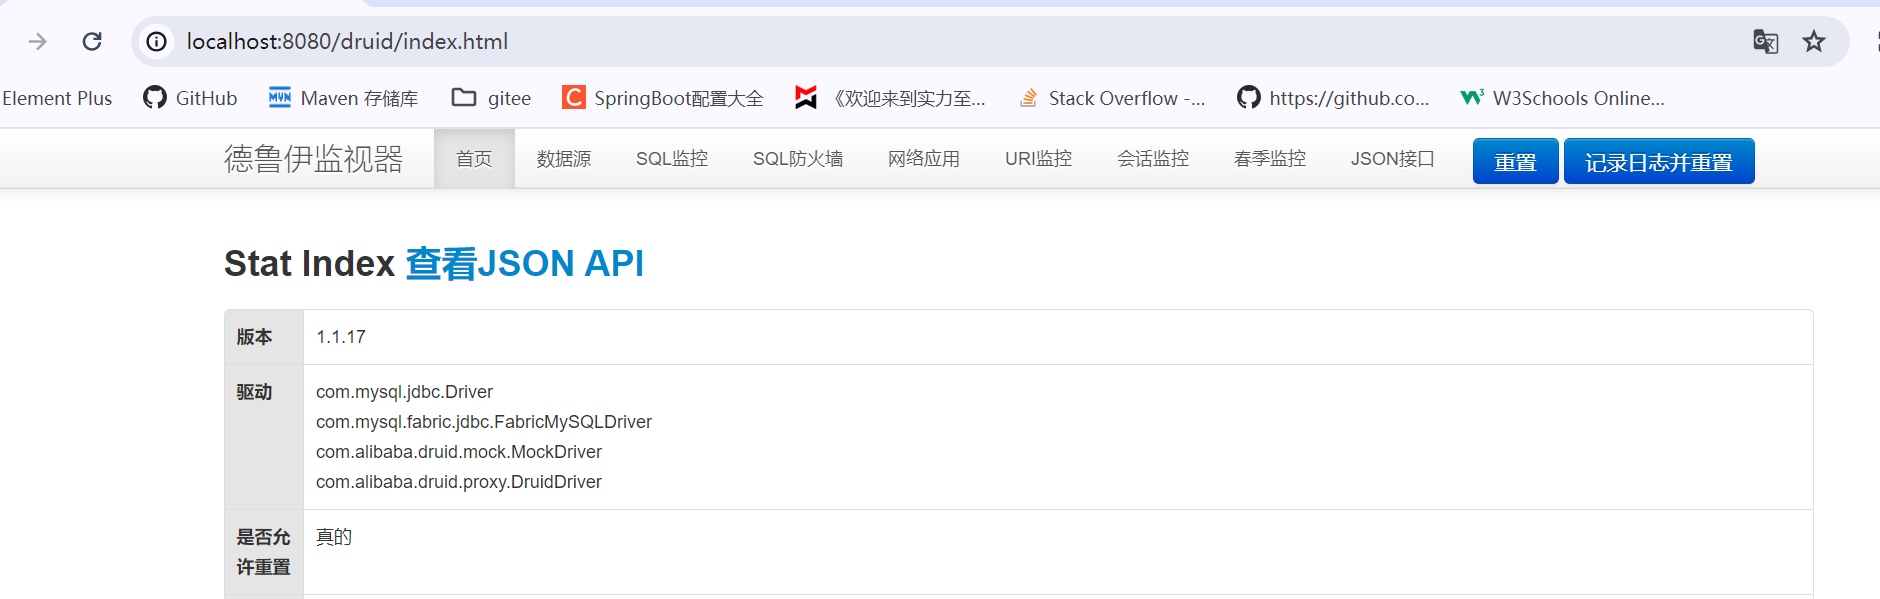
2.浏览器输入http://localhost:8080/druid/index.html查看监控页面
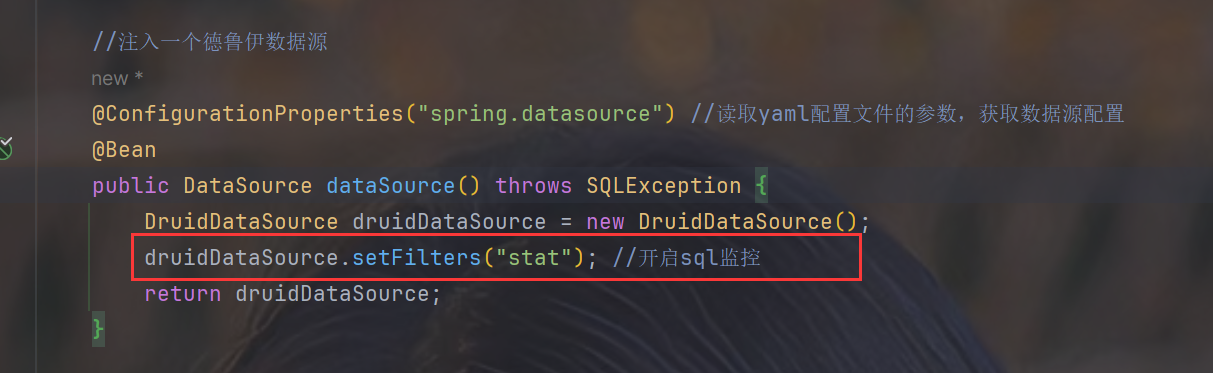
3.配置类注入数据源时开启sql监控
4.编写Controller进行测试
package com.sun.springboot.controller;
import com.sun.springboot.bean.Furn;
import org.springframework.beans.factory.annotation.Autowired;
import org.springframework.jdbc.core.BeanPropertyRowMapper;
import org.springframework.jdbc.core.JdbcTemplate;
import org.springframework.stereotype.Controller;
import org.springframework.web.bind.annotation.GetMapping;
import org.springframework.web.bind.annotation.ResponseBody;
import java.util.List;
@Controller
public class DruidSqlController {
@Autowired
JdbcTemplate jdbcTemplate;
@ResponseBody
@GetMapping("/sql")
public List<Furn> crudDB(){
BeanPropertyRowMapper<Furn> rowMapper =
new BeanPropertyRowMapper<>(Furn.class);
List<Furn> furns = jdbcTemplate.query("select * from furn", rowMapper);
for (Furn furn : furns) {
System.out.println(furn);
}
return furns;
}
}
5.浏览器请求Controller进行测试

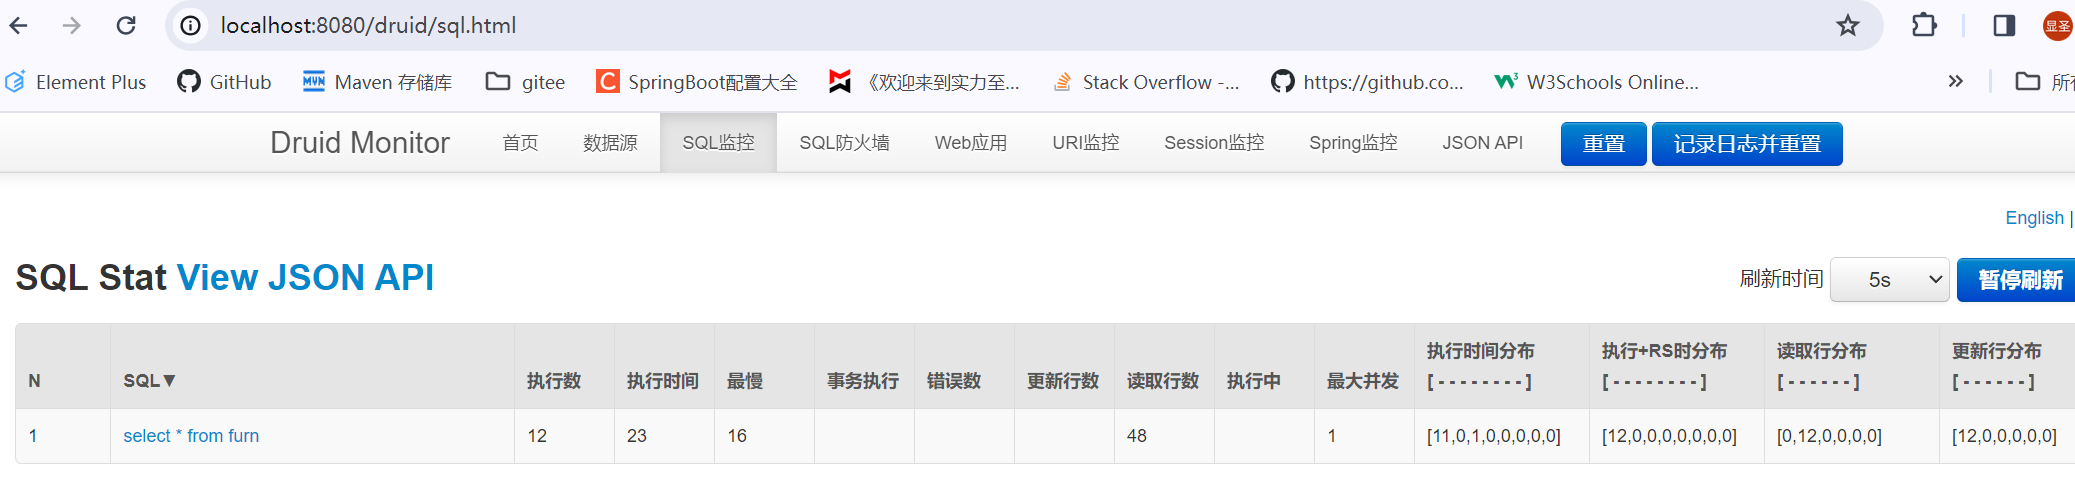
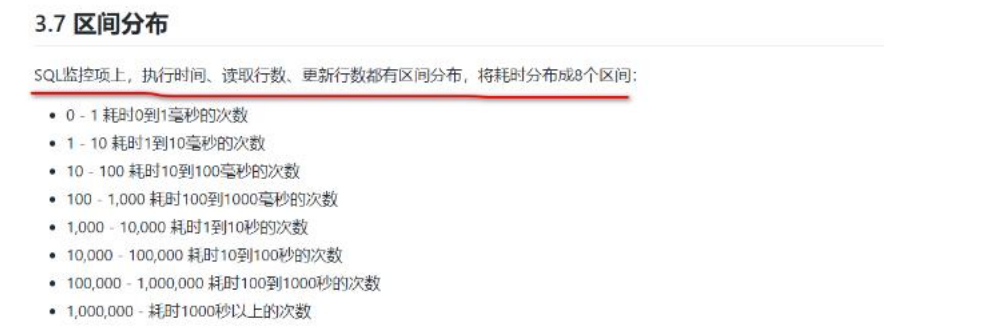
6.关于区间分布
2.Web关联监控
1.配置类配置webStatFilter
@Bean
public FilterRegistrationBean webStatFilter() {
WebStatFilter webStatFilter = new WebStatFilter();
FilterRegistrationBean<WebStatFilter> filterRegistrationBean =
new FilterRegistrationBean<>(webStatFilter);
filterRegistrationBean.setUrlPatterns(Arrays.asList("/*"));
filterRegistrationBean.addInitParameter
("exclusions", "*.js,*.gif,*.jpg,*.png,*.css,*.ico,/druid/*");
return filterRegistrationBean;
}
2.测试


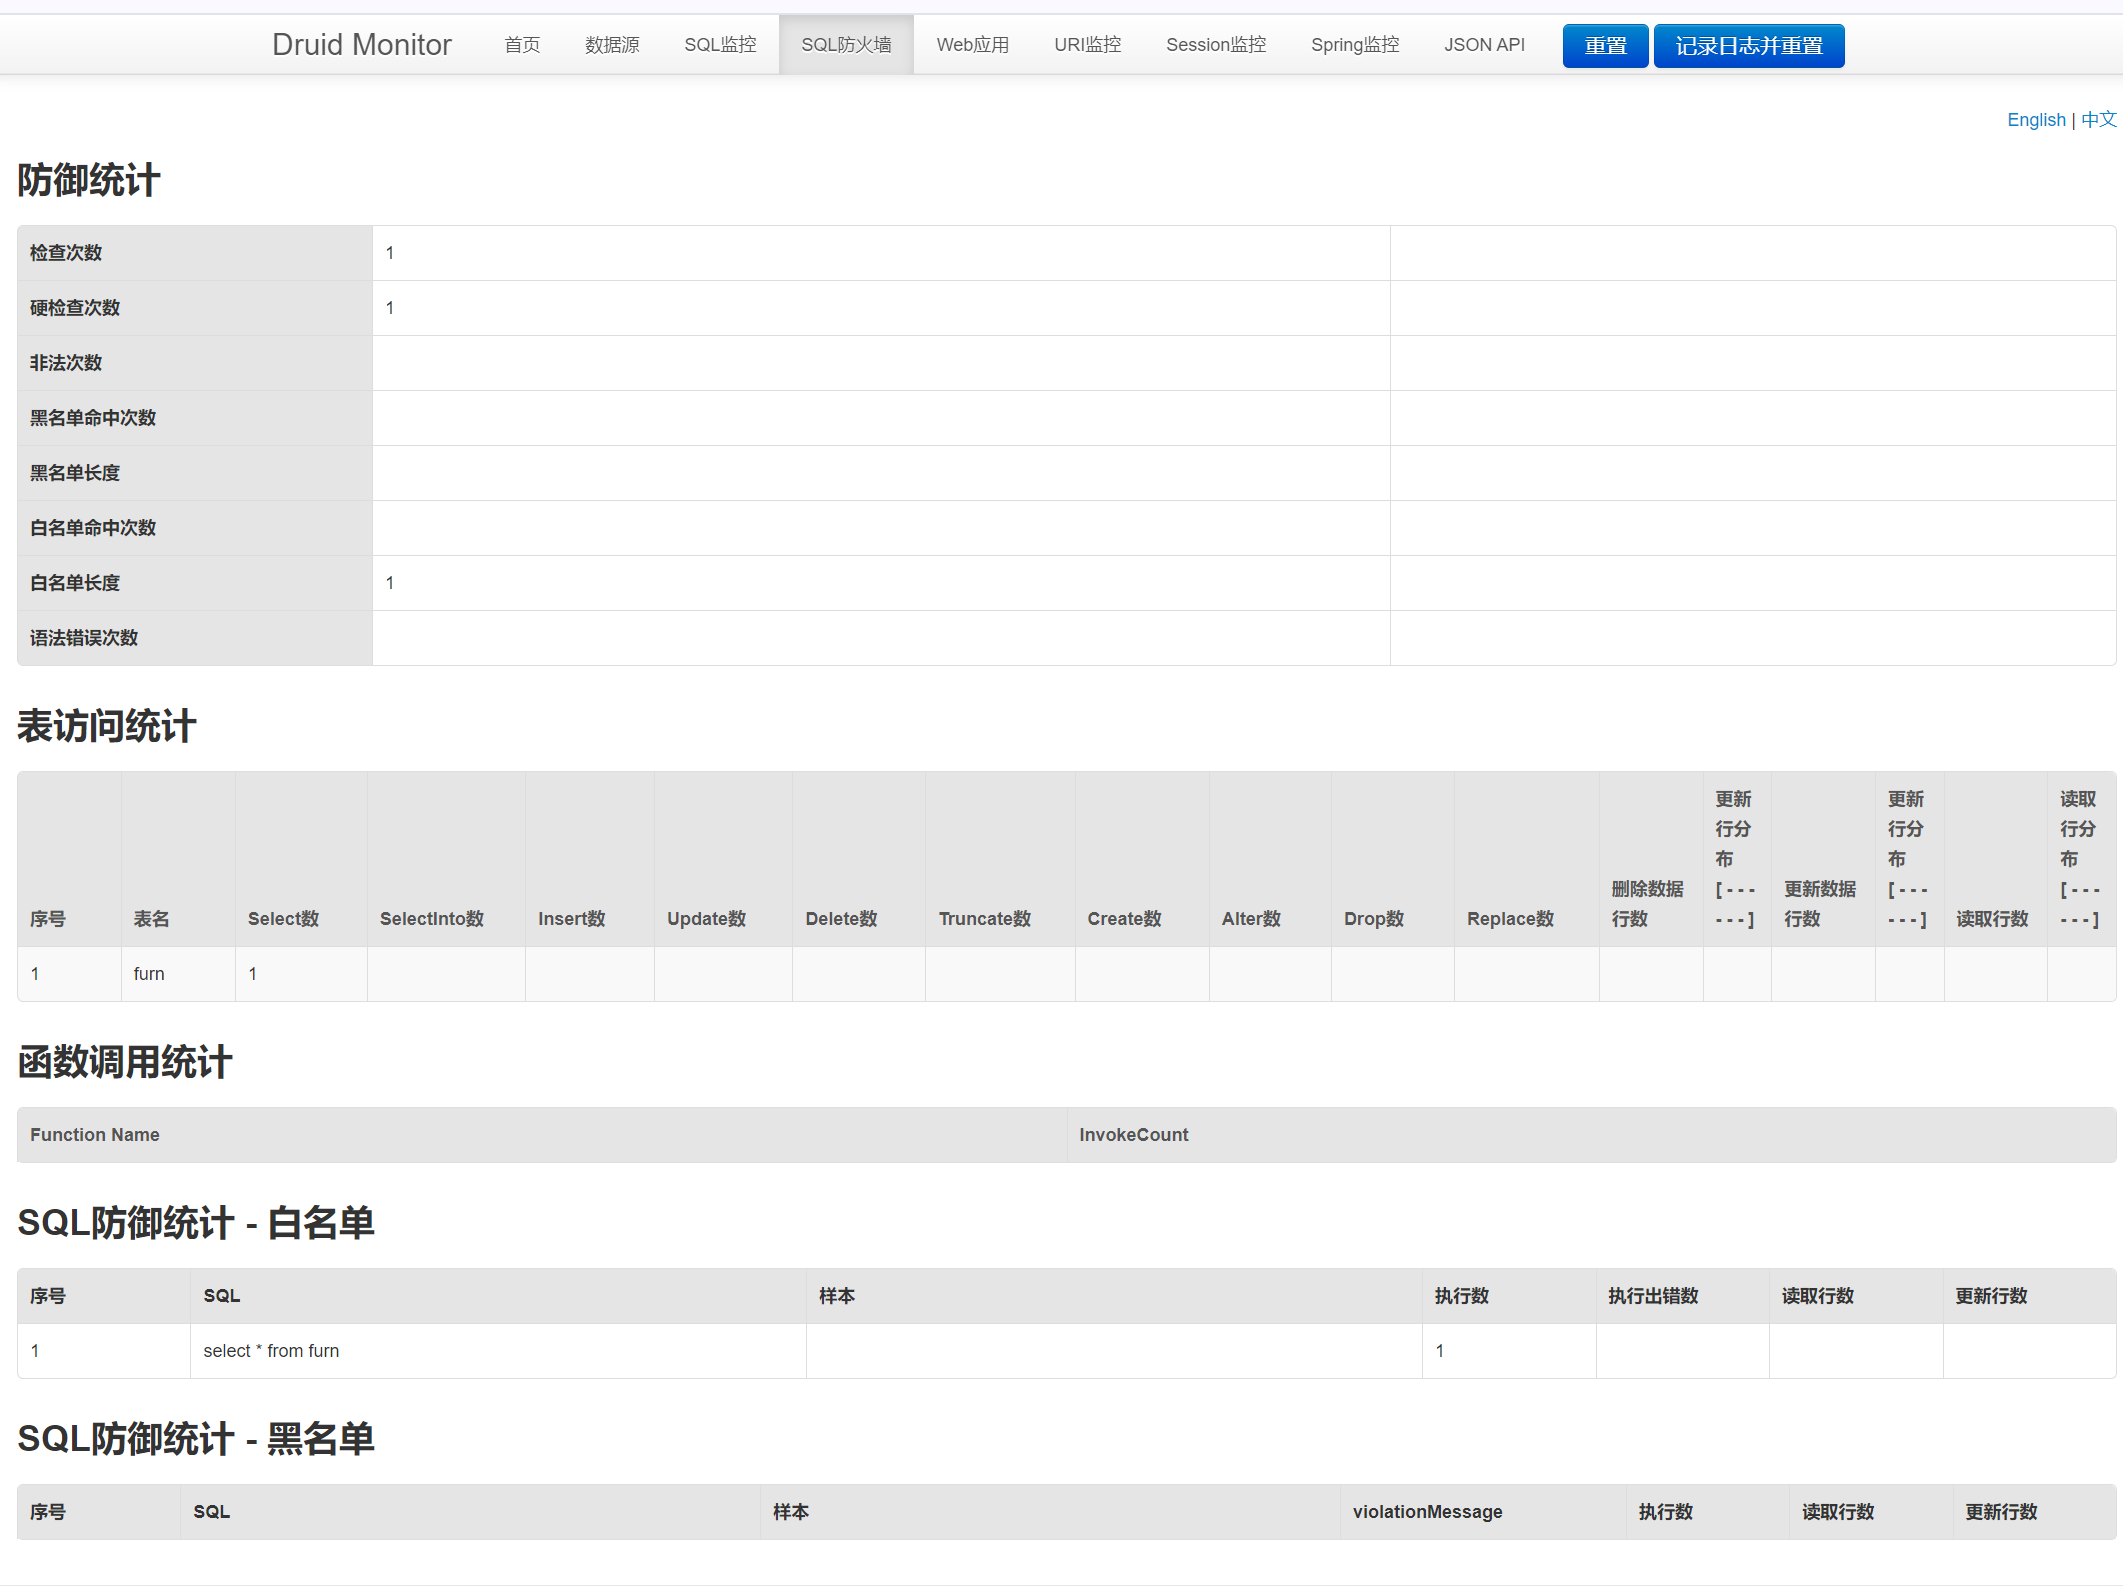
3.SQL防火墙
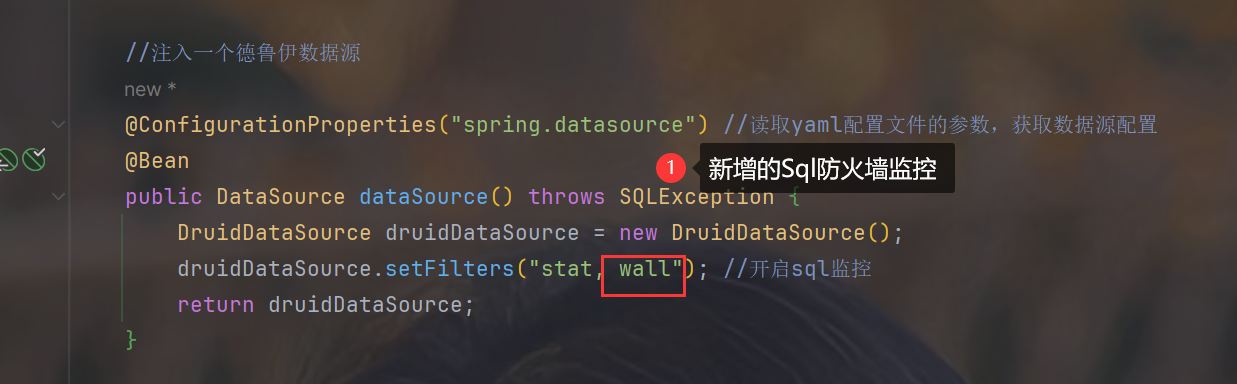
1.配置类注入数据源时添加过滤器
2.测试
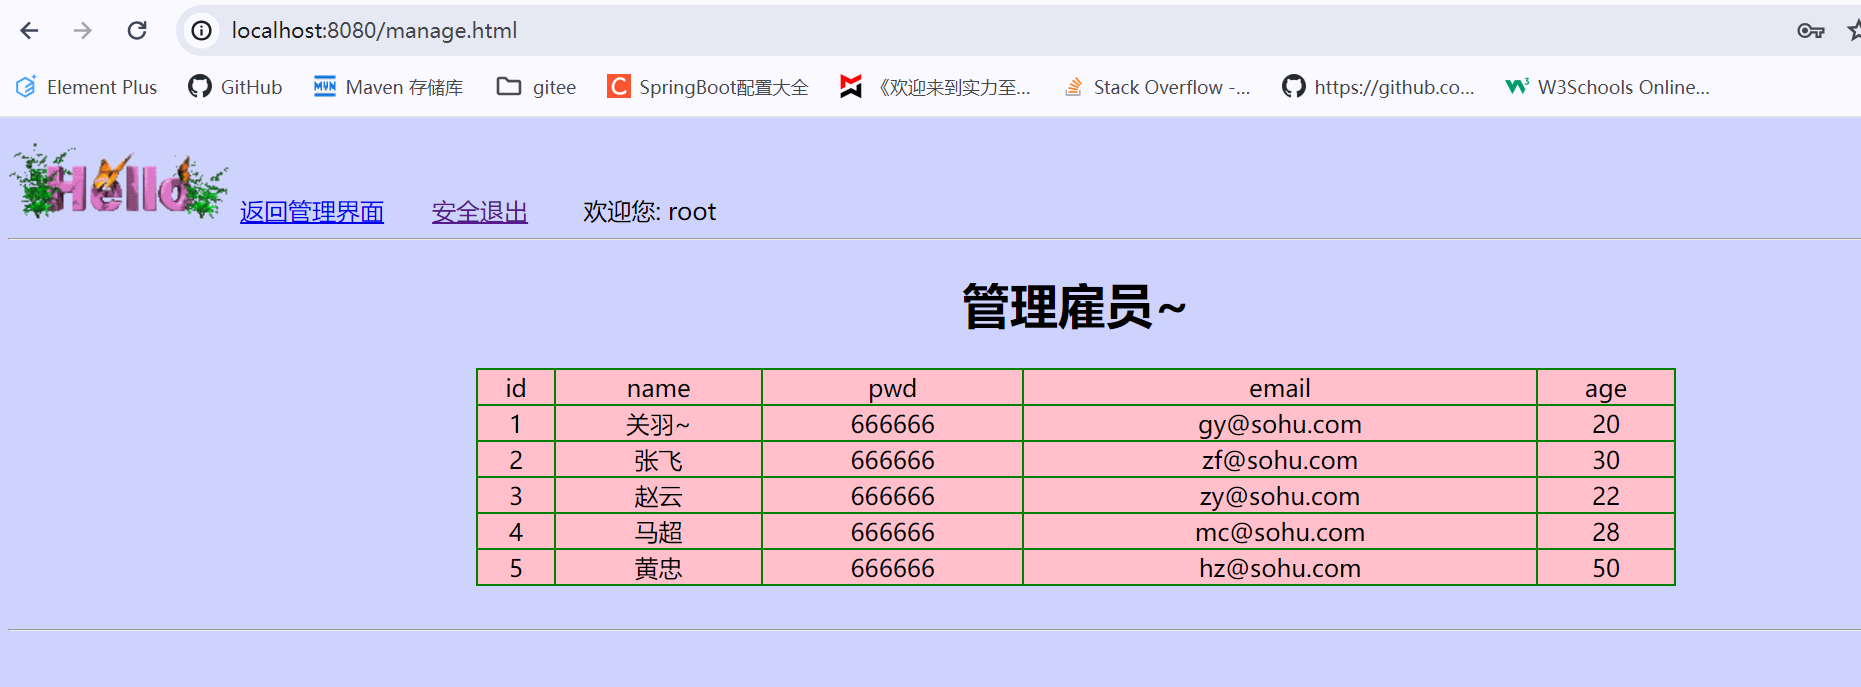
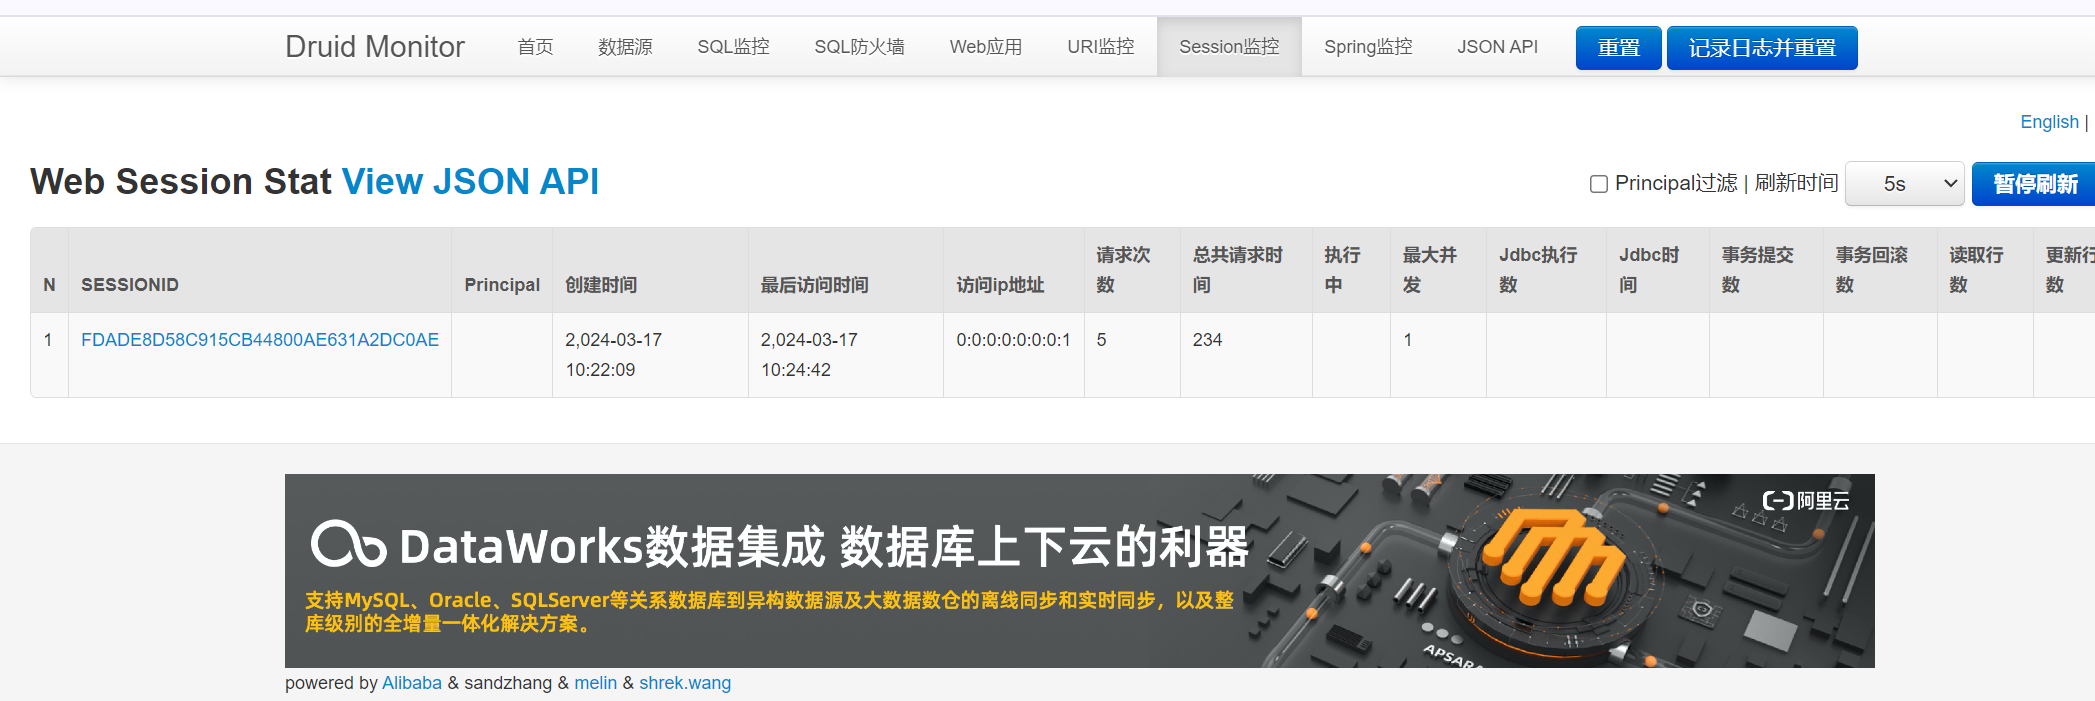
4.Session监控(默认开启)
测试
4.目前阶段完整配置文件
1.pom.xml
<project xmlns="http://maven.apache.org/POM/4.0.0" xmlns:xsi="http://www.w3.org/2001/XMLSchema-instance"
xsi:schemaLocation="http://maven.apache.org/POM/4.0.0 http://maven.apache.org/maven-v4_0_0.xsd">
<modelVersion>4.0.0</modelVersion>
<groupId>org.example</groupId>
<artifactId>springboot-usersys</artifactId>
<version>1.0-SNAPSHOT</version>
<name>Archetype - springboot-usersys</name>
<url>http://maven.apache.org</url>
<parent>
<artifactId>spring-boot-starter-parent</artifactId>
<groupId>org.springframework.boot</groupId>
<version>2.5.3</version>
</parent>
<dependencies>
<dependency>
<groupId>org.springframework.boot</groupId>
<artifactId>spring-boot-starter-web</artifactId>
</dependency>
<dependency>
<groupId>org.projectlombok</groupId>
<artifactId>lombok</artifactId>
</dependency>
<dependency>
<groupId>org.springframework.boot</groupId>
<artifactId>spring-boot-configuration-processor</artifactId>
</dependency>
<dependency>
<groupId>org.springframework.boot</groupId>
<artifactId>spring-boot-starter-thymeleaf</artifactId>
</dependency>
<dependency>
<groupId>org.springframework.boot</groupId>
<artifactId>spring-boot-starter-data-jdbc</artifactId>
</dependency>
<dependency>
<groupId>mysql</groupId>
<artifactId>mysql-connector-java</artifactId>
<version>5.1.49</version>
</dependency>
<dependency>
<groupId>org.springframework.boot</groupId>
<artifactId>spring-boot-starter-test</artifactId>
</dependency>
<dependency>
<groupId>com.alibaba</groupId>
<artifactId>druid</artifactId>
<version>1.1.17</version>
</dependency>
</dependencies>
</project>
2.application.yml 配置数据源信息
spring:
datasource:
url: jdbc:mysql://localhost:3306/spring_boot?useSSL=false&useUnicode=true&characterEncoding=UTF-8
username: root
password: root
driver-class-name: com.mysql.jdbc.Driver
3.DruidDataSourceConfig.java 配置类
package com.sun.springboot.config;
import com.alibaba.druid.pool.DruidDataSource;
import com.alibaba.druid.support.http.StatViewServlet;
import com.alibaba.druid.support.http.WebStatFilter;
import org.springframework.boot.context.properties.ConfigurationProperties;
import org.springframework.boot.web.servlet.FilterRegistrationBean;
import org.springframework.boot.web.servlet.ServletRegistrationBean;
import org.springframework.context.annotation.Bean;
import org.springframework.context.annotation.Configuration;
import javax.sql.DataSource;
import java.sql.SQLException;
import java.util.Arrays;
@Configuration
public class DruidDataSourceConfig {
@ConfigurationProperties("spring.datasource")
@Bean
public DataSource dataSource() throws SQLException {
DruidDataSource druidDataSource = new DruidDataSource();
druidDataSource.setFilters("stat, wall");
return druidDataSource;
}
@Bean
public ServletRegistrationBean statViewServlet() {
StatViewServlet statViewServlet = new StatViewServlet();
ServletRegistrationBean<StatViewServlet> registrationBean =
new ServletRegistrationBean<>(statViewServlet, "/druid/*");
registrationBean.addInitParameter("loginUsername", "root");
registrationBean.addInitParameter("loginPassword", "root");
return registrationBean;
}
@Bean
public FilterRegistrationBean webStatFilter() {
WebStatFilter webStatFilter = new WebStatFilter();
FilterRegistrationBean<WebStatFilter> filterRegistrationBean =
new FilterRegistrationBean<>(webStatFilter);
filterRegistrationBean.setUrlPatterns(Arrays.asList("/*"));
filterRegistrationBean.addInitParameter
("exclusions", "*.js,*.gif,*.jpg,*.png,*.css,*.ico,/druid/*");
return filterRegistrationBean;
}
}
5.使用starter方式整合druid
1.取消之前对druid的配置
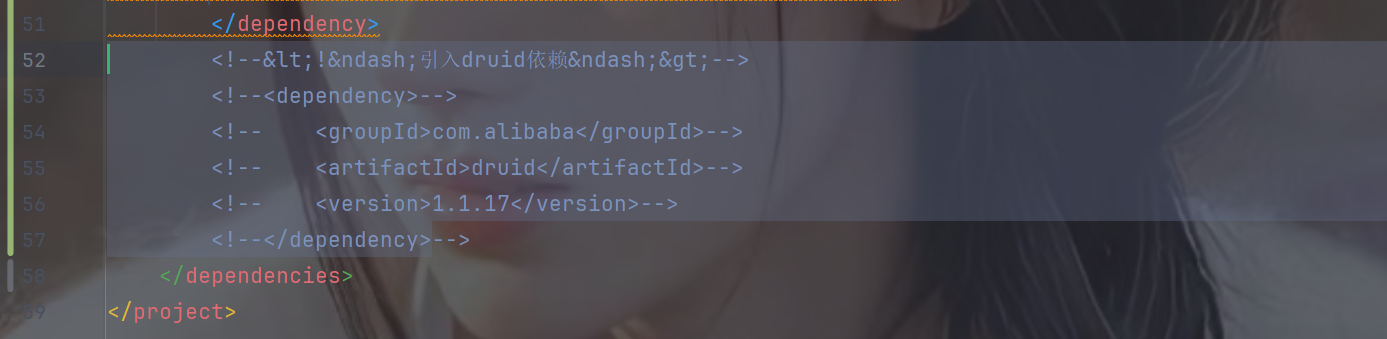
1.修改pom.xml注销druid的依赖
2.注销整个DruidDataSourceConfig.java
3.测试

2.pom.xml 引入依赖
<dependency>
<groupId>com.alibaba</groupId>
<artifactId>druid-spring-boot-starter</artifactId>
<version>1.1.17</version>
</dependency>
3.application.yml 配置数据源和druid监控
spring:
datasource:
url: jdbc:mysql://localhost:3306/spring_boot?useSSL=false&useUnicode=true&characterEncoding=UTF-8
username: root
password: root
driver-class-name: com.mysql.jdbc.Driver
druid:
stat-view-servlet:
enabled: true
login-username: root
login-password: root
reset-enable: false
web-stat-filter:
enabled: true
url-pattern: /*
exclusions: "*.js,*.gif,*.jpg,*.png,*.css,*.ico,/druid/*"
filter:
stat:
log-slow-sql: true
slow-sql-millis: 1000
enabled: true
wall:
enabled: true
config:
drop-table-allow: false
select-all-column-allow: false