微信小程序 - 自定义头部导航栏开发
默认情况下,小程序的顶部导航栏由系统自动生成,允许修改一些基本样式如背景色、文字颜色等。然而,如果需要实现更复杂的样式,如自定义图标、背景等,或者需要适配不同手机屏幕的高度和样式,就需要自定义顶部导航栏。
小程序自定义头部导航栏的开发主要涉及系统顶部状态栏和导航栏标题区域,自定义顶部导航栏的好处包括提高用户体验、增加页面交互性等。创建一个自定义导航栏组件,包含导航栏的样式和交互逻辑,并在需要使用导航栏的页面中引入自定义导航栏组件。
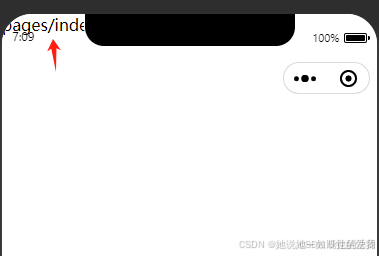
如下图,不同手机品牌的顶部区域范围存在差异,这就需要通过提供的相关API获取相应参数,以便根据当前设备屏幕的高度和样式,完成自定义顶部导航栏。
一、app.json参数配置
自定义导航栏首页需要在app.json文件中配置navigationStyle为custom,这样系统默认自动生成的航行栏就消失了。代码如下:
{
  "pages": [
    "pages/index/index",
    "pages/logs/logs",
    "pages/mine/index"
  ],
  "window": {
    "navigationBarTextStyle": "black",
    "navigationBarTitleText": "Weixin",
    "navigationBarBackgroundColor": "#ffffff",
    "navigationStyle": "custom"
  },
  "style": "v2",
  "componentFramework": "glass-easel",
  "sitemapLocation": "sitemap.json",
  "lazyCodeLoading": "requiredComponents"
} 
二、自定义导航栏组件
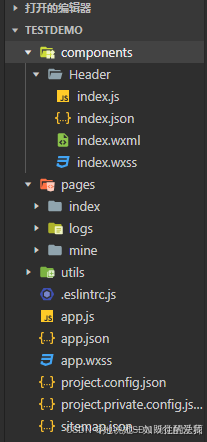
在小程序项目中新建components目录,用于存放自定义组件。在内部创建Header组件,并实现自定义导航栏的样式和交互功能。目录如下图:

首页在index.wxml编写自定义导航栏框架结构,在index.wxss中添加自定义导航栏的样式,index.js中实现导航栏中的交互功能。
index.wxml代码如下:
<!--components/Header/index.wxml-->
<view class="header-wrap">
  <view class="header-fixed-wrap">
    <view class="nav-bar"></view>
    <view class="flex-box">
      <view class="left">
        <button type="default" class="btn-back">返回</button>
      </view>
      <view class="middle">
        <view class="title">标题</view>
      </view>
      <view class="right"></view>
    </view>
  </view>
</view>
css wx
/* components/Header/index.wxss */
.header-wrap { width: 100%; }
.header-wrap .nav-bar{ width: 100%; }
.header-fixed-wrap{
    width: 100%;
    background-color: #ffffff;
    border-bottom: 1px solid #cccccc;
    position: fixed;
    left: 0;
    top: 0;
    z-index: 1000;
}
.header-fixed-wrap .flex-box{
    width: 100%;
    height: 80rpx;
    display: flex;
    flex-direction: row;
    flex-wrap: wrap;
    justify-content: space-between;
    align-items: center;
}
.header-fixed-wrap .left, .header-fixed-wrap .right{ flex: 2; }
.header-fixed-wrap .middle{ flex: 5; }
.header-fixed-wrap .left .btn-back{
    width: 80rpx; height: 60rpx; line-height: 60rpx; font-size: 28rpx; font-weight: normal; padding: 0; background: none;
}
.header-fixed-wrap .middle .title{
    width: 80%; text-align: center; white-space: nowrap; overflow: hidden; text-overflow: ellipsis; margin: 0 auto;
}