树莓派扩展RGB点阵屏的使用
本篇来介绍一个树莓派的RGB 8x8点阵屏扩展板的使用。
1 RGB点阵屏
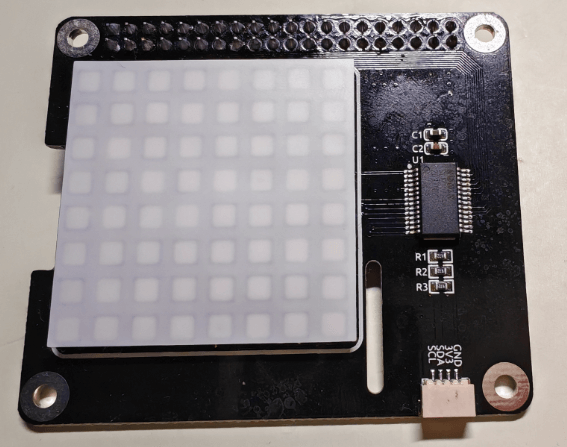
这里使用SunFounder的一个RGB 8x8树莓派扩展板,将其插接到树莓派中即可使用。
2 树莓派IIC配置
树莓派系统的安装,可参考之前的文章:
这个RGB点阵屏与树莓派直接使用IIC通信,因此需要先使能树莓派的IIC,使用如下指令:
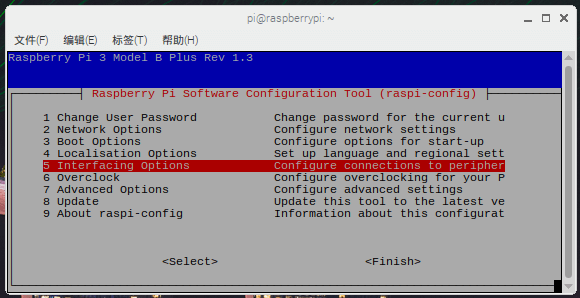
sudo raspi-config
会弹出如下下面,然后选择Interfacing options,回车确认
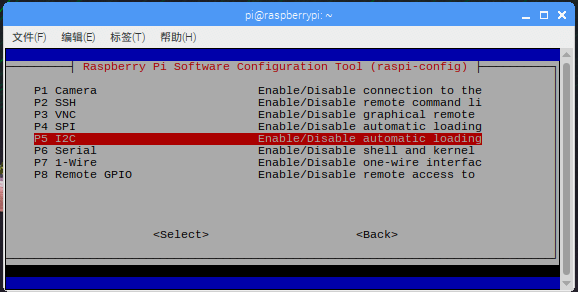
然后再选择P5 I2C,回车确认
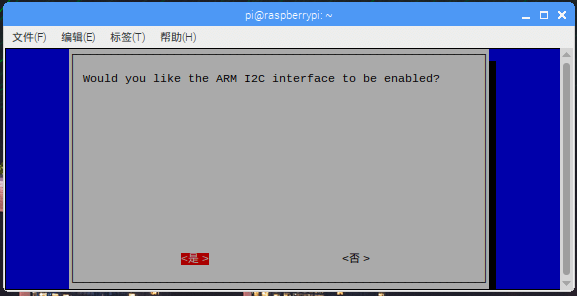
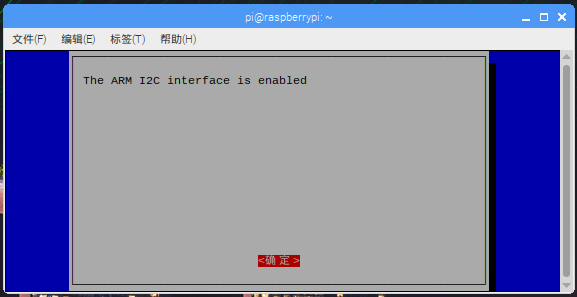
然后确认开启IIC接口:
再次确认:
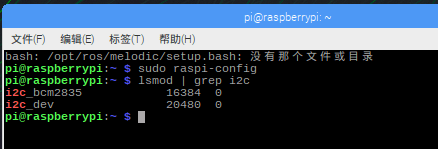
通过如下指令查看IIC模块是否已加载:
lsmod | grep i2c
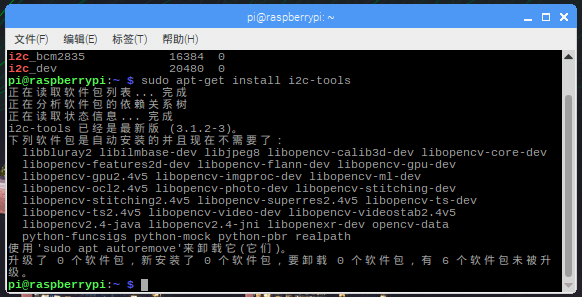
还有安装IIC的软件工具包:
sudo apt-get install i2c-tools
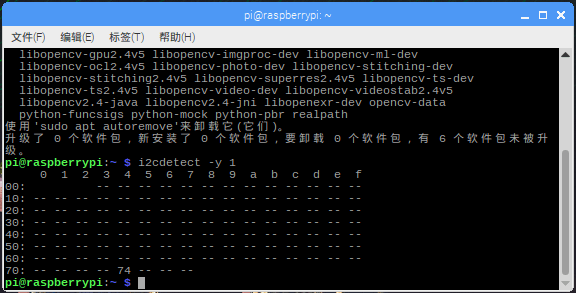
安装完之后,检查IIC的地址:
i2cdetect -y 1
3 运行例程
3.1 下载rgb_matrix代码库
在树莓派中使用git来clone代码仓库:
git clone 
3.2 运行报错解决
运行基础例程:
cd /home/pi/rgb_matrix/raspberrypi
sudo python3 hello_matrix.py
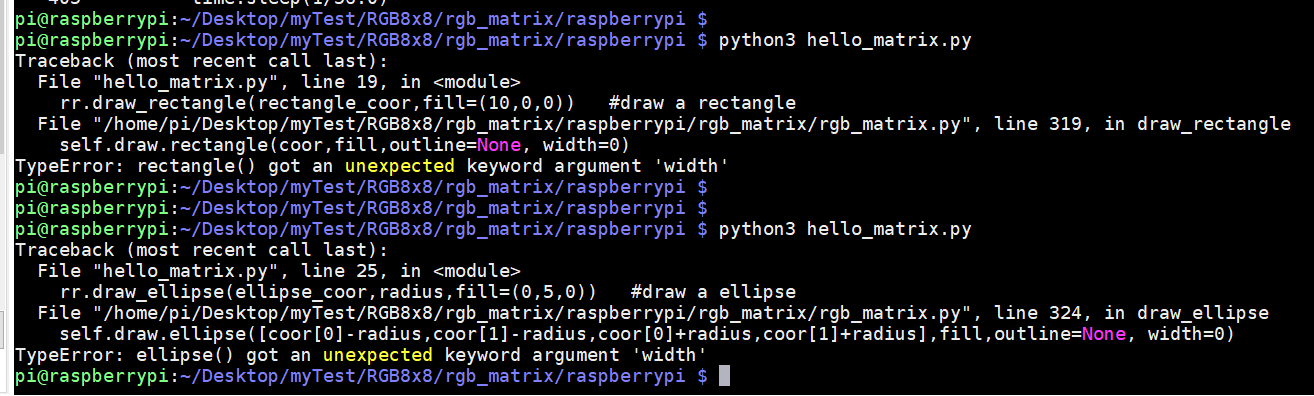
这里报错了,提示rgb_matrix.py的314行有一个非期望的参数joint
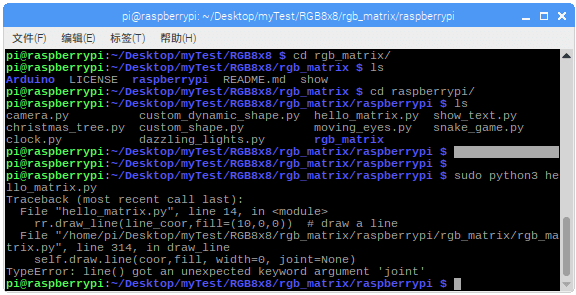
查看rgb_matrix.py的314行,是有一个joint参数,这个参数是传给self.draw.line函数中的,分析代码,这里的self.draw,调用的其实是python的PIL库中的Draw,因此这个line函数就是PIL库中Draw功能中的line函数。可能是不同版本的PIL库的函数有差别,我这个树莓派里的PIL库的line函数不需要joint这个参数,可以把代码中这个参数去掉试试。
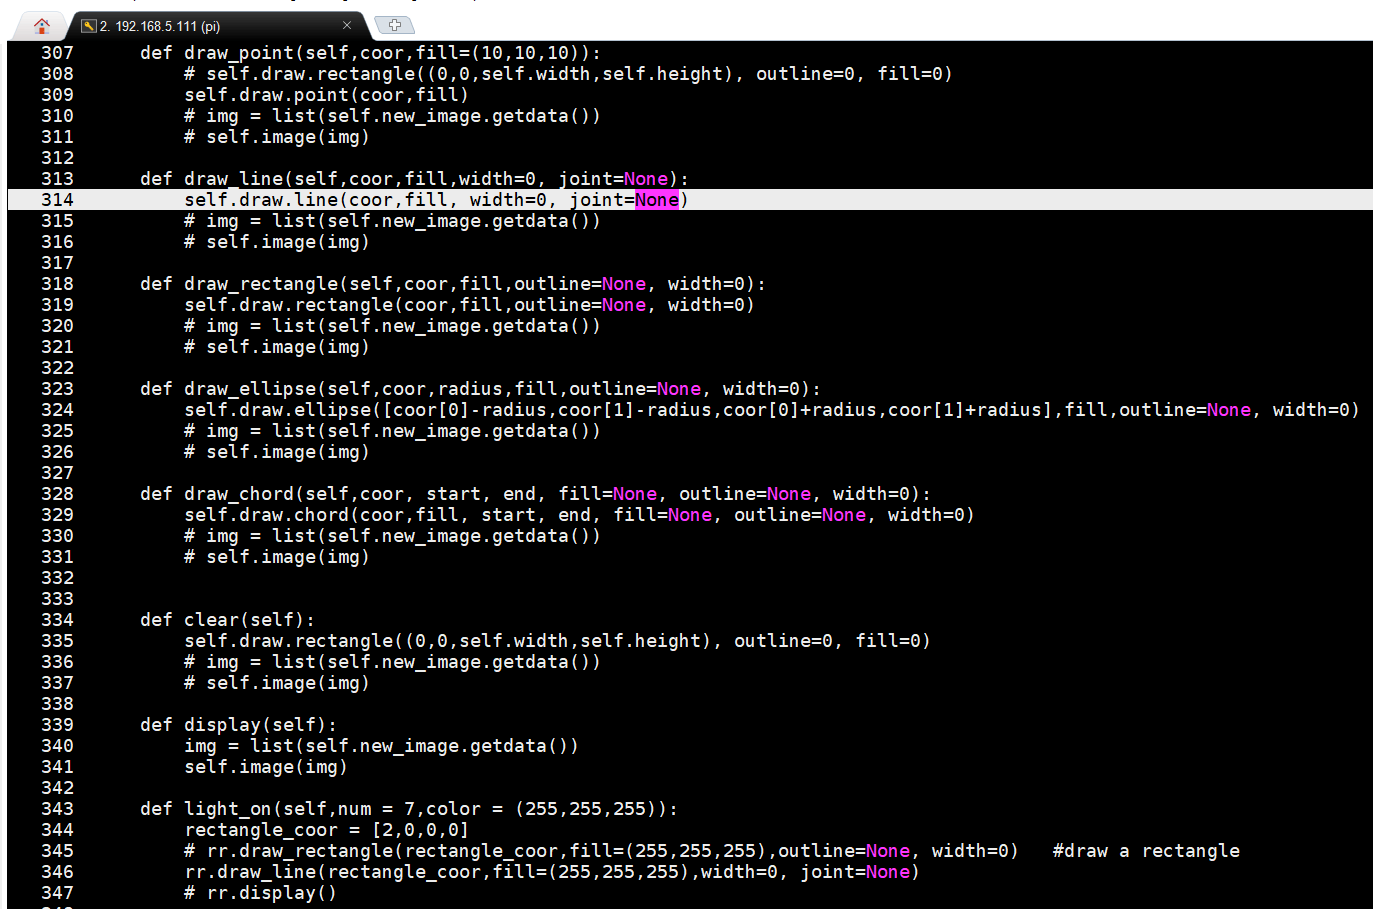
去掉之后,314行就没有报错了,不过还有其它地方报错,也是同样的方法,把代码中提示多余的参数去掉
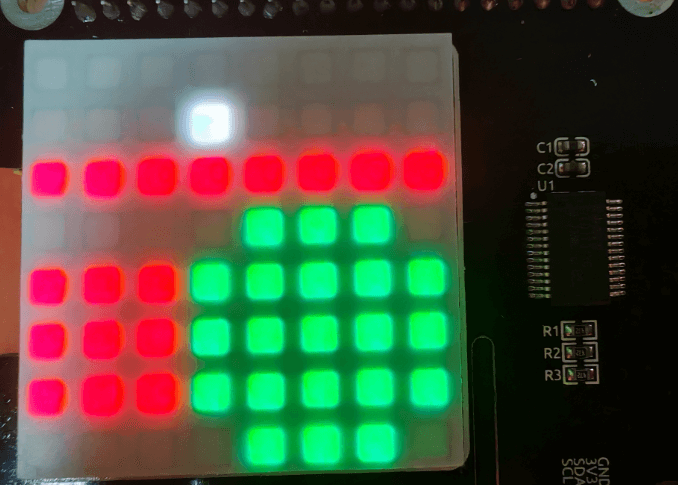
成功运行后的显示效果如下:
3.3 代码分析
hello_matrix.py
from rgb_matrix.rgb_matrix import RGB_Matrix
from rgb_matrix.color import Color
import time

rr = RGB_Matrix(0x74)                     # create an RGB_Matrix object
col = Color()

point_coor = [3,1]
rr.draw_point(point_coor,fill=(10,10,10))   #draw a point
rr.display()
time.sleep(3)

line_coor = [0,2,7,2]
rr.draw_line(line_coor,fill=(10,0,0))  # draw a line
rr.display()
time.sleep(3)

rectangle_coor = [0,4,2,6]
rr.draw_rectangle(rectangle_coor,fill=(10,0,0))   #draw a rectangle
rr.display()
time.sleep(3)

ellipse_coor = [5,5]
radius = 2
rr.draw_ellipse(ellipse_coor,radius,fill=(0,5,0))   #draw a ellipse
rr.display()  #display the picture which you draw
time.sleep(3)

text = 'hello'
rr.show_text(text, delay=200,color=(0,15,0))   # show text
rr.display()
分析代码:
- 首先是引入一些模块
- 从rgb_matrix.py中引入RGB_Matrix这个类
- 从color.py中引入Color这个类
- 引入time模块
- 创建RGB_Matrix对象rr和Color对象col
- 画一些对象
- 调用draw_point画点,在(3,1)位置画一个RGB颜色为(10,10,10)的点,注意位置点在从(0,0)开始的
- 调用draw_line画直线,从(0,2)到(7,2)画一条RGB颜色为(10,0,0)的直线
- 调用draw_rectangle画矩形,对角线从(0,4)到(2,6)画一个RGB颜色为(10,0,0)的矩形
- 调用draw_ellipse画椭圆,以(5,5)为圆心,2为半径,画一个RGB颜色为(0,5,0)的圆
- 调用show_text显示文字,以200ms为显示,以RGB颜色为(0,15,0)显示滚动字符’hello’
4 总结
本篇介绍了树莓派扩展一个8x8的RGB点阵屏的使用方法,并对基础例程中的代码进行了功能分析。