postgresql-patroni高可用安装部署
简介
patroni+etcd,算是目前比较主流的PG高可用搭配了。
patroni都出4.0版本了,一直没时间,断断续续写了好久,最近有人问到,那就当作一个笔记发表吧,自行搭建一个测试库做测试吧。来来回回改了好几遍。文中可能不妨地方没有同步修改的遗漏点。
集群规划
| hostname/ip | 部署软件 | 备注 | 配置 |
|---|---|---|---|
| etcd1/10.0.0.131 | etcd | dcs一致性保障 | 2G 2C |
| etcd2/10.0.0.132 | etcd | dcs一致性保障 | 2G 2C |
| etcd3/10.0.0.133 | etcd | dcs一致性保障 | 2G 2C |
| patroni1/10.0.0.134 | pg+patroni | 数据库高可用、自动failover | 4G 2C |
| patroni2/10.0.0.135 | pg+patroni | 数据库高可用、自动failover | 4G 2C |
| patroni3/10.0.0.136 | pg+patroni | 数据库高可用、自动failover | 4G 2C |
| haproxy/10.0.0.137 | HAProxy | 负载均衡 | 2G 2C |
| 10.0.0.138 | vip |
基础操作所有节点关闭防火墙、ssh通信配置、postgres用户组添加、selinux临时关闭、hostname配置、IP映射文件hosts配置本文不再赘述。
同步服务器时区
## 生产机器请用对应的时间同步工具进行时间同步
sudo timedatectl set-timezone Asia/Shanghai
etcd安装
可以通过ETCD下载地址进行下载安装包,也可以通过yum install etcd 进行安装。本文使用yum源安装方式进行演示。读者自行下载对应的yum安装包
yum install etcd -y
etcd --version
使用centos7 yum 安装默认的etcd版本是3.3.11
本文使用源码包进行安装
配置etcd.conf文件内容
yum 安装的ETCD 其配置文件路径默认存放在 /etc/etcd/etcd.conf
cp  /etc/etcd/etcd.conf  /etc/etcd/etcd.conf_bak
vim  /etc/etcd/etcd.conf
本文演示一下源码安装部署方式,配置文件的变量名称有所不同, etcd节点同步以下操作
tar -zxvf etcd-v3.5.15-linux-amd64.tar.gz -C /etc
cd /etc/etcd-v3.5.15-linux-amd64/
mv etcd-v3.5.15-linux-amd64/   etcd/
配置环境变量
## vim /etc/profile
export ETCD=/etcd/etcd/
PATH=$ETCD:$PATH
加载环境变量 测试环境变量是否生效
[root@vm132 ~]# source /etc/profile
[root@vm132 ~]# etcd -version
etcd Version: 3.5.15
Git SHA: 9a5533382
Go Version: go1.21.12
Go OS/Arch: linux/amd64
[root@vm132 ~]# etcdctl  version
etcdctl version: 3.5.15
API version: 3.5
[root@vm132 ~]#
以下是在使用yum 安装的时候 官网的一个etcd.conf模板,在etcd的最新版本中不再支持以下变量名称,3.3版本的ETCD还可以将以下变量创建环境变量编排进/etcd/profile文件中,在3.5版本不再支持该环境变量的设置方法。
[root@vm132 etcd-v3.5.15-linux-amd64]# cat etcd.conf
#[Member]
#ETCD_CORS=""
ETCD_DATA_DIR="/var/lib/etcd/default.etcd"
#ETCD_WAL_DIR=""
#ETCD_LISTEN_PEER_URLS="http://localhost:2380"
ETCD_LISTEN_CLIENT_URLS="http://localhost:2379"
#ETCD_MAX_SNAPSHOTS="5"
#ETCD_MAX_WALS="5"
ETCD_NAME="default"
#ETCD_SNAPSHOT_COUNT="100000"
#ETCD_HEARTBEAT_INTERVAL="100"
#ETCD_ELECTION_TIMEOUT="1000"
#ETCD_QUOTA_BACKEND_BYTES="0"
#ETCD_MAX_REQUEST_BYTES="1572864"
#ETCD_GRPC_KEEPALIVE_MIN_TIME="5s"
#ETCD_GRPC_KEEPALIVE_INTERVAL="2h0m0s"
#ETCD_GRPC_KEEPALIVE_TIMEOUT="20s"
#
#[Clustering]
#ETCD_INITIAL_ADVERTISE_PEER_URLS="http://localhost:2380"
ETCD_ADVERTISE_CLIENT_URLS="http://localhost:2379"
#ETCD_DISCOVERY=""
#ETCD_DISCOVERY_FALLBACK="proxy"
#ETCD_DISCOVERY_PROXY=""
#ETCD_DISCOVERY_SRV=""
#ETCD_INITIAL_CLUSTER="default=http://localhost:2380"
#ETCD_INITIAL_CLUSTER_TOKEN="etcd-cluster"
#ETCD_INITIAL_CLUSTER_STATE="new"
#ETCD_STRICT_RECONFIG_CHECK="true"
#ETCD_ENABLE_V2="true"
#
#[Proxy]
#ETCD_PROXY="off"
#ETCD_PROXY_FAILURE_WAIT="5000"
#ETCD_PROXY_REFRESH_INTERVAL="30000"
#ETCD_PROXY_DIAL_TIMEOUT="1000"
#ETCD_PROXY_WRITE_TIMEOUT="5000"
#ETCD_PROXY_READ_TIMEOUT="0"
#
#[Security]
#ETCD_CERT_FILE=""
#ETCD_KEY_FILE=""
#ETCD_CLIENT_CERT_AUTH="false"
#ETCD_TRUSTED_CA_FILE=""
#ETCD_AUTO_TLS="false"
#ETCD_PEER_CERT_FILE=""
#ETCD_PEER_KEY_FILE=""
#ETCD_PEER_CLIENT_CERT_AUTH="false"
#ETCD_PEER_TRUSTED_CA_FILE=""
#ETCD_PEER_AUTO_TLS="false"
#
#[Logging]
#ETCD_DEBUG="false"
#ETCD_LOG_PACKAGE_LEVELS=""
#ETCD_LOG_OUTPUT="default"
#
#[Unsafe]
#ETCD_FORCE_NEW_CLUSTER="false"
#
#[Version]
#ETCD_VERSION="false"
#ETCD_AUTO_COMPACTION_RETENTION="0"
#
#[Profiling]
#ETCD_ENABLE_PPROF="false"
#ETCD_METRICS="basic"
#
#[Auth]
#ETCD_AUTH_TOKEN="simple"
这里变量名称在不同版本有所不同,以下是3.5版本官方给出的参考配置文档内容,并给出了可能的参数以及参数解释
本文使用的是3.5版本安装。
# This is the configuration file for the etcd server.

# Human-readable name for this member.
name: 'default'

# Path to the data directory.
data-dir:

# Path to the dedicated wal directory.
wal-dir:

# Number of committed transactions to trigger a snapshot to disk.
snapshot-count: 10000

# Time (in milliseconds) of a heartbeat interval.
heartbeat-interval: 100

# Time (in milliseconds) for an election to timeout.
election-timeout: 1000

# Raise alarms when backend size exceeds the given quota. 0 means use the
# default quota.
quota-backend-bytes: 0

# List of comma separated URLs to listen on for peer traffic.
listen-peer-urls: http://localhost:2380

# List of comma separated URLs to listen on for client traffic.
listen-client-urls: http://localhost:2379

# Maximum number of snapshot files to retain (0 is unlimited).
max-snapshots: 5

# Maximum number of wal files to retain (0 is unlimited).
max-wals: 5

# Comma-separated white list of origins for CORS (cross-origin resource sharing).
cors:

# List of this member's peer URLs to advertise to the rest of the cluster.
# The URLs needed to be a comma-separated list.
initial-advertise-peer-urls: http://localhost:2380

# List of this member's client URLs to advertise to the public.
# The URLs needed to be a comma-separated list.
advertise-client-urls: http://localhost:2379

# Discovery URL used to bootstrap the cluster.
discovery:

# Valid values include 'exit', 'proxy'
discovery-fallback: 'proxy'

# HTTP proxy to use for traffic to discovery service.
discovery-proxy:

# DNS domain used to bootstrap initial cluster.
discovery-srv:

# Comma separated string of initial cluster configuration for bootstrapping.
# Example: initial-cluster: "infra0=http://10.0.1.10:2380,infra1=http://10.0.1.11:2380,infra2=http://10.0.1.12:2380"
initial-cluster:

# Initial cluster token for the etcd cluster during bootstrap.
initial-cluster-token: 'etcd-cluster'

# Initial cluster state ('new' or 'existing').
initial-cluster-state: 'new'

# Reject reconfiguration requests that would cause quorum loss.
strict-reconfig-check: false

# Enable runtime profiling data via HTTP server
enable-pprof: true

# Valid values include 'on', 'readonly', 'off'
proxy: 'off'

# Time (in milliseconds) an endpoint will be held in a failed state.
proxy-failure-wait: 5000

# Time (in milliseconds) of the endpoints refresh interval.
proxy-refresh-interval: 30000

# Time (in milliseconds) for a dial to timeout.
proxy-dial-timeout: 1000

# Time (in milliseconds) for a write to timeout.
proxy-write-timeout: 5000

# Time (in milliseconds) for a read to timeout.
proxy-read-timeout: 0

client-transport-security:
  # Path to the client server TLS cert file.
  cert-file:

  # Path to the client server TLS key file.
  key-file:

  # Enable client cert authentication.
  client-cert-auth: false

  # Path to the client server TLS trusted CA cert file.
  trusted-ca-file:

  # Client TLS using generated certificates
  auto-tls: false

peer-transport-security:
  # Path to the peer server TLS cert file.
  cert-file:

  # Path to the peer server TLS key file.
  key-file:

  # Enable peer client cert authentication.
  client-cert-auth: false

  # Path to the peer server TLS trusted CA cert file.
  trusted-ca-file:

  # Peer TLS using generated certificates.
  auto-tls: false

  # Allowed CN for inter peer authentication.
  allowed-cn:

  # Allowed TLS hostname for inter peer authentication.
  allowed-hostname:

# The validity period of the self-signed certificate, the unit is year.
self-signed-cert-validity: 1

# Enable debug-level logging for etcd.
log-level: debug

logger: zap

# Specify 'stdout' or 'stderr' to skip journald logging even when running under systemd.
log-outputs: [stderr]

# Force to create a new one member cluster.
force-new-cluster: false

auto-compaction-mode: periodic
auto-compaction-retention: "1"

# Limit etcd to a specific set of tls cipher suites
cipher-suites: [
  TLS_ECDHE_RSA_WITH_AES_128_GCM_SHA256,
  TLS_ECDHE_RSA_WITH_AES_256_GCM_SHA384
]

# Limit etcd to specific TLS protocol versions
tls-min-version: 'TLS1.2'
tls-max-version: 'TLS1.3'
使用以下配置内容进行配置
131节点执行指令
####    131节点执行指令
sudo tee -a /etc/etcd/etcd.yaml <<EOF
# 本机的会员名称
name: etcd1
# 数据目录
data-dir: /etc/etcd/data
# 配置etcd的客户端监听地址
listen-client-urls: http://0.0.0.0:2379
# 配置 etcd 服务器用于广告、公示给客户端的URL
advertise-client-urls: http://10.0.0.131:2379
# 配置etcd集群中的节点之间进行通信的URL地址。这些地址用于集群间的数据同步和心跳信号等。
listen-peer-urls: http://10.0.0.131:2380
# 配置集群中其他etcd实例访问当前实例的URL地址。
initial-advertise-peer-urls: http://10.0.0.131:2380
# 这个参数用于指定etcd集群中所有成员的初始配置。它的值是一个由多个成员组成的列表,每个成员由名称和对>等通信URL组成,用逗号分隔。
initial-cluster: etcd1=http://10.0.0.131:2380,etcd2=http://10.0.0.132:2380,etcd3=http://10.0.0.133:2380
# 指定etcd集群的令牌。令牌是一个用于标识特定集群的字符串。当你创建一个新的etcd集群时,你需要为它指定>一个唯一的令牌
initial-cluster-token: etcd-cluster
# 指定etcd集群的初始状态。它有两个可能的值:new和existing。当你创建一个新的etcd集群时,你需要将这个参数设置为new,表示集群处于初始状态。
# 当你将一个已有的etcd节点添加到现有集群时,你需要将这个参数设置为existing,表示集群已经存在。
initial-cluster-state: new
EOF
132节点执行指令
sudo tee -a /etc/etcd/etcd.yaml <<EOF
# 本机的会员名称
name: etcd2
# 数据目录
data-dir: /etc/etcd/data
# 配置etcd的客户端监听地址
listen-client-urls: http://0.0.0.0:2379
# 配置 etcd 服务器用于广告、公示给客户端的URL
advertise-client-urls: http://10.0.0.132:2379
# 配置etcd集群中的节点之间进行通信的URL地址。这些地址用于集群间的数据同步和心跳信号等。
listen-peer-urls: http://10.0.0.132:2380
# 配置集群中其他etcd实例访问当前实例的URL地址。
initial-advertise-peer-urls: http://10.0.0.132:2380
# 这个参数用于指定etcd集群中所有成员的初始配置。它的值是一个由多个成员组成的列表,每个成员由名称和对等通信URL组成,用逗号分隔。
initial-cluster: etcd1=http://10.0.0.131:2380,etcd2=http://10.0.0.132:2380,etcd3=http://10.0.0.133:2380
# 指定etcd集群的令牌。令牌是一个用于标识特定集群的字符串。当你创建一个新的etcd集群时,你需要为它指定一个唯一的令牌
initial-cluster-token: etcd-cluster
# 指定etcd集群的初始状态。它有两个可能的值:new和existing。当你创建一个新的etcd集群时,你需要将这个参数设置为new,表示集群处于初始状态。
# 当你将一个已有的etcd节点添加到现有集群时,你需要将这个参数设置为existing,表示集群已经存在。
initial-cluster-state: new
EOF
133节点执行指令
sudo tee -a /etc/etcd/etcd.yaml <<EOF
# 本机的会员名称
name: etcd3
# 数据目录
data-dir: /etc/etcd/data
# 配置etcd的客户端监听地址
listen-client-urls: http://0.0.0.0:2379
# 配置 etcd 服务器用于广告、公示给客户端的URL
advertise-client-urls: http://10.0.0.133:2379
# 配置etcd集群中的节点之间进行通信的URL地址。这些地址用于集群间的数据同步和心跳信号等。
listen-peer-urls: http://10.0.0.133:2380
# 配置集群中其他etcd实例访问当前实例的URL地址。
initial-advertise-peer-urls: http://10.0.0.133:2380
# 这个参数用于指定etcd集群中所有成员的初始配置。它的值是一个由多个成员组成的列表,每个成员由名称和对等通信URL组成,用逗号分隔。
initial-cluster: etcd1=http://10.0.0.131:2380,etcd2=http://10.0.0.132:2380,etcd3=http://10.0.0.133:2380
# 指定etcd集群的令牌。令牌是一个用于标识特定集群的字符串。当你创建一个新的etcd集群时,你需要为它指定一个唯一的令牌
initial-cluster-token: etcd-cluster
# 指定etcd集群的初始状态。它有两个可能的值:new和existing。当你创建一个新的etcd集群时,你需要将这个参数设置为new,表示集群处于初始状态。
# 当你将一个已有的etcd节点添加到现有集群时,你需要将这个参数设置为existing,表示集群已经存在。
initial-cluster-state: new
EOF
可以使用yamllint进行效验文件yaml格式正确性
yamllint  /etc/etcd/etcd.yaml
## yamlint 对yaml的格式检查会更为严格
查看是否能运行成功
etcd --config-file=/etc/etcd/etcd.yaml &
## 注意观察其刷在前台得日志信息 是否用warnning error 之类得日志信息
配置守护进程(所有节点同步)
## vi /usr/lib/systemd/system/etcd.service


[Unit]
Description=etcd key-value store
After=network.target

[Service]
ExecStart=/etc/etcd/etcd --config-file=/etc/etcd/etcd.yaml
Restart=always
RestartSec=10s

[Install]
WantedBy=multi-user.target
启动etcd 集群并查看状态
source /etc/profile
systemctl daemon-reload
systemctl start etcd
查看节点运行状态是否正常
etcdctl --endpoints=10.0.0.131:2379,10.0.0.132:2379,10.0.0.133:2379 endpoint status --write-out=table

isLeader=true表示该节点为主节点。
查看etcd节点的性能情况,使用以下指令
[root@vm132 ~]# etcdctl check perf
 59 / 60 Boooooooooooooooooooooooooooooooooooooooooooooooooooooooooooooooooooooooooooooooooooooooooooooooooooooooooooooooooooooooooooooooooooooooooooooom  !  98.33%FAIL: Throughput too low: 110 writes/s
PASS: Slowest request took 0.181640s
PASS: Stddev is 0.017988s
FAIL
在patroni任一节点进行测试是否能etcd集群正常通信
curl http://10.0.0.131:2379/health
curl http://10.0.0.131:2379/version

postgresql+patroni集群节点配置
| hostname/ip | 部署软件 | 备注 |
|---|---|---|
| vm131/10.0.0.131 | pg+patroni | 数据库高可用、自动failover |
| vm132/10.0.0.132 | pg+patroni | 数据库高可用、自动failover |
| vm133/10.0.0.133 | pg+patroni | 数据库高可用、自动failover |
使用yum安装其依赖,因为postgresql-16开始,如果需要with-python编译,其需要python3以上的安装包。这里我们python安装python3.11,我们使用得patroni4.0需要python3.8以上得支持,这里yum 安装了python3-devel和python3后,后续源码安装python3.11将其替换,同学们根据个人情况选择解决办法
yum remove python-devel python3-devel -y
yum install -y bison flex readline-devel zlib-devel zlib gcc systemd-devel gcc-c++ watchdog python3 python3-devel tcl tcl-devel perl-ExtUtils-Embed perl-ExtUtils-MakeMaker libicu libicu-devel libnfnetlink  python-yaml libevent-devel libyaml-devel libdbi* openssl-devel bzip2-devel *bsddb* sqlite-devel gdbm-devel ncurses-devel tk-devel db4-devel libpcap-devel xz-devel libffi-devel --下载安装数据库基本依赖包,根据个人需要编译的选项进行选择。
python 安装
tar -zxvf Python-3.11.9.tgz
cd Python-3.11.9/
./configure --prefix=/usr/local/python3
make && make install
mv /usr/bin/python /usr/bin/python_bak
mv /usr/bin/pip  /usr/bin/pip_bak
ln -s /usr/local/python3/bin/python3.11 /usr/bin/python
ln -s /usr/local/python3/bin/pip3.11 /usr/bin/pip
解压postgresql源码包并进行安装
su - postgres
tar -zxvf postgresql-16.3.tar.gz
cd postgresql-16.3
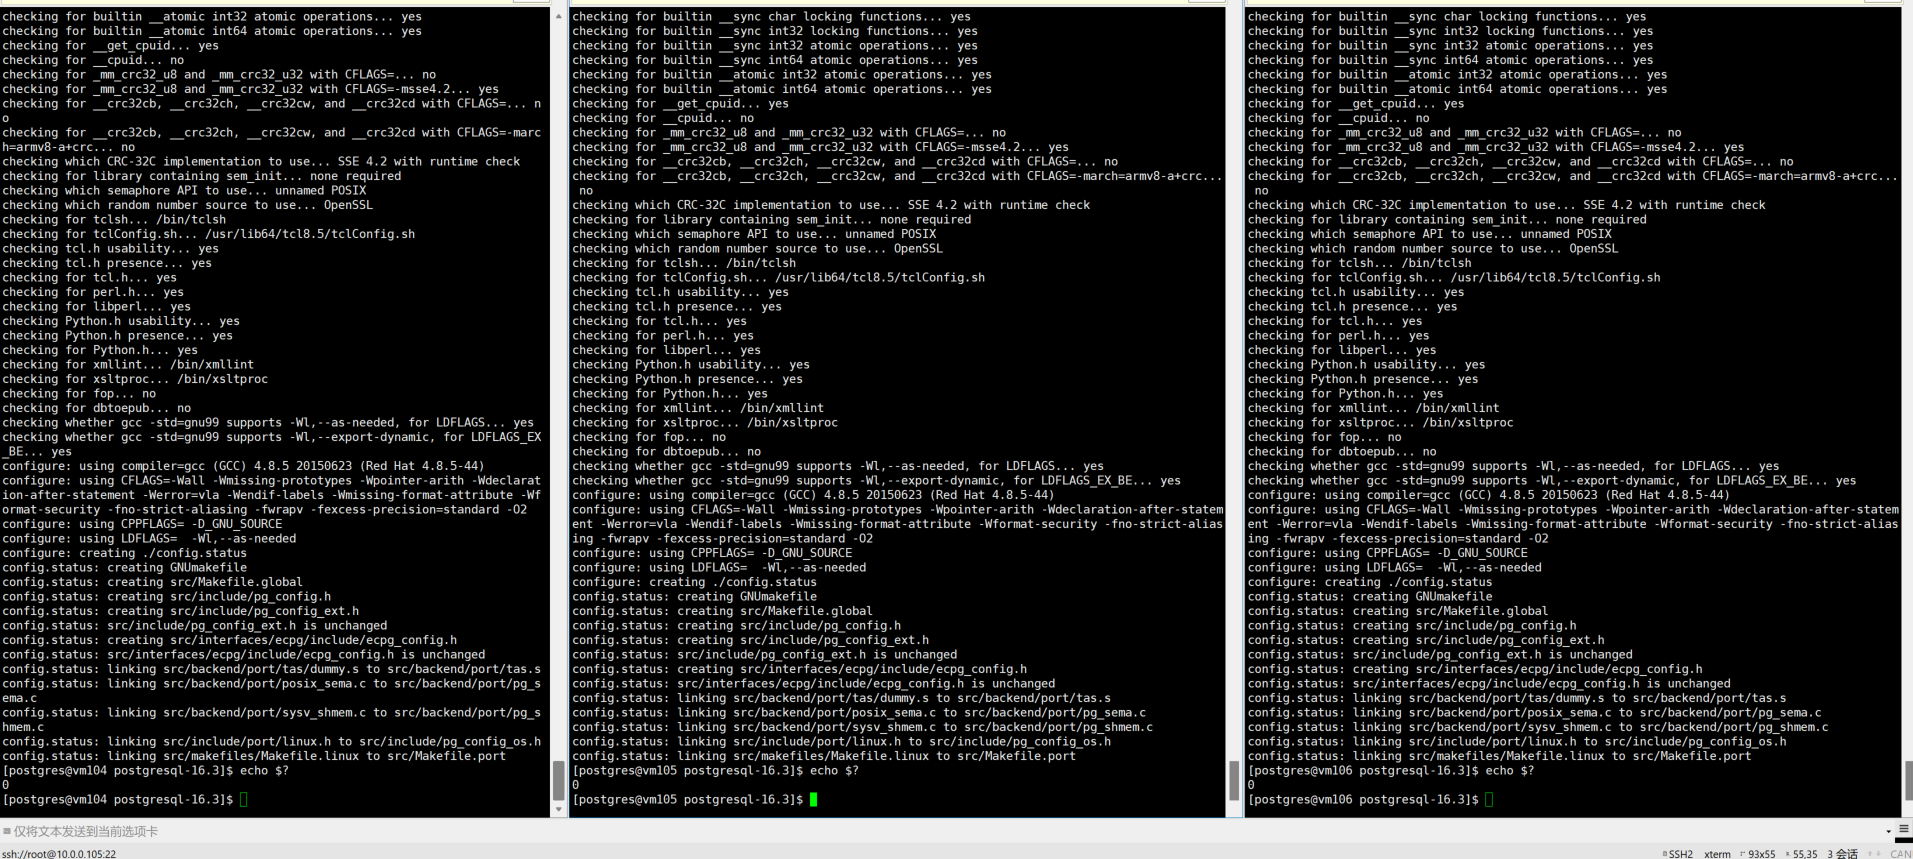
./configure --prefix=/home/postgres/pg --with-openssl  --with-python  --without-icu --with-systemd  --with-tcl --with-perl

##根据个人需求,选择数据库运行时所需要的支持项目。
echo $?
##返回值是0说明编译过程无报错
进行构建
mkdir /home/postgres/pg  --创建装载所需文件夹
make world
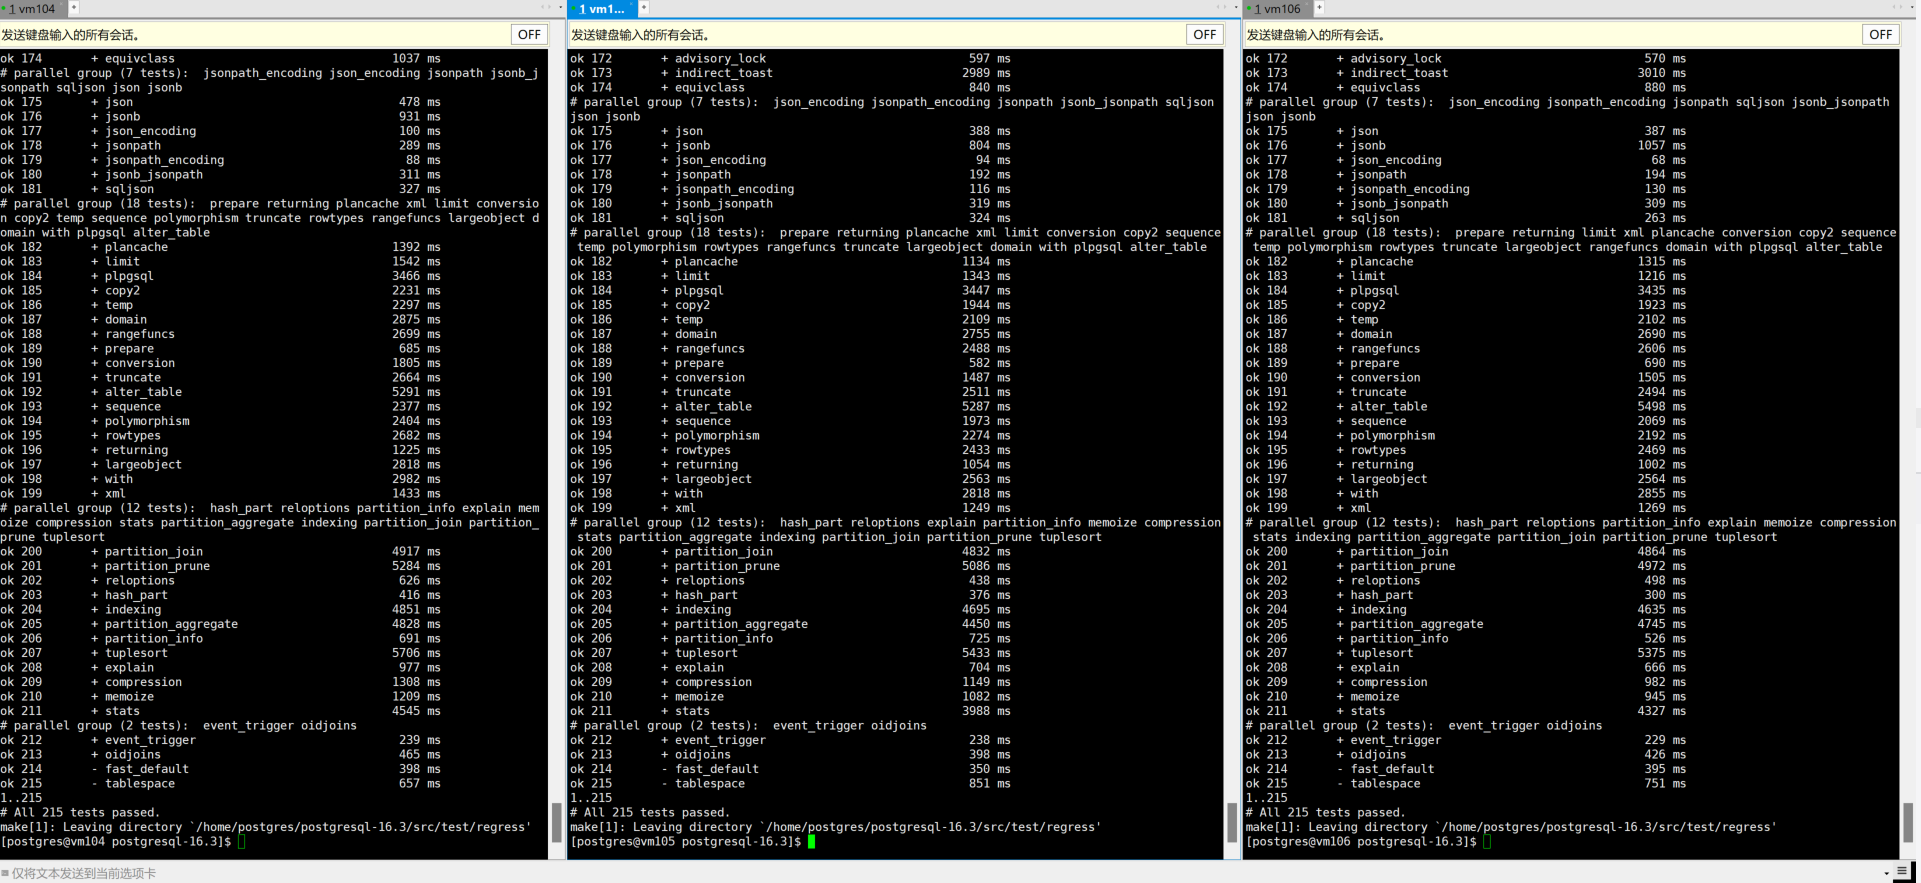
make check ##进行回归测试,非必要。回归测试是一个用于验证PostgreSQL在你的系统上是否按照开发人员设想的那样运行的测试套件
进行构建安装
make install-world
配置数据库环境变量
备注:另外我使用yum安装时候发生eprl源损坏的情况 可以使用以下方法更换eprl源
bash <(curl -sSL https://linuxmirrors.cn/main.sh)
更换yum源
配置环境变量
#vim ~/.bash_profile
export PATH
export PGDATA=/home/postgres/pg/data
export PGHOME=/home/postgres/pg
export LD_LIBRARY_PATH=$PGHOME/lib:/lib64:/lib:/usr/lib:/usr/lib64:/usr/local/lib:/usr/local/lib64:$LD_LIBRARY_PATH
export PATH=$PGHOME/bin:$PATH
export MANPATH=$PGHOME/share/man:$MANPATH
加载环境变量
source ~/.bash_profile
patroni安装配置
本文使用pip进行下载,
pip install patroni[etcd3,psycopg3] --user -i https://pypi.tuna.tsinghua.edu.cn/simple
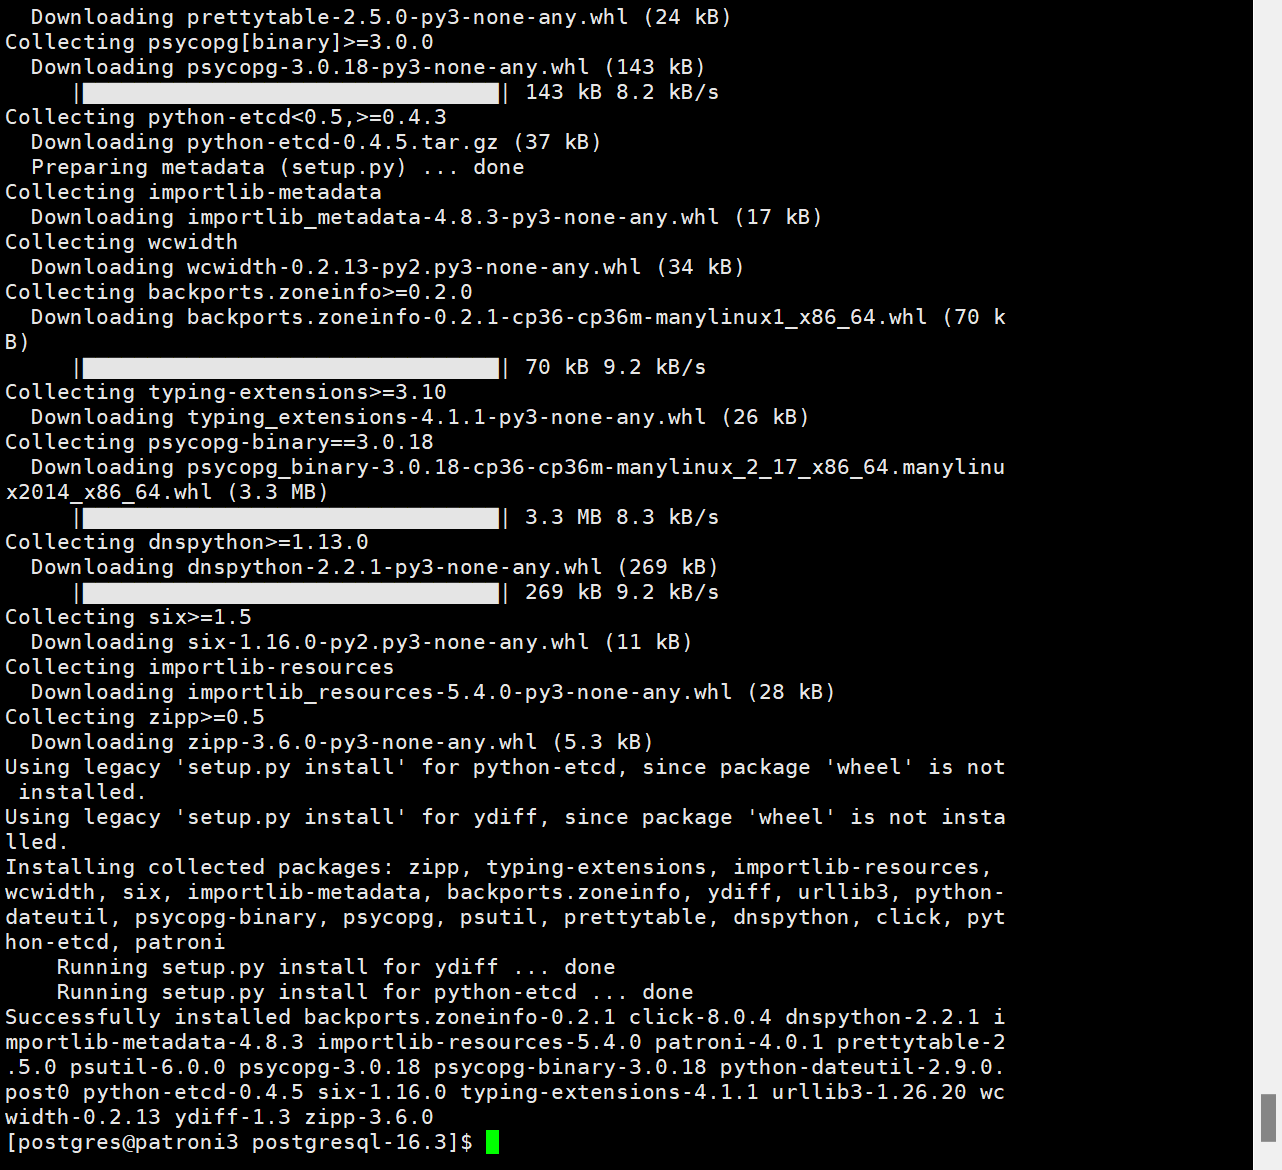
初始化数据库,只需要其中一个节点在进行数据库初始,本文以vm132为例,其余节点在启动patroni的时候会自动进行远程pg_basebackup拉取备份,作为从库。
initdb -D $PGDATA --locale=C -U postgres -W
#输入postgres超级用户密码
chmod -R 0700 $PGDATA
进入数据库创建指定用户
create user  patroni login replication encrypted password 'patroni ';
--haproxy 用于负载均衡的检查用户
create user  haproxy login encrypted password 'haproxy';
GRANT CONNECT ON DATABASE postgres TO haproxy;
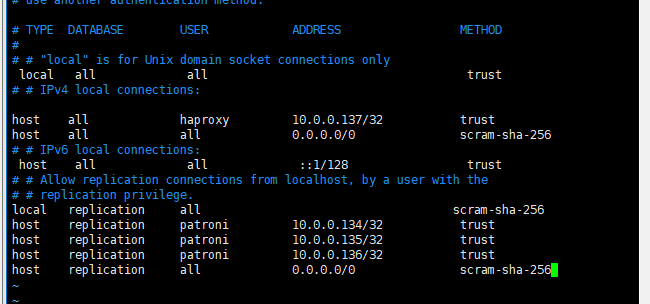
修改pg_hba.conf 配置信息
# # "local" is for Unix domain socket connections only
 local   all             all                                     trust
# # IPv4 local connections:

host    all             haproxy         10.0.0.137/32           trust
host    all             all             0.0.0.0/0               scram-sha-256
# # IPv6 local connections:
 host    all             all             ::1/128                 trust
# # Allow replication connections from localhost, by a user with the
# # replication privilege.
local   replication     all                                    scram-sha-256
host    replication     patroni         10.0.0.134/32           trust
host    replication     patroni         10.0.0.135/32           trust
host    replication     patroni         10.0.0.136/32           trust
host    replication     all             0.0.0.0/0               scram-sha-256
## 为初始主库添加VIP
sudo /sbin/ip addr add 10.0.0.138/24 brd 10.0.0.255 dev ens33 label ens33:1

## 为初始主库删除VIP
sudo /sbin/ip addr del 10.0.0.138/24 brd 10.0.0.255 dev ens33 label ens33:1

## 清楚etcd在namespace 路径存在的同名集群信息,避免冲突
 etcdctl --endpoints="http://10.0.0.131:2379,http://10.0.0.132:2379,http://10.0.0.133:2379" get /patroni_metadata/ --prefix --keys-only
 etcdctl --endpoints="http://10.0.0.131:2379,http://10.0.0.132:2379,http://10.0.0.133:2379" del /patroni_metadata/pg_patroni/ --prefix
 etcdctl --endpoints="http://10.0.0.131:2379,http://10.0.0.132:2379,http://10.0.0.133:2379" get /patroni_metadata/ --prefix --keys-only
patroni配置文件属性
这里136作为异步备库 所以不将其作为选主备选,其也就不需要配置callback,
vm134节点配置(使用os-postgres用户)
### vim ~/patroni.yaml
---
scope: pg_patroni
namespace: /patroni_metadata/
name: patroni1
restapi:
  listen: 10.0.0.134:8008
  connect_address: 10.0.0.134:8008
etcd3:
  host:10.0.0.131:2379
  etcd3: true
bootstrap:
  dcs:
    ttl: 30
    loop_wait: 10
    retry_timeout: 10
    maximum_lag_on_failover: 1048576
  initdb:
    - encoding: UTF8
    - data-checksums
  postgresql:
    use_pg_rewind: true
    pg_hba:
    - local   all             all                                     trust
    - host    all             haproxy         10.0.0.137/32           trust
    - host    all             all             0.0.0.0/0               scram-sha-256
    - host    all             all             ::1/128                 scram-sha-256
    - local   replication     all                                     scram-sha-256
    - host    replication     patroni         10.0.0.134/32           trust
    - host    replication     patroni         10.0.0.135/32           trust
    - host    replication     patroni         10.0.0.136/32           trust
    - host    replication     all             0.0.0.0/0               scram-sha-256
    use_slots: true
    parameters:
      primary_conninfo: 'host=10.0.0.138 port=5432 user=patroni password=patroni'
      wal_level: logical
      hot_standby: on
      max_connections: 100
      max_wal_senders: 10
      max_replication_slots: 10
      max_prepared_transactions: 0
      max_locks_per_transaction: 64
      wal_log_hints: on
      track_commit_timestamp: off
      archive_mode: on
      archive_command: 'mkdir -p /home/postgres/wal_archive && test ! -f /home/postgres/wal_archive/%f && cp %p /home/postgres/wal_archive/%f'
  master_start_timeout: 300
  synchronous_mode: true
  synchronous_mode_strict: false
  synchronous_node_count: 1
postgresql:
  listen: '*'
  connect_address: 10.0.0.134:5432
  data_dir: /home/postgres/pg/data
  bin_dir: /home/postgres/pg/bin
  authentication:
    replication:
      username: patroni
      password: patroni
    superuser:
      username: postgres
      password: postgres
  parameters:
    listen_addresses: '*'
    port: 5432
    max_connections: 200
    superuser_reserved_connections: 10
    shared_buffers: 512MB
    wal_level: logical
    hot_standby: on
    max_wal_senders: 10
    max_replication_slots: 10
    wal_log_hints: on
tags:
  nofailover: false
  noloadbalance: false
  clonefrom: false
  nosync: false
callbacks:
  on_start: /home/postgres/vip_manager.sh
  on_stop: /home/postgres/vip_manager.sh
  on_role_change: /home/postgres/vip_manager.sh
vm135配置
### vim ~/patroni.yaml
---
scope: pg_patroni
namespace: /patroni_metadata/
name: patroni2
restapi:
  listen: 10.0.0.135:8008
  connect_address: 10.0.0.135:8008
etcd3:
  host:10.0.0.132:2379
  etcd3: true
bootstrap:
  dcs:
    ttl: 30
    loop_wait: 10
    retry_timeout: 10
    maximum_lag_on_failover: 1048576
  initdb:
    - encoding: UTF8
    - data-checksums
  postgresql:
    use_pg_rewind: true
    pg_hba:
    - local   all             all                                     trust
    - host    all             haproxy         10.0.0.137/32           trust
    - host    all             all             0.0.0.0/0               scram-sha-256
    - host    all             all             ::1/128                 scram-sha-256
    - local   replication     all                                     scram-sha-256
    - host    replication     patroni         10.0.0.134/32           trust
    - host    replication     patroni         10.0.0.135/32           trust
    - host    replication     patroni         10.0.0.136/32           trust
    - host    replication     all             0.0.0.0/0               scram-sha-256
    use_slots: true
    parameters:
      primary_conninfo: 'host=10.0.0.138 port=5432 user=patroni password=patroni'
      wal_level: logical
      hot_standby: on
      max_connections: 100
      max_wal_senders: 10
      max_replication_slots: 10
      max_prepared_transactions: 0
      max_locks_per_transaction: 64
      wal_log_hints: on
      track_commit_timestamp: off
      archive_mode: on
      archive_command: 'mkdir -p /home/postgres/wal_archive && test ! -f /home/postgres/wal_archive/%f && cp %p /home/postgres/wal_archive/%f'
  master_start_timeout: 300
  synchronous_mode: true
  synchronous_mode_strict: false
  synchronous_node_count: 1
postgresql:
  listen: '*'
  connect_address: 10.0.0.135:5432
  data_dir: /home/postgres/pg/data
  bin_dir: /home/postgres/pg/bin
  authentication:
    replication:
      username: patroni
      password: patroni
    superuser:
      username: postgres
      password: postgres
  parameters:
    listen_addresses: '*'
    port: 5432
    max_connections: 200
    superuser_reserved_connections: 10
    shared_buffers: 512MB
    wal_level: logical
    hot_standby: on
    max_wal_senders: 10
    max_replication_slots: 10
    wal_log_hints: on
tags:
  nofailover: false
  noloadbalance: false
  clonefrom: false
  nosync: false
callbacks:
  on_start: /home/postgres/vip_manager.sh
  on_stop: /home/postgres/vip_manager.sh
  on_role_change: /home/postgres/vip_manager.sh
vm136节点配置
### vim ~/patroni.yaml
---
scope: pg_patroni
namespace: /patroni_metadata/
name: patroni3
restapi:
  listen: 10.0.0.136:8008
  connect_address: 10.0.0.136:8008
etcd3:
  host:10.0.0.133:2379
  etcd3: true
bootstrap:
  dcs:
    ttl: 30
    loop_wait: 10
    retry_timeout: 10
    maximum_lag_on_failover: 1048576
  initdb:
    - encoding: UTF8
    - data-checksums
  postgresql:
    use_pg_rewind: true
    pg_hba:
    - local   all             all                                     trust
    - host    all             haproxy         10.0.0.137/32           trust
    - host    all             all             0.0.0.0/0               scram-sha-256
    - host    all             all             ::1/128                 scram-sha-256
    - local   replication     all                                     scram-sha-256
    - host    replication     patroni         10.0.0.134/32           trust
    - host    replication     patroni         10.0.0.135/32           trust
    - host    replication     patroni         10.0.0.136/32           trust
    - host    replication     all             0.0.0.0/0               scram-sha-256
    parameters:
      primary_conninfo: 'host=10.0.0.138 port=5432 user=patroni password=patroni'
      wal_level: logical
      hot_standby: on
      max_connections: 100
      max_wal_senders: 10
      max_replication_slots: 10
      max_prepared_transactions: 0
      max_locks_per_transaction: 64
      wal_log_hints: on
      track_commit_timestamp: off
      archive_mode: on
      archive_command: 'mkdir -p /home/postgres/wal_archive && test ! -f /home/postgres/wal_archive/%f && cp %p /home/postgres/wal_archive/%f'
  master_start_timeout: 300
  synchronous_mode: true
  synchronous_mode_strict: false
  synchronous_node_count: 1
postgresql:
  listen: '*'
  connect_address: 10.0.0.136:5432
  data_dir: /home/postgres/pg/data
  bin_dir: /home/postgres/pg/bin
  authentication:
    replication:
      username: patroni
      password: patroni
    superuser:
      username: postgres
      password: postgres
  parameters:
    listen_addresses: '*'
    port: 5432
    max_connections: 200
    superuser_reserved_connections: 10
    shared_buffers: 512MB
    wal_level: logical
    hot_standby: on
    max_wal_senders: 10
    max_replication_slots: 10
    wal_log_hints: on
tags:
  nofailover: true
  noloadbalance: false
  clonefrom: false
  nosync: true
这里配置文件中有bootstrap.postgresql.parameters 这个地方配置的是动态参数,
postgresql.parameters主要争对对应的节点的独立参数,edit-config指令主要修改的是bootstrap.postgresql.parameters的动态参数
创建callback脚本,
## vim /home/postgres/vip_manager.sh

#!/bin/bash
readonly cb_name=$1
readonly role=$2
readonly scope=$3

VIP=10.0.0.138
VIPBRD=10.0.0.255
VIPNETMASK=255.255.255.0
VIPNETMASKBIT=24
VIPDEV=ens33
VIPLABEL=1

PATH=$PATH:/sbin:/usr/sbin

function usage() {
    echo "Usage: $0 <on_start|on_stop|on_role_change> <role> <scope>"
    exit 1
}

function addvip(){
    echo "`date +%Y-%m-%d\ %H:%M:%S,%3N` INFO: Adding VIP ${VIP} to ${VIPDEV}"
    sudo /sbin/ip addr add ${VIP}/${VIPNETMASKBIT} brd ${VIPBRD} dev ${VIPDEV} label ${VIPDEV}:${VIPLABEL} || echo "Failed to add VIP"
    sudo /usr/sbin/arping -q -A -c 1 -I ${VIPDEV} ${VIP} || echo "Failed to send ARP"
}

function delvip(){
    echo "`date +%Y-%m-%d\ %H:%M:%S,%3N` INFO: Deleting VIP ${VIP} from ${VIPDEV}"
    sudo /sbin/ip addr del ${VIP}/${VIPNETMASKBIT} dev ${VIPDEV} label ${VIPDEV}:${VIPLABEL} || echo "Failed to delete VIP"
    sudo /usr/sbin/arping -q -A -c 1 -I ${VIPDEV} ${VIP} || echo "Failed to send ARP"
}

echo "`date +%Y-%m-%d\ %H:%M:%S,%3N` WARNING: patroni callback $cb_name $role $scope"

case $cb_name in
    on_stop)
        delvip
        ;;
    on_start)
        ;;
    on_role_change)
        if [[ $role == 'master' ]]; then
            addvip
        elif [[ $role == 'slave' ]] || [[ $role == 'replica' ]] || [[ $role == 'logical' ]]; then
            delvip
        fi
        ;;
    *)
        usage
        ;;
esac
对以上脚本授予执行权限
授予 postgres  sudo权限
chmod +x /home/postgres/vip_manager.sh
以上指令用于清空防火墙规则 如果停用了防火墙,可以将其清除掉
#sudo /sbin/iptables -F
启动patroni 进行测试
# 启动前 停止PG运行
pg_ctl stop
# 启动 patroni
patroni ~/patroni.yaml
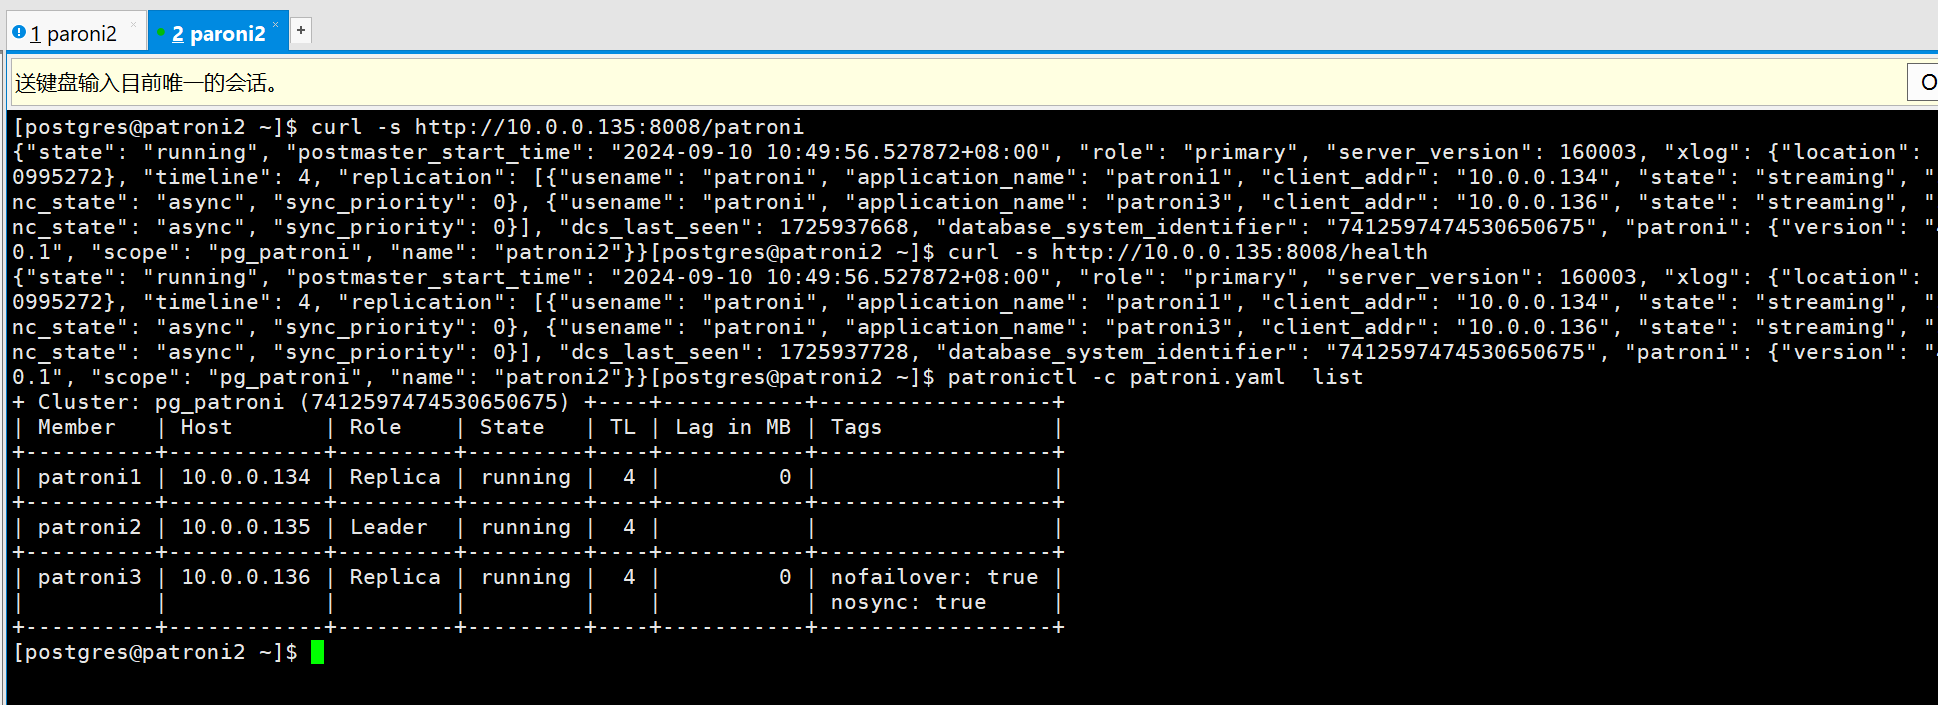
查看集群运行状态
# 使用API
curl -s http://10.0.0.135:8008/patroni
curl -s http://10.0.0.135:8008/health
# 使用patronictl 查看
patronictl -c /home/postgres/patroni.yaml  list
创建开机自启动
## vim /usr/lib/systemd/system/patroni.service

[Unit]
Description=Patroni PostgreSQL High Availability
After=network.target

[Service]
Type=simple
User=postgres
Group=postgres
ExecStart=/home/postgres/.local/bin/patroni   /home/postgres/patroni.yaml
Restart=on-failure
RestartSec=5

TimeoutSec=300

[Install]
WantedBy=multi-user.target
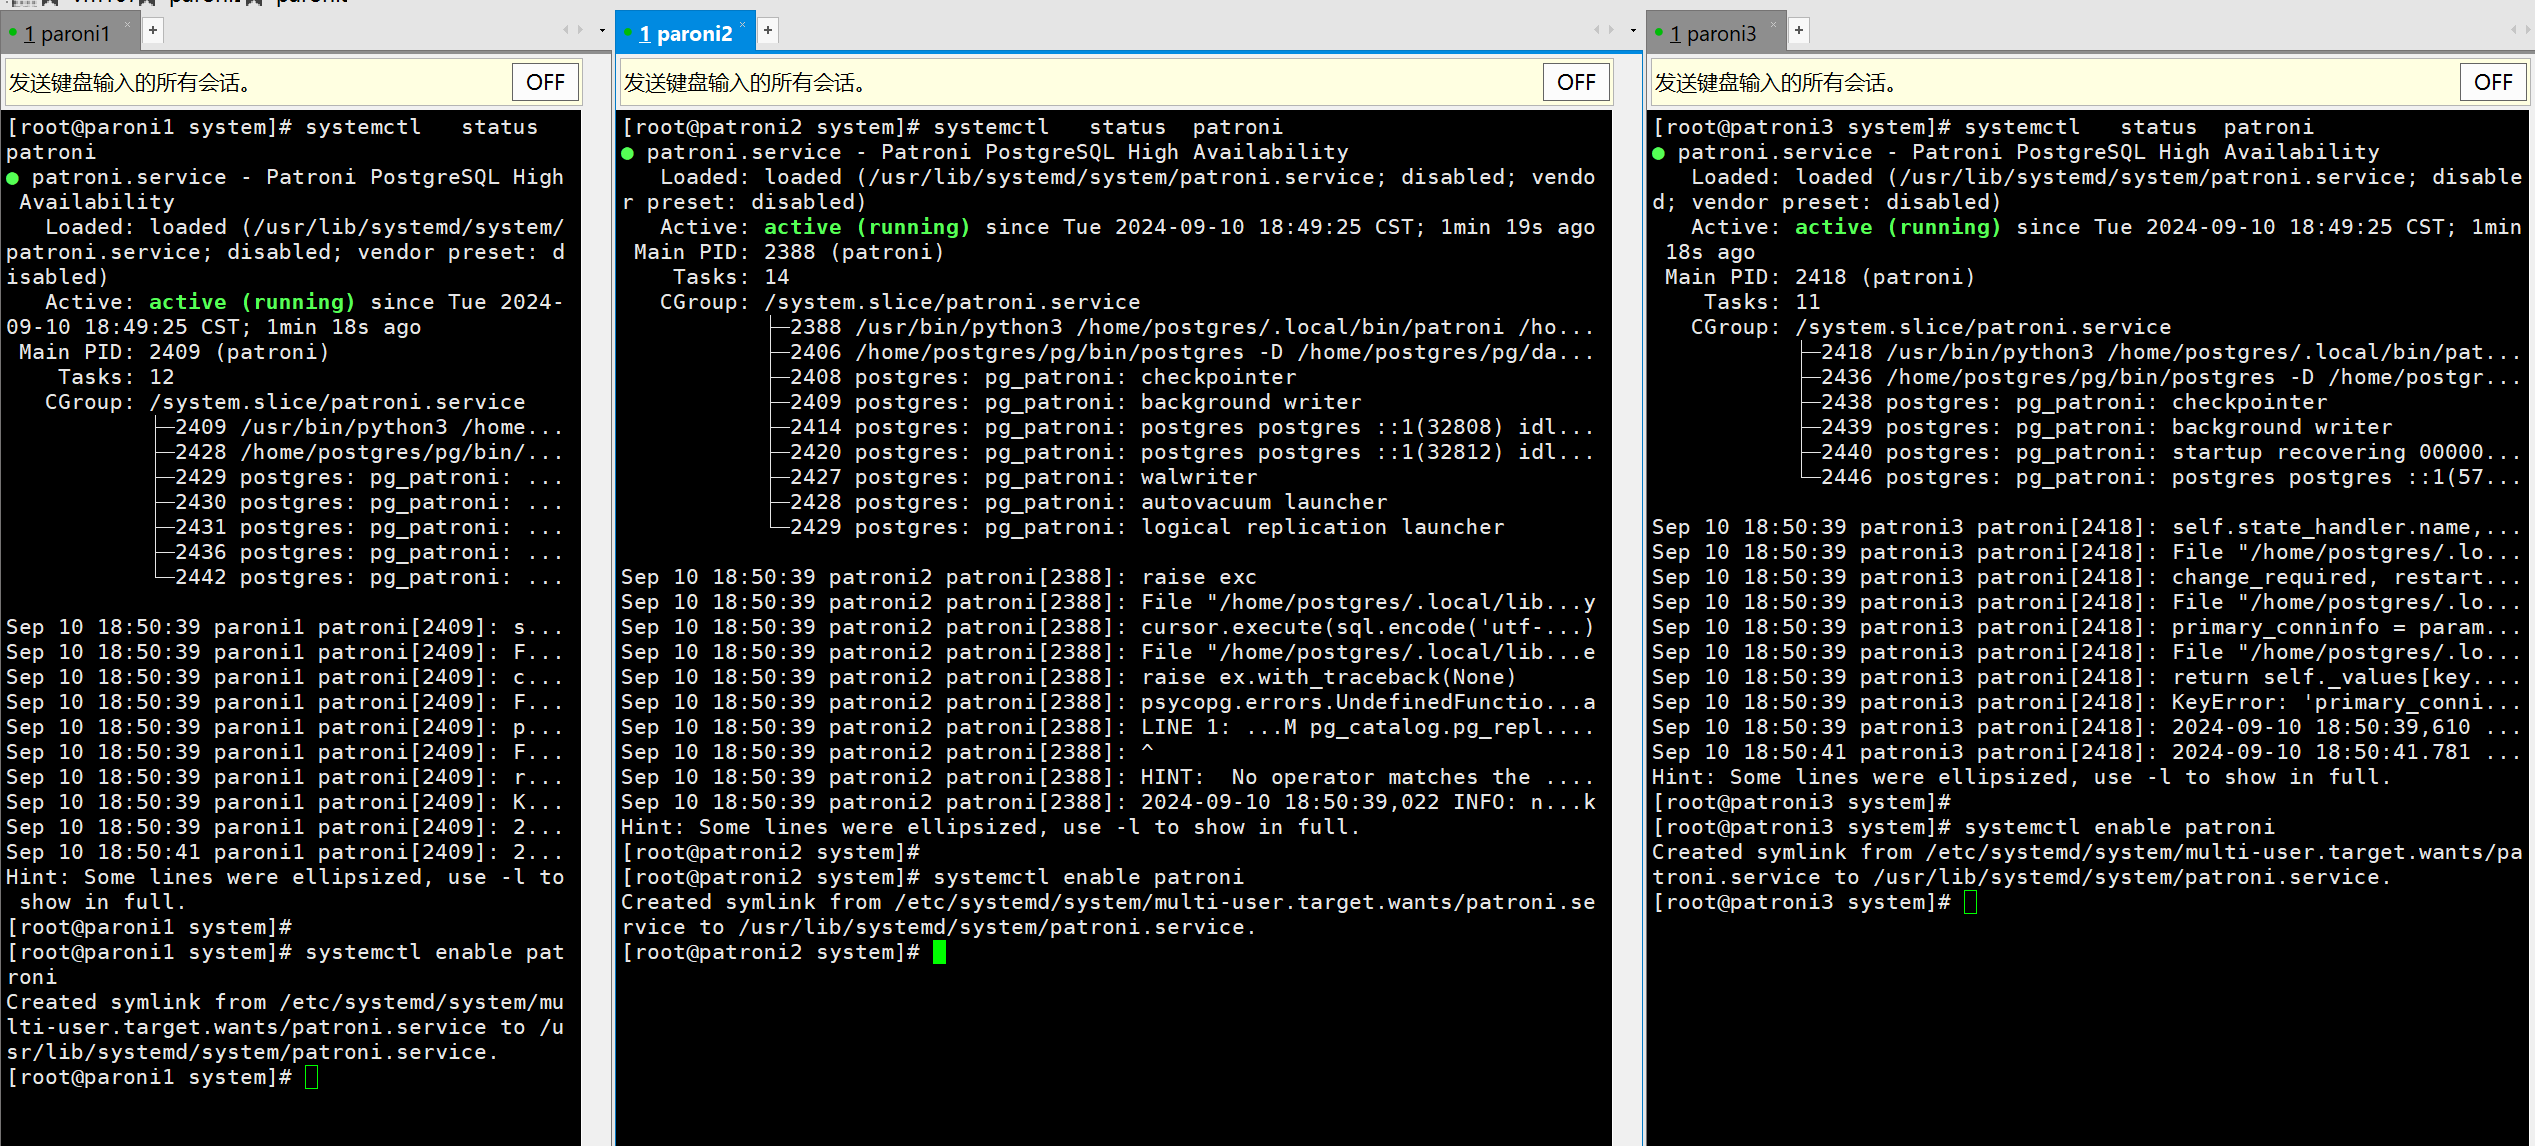
停掉patroni 之后 使用systemctl 在root用户下启动所有patroni节点
systemctl daemon-reload
systemctl start patroni
systemctl status patroni
systemctl enable patroni
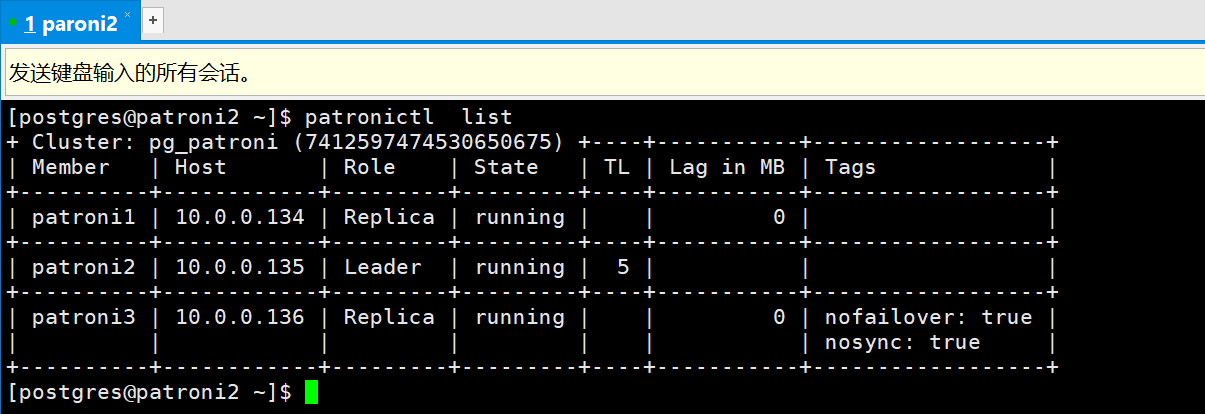
为了 方便操作 创建一个alias
## vim ~/.bash_profile
alias patronictl='patronictl  -c /home/postgres/patroni.yaml'
## 或者设置环境变量
export PATRONI_CONFIGURATION=/home/postgres/patroni.yaml
以上两种方法都可以简化每一次执行patronictl 的指令长度。省略-c /home/postgres/patroni.yaml 的指定。
配置haproxy
对于haproxy,我个人更推荐使用pgbouncer作为负载均衡的配置,部署和变更以及参数调整相对更为简单,两者工作原理仍然又较大区别。最终都可以实现分散负载的作用。
添加依赖包
yum -y install gcc automake autoconf libtool make
useradd haproxy
su - haproxy
tar -zxvf haproxy-3.0.0.tar.gz
cd haproxy-3.0.0/
make PREFIX=/haproxy TARGET=linux-glibc
make install PREFIX=/haproxy
sudo mkdir -p /run/haproxy
sudo mkdir -p /var/lib/haproxy
sudo chown haproxy:haproxy /run/haproxy
sudo chown haproxy:haproxy  /var/lib/haproxy
编辑haproxy 配置文件
vim /haproxy/sbin/haproxy.cfg
global
    log /dev/log local0
    log /dev/log local1 notice
    chroot /var/lib/haproxy
    stats socket /run/haproxy/admin.sock mode 660 level admin
    stats timeout 30s
    user haproxy
    group haproxy
    daemon

defaults
    log global
    option tcplog
    option dontlognull
    timeout connect 5000ms
    timeout client 50000ms
    timeout server 50000ms

frontend postgres_frontend
    bind 10.0.0.138:5432  # 确保这个 IP 地址在网络接口上可用
    acl is_write path_beg /write
    use_backend pg_master if is_write
    default_backend pg_slaves

backend pg_master
    mode tcp
    option tcp-check
    server pg_master 10.0.0.135:5432 check

backend pg_slaves
    mode tcp
    option tcp-check
    balance roundrobin
    server pg_slave_1 10.0.0.134:5432 check port 5432 weight 100
    server pg_slave_2 10.0.0.135:5432 check port 5432 weight 100
    server pg_slave_3 10.0.0.136:5432 check port 5432 weight 100

# Stats page configuration
frontend stats
    bind *:8404  # 监听所有接口的 8404 端口
    mode http  # 设置为 HTTP 模式
    stats enable
    stats uri /stats
    stats auth admin:admin
    stats refresh 10s
    stats show-node
    stats show-legends
以上配置文件内容,最后一行一定要保留换行符。
创建开机自启动项目
## vim /usr/lib/systemd/system/haproxy.service

   [Unit]
   Description=HAProxy Load Balancer
   After=network.target

   [Service]
   ExecStart=/haproxy/sbin/haproxy -f /haproxy/sbin/haproxy.cfg
   ExecReload=/bin/kill -USR2 $MAINPID
   User=haproxy
   Group=haproxy
   Restart=always

   [Install]
   WantedBy=multi-user.target
启动haproxy
sudo systemctl daemon-reload
sudo systemctl start haproxy
sudo systemctl status haproxy
sudo systemctl enable haproxy
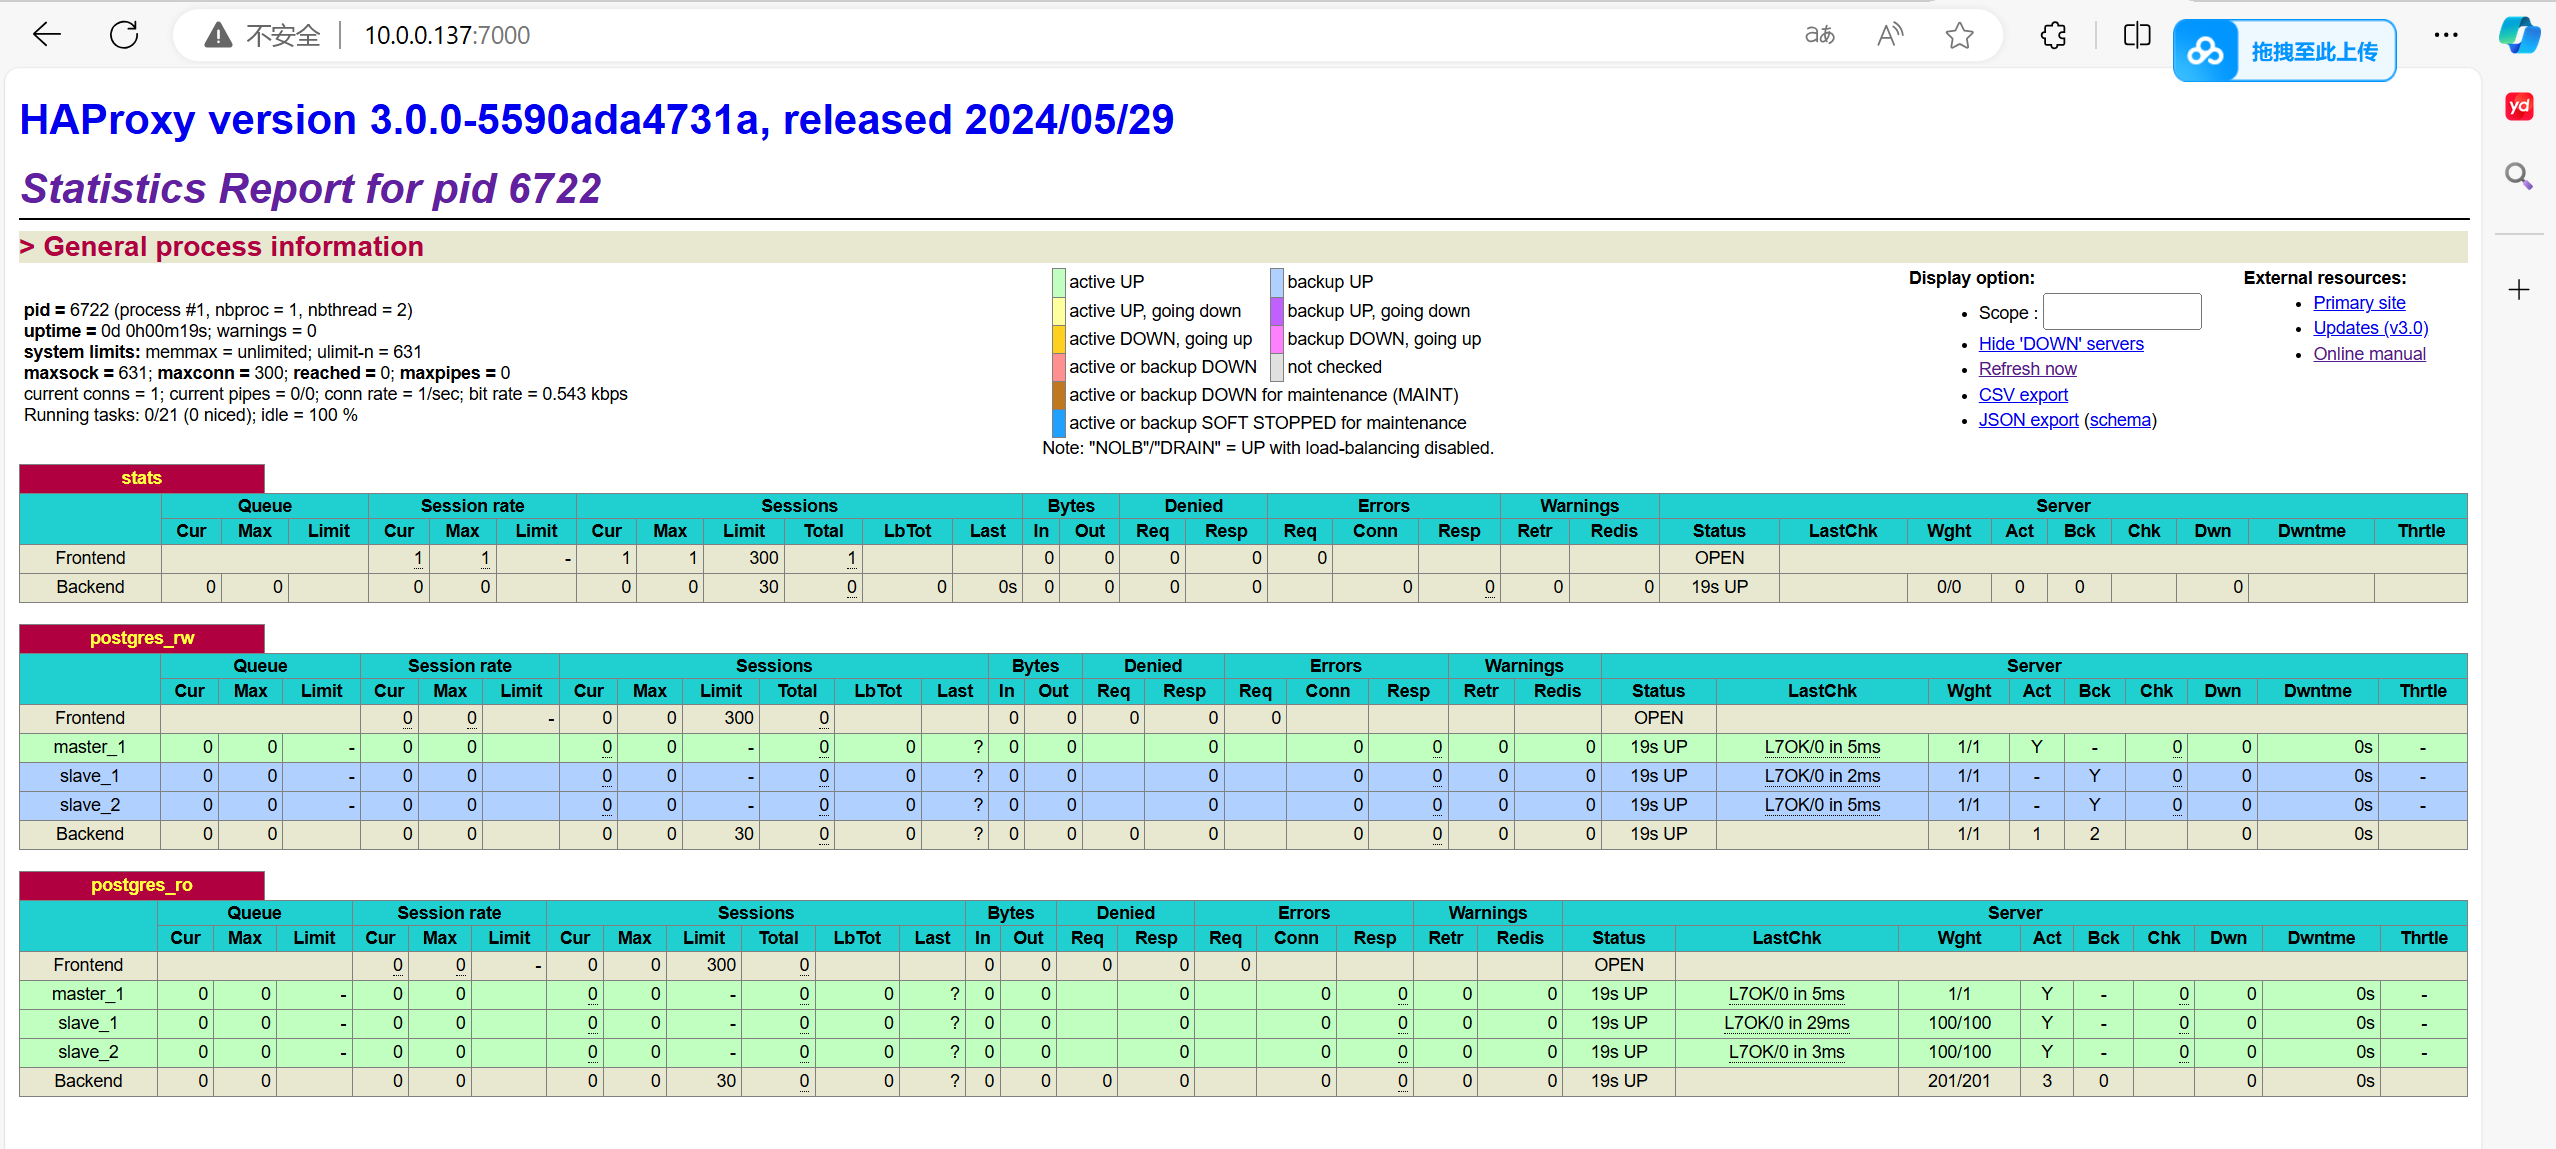
访问haproxy 监控页面
参数解释
proxies:代理配置段
defaults:为frontend,backend,listen提供默认配置
frontend:前端,相当于nginx中的server{}
backend:后端,相当于nginx中的upstream0
listen:同时拥有前端和后端配置,配置简单,生产推荐使用
