Android下反调试与反反调试
版权归作者所有,如有转发,请注明文章出处:https://cyrus-studio.github.io/blog/
反调试检测
反调试检测的几种方式。
1. TrackerId
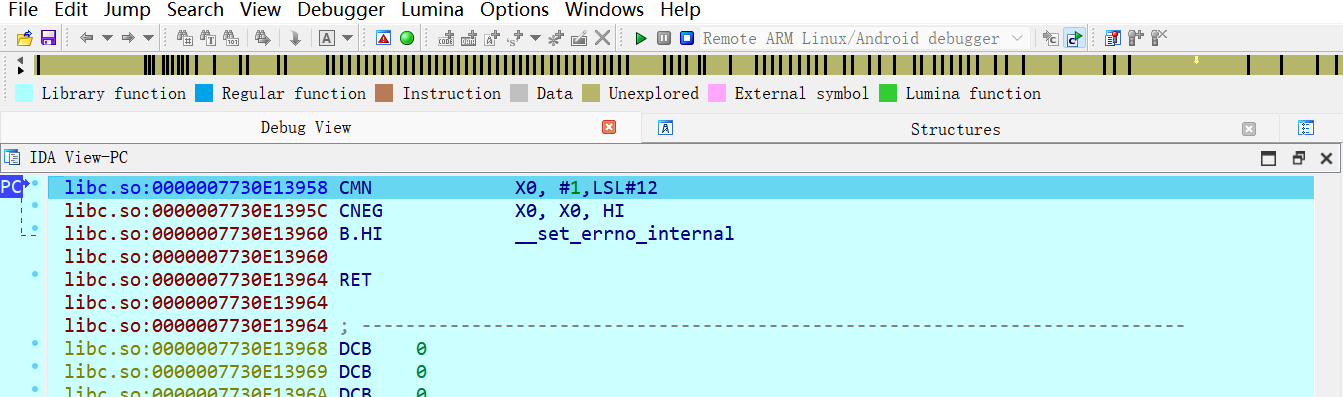
首先,通过 IDA Pro 的调试器附加到当前 app 进程
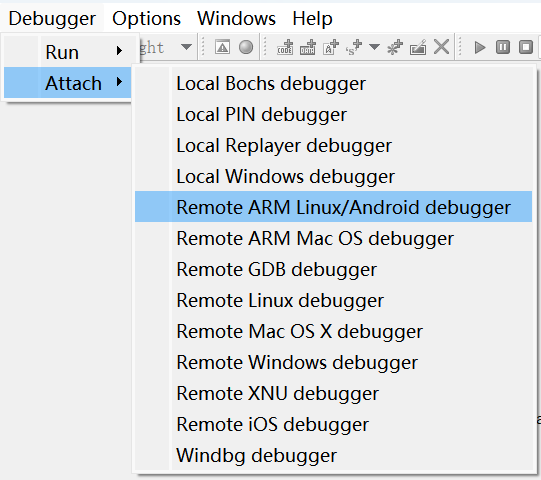
关于IDA Pro调试android app的详细教程可以参考这篇文章【使用IDA Pro动态调试Android APP】
使用 top 命令查看进程状态
top | grep com.cyrus.example

17305 u0_a137      10 -10 4.8G 104M  42M t  0.0   1.8   0:02.02 com.cyrus.example
在输出中,S 表示进程状态,17305 是 PID。
通过head /proc/[pid]/status 可以查看详细的进程状态。
head -n 6 /proc/17305/status

Name:   m.cyrus.example
State:  S (sleeping)
Tgid:   17305
Pid:    17305
PPid:   728
TracerPid:      16208
TracerPid: 16208 说明当前的进程正在被进程 16208 调试或跟踪,否则没有被调试值应该为0。
2. stat
这时我们断点调试 app
再通过 head /proc/[pid]/status 可以查看详细的进程状态,包括是否被调试等信息。
head -n 6 /proc/17305/status

Name:   m.cyrus.example
State:  t (tracing stop)
Tgid:   17305
Pid:    17305
PPid:   728
TracerPid:      16208
在输出中,t (tracing stop) 表示 app 停止(被调试或其他暂停)
3. wchan
使用 cat 命令查看 /proc/[pid]/wchan 文件,该文件显示进程当前正在等待的内核函数。
cat /proc/17305/wchan

ptrace_stop
在输出中,ptrace_stop 表示进程 17305 当前正在被调试器暂停,等待调试器发出的命令。
4. android app 反调试检测
在 Android app 中实现反调试检测
package com.cyrus.example.antidebug

import android.os.Bundle
import android.os.Debug
import android.util.Log
import android.widget.TextView
import androidx.appcompat.app.AppCompatActivity
import com.cyrus.example.R
import kotlinx.coroutines.CoroutineScope
import kotlinx.coroutines.Dispatchers
import kotlinx.coroutines.launch
import kotlinx.coroutines.withContext
import java.io.BufferedReader
import java.io.File
import java.io.FileReader
import java.io.IOException
import java.net.InetSocketAddress
import java.net.Socket

class AntiDebugActivity : AppCompatActivity() {

    private val TAG = "AntiDebug"
    private lateinit var debugInfoTextView: TextView

    override fun onCreate(savedInstanceState: Bundle?) {
        super.onCreate(savedInstanceState)
        setContentView(R.layout.activity_anti_debug)

        // 绑定 TextView
        debugInfoTextView = findViewById(R.id.debugInfoTextView)

        // 使用协程来执行调试检测
        CoroutineScope(Dispatchers.Main).launch {
            val debugInfo = checkDebugInfo()

            // 将调试信息显示到 TextView
            debugInfoTextView.text = debugInfo

            // 打印调试信息到日志
            Log.d(TAG, debugInfo)
        }
    }

    // 检查所有的调试信息
    private suspend fun checkDebugInfo(): String {
        val debugInfoBuilder = StringBuilder()

        val debuggerConnected = isDebuggerConnected()
        val waitingForDebugger = isWaitingForDebugger()

        // 获取TrackerId(TracerPid)
        val tracerPid = hasTracerPid()
        // 从 /proc/self/stat 获取调试状态
        val debugStatus = getProcStatStatus()
        // 获取wchan trace标识
        val wchanStatus = getWchanStatus()

        // 检测 JDWP 端口时使用协程的 IO 线程
        val jdwpDetected = withContext(Dispatchers.IO) {
            detectJDWP()
        }

        debugInfoBuilder.append("Debugging Information:\n")
        debugInfoBuilder.append("Debugger Connected: ").append(debuggerConnected).append("\n")
        debugInfoBuilder.append("Waiting for Debugger: ").append(waitingForDebugger).append("\n")
        debugInfoBuilder.append("JDWP Port (Debugger Attached): ").append(jdwpDetected).append("\n")
        debugInfoBuilder.append("TracerPid: ").append(tracerPid).append("\n")
        debugInfoBuilder.append("状态: ").append(debugStatus).append("\n")
        debugInfoBuilder.append("Wchan 状态: ").append(wchanStatus).append("\n")

        if (debuggerConnected || waitingForDebugger || tracerPid != 0 || jdwpDetected
            || debugStatus == "停止(可能是被调试状态)" || wchanStatus.contains("trace")) {
            debugInfoBuilder.append("\nApp is being debugged!\n")
        } else {
            debugInfoBuilder.append("\nApp is not being debugged.\n")
        }

        return debugInfoBuilder.toString()
    }

    // 方法 1: 使用 Debug.isDebuggerConnected()
    private fun isDebuggerConnected(): Boolean {
        return Debug.isDebuggerConnected()
    }

    // 方法 2: 检查 Debug.waitingForDebugger()
    private fun isWaitingForDebugger(): Boolean {
        return Debug.waitingForDebugger()
    }

    // 方法 3: 返回 TracerPid 的值
    private fun hasTracerPid(): Int {
        try {
            BufferedReader(FileReader("/proc/self/status")).use { reader ->
                var line: String?
                while (reader.readLine().also { line = it } != null) {
                    if (line!!.startsWith("TracerPid:")) {
                        return line!!.split(":")[1].trim().toInt()
                    }
                }
            }
        } catch (e: IOException) {
            e.printStackTrace()
        }
        return 0 // 如果没有找到 TracerPid,返回 0 表示没有被调试
    }

    // 方法 4: 检测调试端口(JDWP),在后台线程中运行
    private fun detectJDWP(): Boolean {
        return try {
            Socket().use { socket ->
                socket.connect(InetSocketAddress("127.0.0.1", 8700), 1000)
            }
            true
        } catch (e: IOException) {
            // 没有调试器连接
            false
        }
    }

    // 从 /proc/self/wchan 获取进程的等待状态
    private fun getWchanStatus(): String {
        try {
            // 读取 /proc/self/wchan 文件
            val wchanFile = File("/proc/self/wchan")
            if (wchanFile.exists()) {
                return wchanFile.readText().trim()
            }
        } catch (e: Exception) {
            e.printStackTrace()
        }
        return "无法获取 Wchan 状态"
    }


    // 解析 /proc/self/stat 获取进程状态
    private fun getProcStatStatus(): String {
        try {
            // 读取 /proc/self/stat 文件
            val statFile = File("/proc/self/stat")
            val statContent = statFile.readText()

            // /proc/self/stat 的内容格式是以空格分隔的字段
            // 第3个字段是进程状态
            val statFields = statContent.split(" ")
            if (statFields.size > 2) {
                val processState = statFields[2] // 进程状态字段
                return when (processState) {
                    "R" -> "运行中"
                    "S" -> "睡眠中"
                    "D" -> "不可中断睡眠中"
                    "T" -> "停止(可能是被调试状态)"
                    "Z" -> "僵尸进程"
                    else -> "未知状态: $processState"
                }
            }
        } catch (e: Exception) {
            e.printStackTrace()
        }
        return "无法获取调试状态"
    }

}
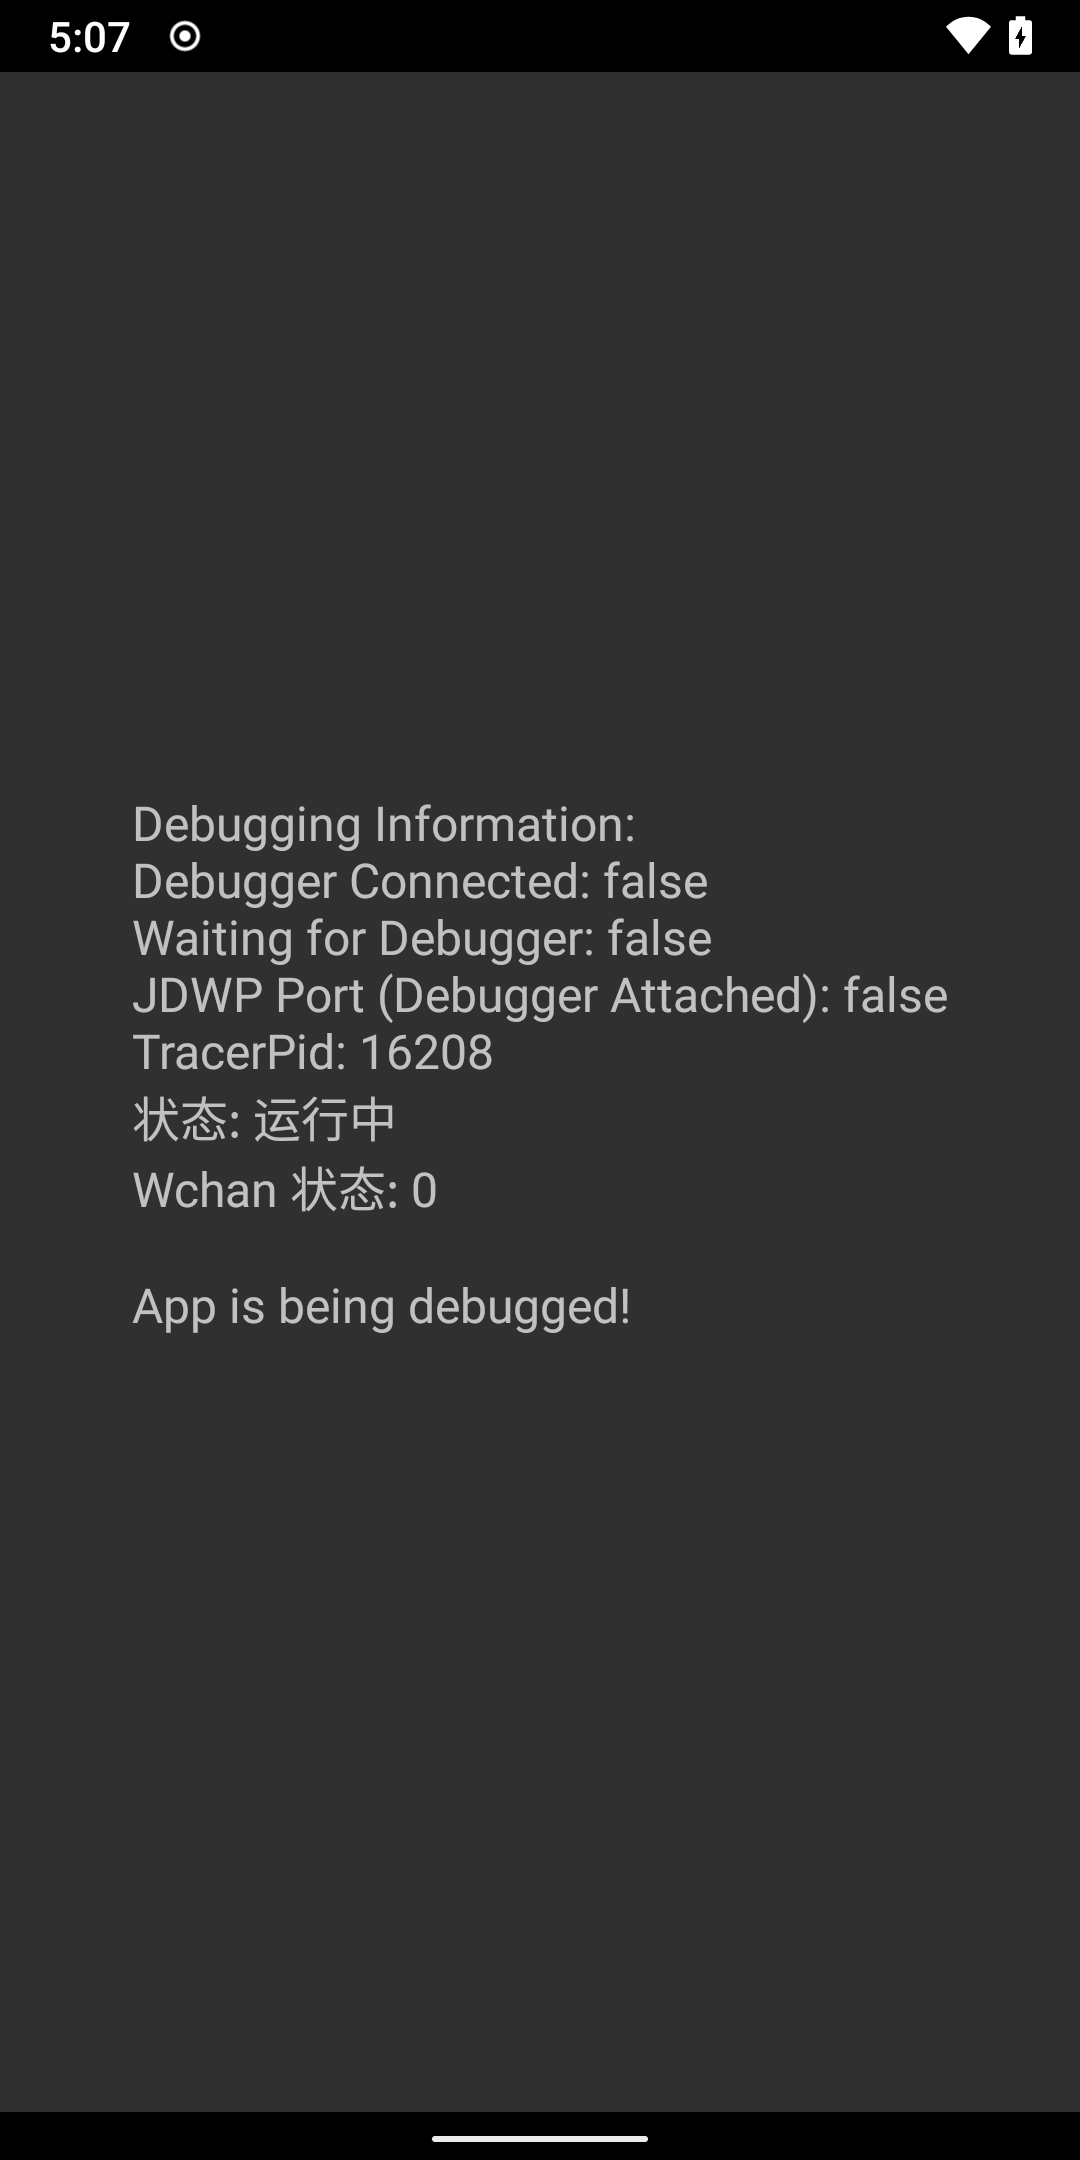
当调试器附加到 app
源码地址:https://github.com/CYRUS-STUDIO/AndroidExample
修改Android内核,绕过反调试
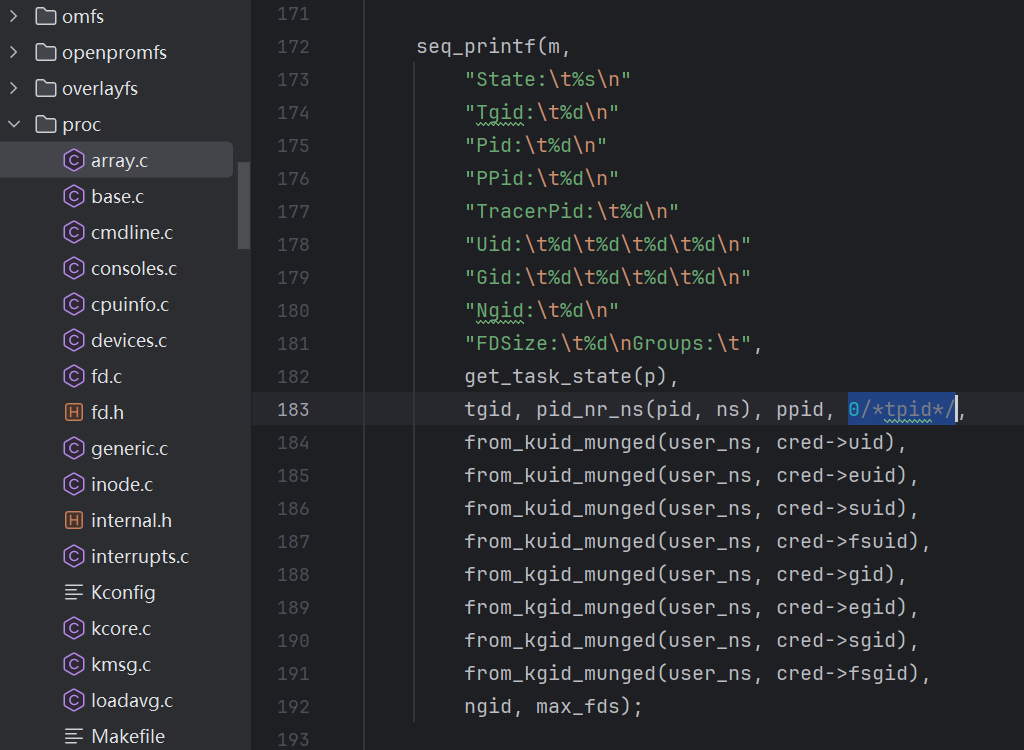
1. TrackerId
编辑 fs/proc/array.c
修改tpid(TrackerId)固定返回0
2. stat
编辑 fs/proc/array.c
直接把状态标识T(stopped)和t(tracing stop),修改为S(sleeping)
static const char * const task_state_array[] = {
    "R (running)",    /*   0 */
    "S (sleeping)",       /*   1 */
    "D (disk sleep)",  /*   2 */
    "T (stopped)",    /*   4 */
    "t (tracing stop)",    /*   8 */
    "X (dead)",       /*  16 */
    "Z (zombie)",     /*  32 */
};
修改后
static const char * const task_state_array[] = {
    "R (running)",    /*   0 */
    "S (sleeping)",       /*   1 */
    "D (disk sleep)",  /*   2 */
    "S (sleeping)",       /*   4 */
    "S (sleeping)",    /*   8 */
    "X (dead)",       /*  16 */
    "Z (zombie)",     /*  32 */
};
3. wchan
编辑 fs/proc/base.c
修改 proc_pid_wchan 函数,去掉 trace 检测标识
static int proc_pid_wchan(struct seq_file *m, struct pid_namespace *ns,
            struct pid *pid, struct task_struct *task)
{
    unsigned long wchan;
    char symname[KSYM_NAME_LEN];

    wchan = get_wchan(task);

    if (wchan && ptrace_may_access(task, PTRACE_MODE_READ_FSCREDS)
          && !lookup_symbol_name(wchan, symname))
       seq_printf(m, "%s", symname);
    else
       seq_putc(m, '0');

    return 0;
}
修改后
static int proc_pid_wchan(struct seq_file *m, struct pid_namespace *ns,
            struct pid *pid, struct task_struct *task)
{
    unsigned long wchan;
    char symname[KSYM_NAME_LEN];

    wchan = get_wchan(task);

    if (wchan && ptrace_may_access(task, PTRACE_MODE_READ_FSCREDS)
          && !lookup_symbol_name(wchan, symname))
       // 判断 symname 中是否包含 "trace"
       if (strstr(symname, "trace")) {
          // sys_epoll_wait 是内核中实现 epoll_wait 系统调用的具体函数。
          // 这个表示进程正在等待 ep_poll 函数(通常与 I/O 事件相关)。
          seq_printf(m, "%s", "sys_epoll_wait");
       } else {
          seq_printf(m, "%s", symname);
       }
    else
       seq_putc(m, '0');

    return 0;
}
修改 ro.debugble 使全局可调试
编辑 device/{vendor}/{device}/common_prop.mk
找到 ro.debuggable 这一行。如果没有这一行,你可以手动添加
# Debug
PRODUCT_PROPERTY_OVERRIDES += \
    ro.debuggable=1 \
修改完成后,你就可以调试设备上所有 app 了。
编译和刷新系统
关于如何编译和刷新系统可以参考这篇文章【使用 release key 对 LineageOS 进行编译和签名】
测试
打开 IDA Pro 的调试器附加到当前 app 进程并 Pause process 。
通过命令行读取进程 TracerPid、State 和 wchan 信息检测是否修改成功。
adb shell

# 查看进程信息
top | grep com.cyrus.example
 6780 root         20   0  32M 1.4M 1.0M S  0.0   0.0   0:00.00 grep com.cyrus.example
 5256 u0_a137      10 -10 4.9G 105M  43M S  0.0   1.8   0:02.69 com.cyrus.example

# 查看进程状态
head -n 6 /proc/5256/status
Name:   m.cyrus.example
State:  S (sleeping)
Tgid:   5256
Pid:    5256
PPid:   738
TracerPid:      0

# 查看wchan状态
wayne:/ # cat /proc/5256/wchan
sys_epoll_wait

wayne:/ # cat /proc/5256/wchan
SyS_epoll_wait
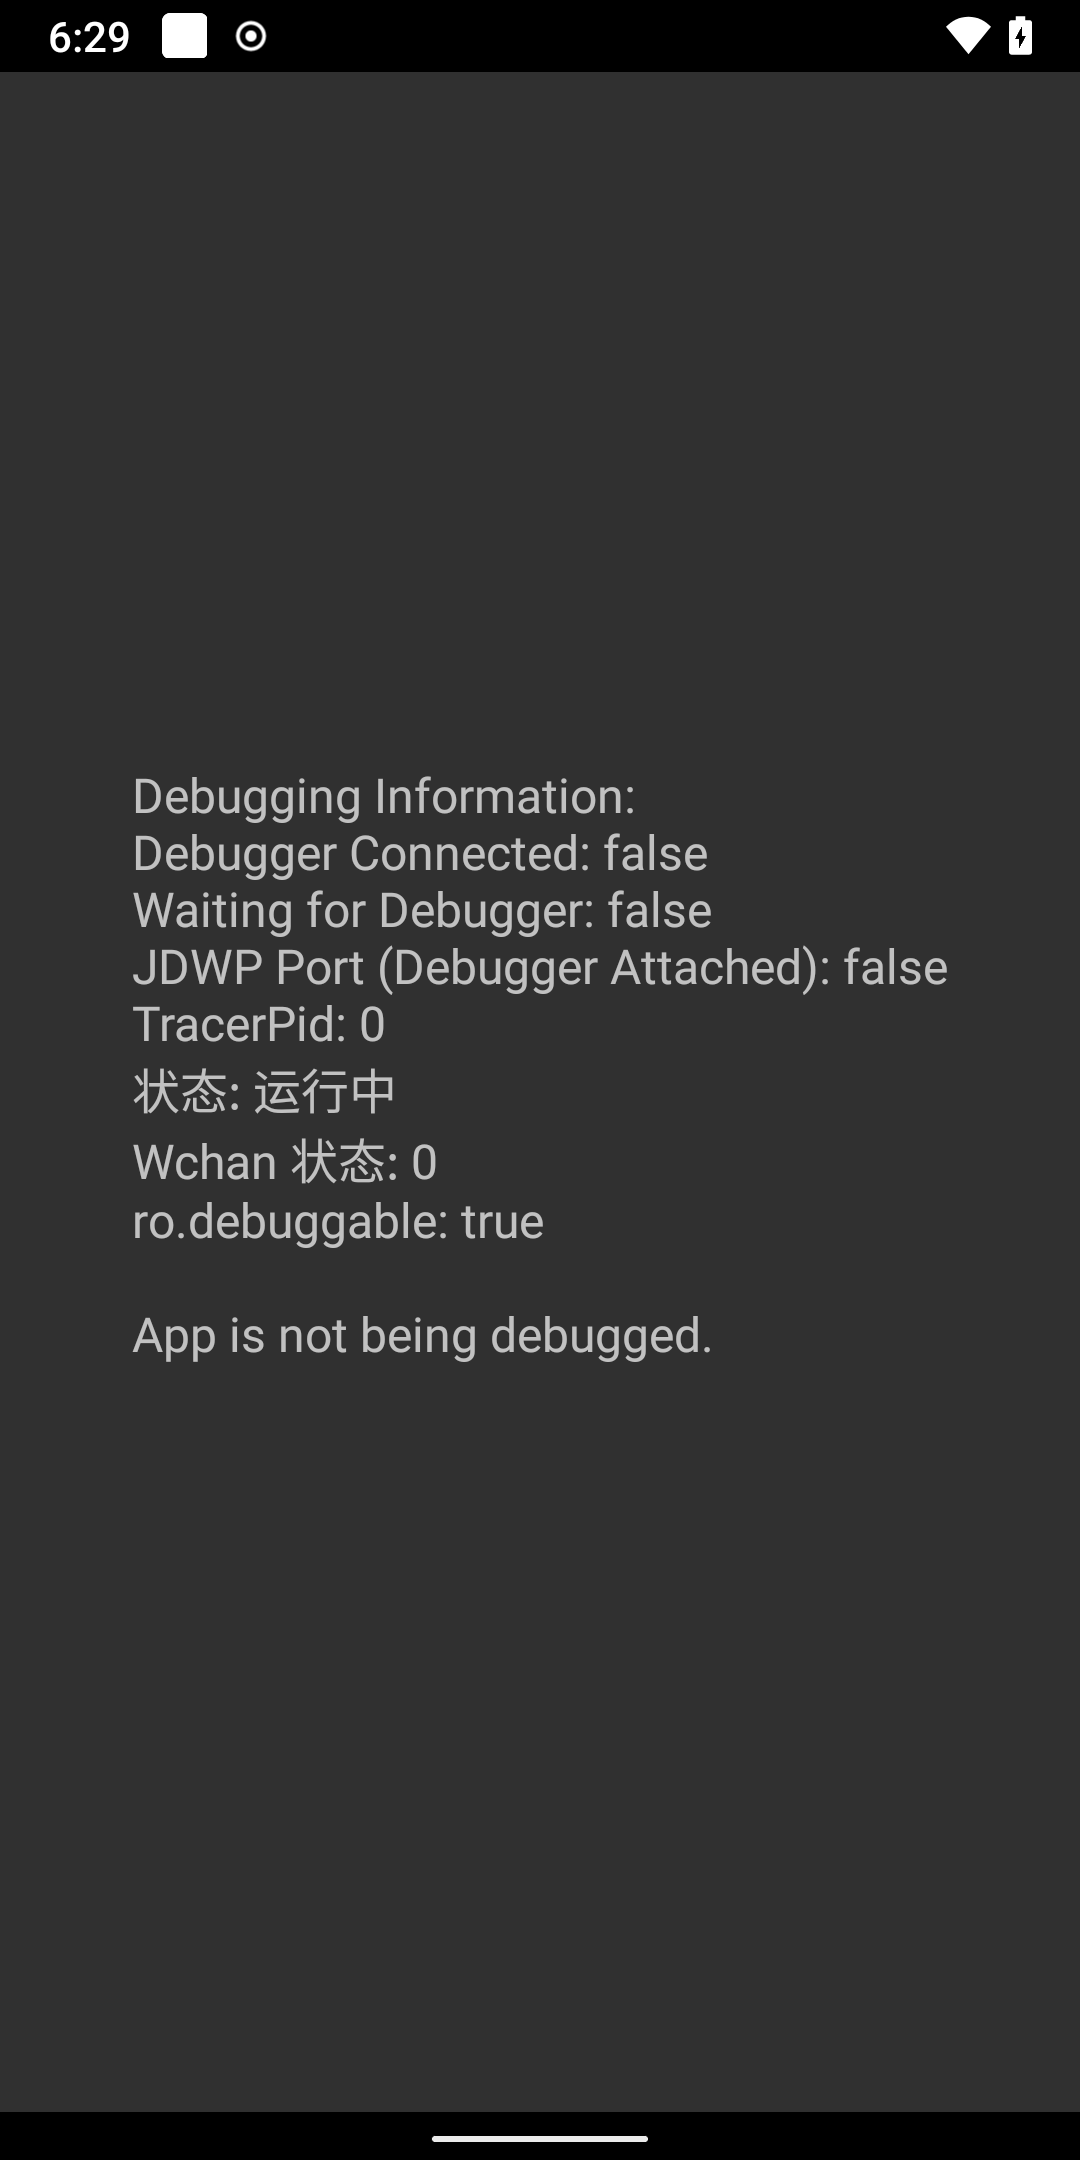
通过APP读取 TracerPid、State 和 wchan 信息,检测是否修改成功。