828华为云征文 | 云服务器Flexus X实例:RAG 开源项目 FastGPT 部署,玩转大模型
目录
一、FastGPT 简介
二、FastGPT 部署
2.1 下载启动文件
2.2 开放端口权限
2.3 启动 FastGPT
三、FastGPT 运行
3.1 登录 FastGPT
3.2 知识库
3.3 应用
四、总结
本篇文章主要通过 Flexus云服务器X实例 部署 RAG 开源项目 FastGPT,通过 FastGPT 可以使用大模型生成用户需要的内容。 Flexus云服务器X实例具有柔性算力,六倍性能,旗舰体验,覆盖高科技、零售、金融、游戏等行业大多数通用工作负载场景,完全可以支持 FastGPT 的部署、运行和使用,而且,Flexus云服务器X实例 能够提供完备的产品能力,可以基于业务诉求灵活自定义拓扑组网,支持灵活自定义vCPU和内存配比,完全基于业务资源诉求选择合适规格,节省资源开销等优势,需要的小伙伴赶紧用起来吧!
一、FastGPT 简介
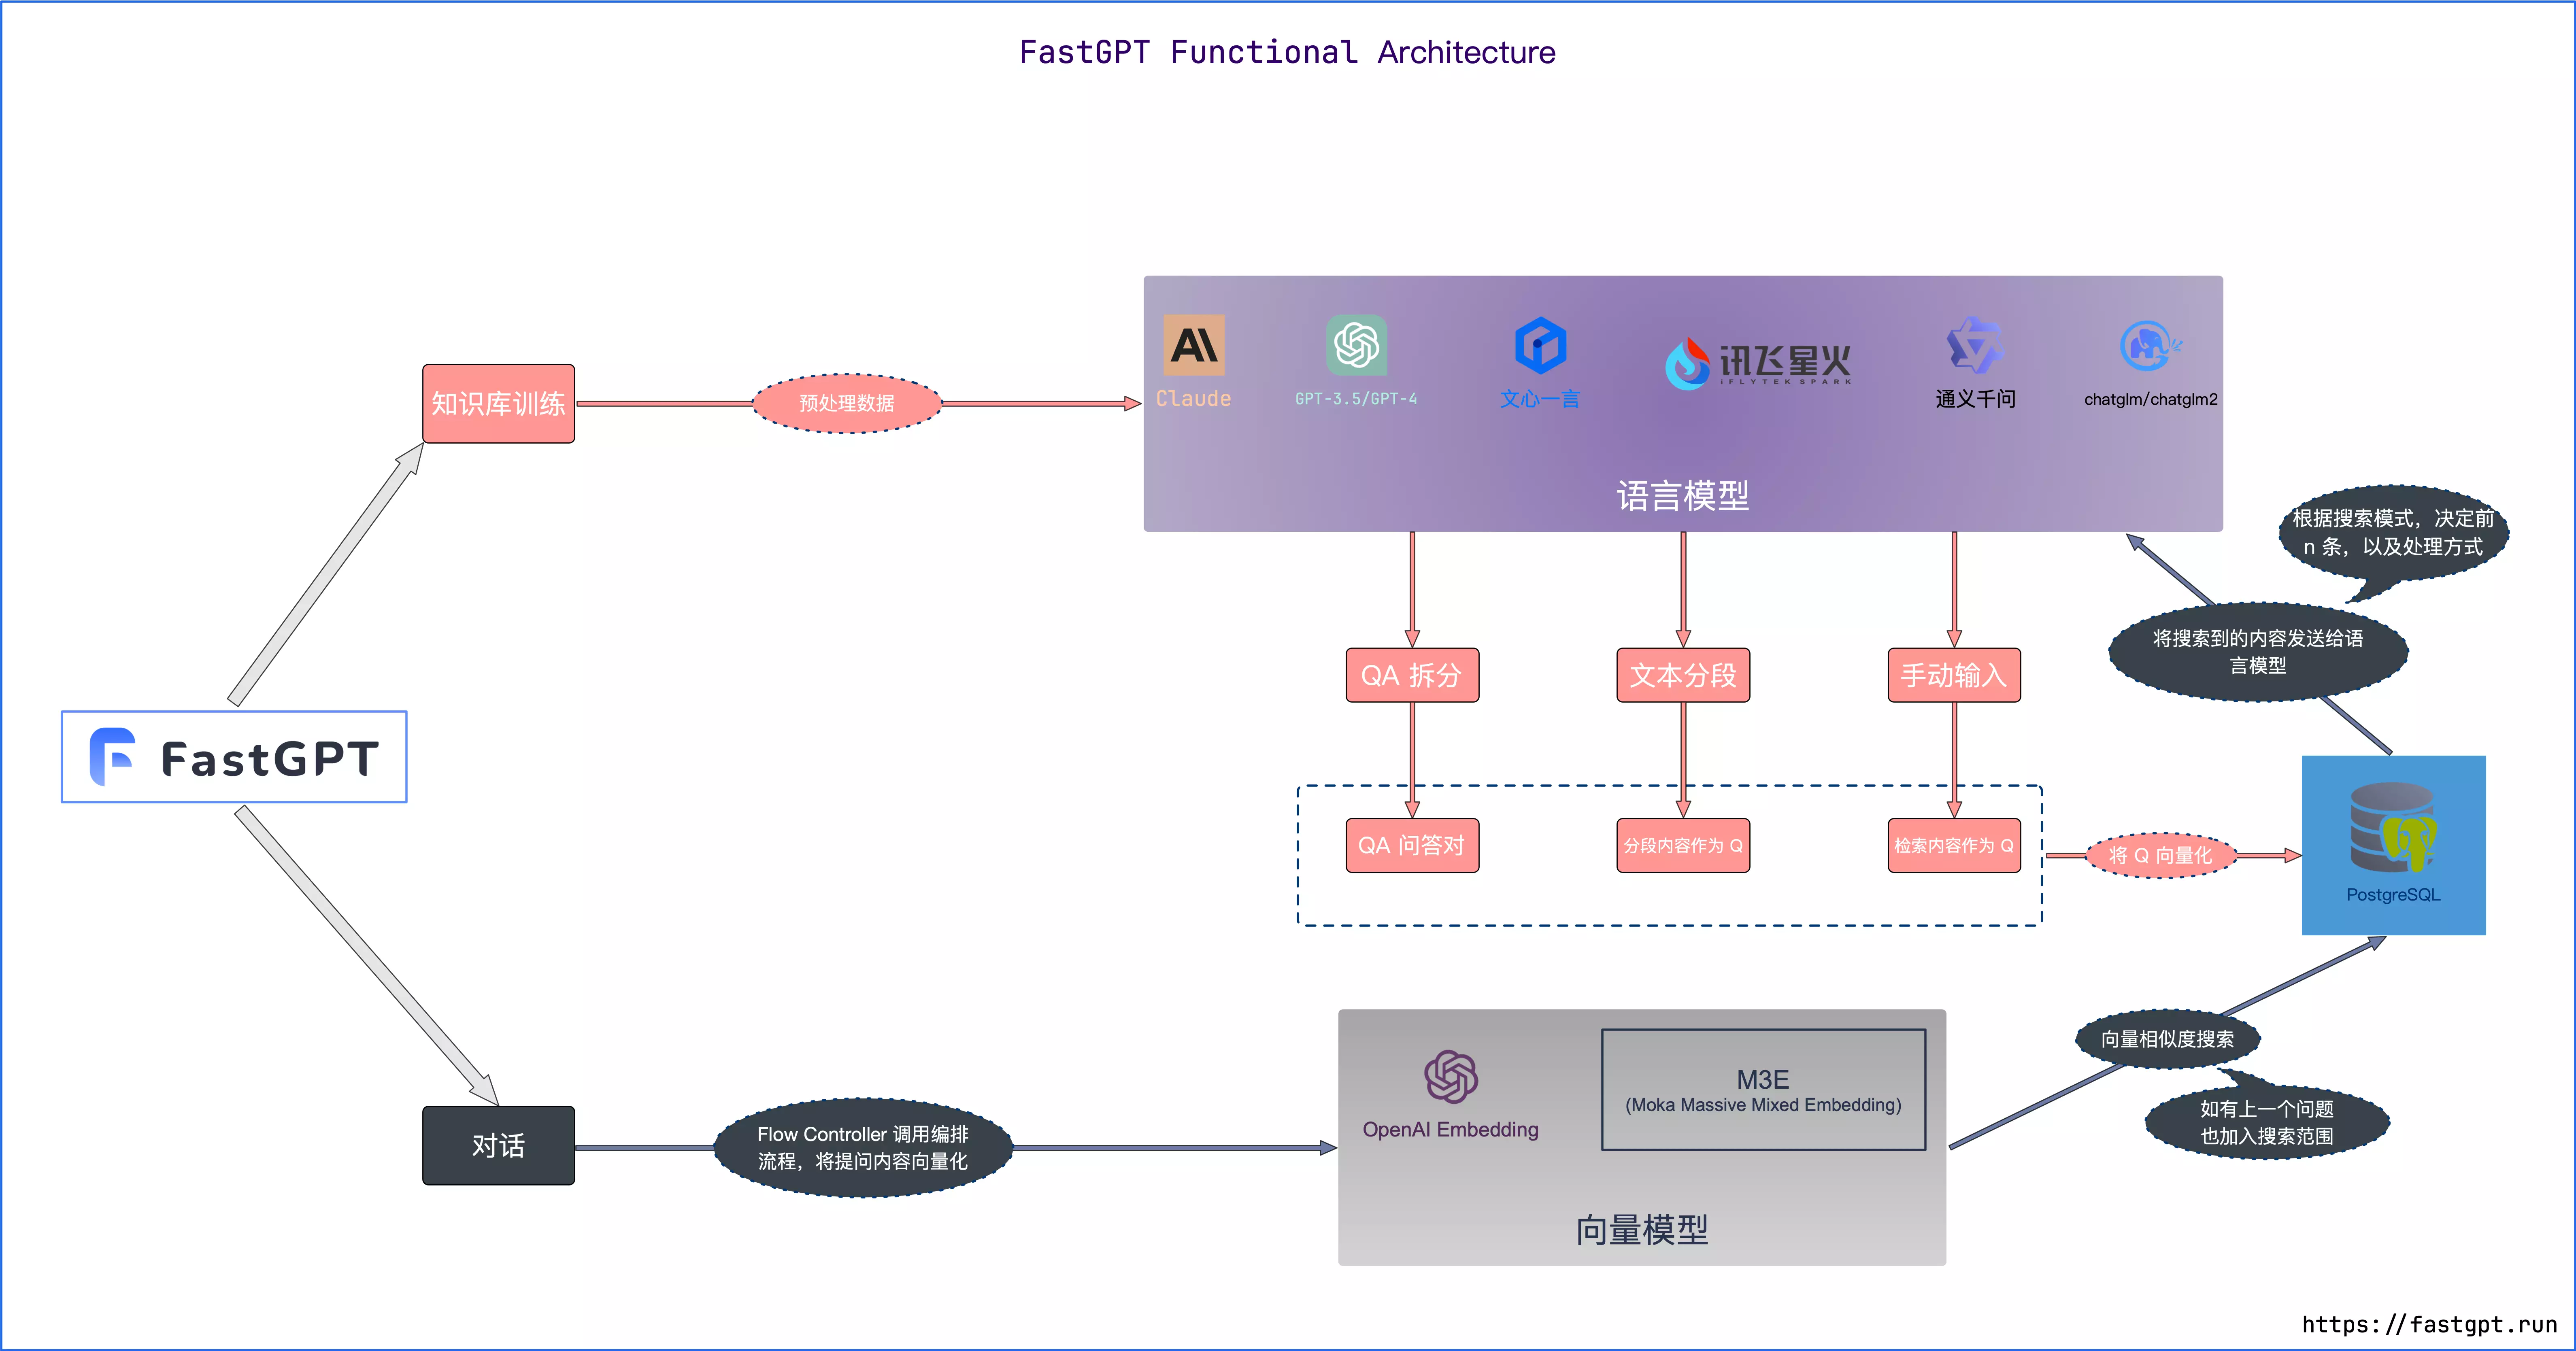
FastGPT 是一个基于 LLM 大语言模型的知识库问答系统,提供开箱即用的数据处理、模型调用等能力。同时可以通过 Flow 可视化进行工作流编排,从而实现复杂的问答场景!
具有如下特性:
(1)专属 AI 客服:通过导入文档或已有问答对进行训练,让 AI 模型能根据你的文档以交互式对话方式回答问题;
(2)简单易用的可视化界面:FastGPT 采用直观的可视化界面设计,为各种应用场景提供了丰富实用的功能。通过简洁易懂的操作步骤,可以轻松完成 AI 客服的创建和训练流程;
(3)自动数据预处理:提供手动输入、直接分段、LLM 自动处理和 CSV 等多种数据导入途径,其中“直接分段”支持通过 PDF、WORD、Markdown 和 CSV 文档内容作为上下文。FastGPT 会自动对文本数据进行预处理、向量化和 QA 分割,节省手动训练时间,提升效能;
(4)工作流编排:基于 Flow 模块的工作流编排,可以帮助你设计更加复杂的问答流程。例如查询数据库、查询库存、预约实验室等;
(5)强大的 API 集成:FastGPT 对外的 API 接口对齐了 OpenAI 官方接口,可以直接接入现有的 GPT 应用,也可以轻松集成到企业微信、公众号、飞书等平台。
二、FastGPT 部署
2.1 下载启动文件
首先,创建一个目录方便存储部署的文件,执行如下命令创建目录。
root@flexusx-7305:~# mkdir fastgpt进入 fastgpt 目录,下载 config.json 文件。
root@flexusx-7305:~# cd fastgpt
root@flexusx-7305:~/fastgpt# curl -O https://raw.githubusercontent.com/labring/FastGPT/main/projects/app/data/config.json
  % Total    % Received % Xferd  Average Speed   Time    Time     Time  Current
                                 Dload  Upload   Total   Spent    Left  Speed
100  6637  100  6637    0     0  17283      0 --:--:-- --:--:-- --:--:-- 17283
root@flexusx-7305:~#
如上所示,下载成功。config.json 文件是用于配置 FastGPT,包括大模型、向量数据库、重排模型等,config.json 文件部分内容如下所示。
{
  "feConfigs": {
    "lafEnv": "https://laf.dev" // laf环境。 https://laf.run (杭州阿里云) ,或者私有化的laf环境。如果使用 Laf openapi 功能,需要最新版的 laf 。
  },
  "systemEnv": {
    "vectorMaxProcess": 15,
    "qaMaxProcess": 15,
    "pgHNSWEfSearch": 100 // 向量搜索参数。越大,搜索越精确,但是速度越慢。设置为100,有99%+精度。
  },
  "llmModels": [
    {
      "model": "gpt-4o-mini", // 模型名(对应OneAPI中渠道的模型名)
      "name": "gpt-4o-mini", // 模型别名
      "avatar": "/imgs/model/openai.svg", // 模型的logo
      "maxContext": 125000, // 最大上下文
      "maxResponse": 16000, // 最大回复
      "quoteMaxToken": 120000, // 最大引用内容
      "maxTemperature": 1.2, // 最大温度
      "charsPointsPrice": 0, // n积分/1k token(商业版)
      "censor": false, // 是否开启敏感校验(商业版)
      "vision": true, // 是否支持图片输入
      "datasetProcess": true, // 是否设置为知识库处理模型(QA),务必保证至少有一个为true,否则知识库会报错
      "usedInClassify": true, // 是否用于问题分类(务必保证至少有一个为true)
      "usedInExtractFields": true, // 是否用于内容提取(务必保证至少有一个为true)
      "usedInToolCall": true, // 是否用于工具调用(务必保证至少有一个为true)
      "usedInQueryExtension": true, // 是否用于问题优化(务必保证至少有一个为true)
      "toolChoice": true, // 是否支持工具选择(分类,内容提取,工具调用会用到。目前只有gpt支持)
      "functionCall": false, // 是否支持函数调用(分类,内容提取,工具调用会用到。会优先使用 toolChoice,如果为false,则使用 functionCall,如果仍为 false,则使用提示词模式)
      "customCQPrompt": "", // 自定义文本分类提示词(不支持工具和函数调用的模型
      "customExtractPrompt": "", // 自定义内容提取提示词
      "defaultSystemChatPrompt": "", // 对话默认携带的系统提示词
      "defaultConfig": {}, // 请求API时,挟带一些默认配置(比如 GLM4 的 top_p)
      "fieldMap": {} // 字段映射(o1 模型需要把 max_tokens 映射为 max_completion_tokens)
    },
    {
      "model": "gpt-4o",
      "name": "gpt-4o",
      "avatar": "/imgs/model/openai.svg",
      "maxContext": 125000,
      "maxResponse": 4000,
      "quoteMaxToken": 120000,
      "maxTemperature": 1.2,
      "charsPointsPrice": 0,
      "censor": false,
      "vision": true,
      "datasetProcess": false,
      "usedInClassify": true,
      "usedInExtractFields": true,
      "usedInToolCall": true,
      "usedInQueryExtension": true,
      "toolChoice": true,
      "functionCall": false,
      "customCQPrompt": "",
      "customExtractPrompt": "",
      "defaultSystemChatPrompt": "",
      "defaultConfig": {},
      "fieldMap": {}
    },
然后,下载 Docker yml 文件,执行如下命令。
root@flexusx-7305:~/fastgpt# curl -o docker-compose.yml https://raw.githubusercontent.com/labring/FastGPT/main/files/docker/docker-compose-pgvector.yml
  % Total    % Received % Xferd  Average Speed   Time    Time     Time  Current
                                 Dload  Upload   Total   Spent    Left  Speed
100  5577  100  5577    0     0  14448      0 --:--:-- --:--:-- --:--:-- 14448
root@flexusx-7305:~#
docker-compose.yml 里面的镜像需要修改为国内镜像,如下所示。
version: '3.3'
services:
  # db
  pg:
    #image: pgvector/pgvector:0.7.0-pg15 # docker hub
    image: registry.cn-hangzhou.aliyuncs.com/fastgpt/pgvector:v0.7.0 # 阿里云
    container_name: pg
    restart: always
    ports: # 生产环境建议不要暴露
      - 5432:5432
    networks:
      - fastgpt
    environment:
      # 这里的配置只有首次运行生效。修改后,重启镜像是不会生效的。需要把持久化数据删除再重启,才有效果
      - POSTGRES_USER=username
      - POSTGRES_PASSWORD=password
      - POSTGRES_DB=postgres
    volumes:
      - ./pg/data:/var/lib/postgresql/data
  mongo:
    #image: mongo:5.0.18 # dockerhub
    image: registry.cn-hangzhou.aliyuncs.com/fastgpt/mongo:5.0.18 # 阿里云
    # image: mongo:4.4.29 # cpu不支持AVX时候使用
    container_name: mongo
    restart: always
    ports:
      - 27017:27017
    networks:
      - fastgpt
    command: mongod --keyFile /data/mongodb.key --replSet rs0
    environment:
      - MONGO_INITDB_ROOT_USERNAME=myusername
      - MONGO_INITDB_ROOT_PASSWORD=mypassword
    volumes:
      - ./mongo/data:/data/db
    entrypoint:
      - bash
      - -c
      - |
        openssl rand -base64 128 > /data/mongodb.key
        chmod 400 /data/mongodb.key
        chown 999:999 /data/mongodb.key
        echo 'const isInited = rs.status().ok === 1
        if(!isInited){
          rs.initiate({
              _id: "rs0",
              members: [
                  { _id: 0, host: "mongo:27017" }
              ]
          })
        }' > /data/initReplicaSet.js
        # 启动MongoDB服务
        exec docker-entrypoint.sh "$$@" &

        # 等待MongoDB服务启动
        until mongo -u myusername -p mypassword --authenticationDatabase admin --eval "print('waited for connection')" > /dev/null 2>&1; do
          echo "Waiting for MongoDB to start..."
          sleep 2
        done

        # 执行初始化副本集的脚本
        mongo -u myusername -p mypassword --authenticationDatabase admin /data/initReplicaSet.js

        # 等待docker-entrypoint.sh脚本执行的MongoDB服务进程
        wait $$!
# fastgpt
  sandbox:
    container_name: sandbox
    #image: ghcr.io/labring/fastgpt-sandbox:latest # git
    image: registry.cn-hangzhou.aliyuncs.com/fastgpt/fastgpt-sandbox:latest # 阿里云
    networks:
      - fastgpt
    restart: always
  fastgpt:
    container_name: fastgpt
    #image: ghcr.io/labring/fastgpt:v4.8.9 # git
    image: registry.cn-hangzhou.aliyuncs.com/fastgpt/fastgpt:v4.8.9 # 阿里云
    ports:
      - 3000:3000
    networks:
      - fastgpt
    depends_on:
      - mongo
      - pg
      - sandbox
    restart: always
    environment:
      # root 密码,用户名为: root。如果需要修改 root 密码,直接修改这个环境变量,并重启即可。
      - DEFAULT_ROOT_PSW=1234
      # AI模型的API地址哦。务必加 /v1。这里默认填写了OneApi的访问地址。
      - OPENAI_BASE_URL=http://oneapi:3000/v1
      # AI模型的API Key。(这里默认填写了OneAPI的快速默认key,测试通后,务必及时修改)
      - CHAT_API_KEY=sk-fastgpt
      # 数据库最大连接数
      - DB_MAX_LINK=30
      # 登录凭证密钥
      - TOKEN_KEY=any
      # root的密钥,常用于升级时候的初始化请求
      - ROOT_KEY=root_key
      # 文件阅读加密
      - FILE_TOKEN_KEY=filetoken
      # MongoDB 连接参数. 用户名myusername,密码mypassword。
      - MONGODB_URI=mongodb://myusername:mypassword@mongo:27017/fastgpt?authSource=admin
      # pg 连接参数
      - PG_URL=postgresql://username:password@pg:5432/postgres
      # sandbox 地址
      - SANDBOX_URL=http://sandbox:3000
      # 日志等级: debug, info, warn, error
      - LOG_LEVEL=info
      - STORE_LOG_LEVEL=warn
    volumes:
      - ./config.json:/app/data/config.json
............
需要将对应的镜像(image处)替换为国内镜像源。
2.2 开放端口权限
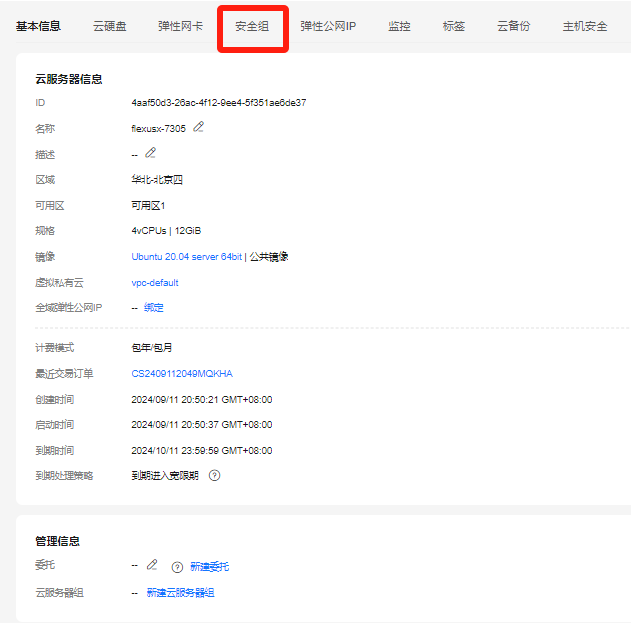
FastGPT 需要使用 3000 端口,所以需要开放 3000 端口。
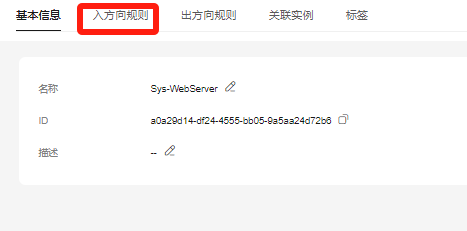
在基本信息中,点击安全组,如下所示。
然后,点击配置规则,配置对应的端口,如下所示。
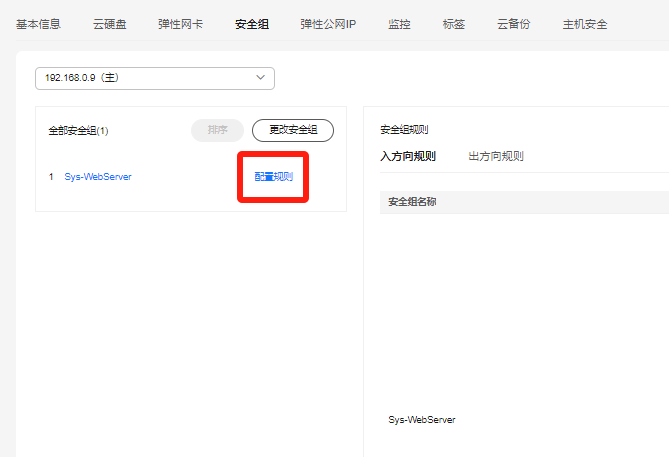
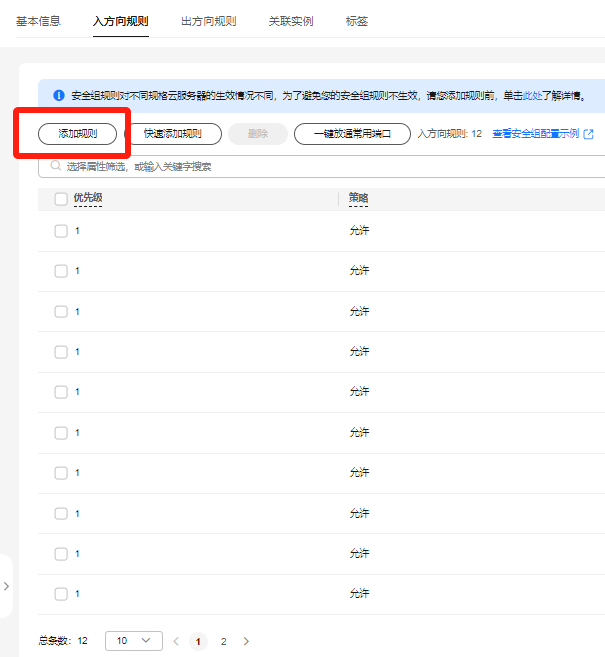
然后,点击入方向规则,如下所示。
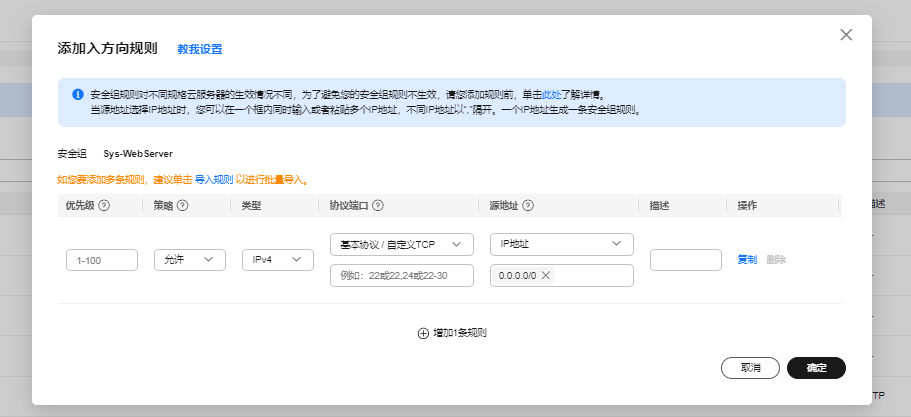
然后,点击添加规则,如下所示。
最后,填写优先级、策略、类型、协议端口、源地址等,点击确定即可添加。
2.3 启动 FastGPT
最后,执行命令 docker-compose up -d 启动容器,如下所示。
root@flexusx-7305:~/fastgpt# docker-compose up -d
Pulling pg (registry.cn-hangzhou.aliyuncs.com/fastgpt/pgvector:v0.7.0)...
v0.7.0: Pulling from fastgpt/pgvector
b0a0cf830b12: Pull complete
b311dac095c3: Pull complete
36163cea98c3: Pull complete
fe401a45083b: Pull complete
b4f63e66f657: Pull complete
9a8245430c33: Pull complete
74c893d239e5: Pull complete
789ed9a95b21: Pull complete
5b691e4e12b4: Pull complete
e502d5360f88: Pull complete
0292671f3c2d: Pull complete
5247a27db111: Pull complete
b3a42a5269c3: Pull complete
5fc19b802589: Pull complete
973f95d4f335: Pull complete
694339e21380: Pull complete
Digest: sha256:27df42f0d0be8d5623ff1aea5fea7134e175af1cdef62d9df00b322a3c85edc9
Status: Downloaded newer image for registry.cn-hangzhou.aliyuncs.com/fastgpt/pgvector:v0.7.0
Pulling mongo (registry.cn-hangzhou.aliyuncs.com/fastgpt/mongo:5.0.18)...
5.0.18: Pulling from fastgpt/mongo
99803d4b97f3: Pull complete
6653ceb22977: Pull complete
e067c5774dde: Pull complete
3f2512535c9b: Pull complete
95823dd64119: Pull complete
806644aafaf1: Pull complete
b6eb4ecca0a2: Pull complete
a85fb80d261c: Pull complete
b8e25023b418: Pull complete
Digest: sha256:2b7e5f3ddc4f4707cdf72bd55e50a0dbd34b5832e5e97d9fdf5adc19abebf068
Status: Downloaded newer image for registry.cn-hangzhou.aliyuncs.com/fastgpt/mongo:5.0.18
Pulling sandbox (registry.cn-hangzhou.aliyuncs.com/fastgpt/fastgpt-sandbox:latest)...
latest: Pulling from fastgpt/fastgpt-sandbox
ec99f8b99825: Already exists
826542d541ab: Pull complete
dffcc26d5732: Pull complete
db472a6f05b5: Pull complete
ecd04a51a4f0: Pull complete
545ea84d560a: Pull complete
c58556c21eaf: Pull complete
Digest: sha256:713b33d3046df1dbad4d8a96e96d6768da40b37725aae51d62c65f78d142f7f0
Status: Downloaded newer image for registry.cn-hangzhou.aliyuncs.com/fastgpt/fastgpt-sandbox:latest
Pulling fastgpt (registry.cn-hangzhou.aliyuncs.com/fastgpt/fastgpt:v4.8.9)...
v4.8.9: Pulling from fastgpt/fastgpt
ec99f8b99825: Already exists
826542d541ab: Already exists
dffcc26d5732: Already exists
db472a6f05b5: Already exists
491fb52a5552: Pull complete
e976869203ad: Pull complete
3752adf5e588: Pull complete
4f4fb700ef54: Pull complete
16dac137804b: Pull complete
6e71790b1b02: Pull complete
182766849e9d: Pull complete
dcb3c7036667: Pull complete
953e3286d363: Pull complete
b07e2289cb81: Pull complete
12cd02b56be5: Pull complete
1cb02e13b272: Pull complete
bf8bf6a61713: Pull complete
ccd96c6d5426: Pull complete
303d7b560361: Pull complete
9b6e2c2688e6: Pull complete
d44f4ca5f7c4: Pull complete
Digest: sha256:91e1bc8349f477c0c70b25a0dbeb7394240aac515ee5dd9e8c7c6e44b2d3da4a
Status: Downloaded newer image for registry.cn-hangzhou.aliyuncs.com/fastgpt/fastgpt:v4.8.9
Pulling mysql (registry.cn-hangzhou.aliyuncs.com/fastgpt/mysql:8.0.36)...
8.0.36: Pulling from fastgpt/mysql
bd37f6d99203: Pull complete
d2433cba0951: Pull complete
13702d9fe3c3: Pull complete
83bcc87284a1: Pull complete
c38d8660e1fa: Pull complete
7e1bc321f421: Pull complete
bddd54b9c549: Pull complete
4eaae1e844ac: Pull complete
5196e1e87d8f: Pull complete
6586d096303c: Pull complete
cf55ff1c80af: Pull complete
Digest: sha256:c57363379dee26561c2e554f82e70704be4c8129bd0d10e29252cc0a34774004
Status: Downloaded newer image for registry.cn-hangzhou.aliyuncs.com/fastgpt/mysql:8.0.36
Pulling oneapi (registry.cn-hangzhou.aliyuncs.com/fastgpt/one-api:v0.6.6)...
v0.6.6: Pulling from fastgpt/one-api
4abcf2066143: Already exists
17841cb3f506: Pull complete
4394f95d2b0d: Pull complete
7fcd5fcce5af: Pull complete
Digest: sha256:480a8d63af5057f7d81437dc138da941998657779b6c0150fd5e595b6ff72c71
Status: Downloaded newer image for registry.cn-hangzhou.aliyuncs.com/fastgpt/one-api:v0.6.6
Creating pg      ... done
Creating mongo   ... done
Creating sandbox ... done
Creating mysql   ... done
如上所示,分别拉取了pgvector、mongo、fastgpt-sandbox、fastgpt、mysql、one-api 镜像。
通过 docker ps 查看当前运行的镜像,如下所示。
root@flexusx-7305:~/fastgpt# docker ps
CONTAINER ID   IMAGE                                                                        COMMAND                  CREATED        STATUS        PORTS                                                  NAMES
68a1f9a73e58   registry.cn-hangzhou.aliyuncs.com/fastgpt/fastgpt:v4.8.9                     "sh -c 'node --max-o…"   22 hours ago   Up 22 hours   0.0.0.0:3000->3000/tcp, :::3000->3000/tcp              fastgpt
b57af8cd1b6b   registry.cn-hangzhou.aliyuncs.com/fastgpt/one-api:v0.6.6                     "/one-api"               22 hours ago   Up 22 hours   0.0.0.0:3001->3000/tcp, [::]:3001->3000/tcp            oneapi
2de37c379c6a   registry.cn-hangzhou.aliyuncs.com/fastgpt/mysql:8.0.36                       "docker-entrypoint.s…"   22 hours ago   Up 22 hours   0.0.0.0:3306->3306/tcp, :::3306->3306/tcp, 33060/tcp   mysql
9d7906452f26   registry.cn-hangzhou.aliyuncs.com/fastgpt/fastgpt-sandbox:latest             "docker-entrypoint.s…"   22 hours ago   Up 22 hours                                                          sandbox
6f9c7f088d9d   registry.cn-hangzhou.aliyuncs.com/fastgpt/mongo:5.0.18                       "bash -c 'openssl ra…"   22 hours ago   Up 22 hours   0.0.0.0:27017->27017/tcp, :::27017->27017/tcp          mongo
3867cf7f6df9   registry.cn-hangzhou.aliyuncs.com/fastgpt/pgvector:v0.7.0                    "docker-entrypoint.s…"   22 hours ago   Up 22 hours   0.0.0.0:5432->5432/tcp, :::5432->5432/tcp              pg
89bb9f7a3dd1   swr.cn-north-4.myhuaweicloud.com/ddn-k8s/docker.io/justsong/one-api:v0.6.0   "/one-api"               2 days ago     Up 23 hours   0.0.0.0:3002->3000/tcp, [::]:3002->3000/tcp            one-api
65fe1c102df6   daocloud.io/library/mysql:8                                                  "docker-entrypoint.s…"   4 days ago     Up 23 hours   3306/tcp, 33060/tcp                                    root_db_1
root@flexusx-7305:~/fastgpt#
三、FastGPT 运行
3.1 登录 FastGPT
在浏览器中访问 http://服务器IP:3000,FastGPT界面如下所示。
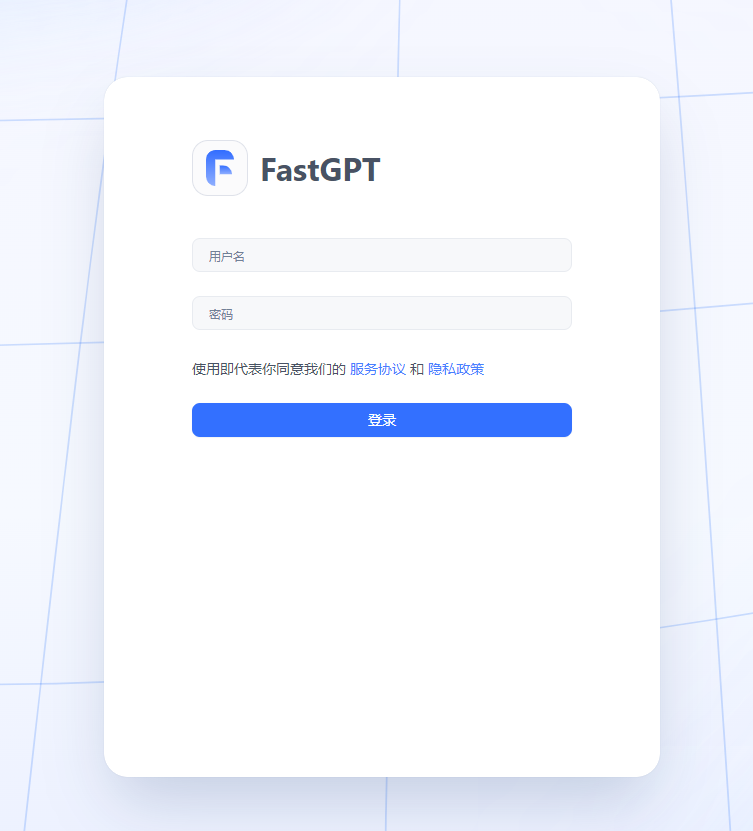
默认用户是 root,密码是 1234,登录后如下所示。
3.2 知识库
点击知识库,右上角点击新建,如下所示。
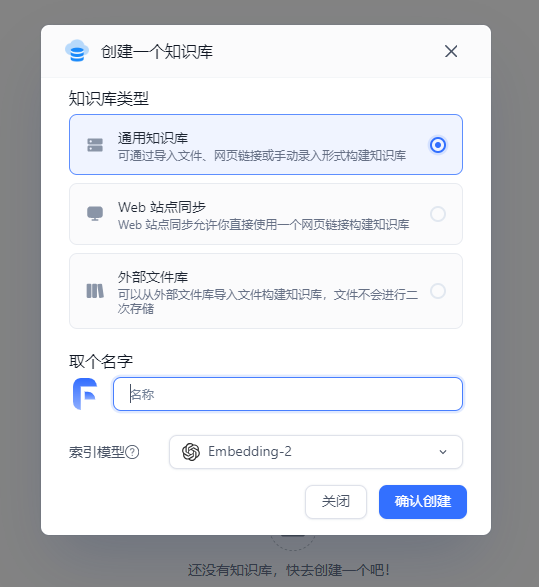
然后填写知识库名称,创建完成,知识库如下所示。
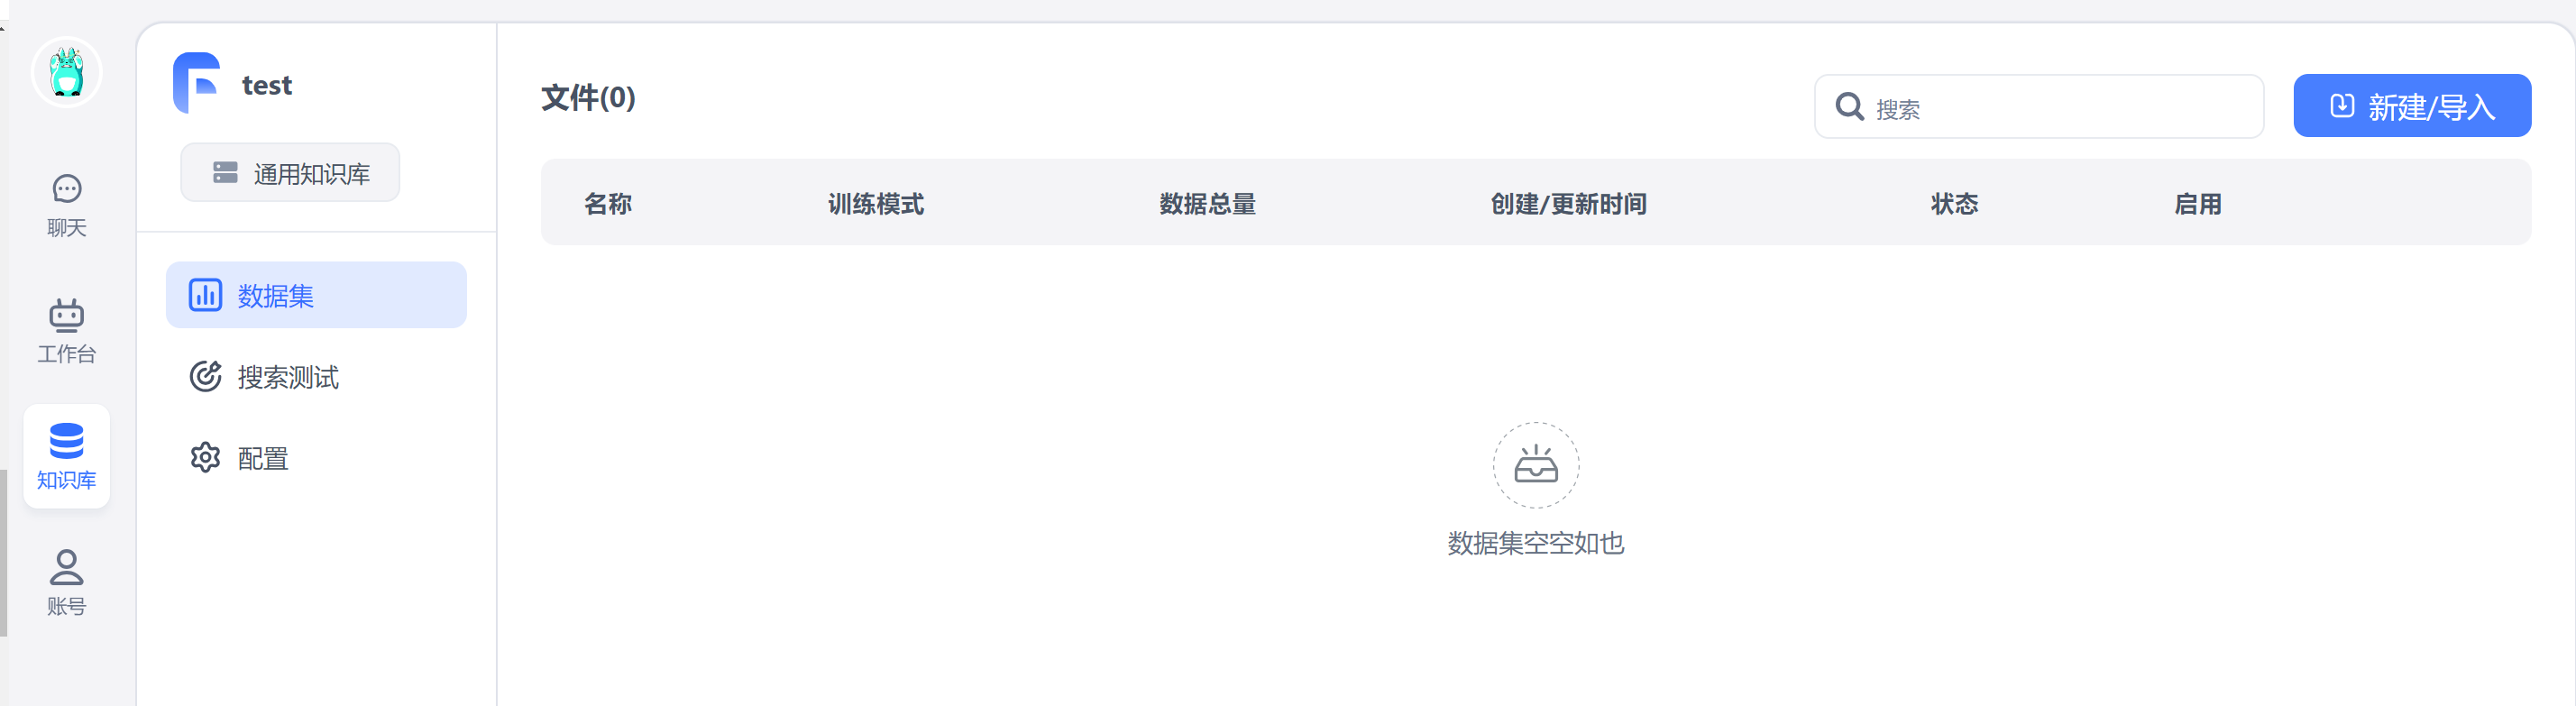
然后,可以点击新建/导入按钮导入文档。
3.3 应用
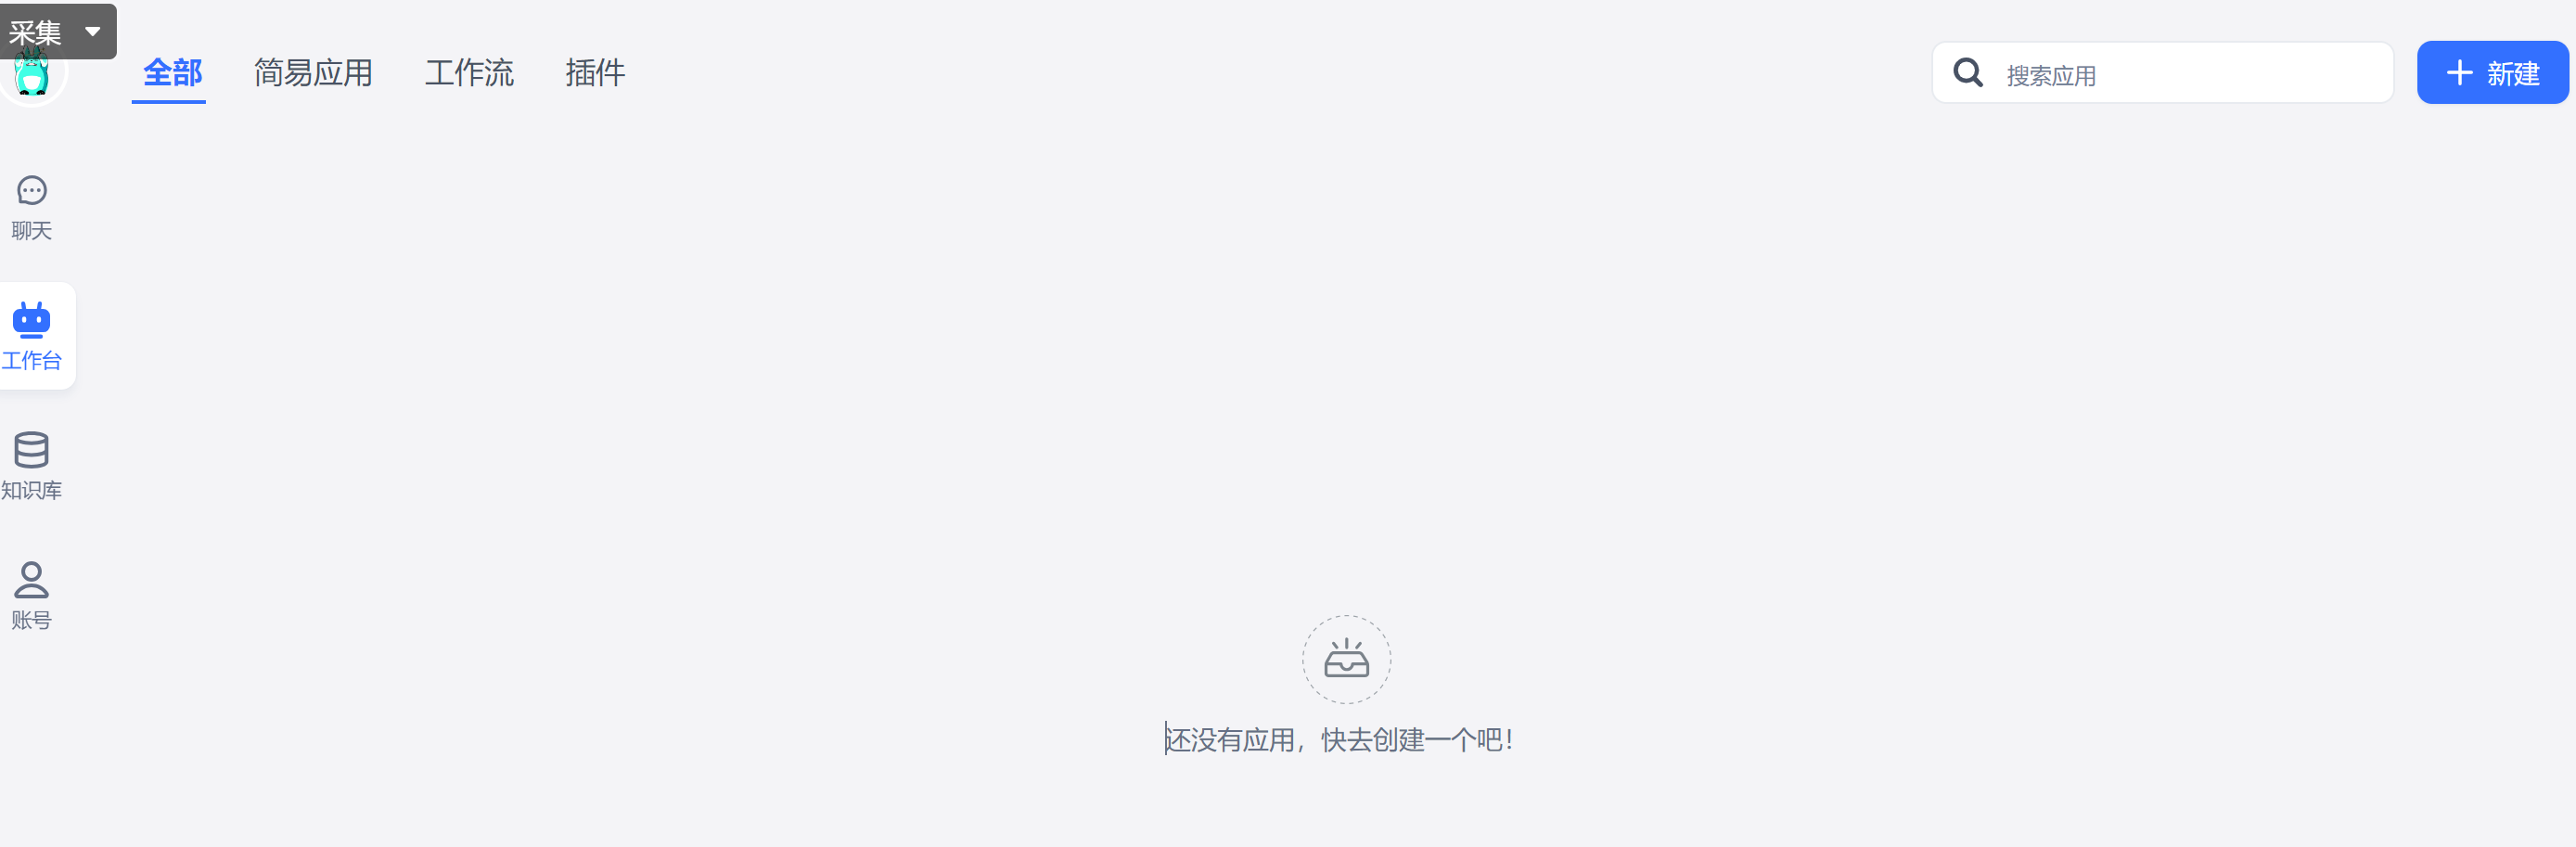
点击工作台,点击右上角新建,如下所示。
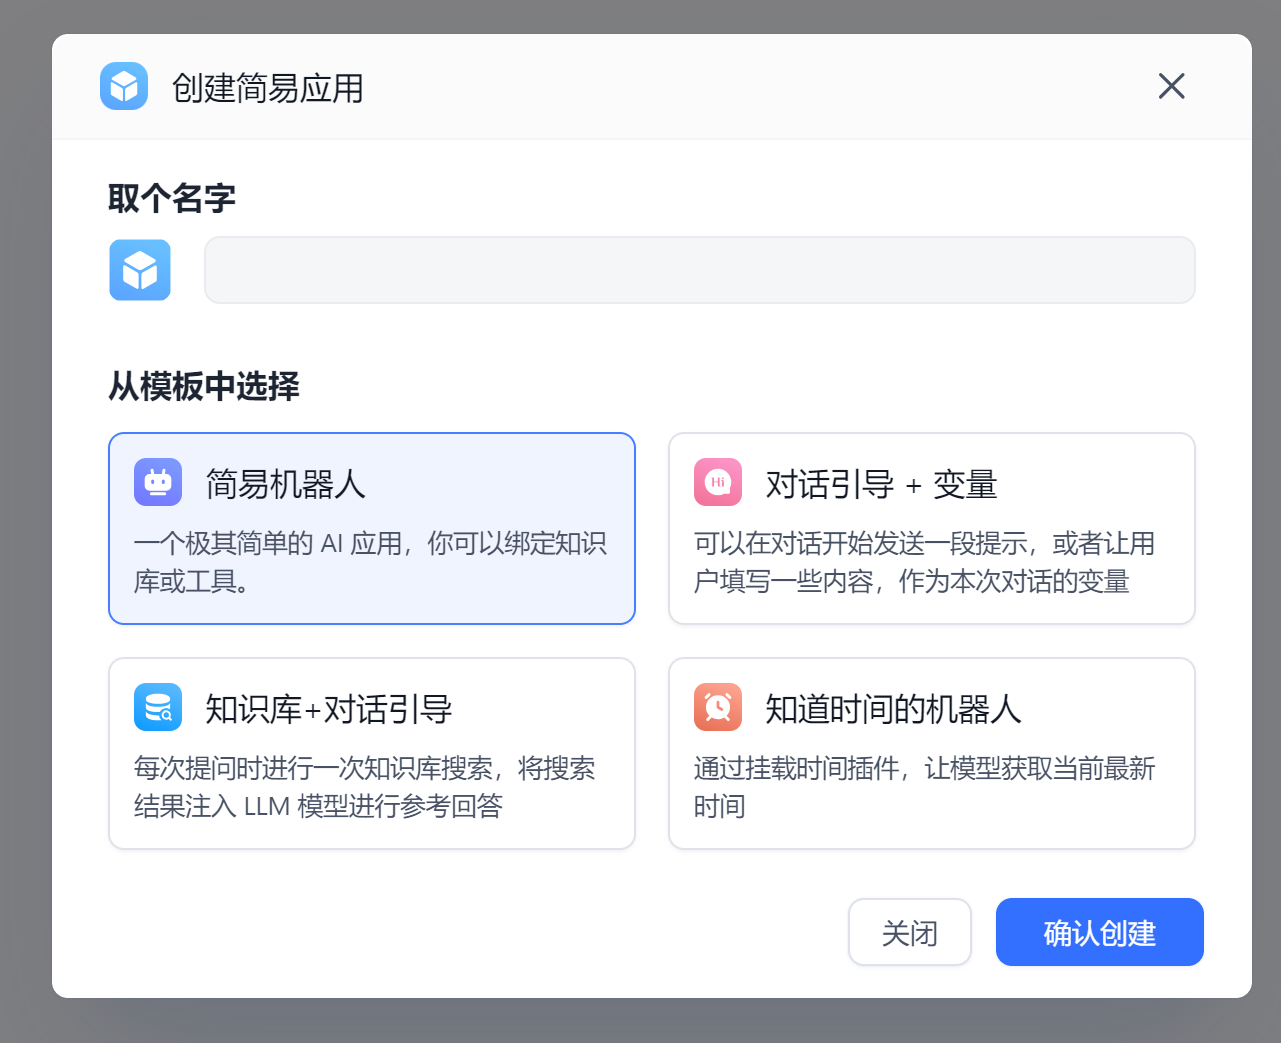
输入名称,创建应用完成,如下所示。
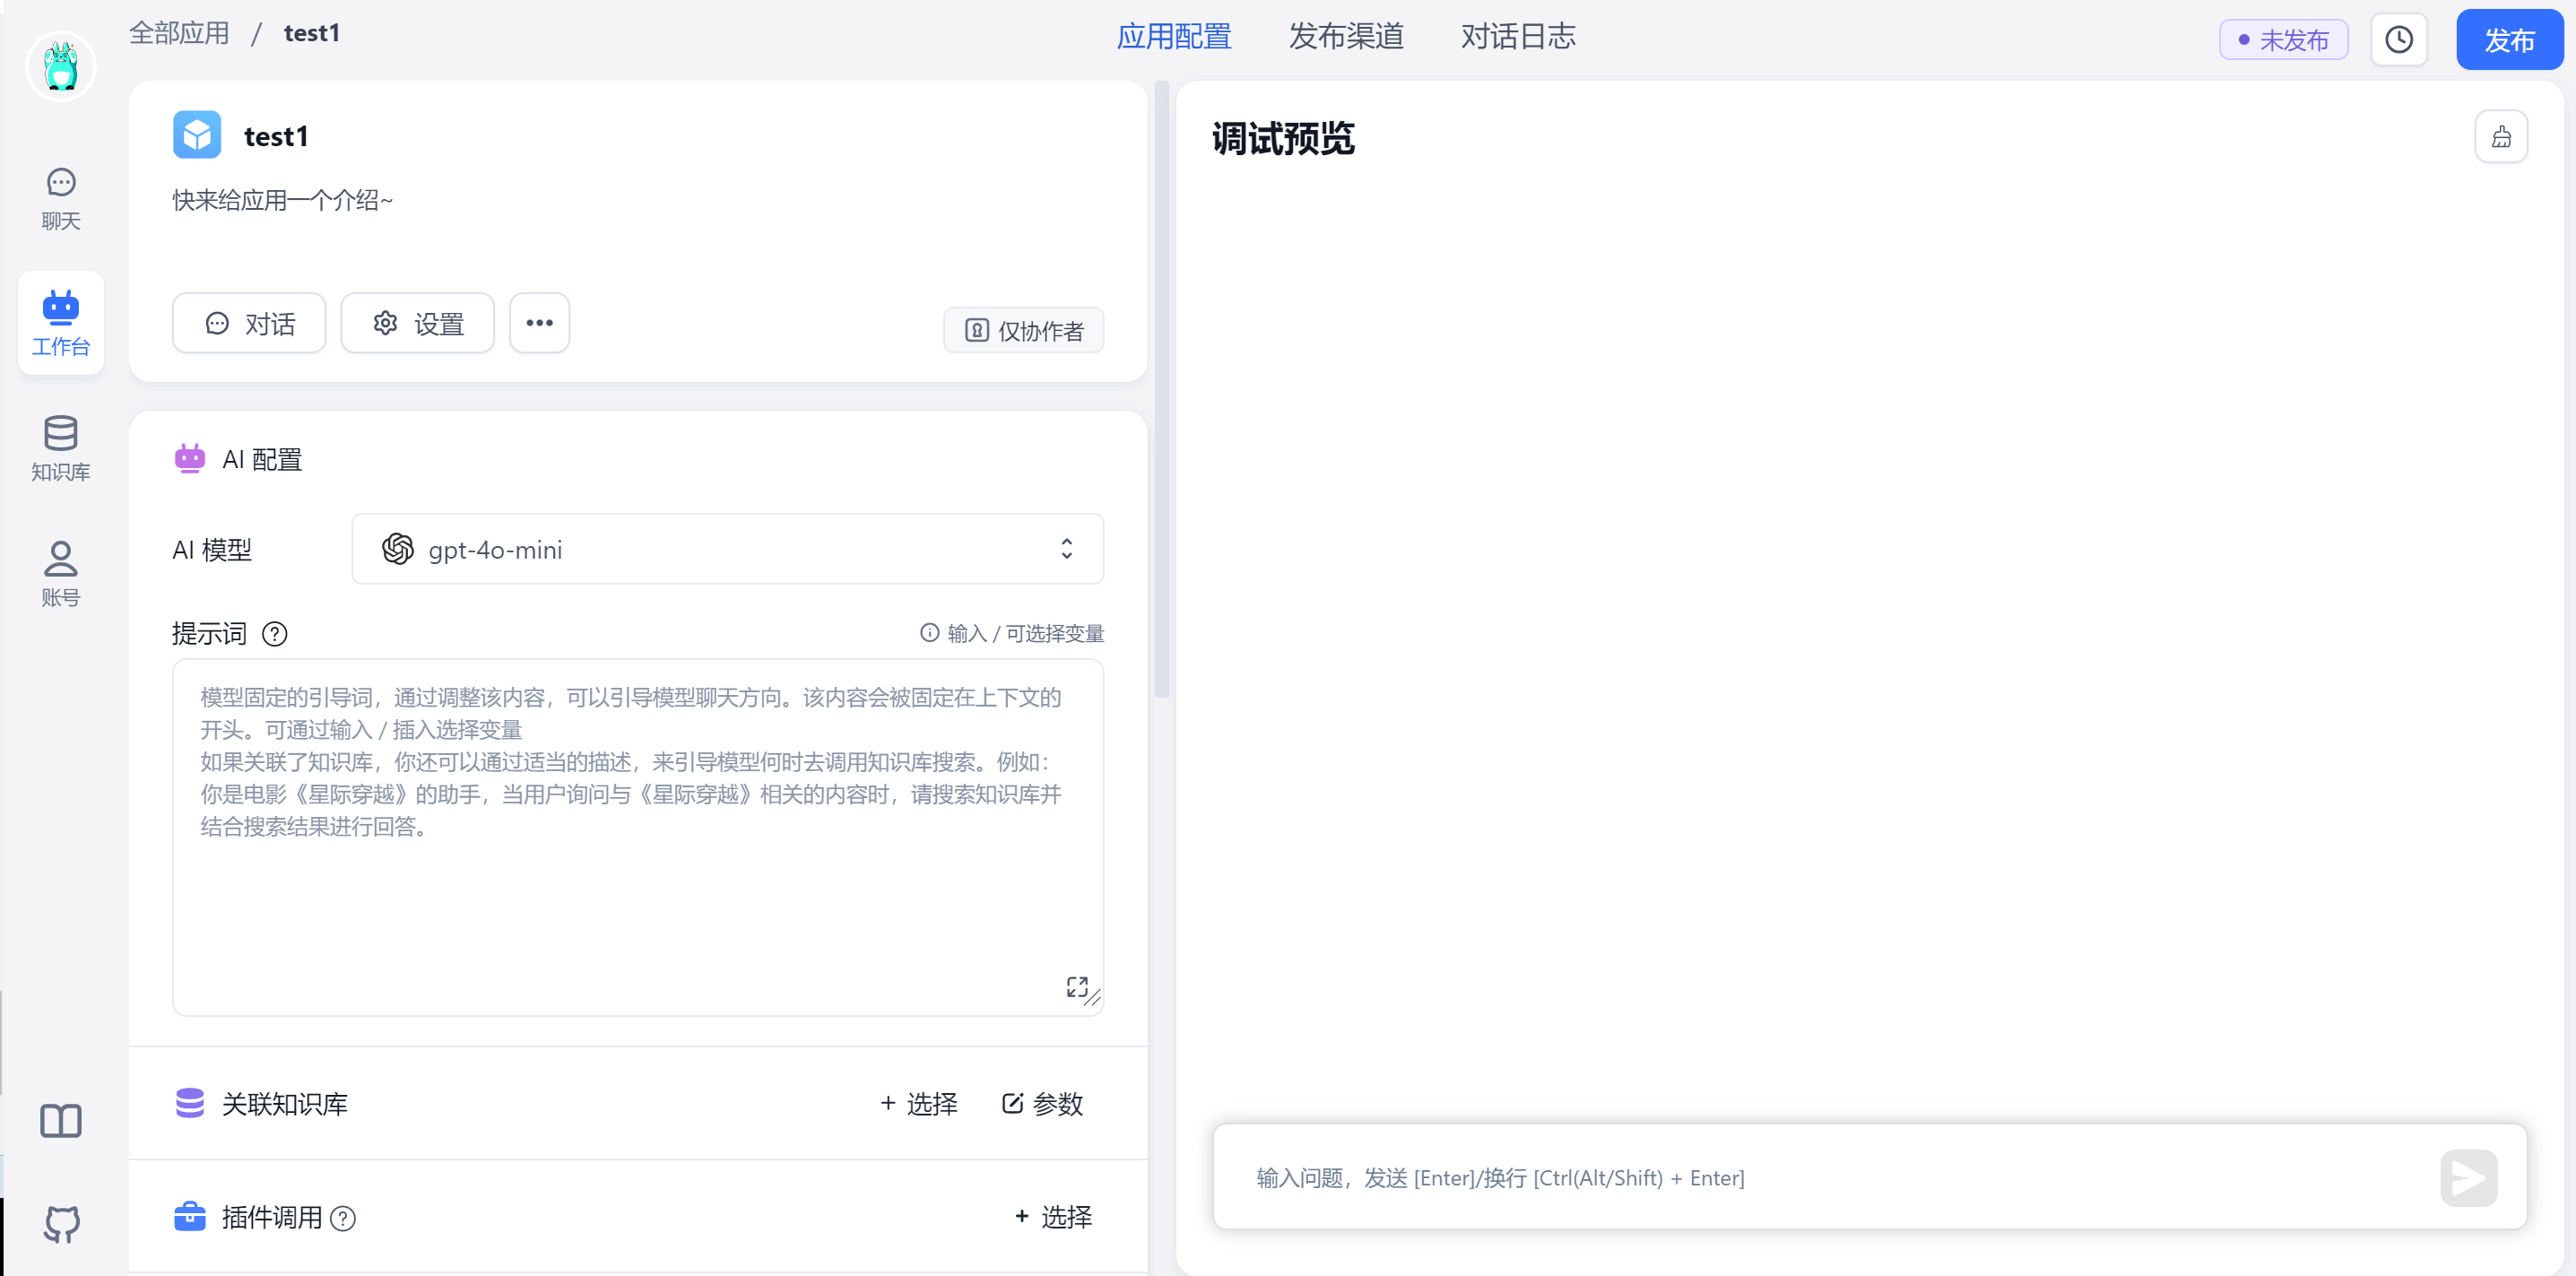
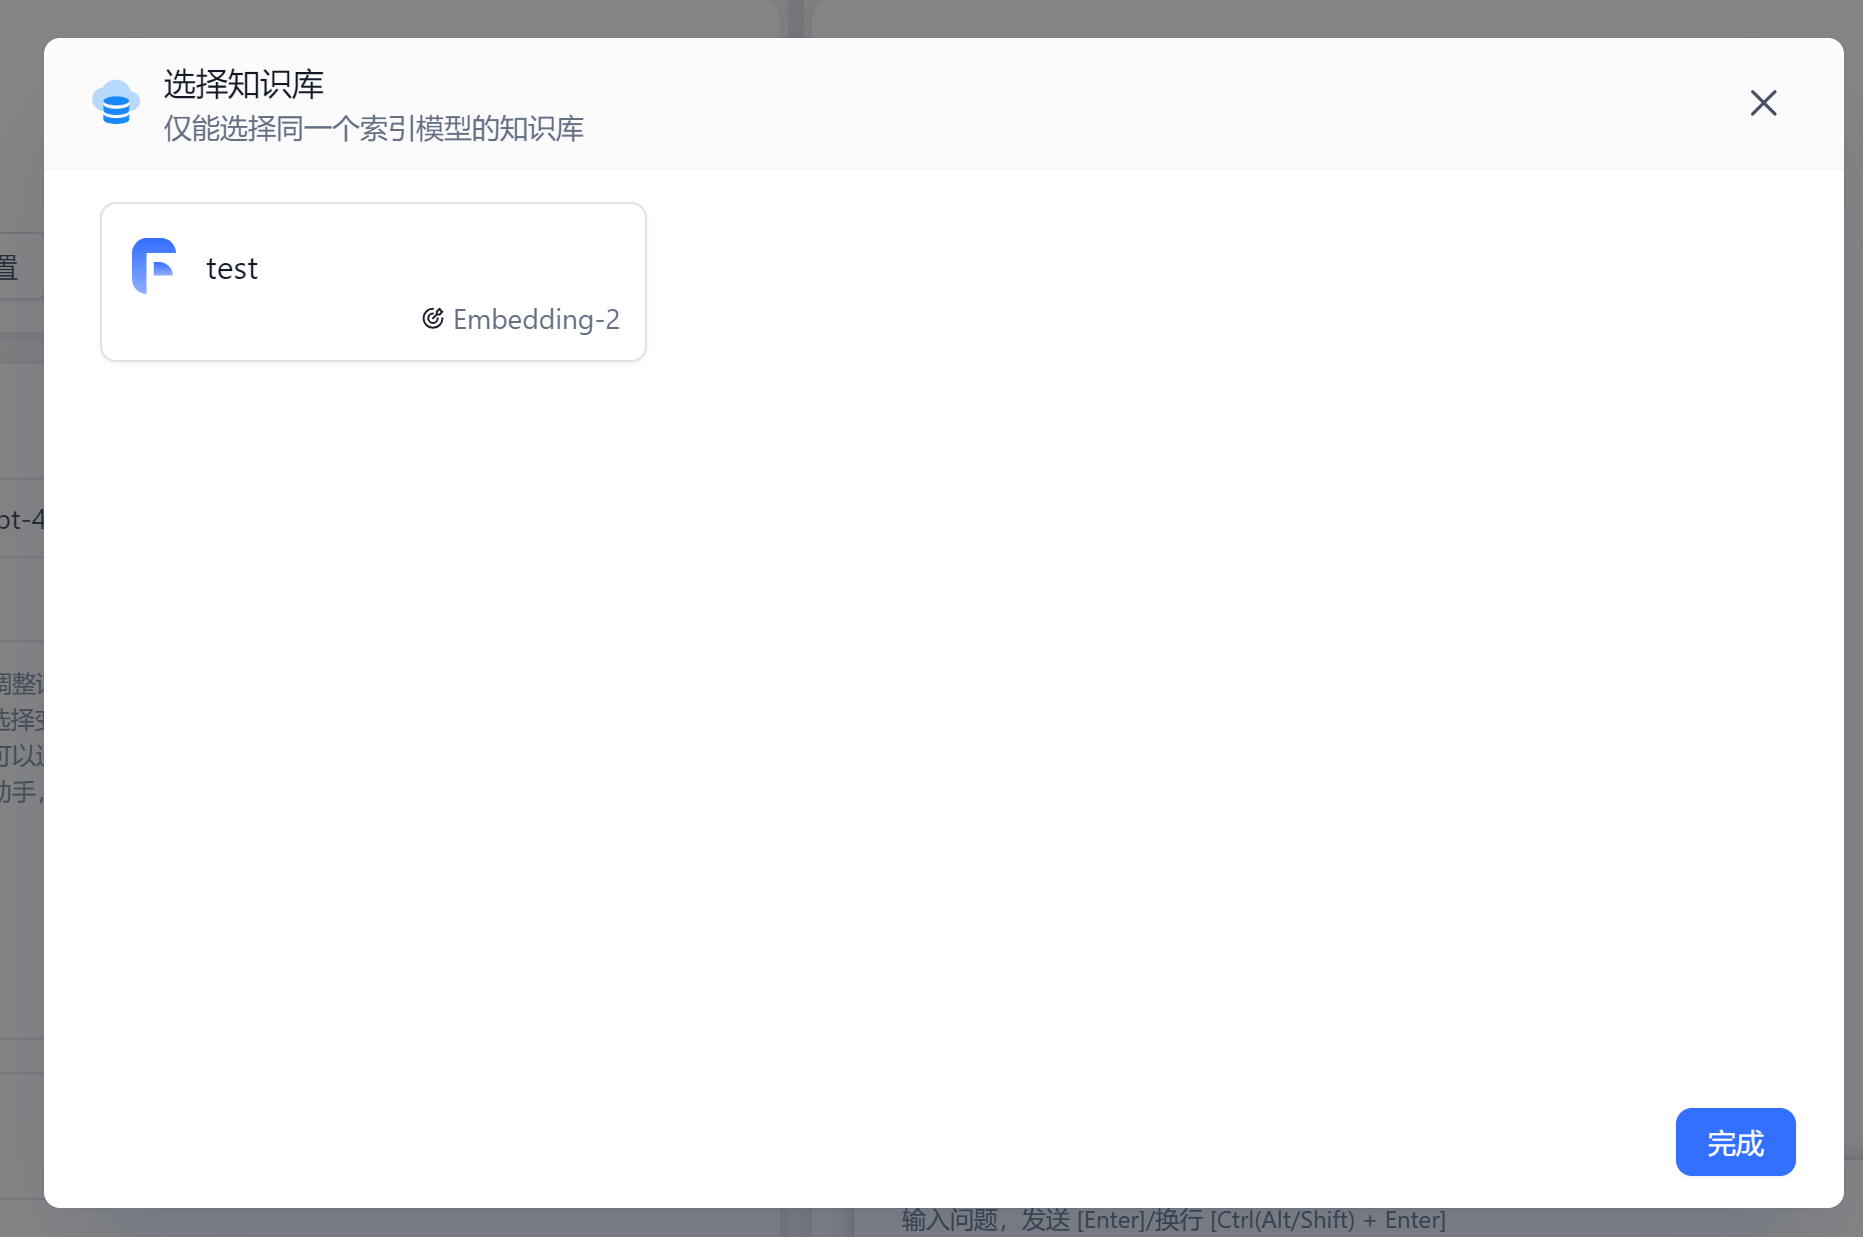
可以在 AI 配置中选择模型,填写提示词,关联知识库,知识库可以选择 3.2 知识库中创建的,如下所示。
配置完大模型后可以在右侧聊天窗口开启聊天。
四、总结
通过本篇文章,使用 Flexus云服务器X实例 实例部署 FastGPT,整个过程非常顺利,包括:下载配置文件、拉取镜像、启动容器、远程访问 FastGPT等,而且 Flexus云服务器X实例 具有高安全性,开放端口需要配置对应的规则,可以保障 FastGPT 的安全运行,有需要的小伙伴赶紧用起来吧!