【教学类-18-04】20240508《蒙德里安“黑白格子画” 七款图案挑选》

背景需求
最近有2位客户买了蒙德里安黑白格子画的素材,其中一位问是否是1000张。


【教学类-18-03】20240508《蒙德里安“红黄蓝黑格子画”-A4横版》(大小格子)_processing简单图形画蒙德里安-CSDN博客文章浏览阅读1.1k次,点赞35次,收藏7次。【教学类-18-03】20240508《蒙德里安“红黄蓝黑格子画”-A4横版》(大小格子)_processing简单图形画蒙德里安https://blog.csdn.net/reasonsummer/article/details/138568655
实际上我只做了“蒙德里安学具”用到的4款图形的图片数量。每套最多30张精选图片。


因为随机生成的线条图并不都符合我的教学需要(色块不能太大-涂色太累,边缘部分不能有黑线,与边线融合会变粗等),需要手动挑选,所以我每种选了20份,绝对没有1000份
第1款:正方15:15

第2款:长方15:21

第3款:长方21:15

第4款:正方5:21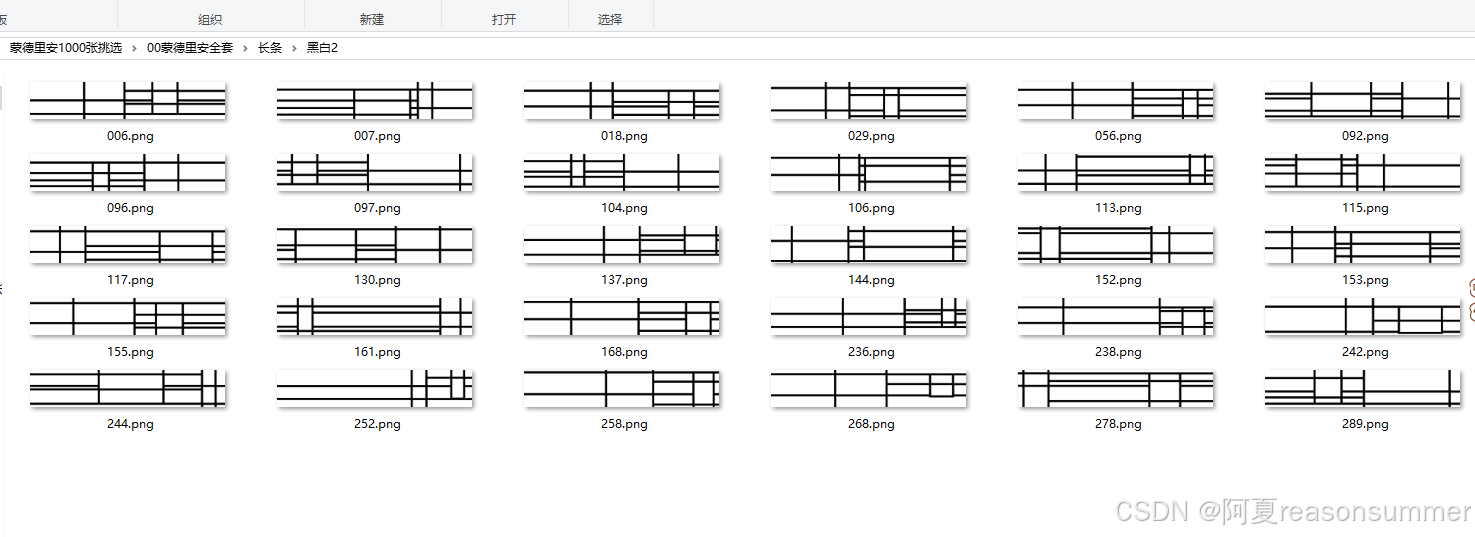
【教学类-18-03】20240508《蒙德里安“红黄蓝黑格子画”-A4横版》(大小格子)_蒙德里安格子画色值-CSDN博客文章浏览阅读1.1k次,点赞35次,收藏7次。【教学类-18-03】20240508《蒙德里安“红黄蓝黑格子画”-A4横版》(大小格子)_蒙德里安格子画色值https://blog.csdn.net/reasonsummer/article/details/138568655
今天我想用批量的方式制作['小正方','长条','半竖','半横','全竖','全横','全正']7款不同尺寸的蒙德里安黑白格子学具。
一共写了三个代码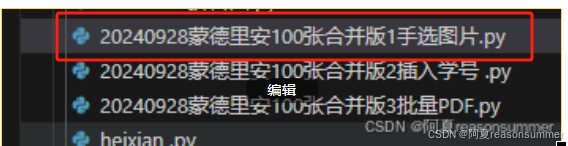
一、根据不同尺寸生成7款图片(最后手动挑选)
'''
目的:蒙德里安(大小不规律格子)白色
作者:AI对话大师
时间:2024年5月8日

第一步:手选图片
目的:蒙德里安(大小不规律格子)白色 7款大小-
作者:AI对话大师
时间:2024年9月28日
'''

from PIL import Image, ImageDraw
import random,os


N=['小正方','长条','半竖','半横','全竖','全横','全正']
print(len(N))
l=[[1500,1500],[2900,500],[1500,2100],[2100,1500],[2100,2900],[2900,2100],[2100,2100]]
# # 正方
# width= 1500
# height= 1500
# # 长条
# width=  2738
# height= 520
# 半竖
# width= 1500
# height= 2100
# # 半横
# width= 2100
# height= 1500
# # 全横
# width= 2970
# height= 2100
# # 全竖
# width= 2100
# height= 2970


n=2
for w in range(len(N)):


    outline_width = 30 # 外框线宽度
    for xx in range(600):
        # 创建一个新的空白图片

        # width, height = 2100, 1500
        min_rect_size = 200
        width=int(l[w][0])
        height=int(l[w][1])

        image = Image.new('RGB', (width, height), color=(255, 255, 255))
        draw = ImageDraw.Draw(image)

        # 已放置的矩形列表
        placed_rects = []

        # 尝试放置多个不重叠的矩形
        num_rects = n # 尝试放置的矩形数量
        # 控制3个红、3个黄、3个蓝、3个黑
        colors = [(255, 255, 255)]    # 白色
        # colors = [(255, 0, 0), (255, 255, 0), (0, 0, 255), (0, 0, 0),(255, 255, 255)]  # 颜色列表


        # 左上角向左 左下角向左
        def extend_line_to_boundary_left(start_x, start_y, direction_x, stop_color):
            x = start_x
            y = start_y
            while 0 <= x <= width and image.getpixel((x, y)) != stop_color:
                x += direction_x
            return x

        # 右上角向右 右下角向右
        def extend_line_to_boundary_right(start_x, start_y, direction_x, stop_color, width, image):
            x = start_x
            y = start_y
            while 0 <= x < width and image.getpixel((x, y)) != stop_color:
                x += direction_x
            return x

        # 左上角向上 右上角向上
        def extend_line_to_boundary_up(start_x, start_y, direction_y, stop_color, height, draw):
            x = start_x
            y = start_y
            while 0 <= y < height:
                try:
                    if draw.getpixel((x, y)) == stop_color:
                        break
                except IndexError:
                    break
                y += direction_y
            return y

        # 左下角向下 右下角向下
        def extend_line_to_boundary_down(start_x, start_y, direction_y, stop_color, height, draw):
            x = start_x
            y = start_y
            while 0 <= y < height:
                try:
                    if draw.getpixel((x, y)) == stop_color:
                        break
                except IndexError:
                    break
                y += direction_y
            return y

        for _ in range(num_rects):
            success = False
            while not success:

                # 随机生成矩形位置和大小
                left = random.randint(0, width - min_rect_size)
                top = random.randint(0, height - min_rect_size)
                # right = left + random.randint(min_rect_size, width - left)
                # bottom = top + random.randint(min_rect_size, height - top)
                right = left + random.randint(min_rect_size, width - left)
                bottom = top + random.randint(min_rect_size, height - top)

                # max_rect_size

                # 检查新矩形是否与已放置的矩形重叠
                for rect in placed_rects:
                    if left < rect[2] and right > rect[0] and top < rect[3] and bottom > rect[1]:
                        # 如果重叠,则重新生成新的矩形位置和大小
                        break
                else:
                    # 如果没有重叠,则绘制矩形并添加到已放置的矩形列表
                    color = random.choice(colors)  # 随机选择颜色里的一个白色

                    outline_color = (0, 0, 0)  # 外框线颜色为黑色

                    draw.rectangle([(left, top), (right, bottom)], fill=color, outline=(0, 0, 0),width=outline_width)
                    placed_rects.append((left, top, right, bottom))
                    success = True

                    # 延长矩形边界至画布边框
                    # 延长矩形边界至画布边框
                    # draw.line([(left, top), (0, top)], fill=outline_color, width=outline_width)
                    # draw.line([(right, top), (width, top)], fill=outline_color, width=outline_width)
                    # draw.line([(right, bottom), (width, bottom)], fill=outline_color, width=outline_width)
                    # draw.line([(left, bottom), (0, bottom)], fill=outline_color, width=outline_width)
                    # draw.line([(left, top), (left, 0)], fill=outline_color, width=outline_width)
                    # draw.line([(right, top), (right, 0)], fill=outline_color, width=outline_width)
                    # draw.line([(right, bottom), (right, height)], fill=outline_color, width=outline_width)
                    # draw.line([(left, bottom), (left, height)], fill=outline_color, width=outline_width)


                    # 检测矩形左下角的坐标(left-1、bottom-15),向下垂直延伸画一根黑色线条
                    y = extend_line_to_boundary_down(left - 1, bottom - 15, 1, outline_color, height, image)
                    draw.line([(left + 15, bottom - 15), (left + 15, y)], fill=outline_color, width=outline_width)


                    #  # 检测矩形左上角的坐标(left-1、top+15),向上垂直延伸画一根黑色线条
                    y = extend_line_to_boundary_up(left-1, top+15, -1, outline_color, height, image)
                    draw.line([(left +15, top + 15), (left +15, y)], fill=outline_color, width=outline_width)

                    # 检测矩形左上角的坐标(left-1、top+15),向左侧水平延伸画一根黑色线条
                    x = extend_line_to_boundary_left(left -1, top + 15, -1, outline_color)
                    draw.line([(left - 1, top + 15), (x, top + 15)], fill=outline_color, width=outline_width)

                    # 检测矩形右上角的坐标(right+1、top+15),向上垂直延伸画一根黑色线条
                    y = extend_line_to_boundary_up(right + 1, top + 15, -1, outline_color, height, image)
                    draw.line([(right -15, top + 15), (right -15, y)], fill=outline_color, width=outline_width)

                    # 检测矩形左下角的坐标(left-1、top+15),向左侧水平延伸画一根黑色线条
                    x = extend_line_to_boundary_left(left -1, bottom - 15, -1, outline_color)
                    draw.line([(left - 1, bottom - 15), (x, bottom - 15)], fill=outline_color, width=outline_width)

                # # 检测矩形右上角的坐标(right+1、top+15),向右侧水平延伸画一根黑色线条

                #      # 检测矩形左下角的坐标(left-1、bottom-15),向下垂直延伸画一根黑色线条
                #     y = extend_line_to_boundary_down(left - 1, bottom - 15, 1, outline_color, height, image)
                #     draw.line([(left + 15, bottom - 15), (left + 15, y)], fill=outline_color, width=outline_width)

                    x = extend_line_to_boundary_right(right + 1, top + 15, 1, outline_color, width, image)
                    draw.line([(right + 1, top + 15), (x, top + 15)], fill=outline_color, width=outline_width)

                    # 检测矩形右下角的坐标(right+1、bottom-15),向下垂直延伸画一根黑色线条
                    y = extend_line_to_boundary_down(right + 1, bottom - 15, 1, outline_color, height, image)
                    draw.line([(right - 15, bottom - 15), (right - 15, y)], fill=outline_color, width=outline_width)

                    # 检测矩形右下角的坐标(right+1、top+15),向右侧水平延伸画一根黑色线条
                    x = extend_line_to_boundary_right(right + 1, bottom - 15, 1, outline_color, width, image)
                    draw.line([(right + 1, bottom - 15), (x, bottom - 15)], fill=outline_color, width=outline_width)

        # 显示图片(如果你使用的是图形界面环境)
        # image.show()
        path=r'C:\Users\jg2yXRZ\OneDrive\桌面\蒙德里安1000张挑选\01一千张原始图需要挑选'
        new_path=path+fr'\{N[w]}'
        os.makedirs(new_path,exist_ok=True)
        image.save(new_path+fr'\{xx:05d}.png')
生成了7种不同尺寸的黑白格子图


手动挑选适合涂色的画面
1、靠四条边上不能有线条(插入word模板,有黑色边框会导致线条加粗)
2、格子不能太大或太小(涂色面积大,费劲))

挑选后,不要图片都删除

500张图挑选出平均生成40张图


 我想每种凑100张,所以再生成一次600张


花了一个下午把所有图片都挑选到100张,
感觉这样太累了,还是要在写代码的时候,就控制好两个正方形的位置,不让它太靠近画布的边缘,让两个正方形位置靠近一点。
第二步:给每张图片左上角画“学号框”

'''
第二步
蒙德里安黑白格子画-7款大小图片批量插入学号框
星火讯飞、阿夏
20240928
'''

from PIL import Image, ImageDraw
import os,time
import shutil

N=['小正方','长条','半竖','半横','全竖','全横','全正']

# 图片文件夹路径
path =r'C:\Users\jg2yXRZ\OneDrive\桌面\蒙德里安1000张挑选'
folder_path=path+r'\01一千张原始图需要挑选'

import shutil

folder_path = path+r'\01一千张原始图需要挑选'
new_path = path+r'\02挑选后添加学号'
# 复制一份
if not os.path.exists(new_path):
    shutil.copytree(folder_path, new_path)

time.sleep(1)

# import os
# from PIL import Image

import os
import glob

root_folder = new_path
image_extensions = ['*.jpg', '*.jpeg', '*.png', '*.gif']
images = []

for folder in os.listdir(root_folder):
    print(folder)    # 全横
    select_folder = os.path.join(root_folder, folder, '挑选')
    print(select_folder)
    # C:\Users\jg2yXRZ\OneDrive\桌面\蒙德里安1000张挑选\02挑选后添加学号\长条\选择
    for f in os.listdir(select_folder):
        # for ext in image_extensions:
            # images.extend(glob.glob(os.path.join(select_folder, ext)))
        image_path_all=os.path.join(select_folder, f)


        image_path = os.path.join(image_path_all)
        image = Image.open(image_path)
        draw = ImageDraw.Draw(image)

        # 定义边框宽度和颜色
        border_width = 3
        border_color = (180, 180, 180)  # 黑色

        # 定义填充颜色
        fill_color = (255, 255, 255)  # 白色

        # 插入边框和填充正方形
        x = 10
        y = 10
        size = 200
        draw.rectangle([(x, y), (x + size, y + size)], fill=fill_color, outline=border_color, width=border_width)

        # 保存修改后的图片
        new_image_path = os.path.join(image_path_all)
        image.save(new_image_path)
本代码把“01一千张文件夹”复制一份变成“02挑选后”

然后把02里面的所有图片左上角加上学号框
长方1

长方2

正方

长条

左上角的学号都定好了,起到图纸方向定位的作用(不过孩子操作时,会把纸张旋转各种角度涂色,学号会在格子的左或右侧,算了,只要有学号,能便于区分物主就可以了)
第三步:”不同文件大小对应不同的word模板
 七个文件夹图片对应用七个word模版

边框6磅


代码展示(生成时长很长)
'''
第三步
蒙德里安黑白格子画-7款大小图片批量插入word,制作PDF,并打包
星火讯飞、阿夏
20240928

'''
import glob
import shutil
from docx import Document
import os,time,random
from docx import Document
from docx.shared import Cm
from docx2pdf import convert
from PyPDF2 import PdfMerger
from datetime import datetime
from PIL import Image, ImageDraw

# 图片文件夹路径
path =r'C:\Users\jg2yXRZ\OneDrive\桌面\蒙德里安1000张挑选'
folder_path=path+r'\02挑选后添加学号'

N=['小正方','长条','半竖','半横','全竖','全横','全正']

root_folder = folder_path

ordered_select_folders = [os.path.join(root_folder, folder, '挑选') for folder in os.listdir(root_folder)]
# print(ordered_select_folders)
# print(len(ordered_select_folders))

# 按照N的顺序重新排列select_folders
select_folders = sorted(ordered_select_folders, key=lambda x: N.index(x.split('\\')[-2]))
# print(select_folders)

# 尺寸
s=[['13.9','13.9'],['27.38','5.2'],['13.69','19.1'],['19.1','13.69'],['19.25','27.85'],['28.30','19.10'],['19.1','19.1']]
# 格子数量
g=[2,3,2,2,1,1,1]

# 读取word文件
w=[]
r=1
for file_name in os.listdir(path):
    if file_name.startswith(f'{r:02}') and file_name.endswith('.docx'):
        file_path = os.path.join(path, file_name)
        print(file_path)
        w.append(file_path)
        r+=1
# print(w)

all_path=path+r'\03蒙德里安黑白格子精选7类各100张'
os.makedirs(all_path,exist_ok=True)

for x in range(len(select_folders)):

    # 零时文件夹存放文件
    imagePath=path+r'\ls'
    os.makedirs(imagePath,exist_ok=True)

    # 读取同一款图片
    input_path=select_folders[x]
    file_paths = [os.path.join(input_path, file) for file in os.listdir(input_path)]
    cd=len(file_paths)
    # print(file_paths)

    pic_list_six = [file_paths[i:i+g[x]] for i in range(0, len(file_paths), g[x])]
    # print(pic_list_six)
    # print(len(pic_list_six))
    # 100zhang
    # print('----3、黏贴图片卡,一页1图、1页2图 一页6图-------')

    # 处理每一组图片
    for group_index, group in enumerate(pic_list_six):
        # print(group_index)
        # # 99
        # print(group)
        # ['C:\\Users\\jg2yXRZ\\OneDrive\\桌面\\蒙德里安1000张挑选\\02挑选后添加学号\\全正\\挑选\\00596.png']

        # 创建新的Word文档
        doc = Document(w[x])

        # # 遍历每个单元格,并插入图片
        for cell_index, image_file in enumerate(group):
            # print(cell_index)
            # 表012
            # print(image_file)
            # C:\Users\jg2yXRZ\OneDrive\桌面\蒙德里安1000张挑选\02挑选后添加学号\全正\挑选\00596.png

            # 计算图片长宽(单位:厘米)
            table = doc.tables[cell_index]
            cell = table.cell(0, 0)
            cell_paragraph = cell.paragraphs[0]
            cell_paragraph.clear()
            run = cell_paragraph.add_run()

            run.add_picture(os.path.join(image_file), width=Cm(float(s[x][0])), height=Cm(float(s[x][1])))
            cell_paragraph.alignment = 1  # 设置单元格中的文本居中

        # 保存修改后的.docx文件
        doc.save(imagePath + fr'\{group_index + 1:02d}页.docx')
        # docx 文件另存为PDF文件
        inputFile = imagePath + fr'\{group_index + 1:02d}页.docx'  # 要转换的文件:已存在
        outputFile = imagePath + fr'\{group_index + 1:02d}页.pdf'  # 要生成的文件:不存在
        convert(inputFile, outputFile)
        time.sleep(0)

    pdf_lst = [f for f in os.listdir(imagePath) if f.endswith('.pdf')]
    pdf_lst = [os.path.join(imagePath, filename) for filename in pdf_lst]
    pdf_lst.sort()
    file_merger = PdfMerger()
    for pdf in pdf_lst:
        print(pdf)
        file_merger.append(pdf)
    # file_merger.write("C:/Users/jg2yXRZ/OneDrive/桌面/描字帖/(打印合集)大班A整页描字帖2乘5加表格-4名字-({}人).pdf".format(num))
    file_merger.write(all_path+fr"\{w[x][-14:-5]}(1页{g[x]}图共{int(cd/g[x])}页{cd}张).pdf")
    # 9宫格制作2图任务卡时报错,
    # time.sleep(0)
    time.sleep(1)
    # 01 06图答题卡.pdf
        # 02 06图任务卡.pdf
    file_merger.close()
        # doc.Close()

    # # print('----------第5步:删除临时文件夹------------')
    import shutil
    shutil.rmtree(imagePath) #递归删除文件夹,即:删除非空文件夹

# 打包rar(我的电脑没有装rar)
# import os
# import rarfile

# def create_rar(folder_path, rar_name):
#     # 检查文件夹是否存在
#     if not os.path.exists(folder_path):
#         print("文件夹不存在")
#         return

#     # 创建RAR文件
#     with rarfile.RarFile(rar_name, 'w') as rf:
#         for foldername, subfolders, filenames in os.walk(folder_path):
#             for filename in filenames:
#                 file_path = os.path.join(foldername, filename)
#                 rf.add(file_path, arcname=os.path.relpath(file_path, folder_path))

#     print("RAR文件已创建")

# # 调用函数,将"123"文件夹打包成"123.rar"
# create_rar(all_path, path+r"\蒙德里安黑白格子精选7类各100张.rar")


import os
import zipfile

def create_zip(input_folder, output_file):
    with zipfile.ZipFile(output_file, 'w', zipfile.ZIP_DEFLATED) as zf:
        for root, dirs, files in os.walk(input_folder):
            for file in files:
                zf.write(os.path.join(root, file), os.path.relpath(os.path.join(root, file), input_folder))

input_folder = all_path
output_file =path+r'\蒙德里安黑白格子精选7类各100张.zip'
create_zip(input_folder, output_file)
本代码是遍历每个图片文件夹,指定插入图片的尺寸、格子数,
依次读取数字开头的docx文件

运行一次时间很长,大约90分钟才全部运行完

最后7套PDF保存在03文件夹里


作品展示


还有一套zip打包,便于发货

下次再有人买这个学具,终于商品匹配了。
1000张挑选太累了,暂时100张吧(日常教学也够用了)

