Ability内页面的跳转和数据传递(router和want显/隐跳转)
目录
案例:使用router完成页面跳转
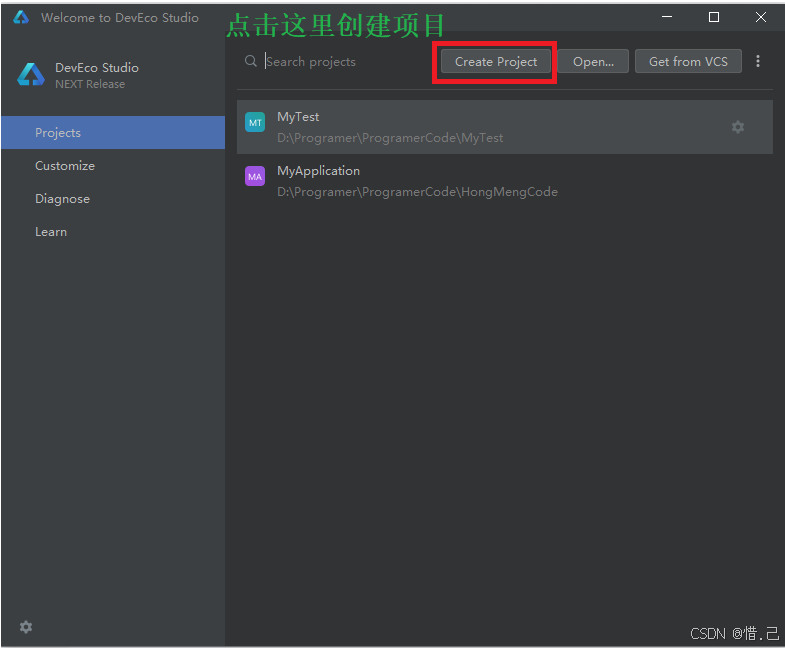
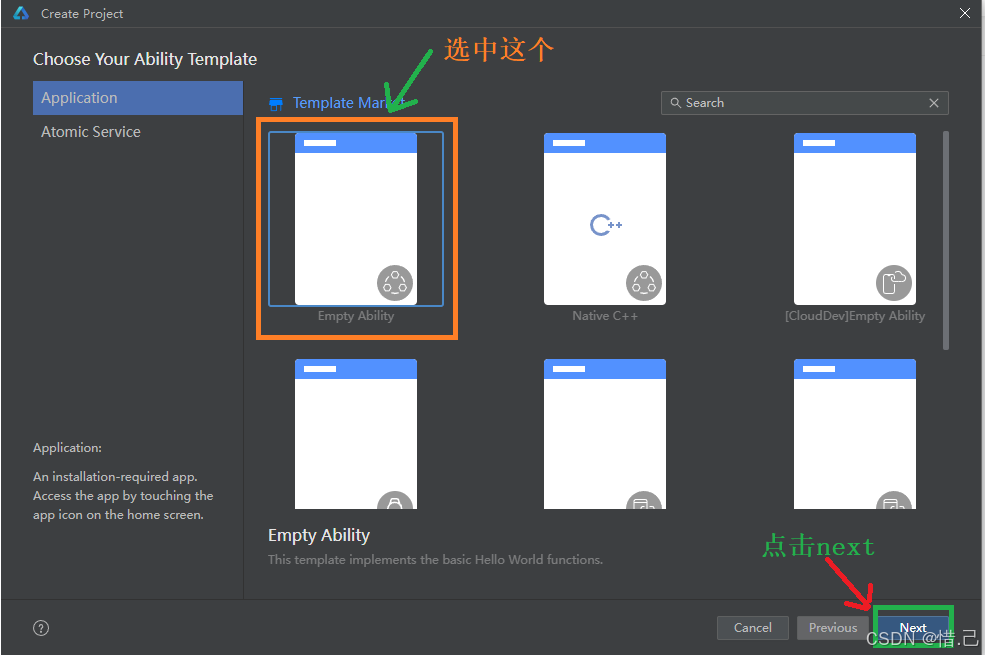
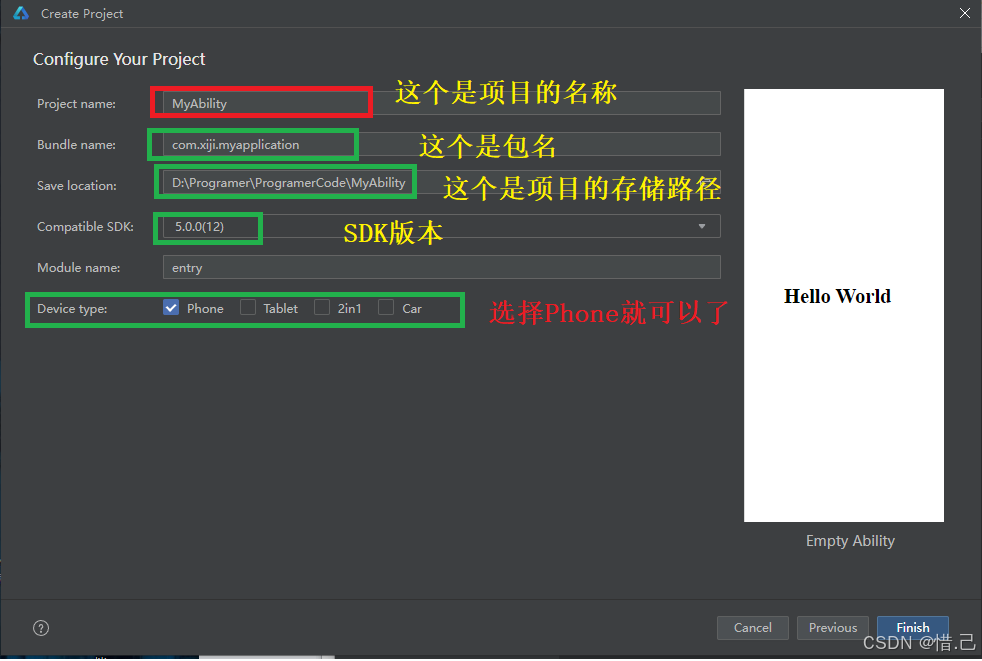
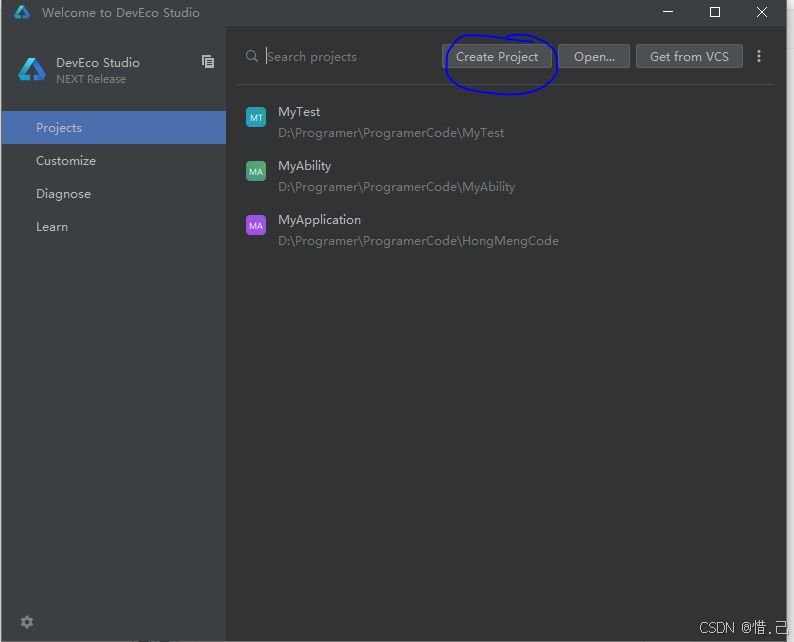
1.创建一个Arkts项目
2.创建第二个页面
3.手动创建第三个页面
4.编写跳转路由
5.编写接受路由
6.编写返回上一个页面的代码
7.第三个界面代码完善
8.效果
案例:使用want启动Ability
1.创建一个新的项目
2.创建第二个界面
3.创建一个Ability
4.修改新生成的Ability中的信息
5.编写Index.ets中的代码
6.效果图
7.编写隐式启动代码
1)编写module.json5文件
2)编写index.ets中的内容
8.隐式启动效果图
案例:使用router完成页面跳转
1.创建一个Arkts项目
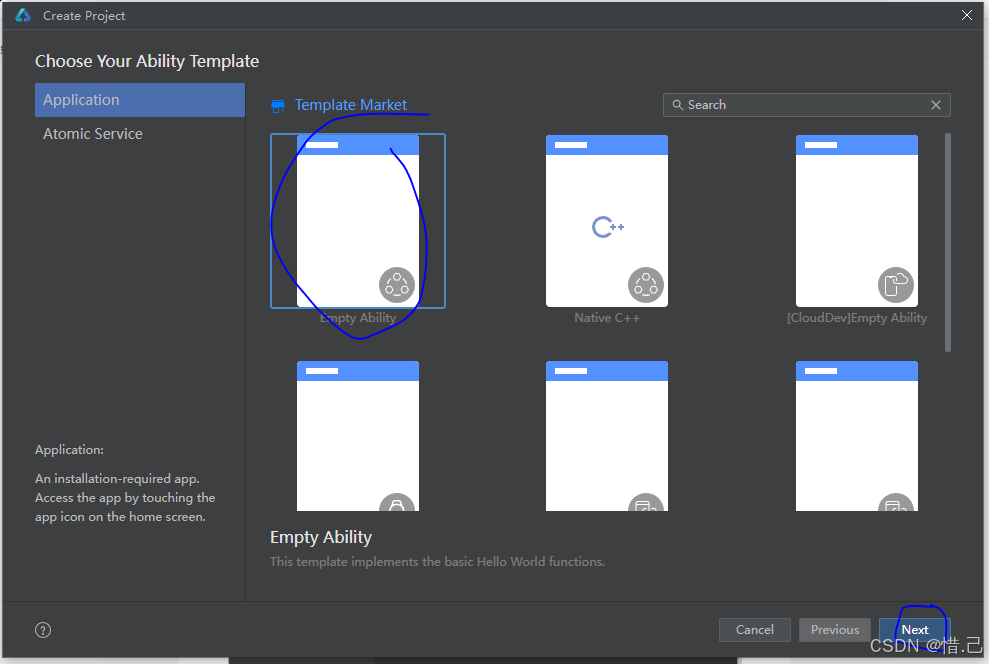
打开DevEco Studio开发工具 ====》 点击Create Project ===》创建项目
选中Empty Ability ===> 点击next ===>
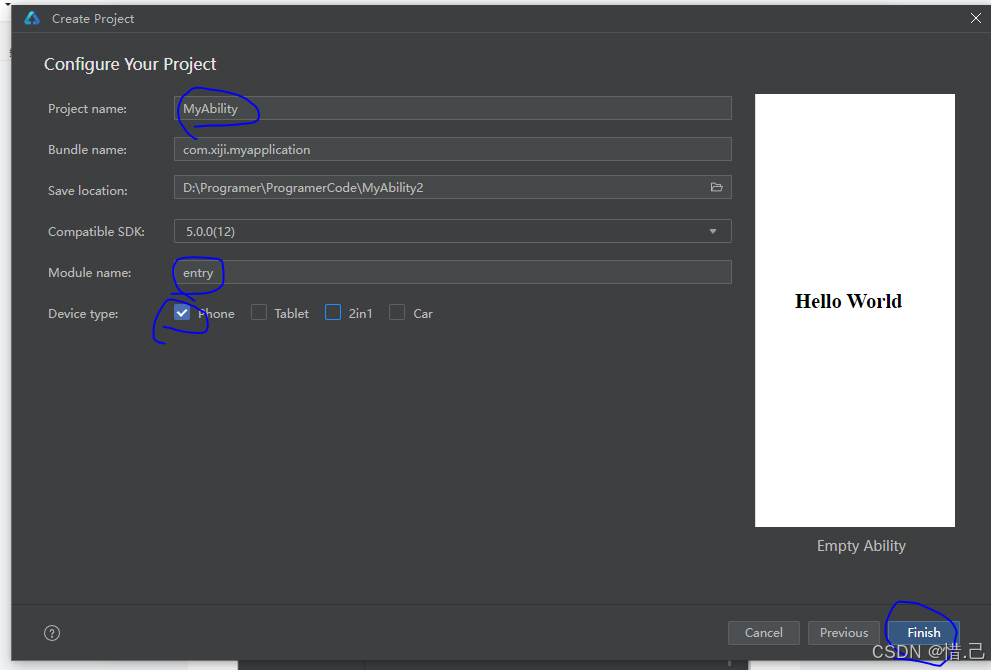
在新弹出的界面填写相关信息===》点击finsh ===>等待界面打开

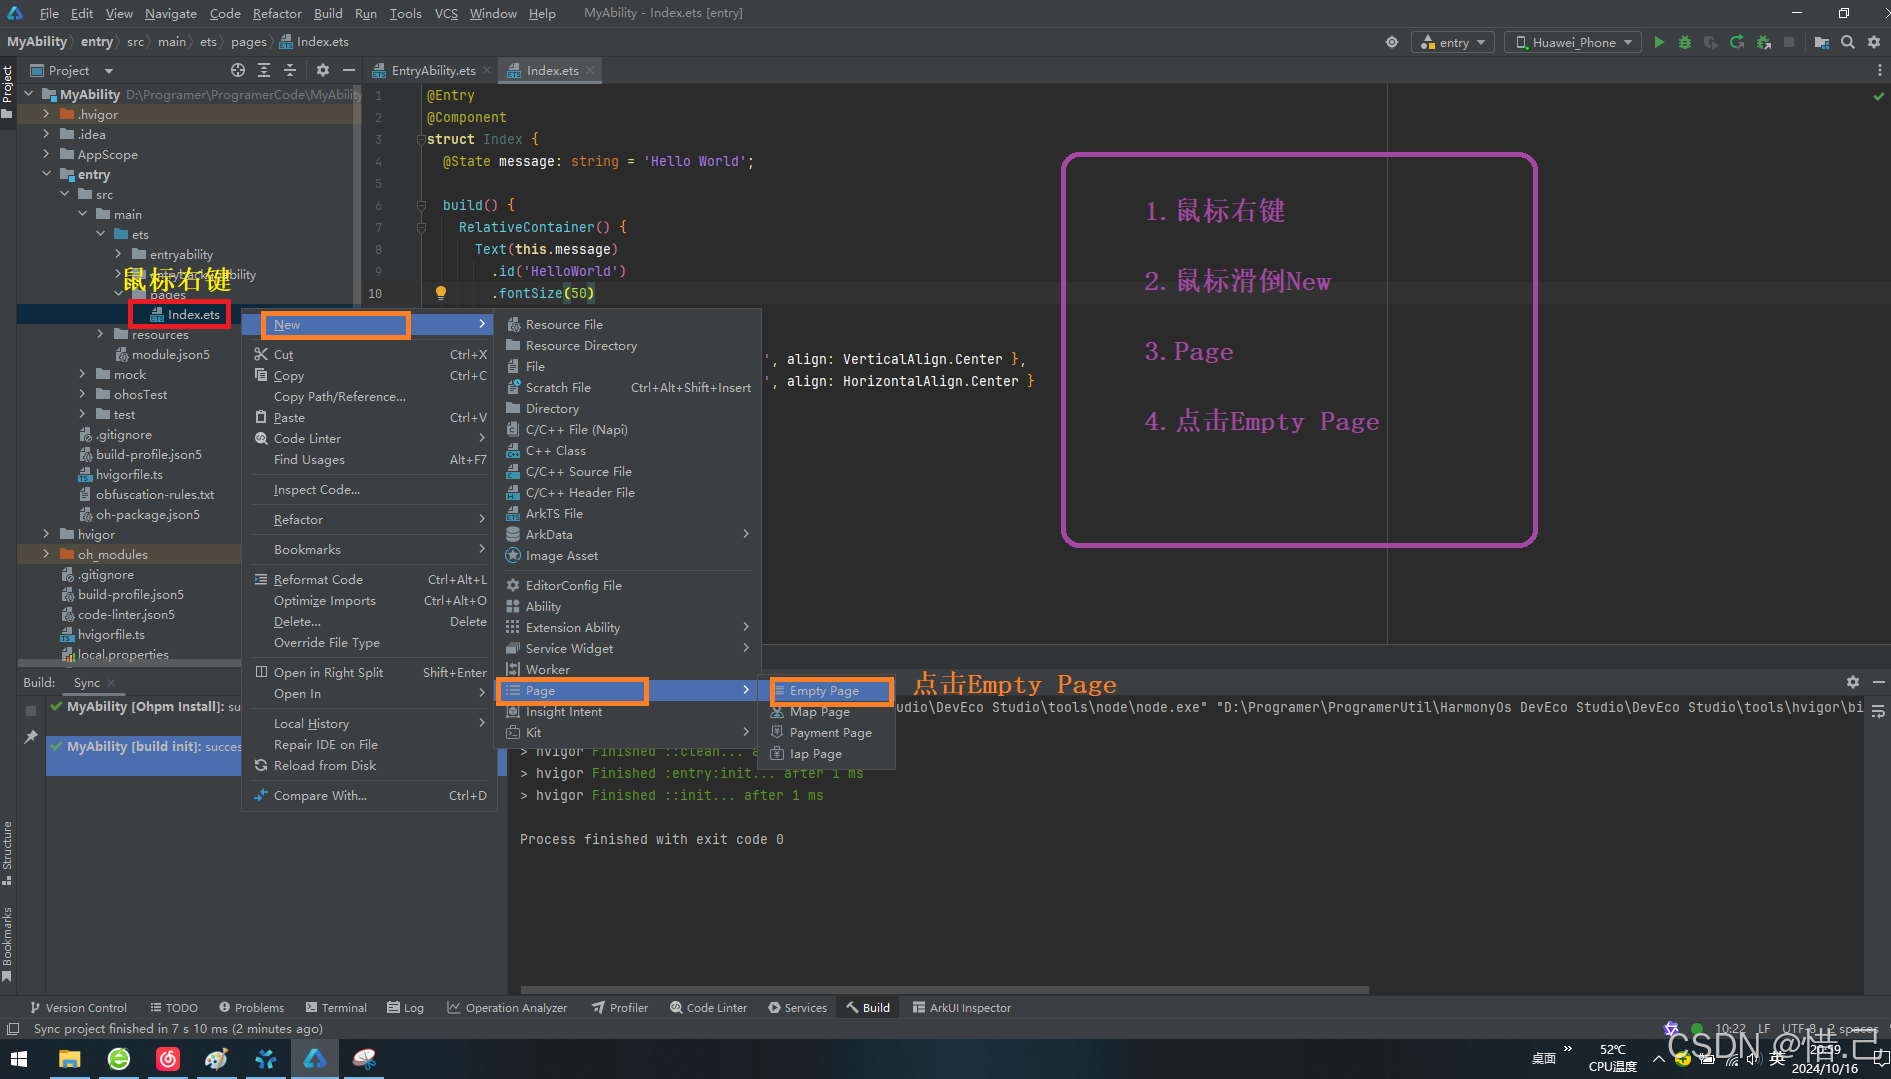
2.创建第二个页面
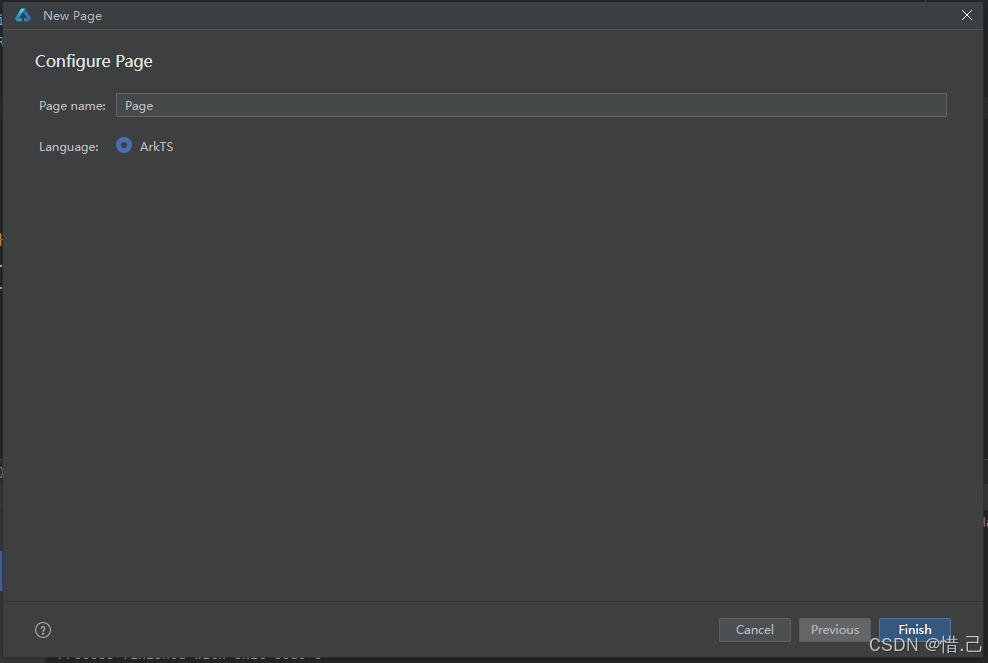
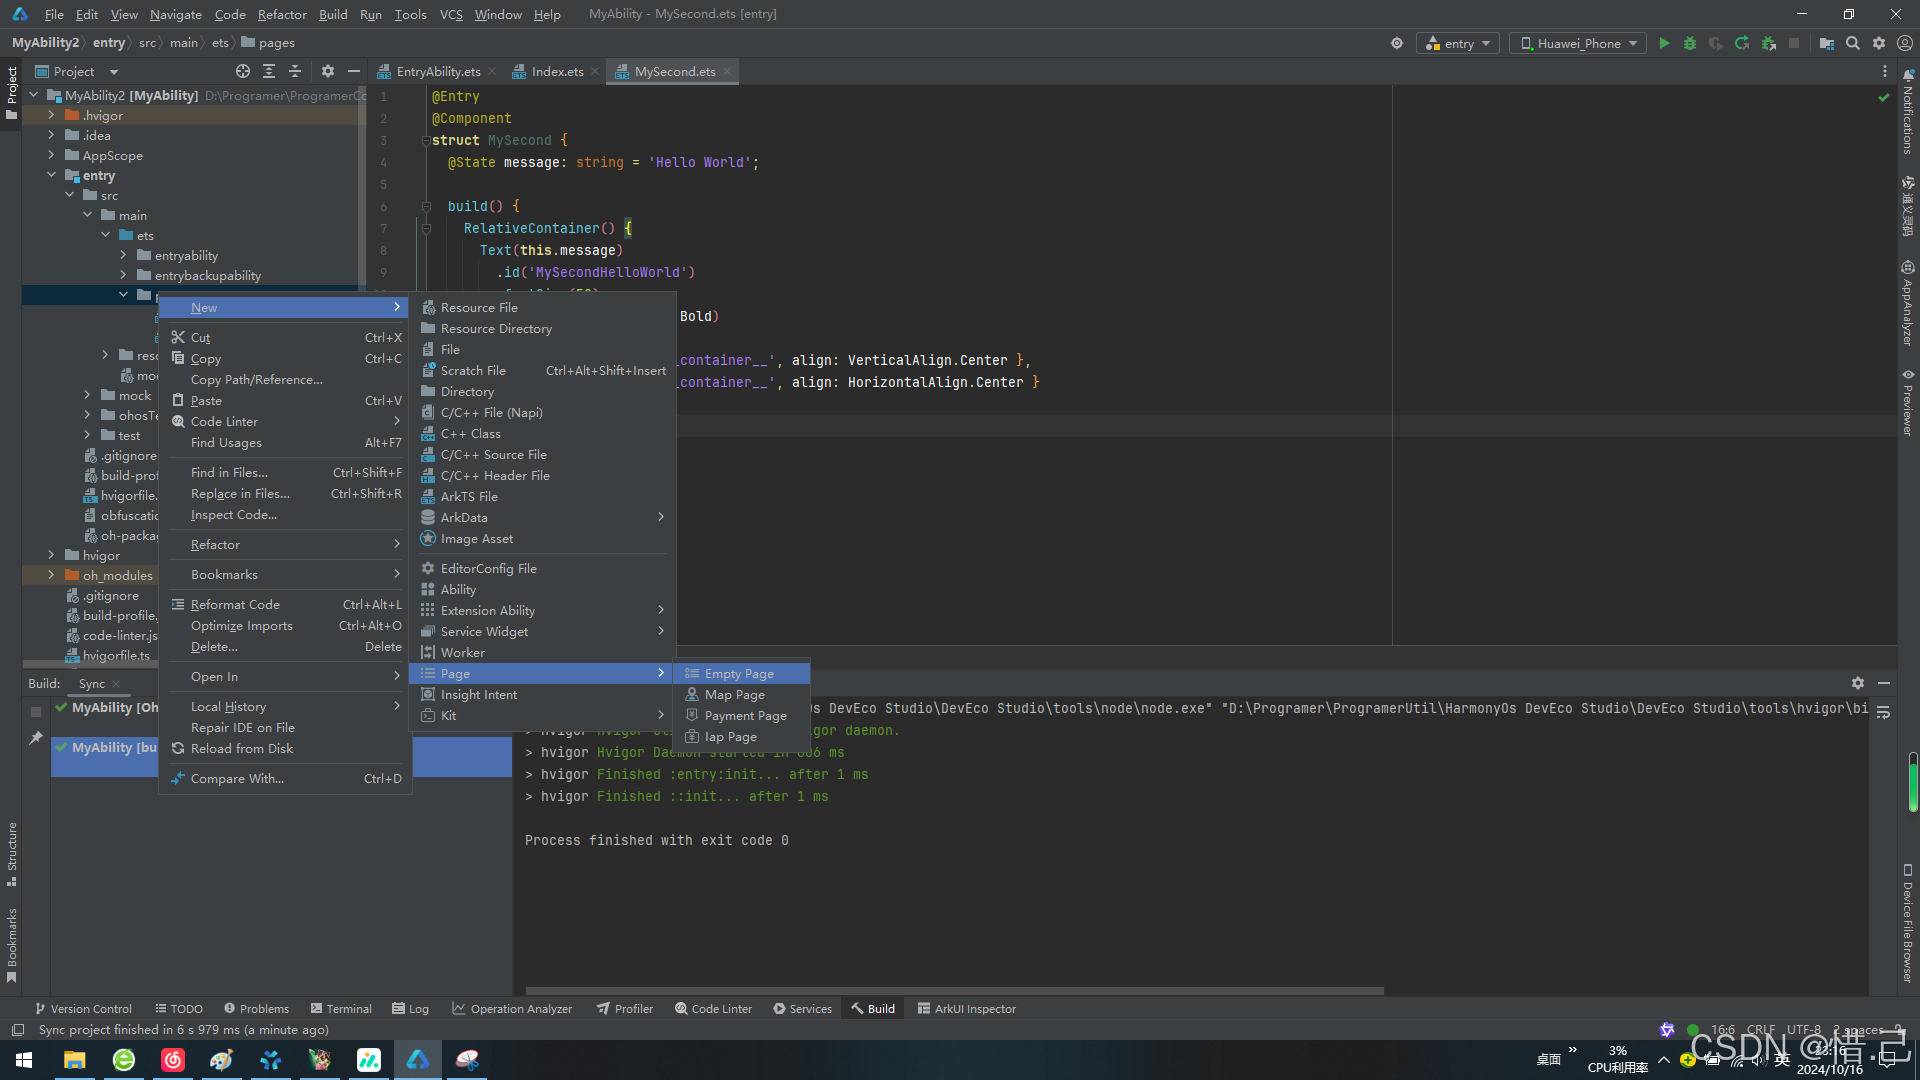
找到page ==>鼠标右键 ==》new ==> page ====>Empty View==>在新弹出的界面====》点击finsh ===>等待创建就可以了
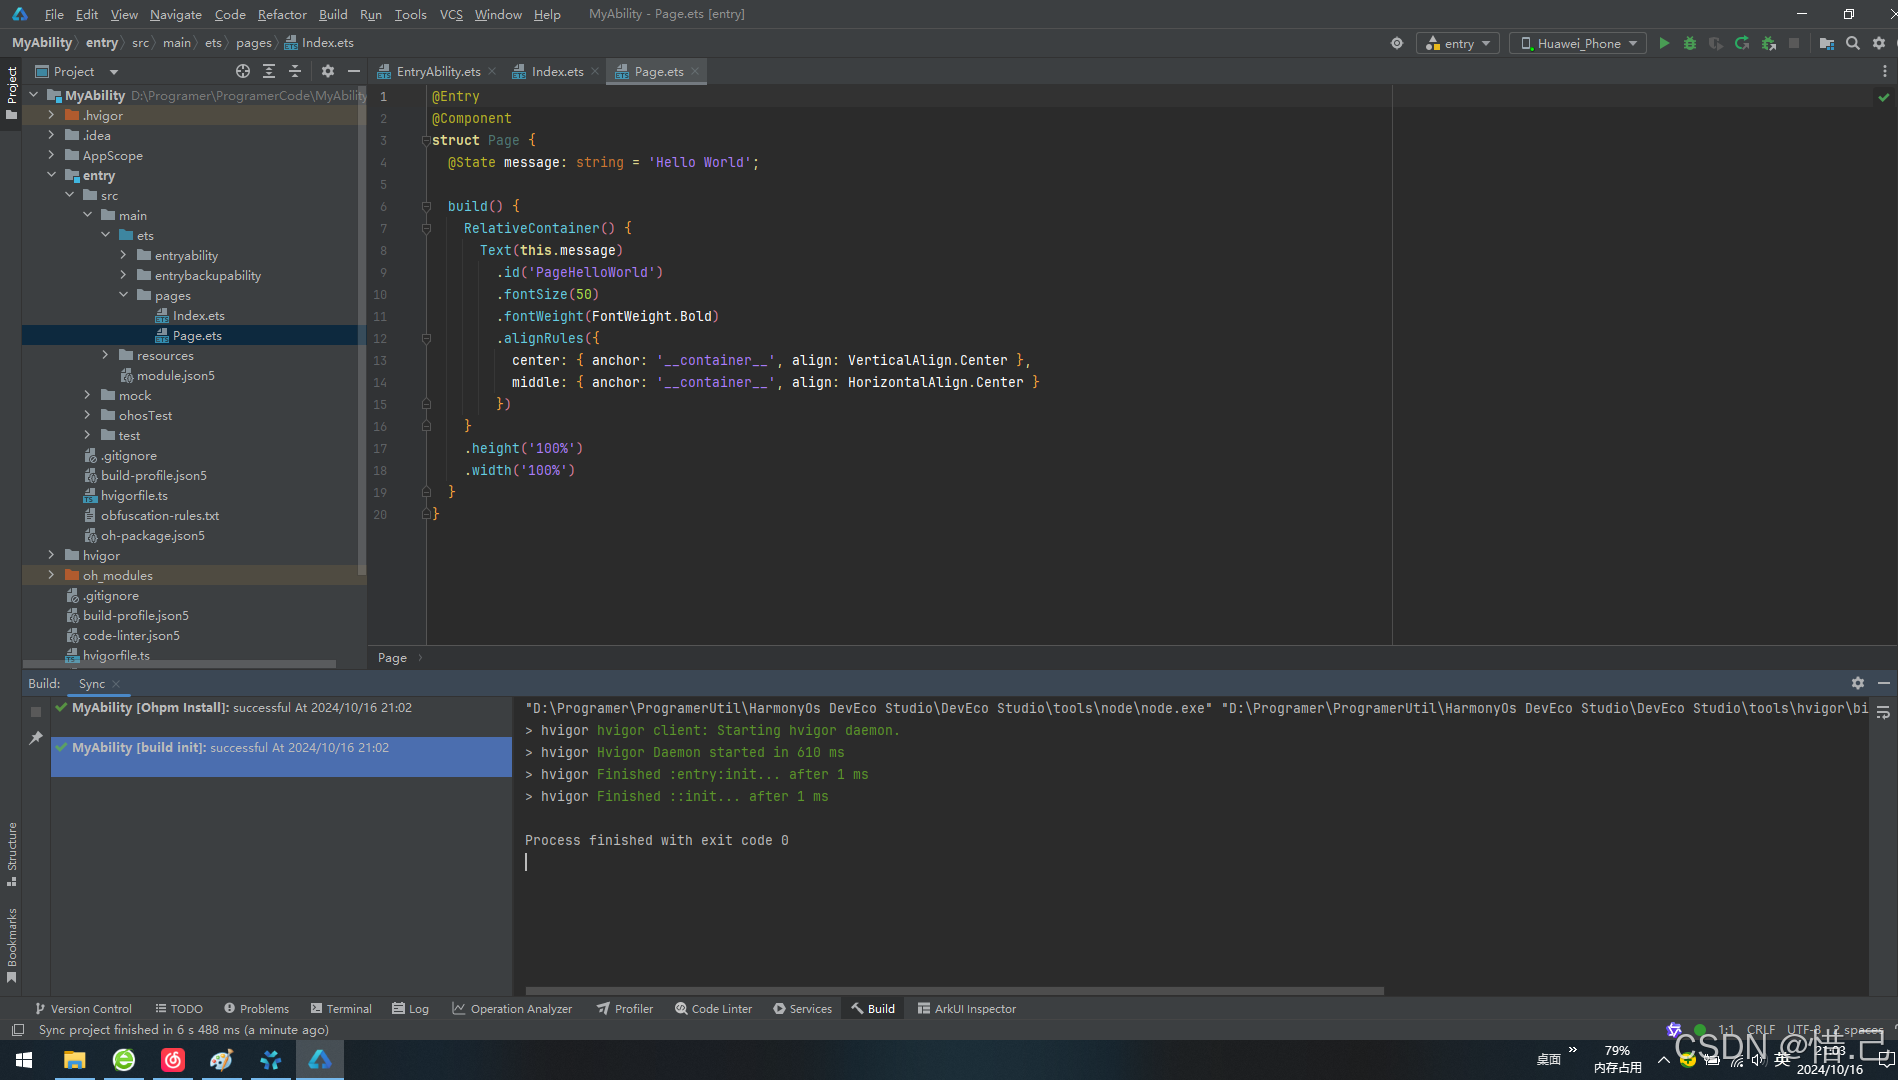
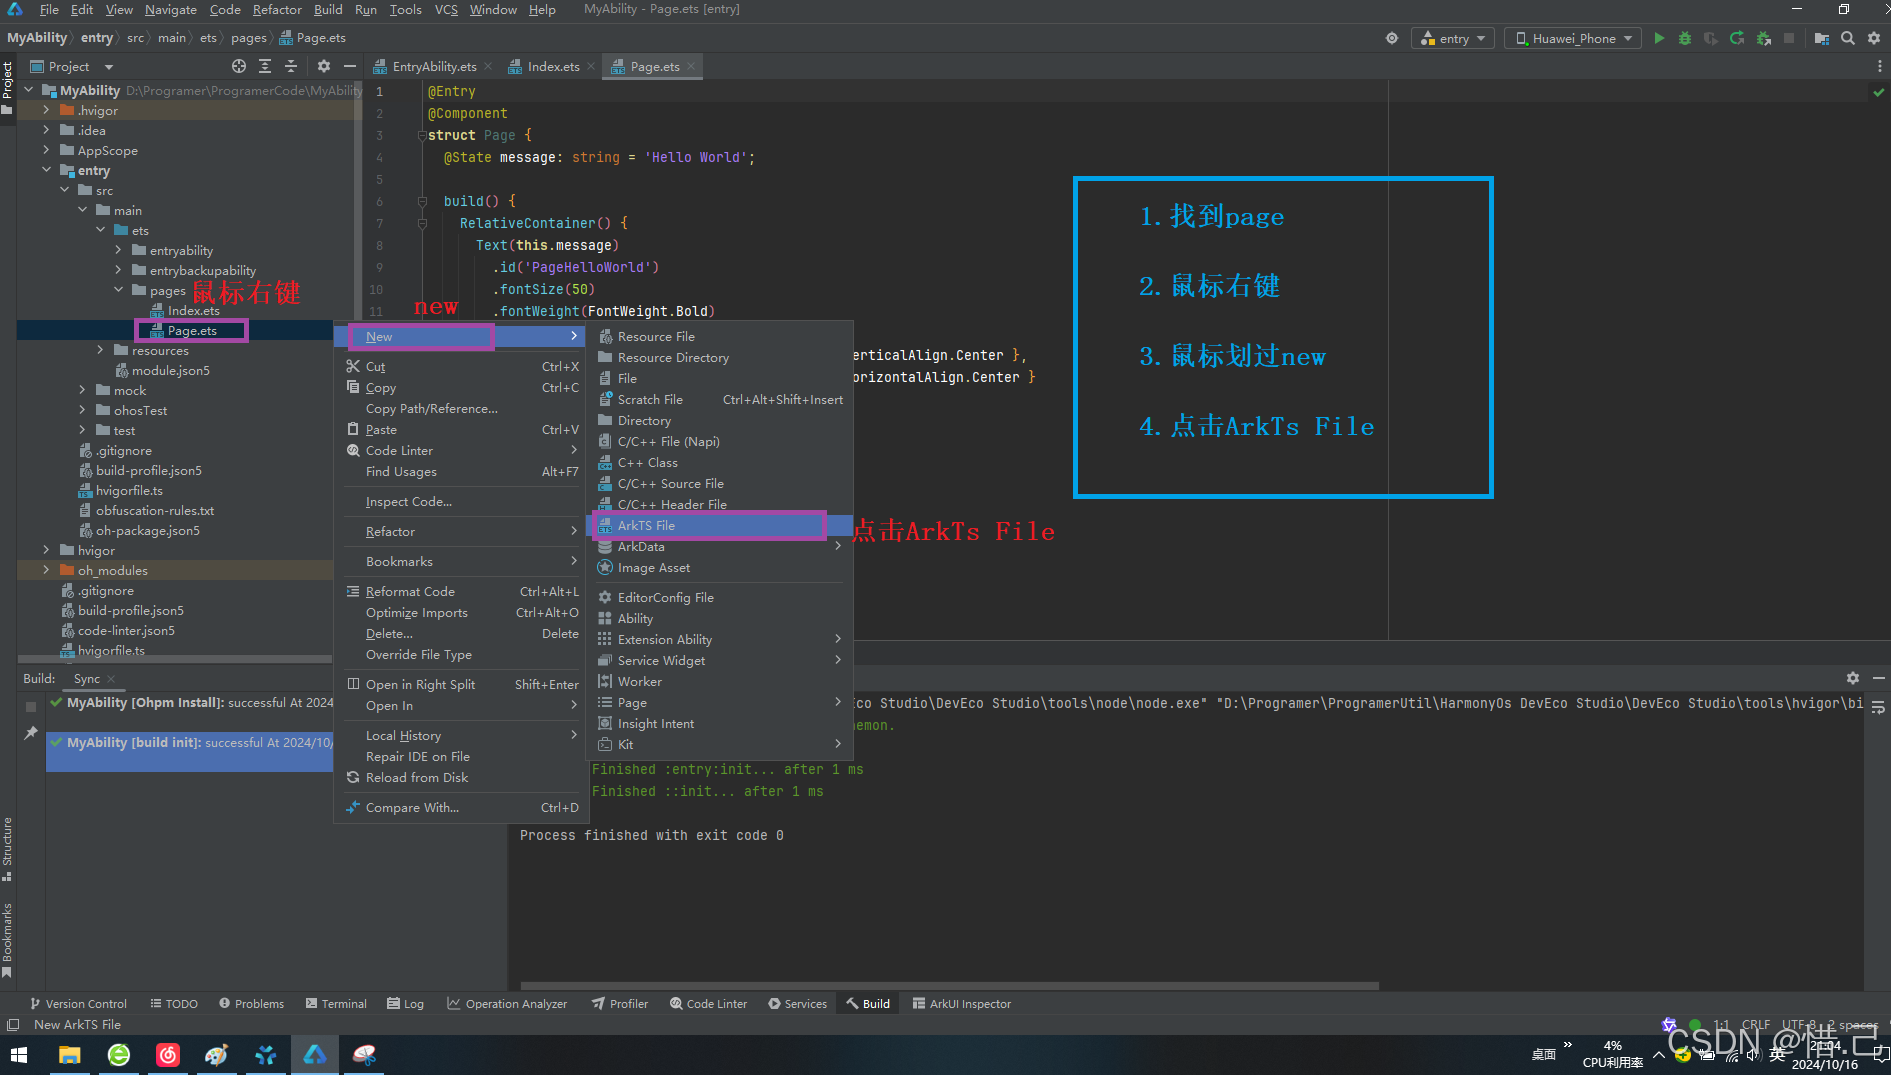
3.手动创建第三个页面
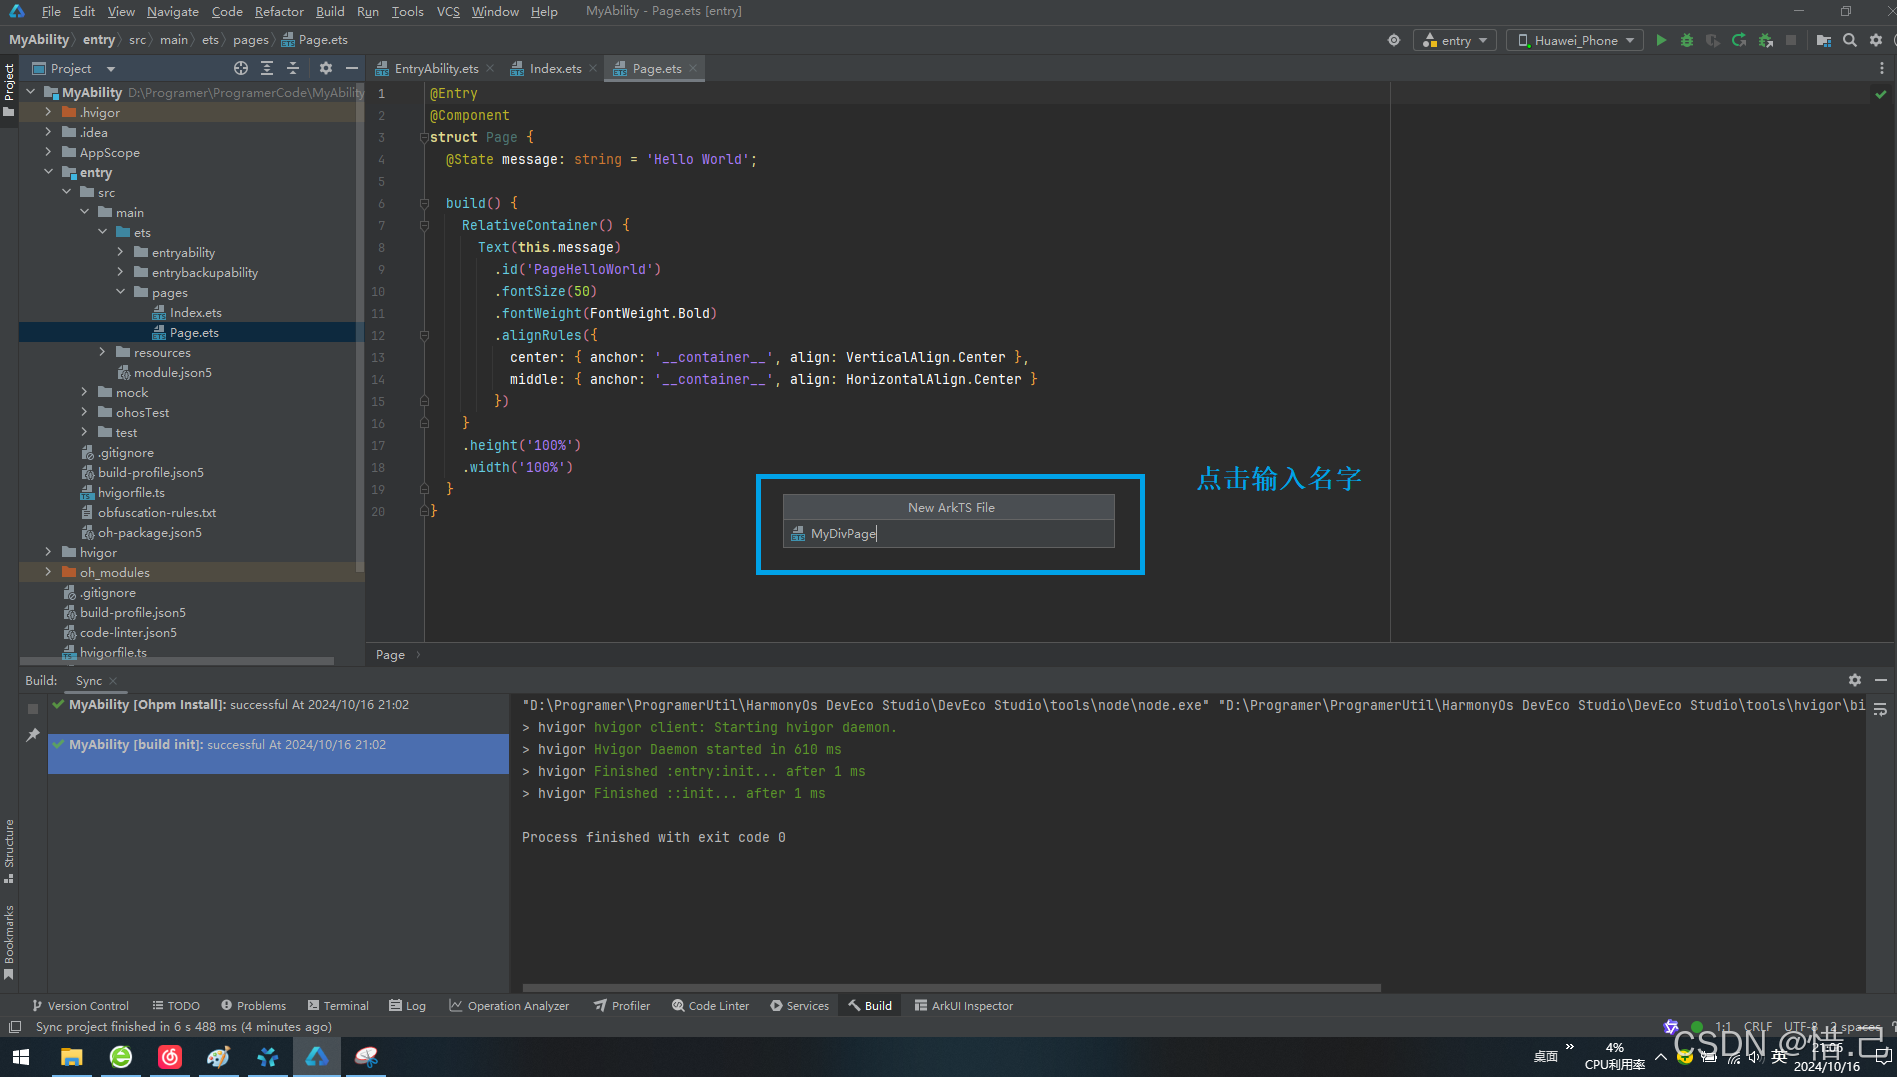
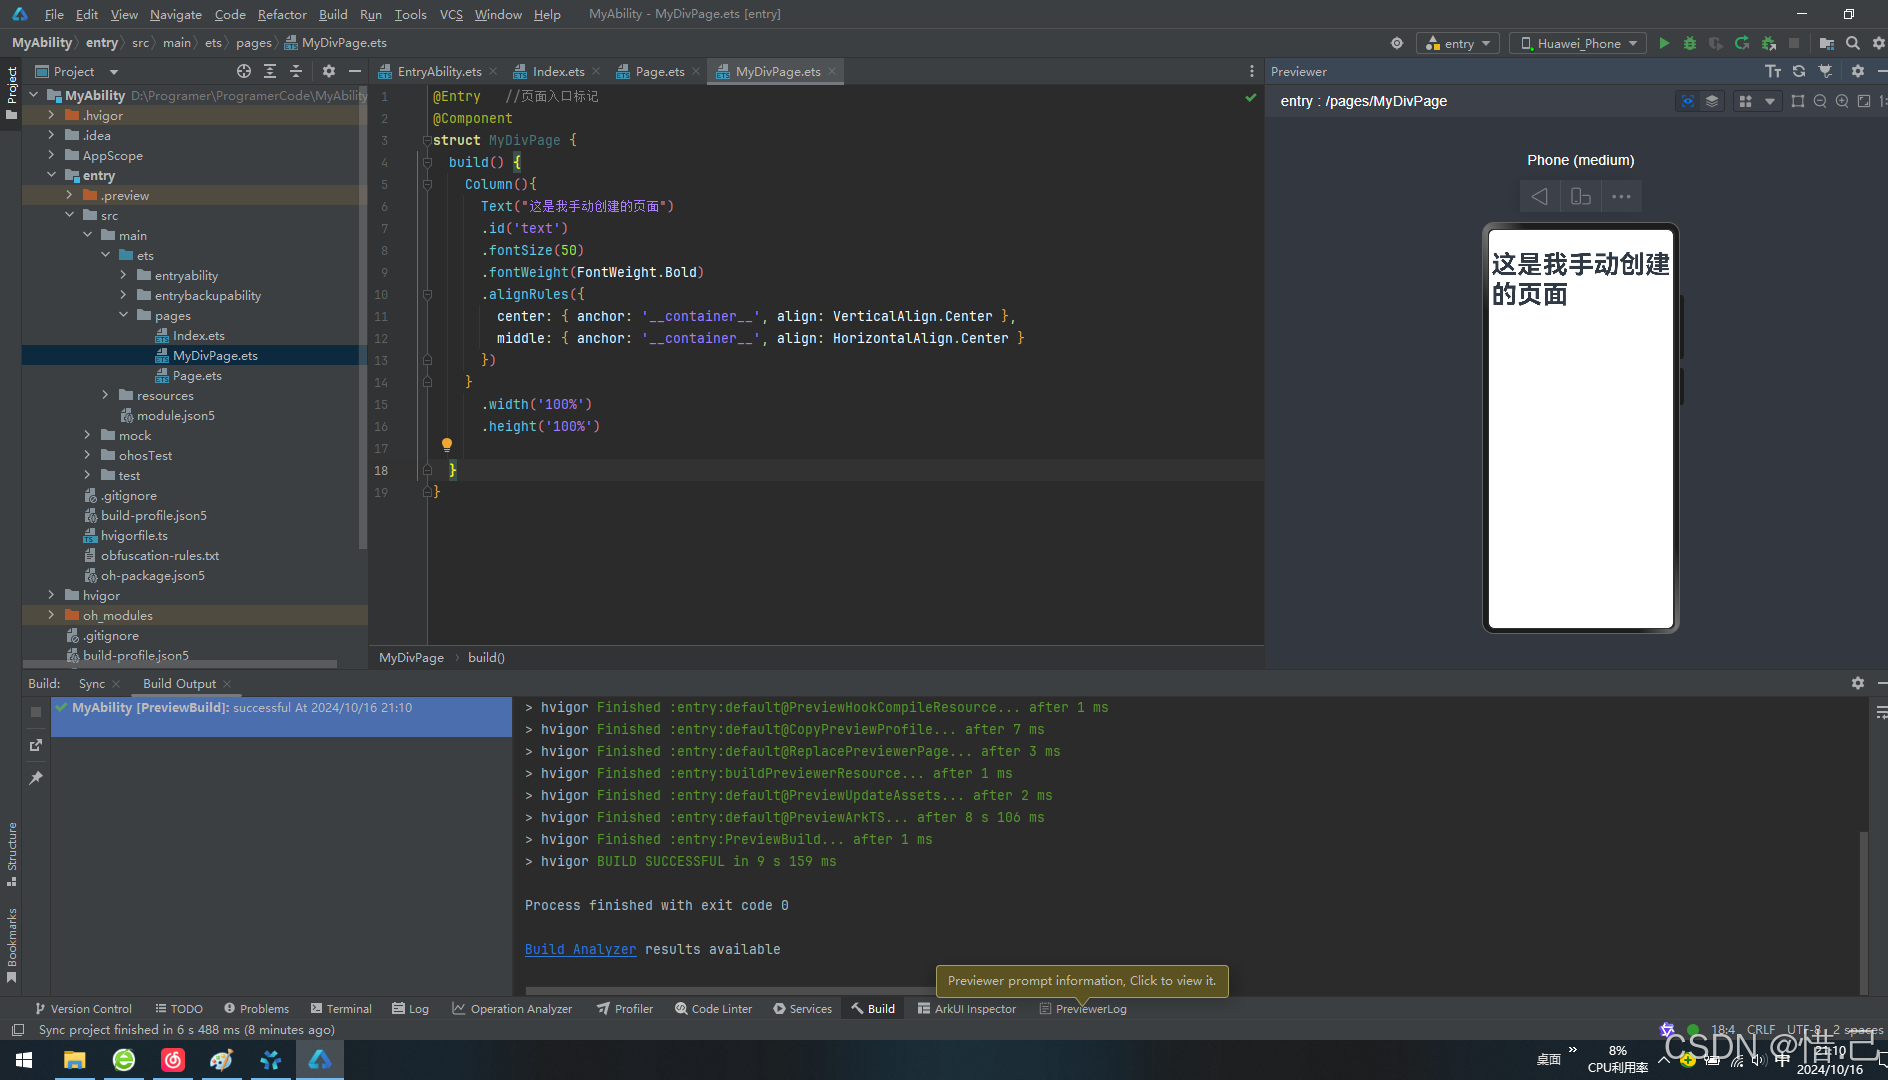
在新弹出的界面编写代码
@Entry   //页面入口标记
@Component
struct MyDivPage {
  build() {
    Column(){
      Text("这是我手动创建的页面")
      .id('text')
      .fontSize(50)
      .fontWeight(FontWeight.Bold)
      .alignRules({
        center: { anchor: '__container__', align: VerticalAlign.Center },
        middle: { anchor: '__container__', align: HorizontalAlign.Center }
      })
    }
      .width('100%')
      .height('100%')

  }
}
预览效果
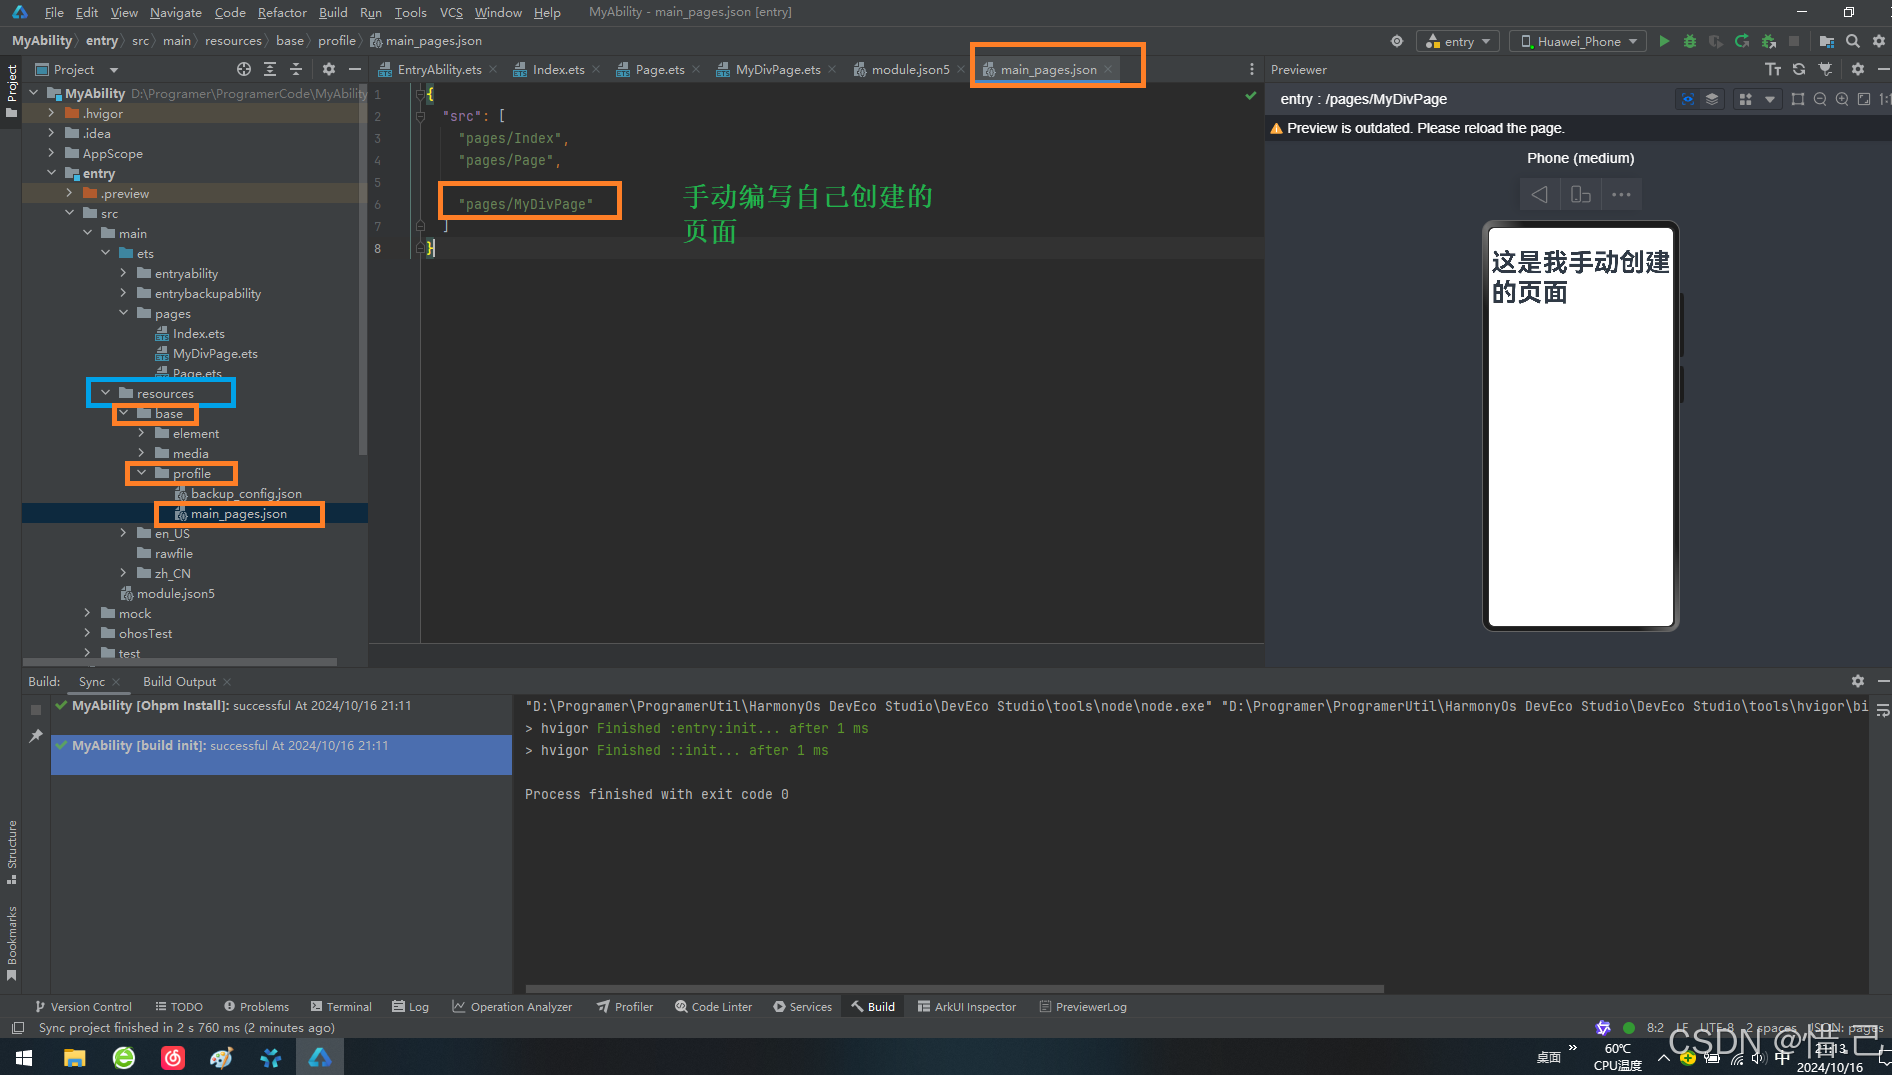
在resources ===》base ==> profile ===> 双击 main_pages.json ==>配置手动创建的页面
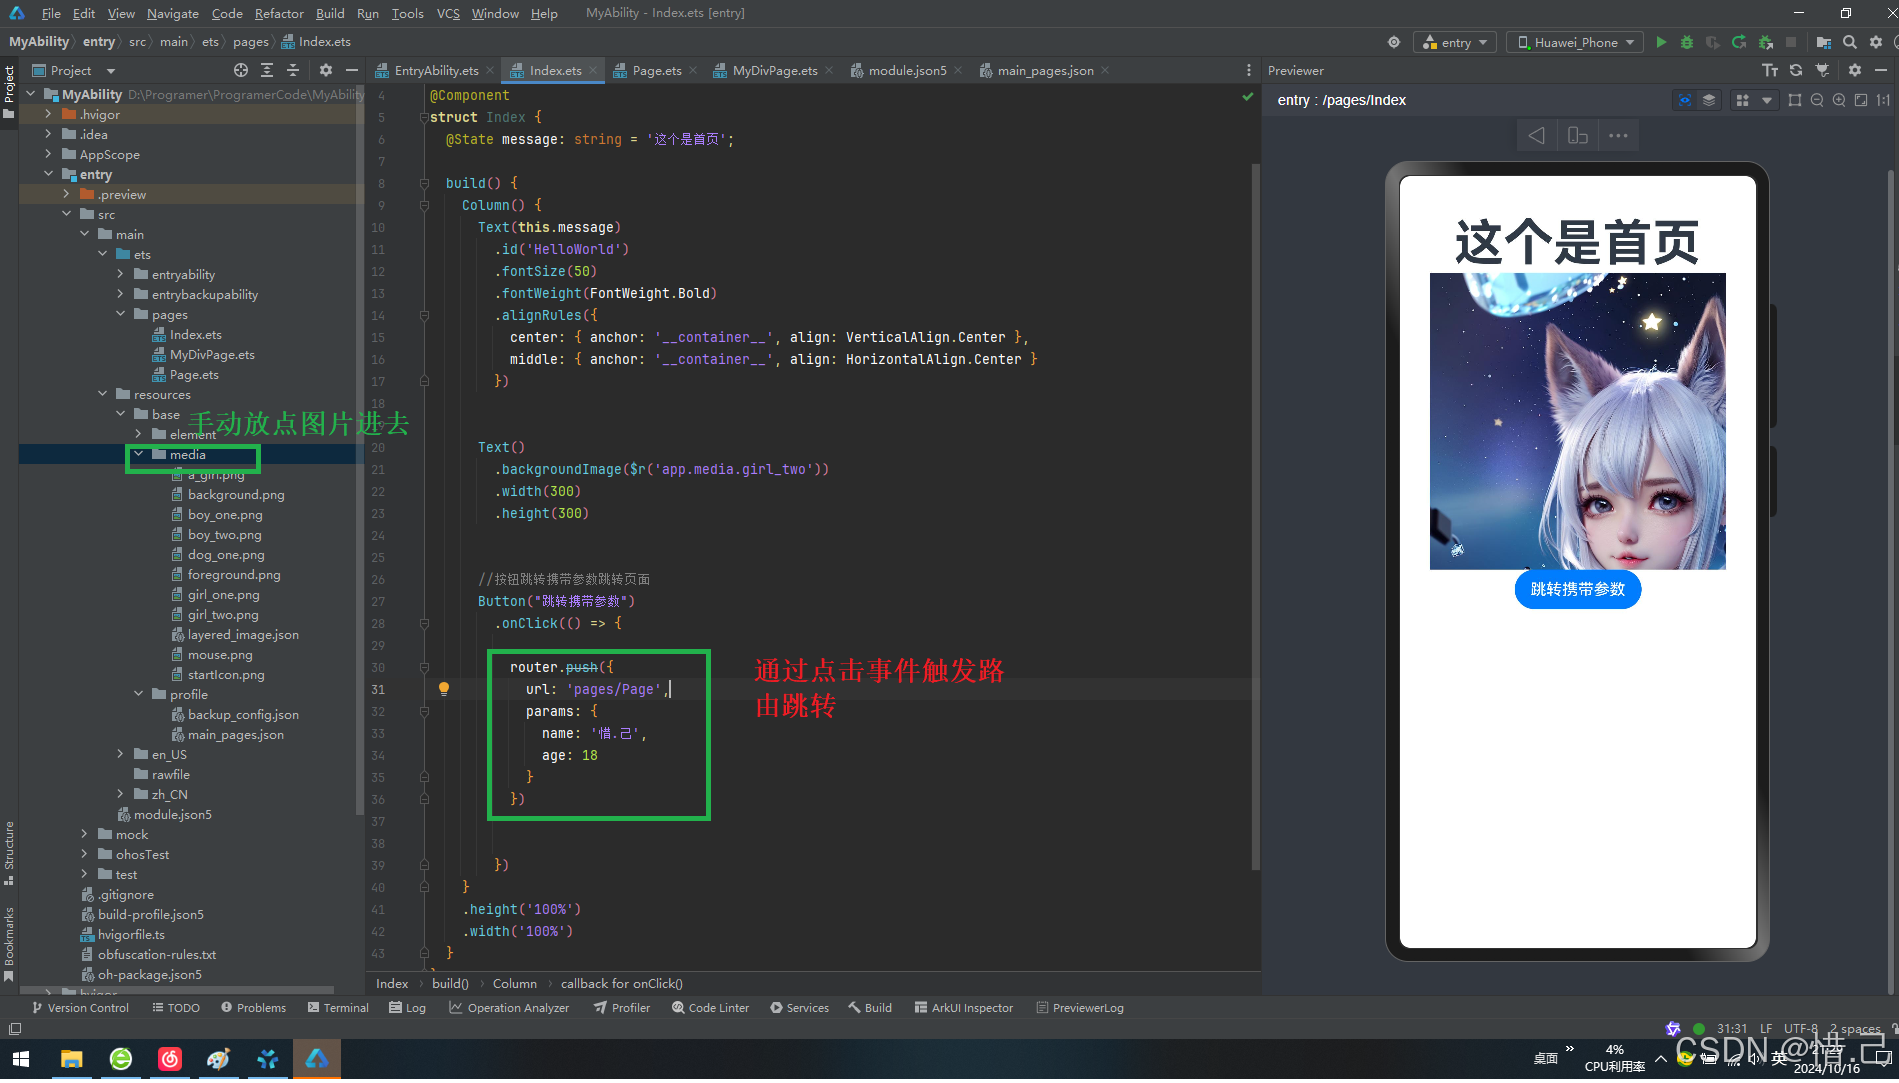
4.编写跳转路由
1--导入路由
import router from '@ohos.router';
2--编写代码
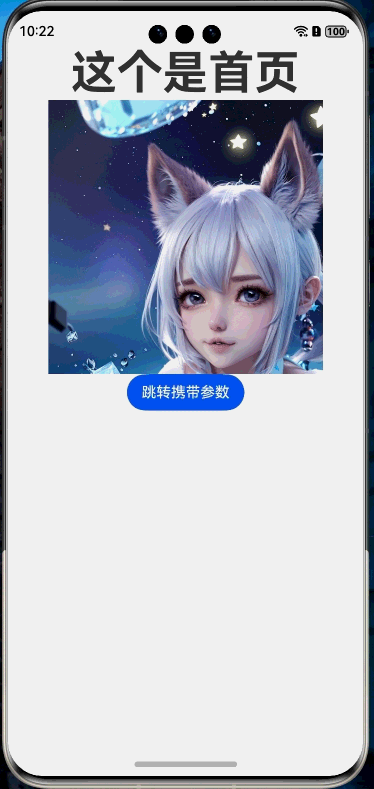
import router from '@ohos.router';

@Entry
@Component
struct Index {
  @State message: string = '这个是首页';

  build() {
    Column() {
      Text(this.message)
        .id('HelloWorld')
        .fontSize(50)
        .fontWeight(FontWeight.Bold)
        .alignRules({
          center: { anchor: '__container__', align: VerticalAlign.Center },
          middle: { anchor: '__container__', align: HorizontalAlign.Center }
        })


      Text()
        .backgroundImage($r('app.media.girl_two'))
        .width(300)
        .height(300)


      //按钮跳转携带参数跳转页面
      Button("跳转携带参数")
        .onClick(() => {

          router.push({
            url: 'pages/Page',
            params: {
              name: '惜.己',
              age: 18
            }
          })


        })
    }
    .height('100%')
    .width('100%')
  }
}
5.编写接受路由
结构对象中的参数 param['属性名']
@State params: object = router.getParams();
name: string = params[my_name]
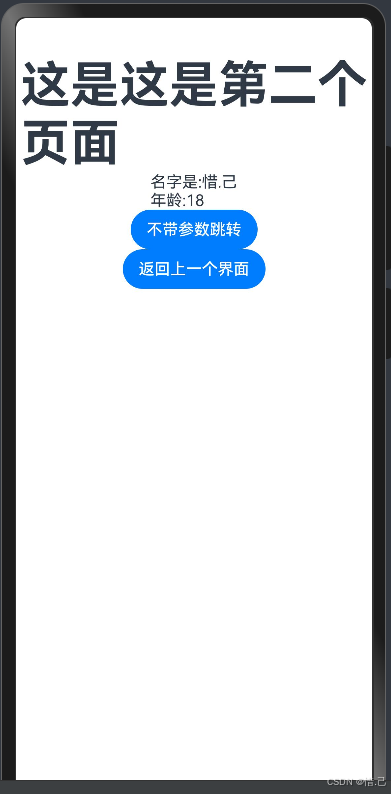
import router from '@ohos.router';

@Entry
@Component
struct Page {
  @State message: string = '这是这是第二个页面';
  //手动接受跳转过来的数据
  @State params: object =  router.getParams();


  build() {
    Column() {
      Text(this.message)
        .id('PageHelloWorld')
        .fontSize(50)
        .fontWeight(FontWeight.Bold)
        .alignRules({
          center: { anchor: '__container__', align: VerticalAlign.Center },
          middle: { anchor: '__container__', align: HorizontalAlign.Center }
        })

      Text("名字是:"+this.params['my_name']+"\n年龄:"+this.params['my_age'])
        .id('name')


      Button("不带参数跳转")
        .onClick(()=>{
          router.pushUrl({
            url: 'pages/MyDivPage'
          })
        })

      Button("返回上一个界面")
        .onClick(()=>{
          router.back()
        })

    }
    .height('100%')
    .width('100%')
  }
}
6.编写返回上一个页面的代码
Button("返回上一个界面")
  .onClick(()=>{
    router.back()
  })
第二个界面完善的代码
import router from '@ohos.router';

@Entry
@Component
struct Page {
  @State message: string = '这是这是第二个页面';
  //手动接受跳转过来的数据
  @State params: object =  router.getParams();


  build() {
    Column() {
      Text(this.message)
        .id('PageHelloWorld')
        .fontSize(50)
        .fontWeight(FontWeight.Bold)
        .alignRules({
          center: { anchor: '__container__', align: VerticalAlign.Center },
          middle: { anchor: '__container__', align: HorizontalAlign.Center }
        })

      Text("名字是:"+this.params['my_name']+"\n年龄:"+this.params['my_age'])
        .id('name')


      Button("不带参数跳转")
        .onClick(()=>{
          router.pushUrl({
            url: 'pages/MyDivPage'
          })
        })

      Button("返回上一个界面")
        .onClick(()=>{
          router.back()
        })

    }
    .height('100%')
    .width('100%')
  }
}
7.第三个界面代码完善
import { router } from '@kit.ArkUI'

@Entry   //页面入口标记
@Component
struct MyDivPage {
  build() {
    Column(){
      Text("这是我手动创建的页面")
      .id('text')
      .fontSize(50)
      .fontWeight(FontWeight.Bold)
      .alignRules({
        center: { anchor: '__container__', align: VerticalAlign.Center },
        middle: { anchor: '__container__', align: HorizontalAlign.Center }
      })


      Button("返回上一个界面")
        .onClick(()=>{
          router.back()
        })
    }
      .width('100%')
      .height('100%')


  }
}
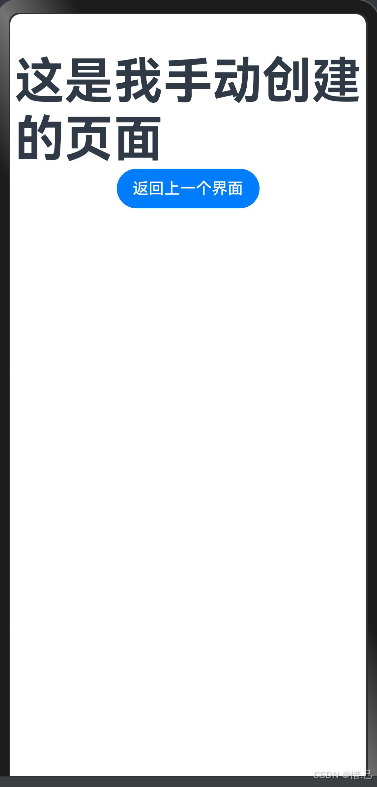
8.效果
案例:使用want启动Ability
1.创建一个新的项目
2.创建第二个界面
page ===> 鼠标右键===>new Page ===> Empty Page ===>在新的界面填写信息===》finsh
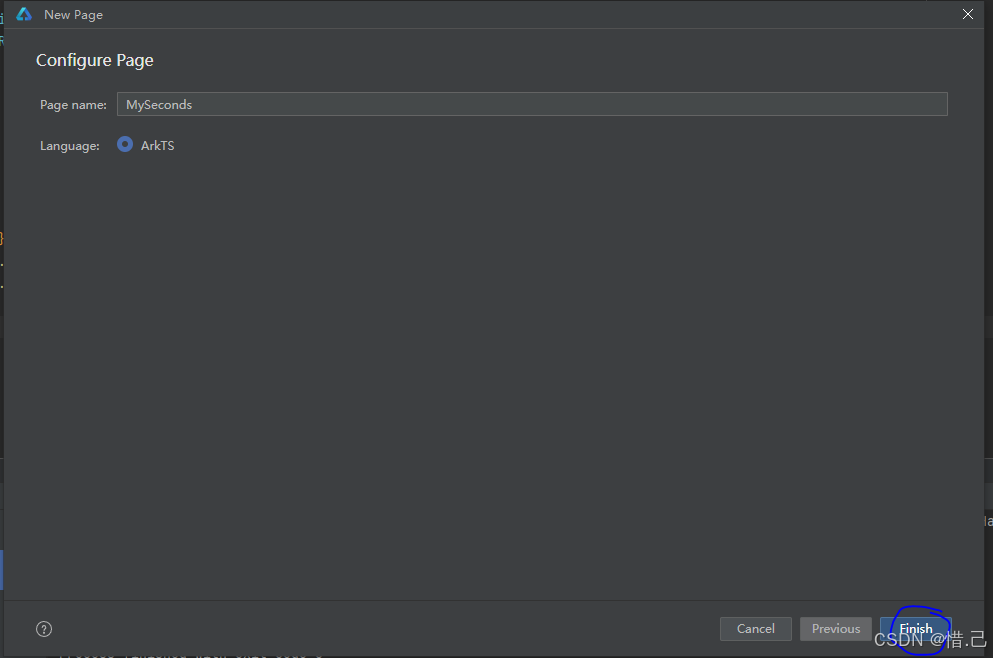
页面内容
@Entry
@Component
struct MySecond {
  @State message: string = 'Hello World';

  build() {
    RelativeContainer() {
      Text(this.message)
        .id('MySecondHelloWorld')
        .fontSize(50)
        .fontWeight(FontWeight.Bold)
        .alignRules({
          center: { anchor: '__container__', align: VerticalAlign.Center },
          middle: { anchor: '__container__', align: HorizontalAlign.Center }
        })
    }
    .height('100%')
    .width('100%')
  }
}
3.创建一个Ability
ets ==> 鼠标右键 ===> new ===> Ability ==>鼠标点击
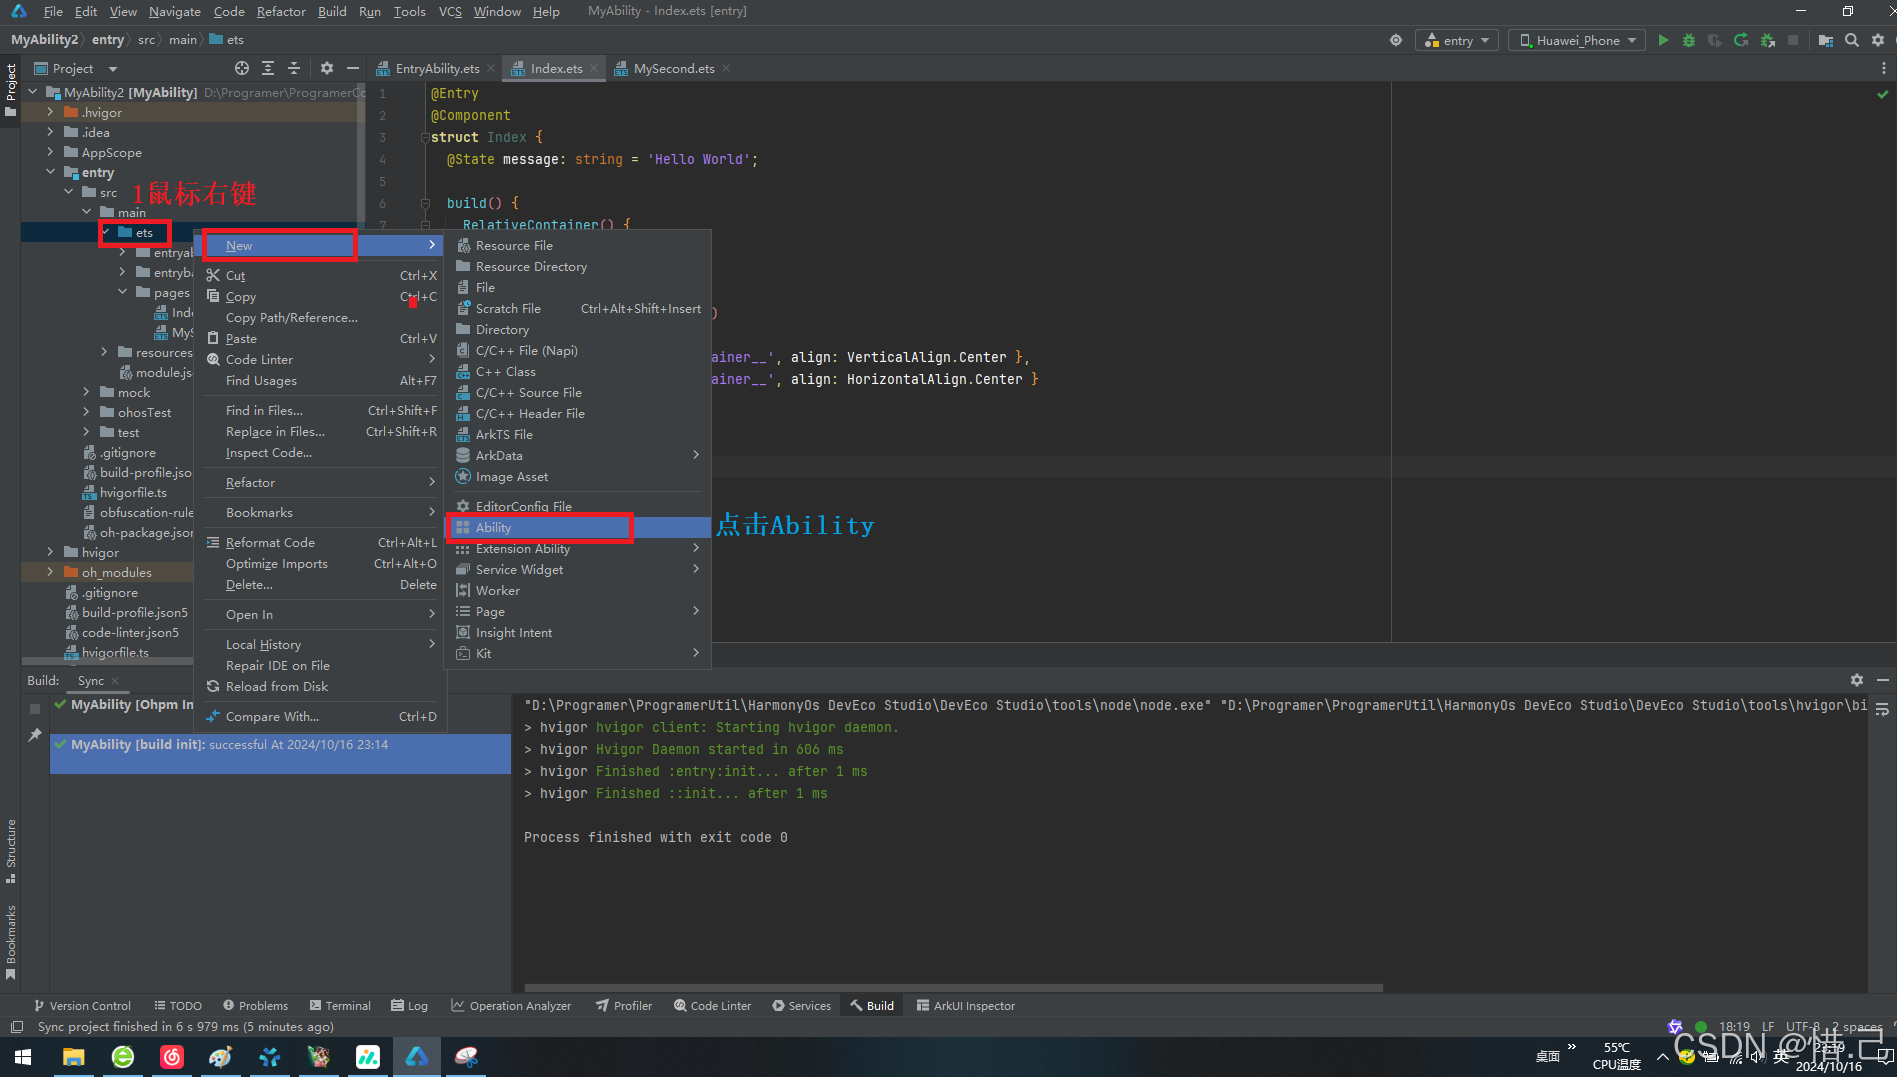
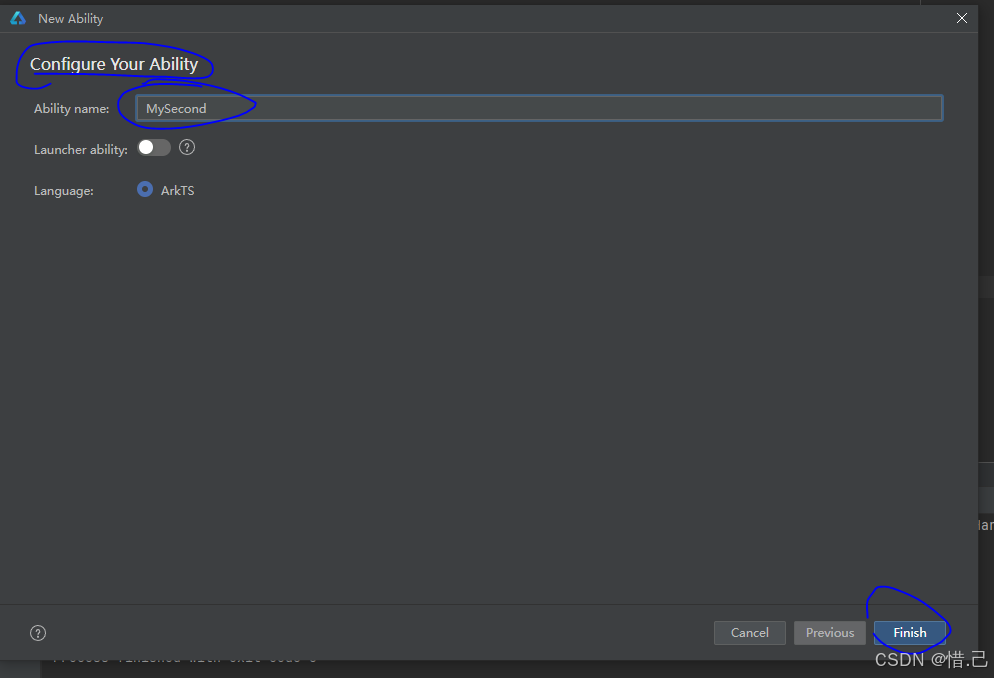
填写信息 ===> finsh
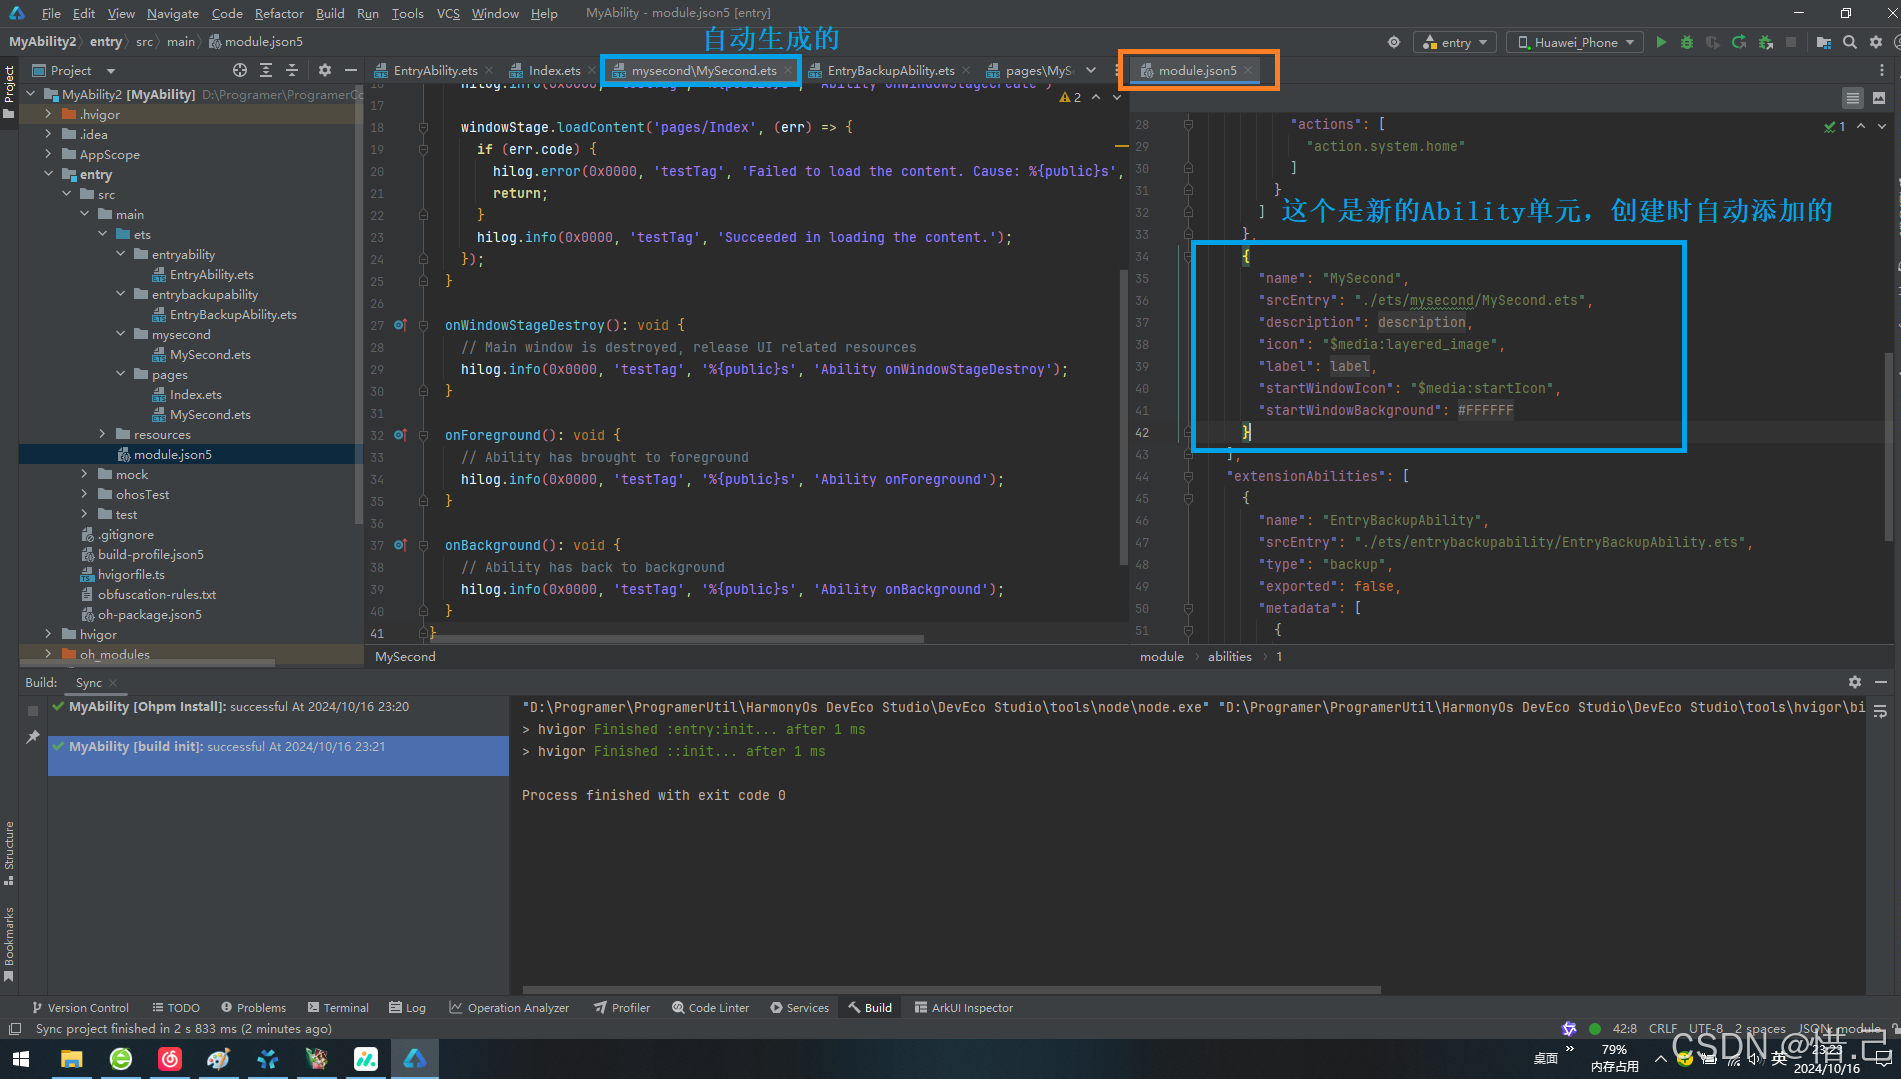
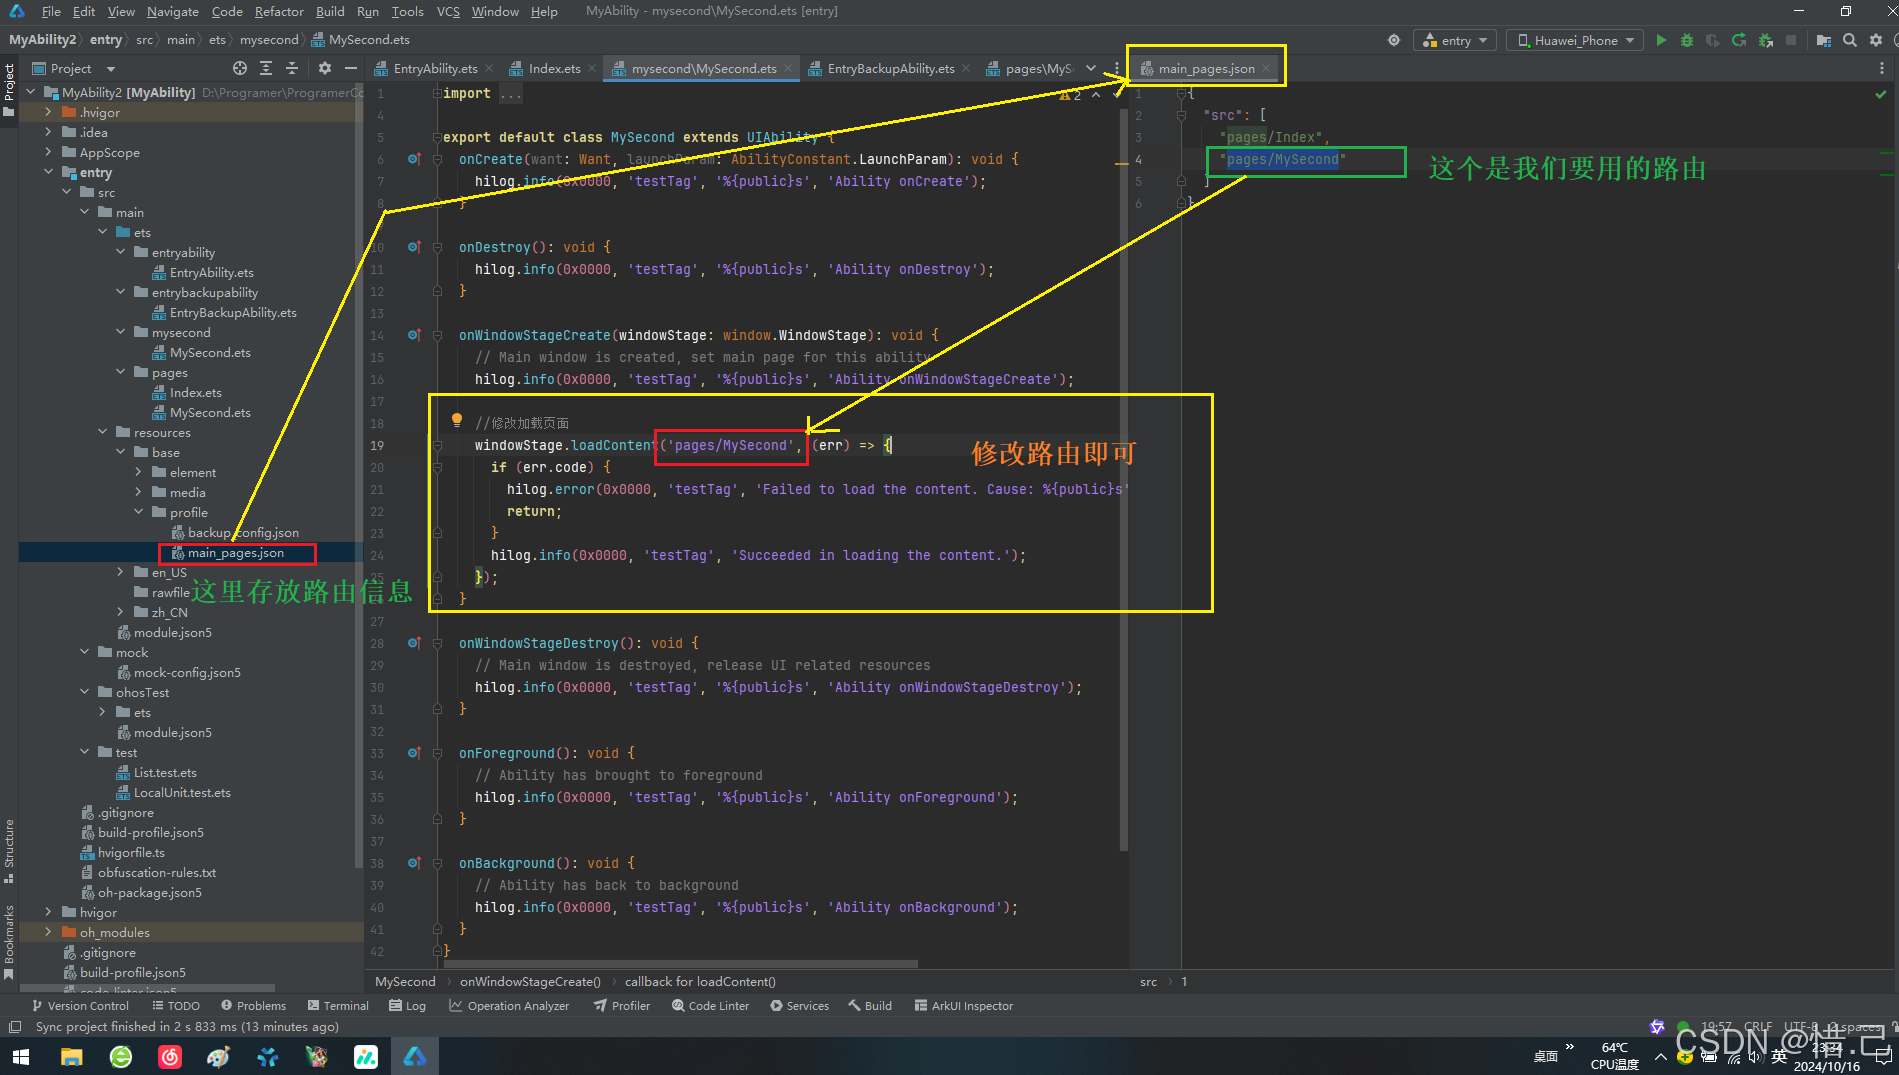
4.修改新生成的Ability中的信息
按照图修改即可
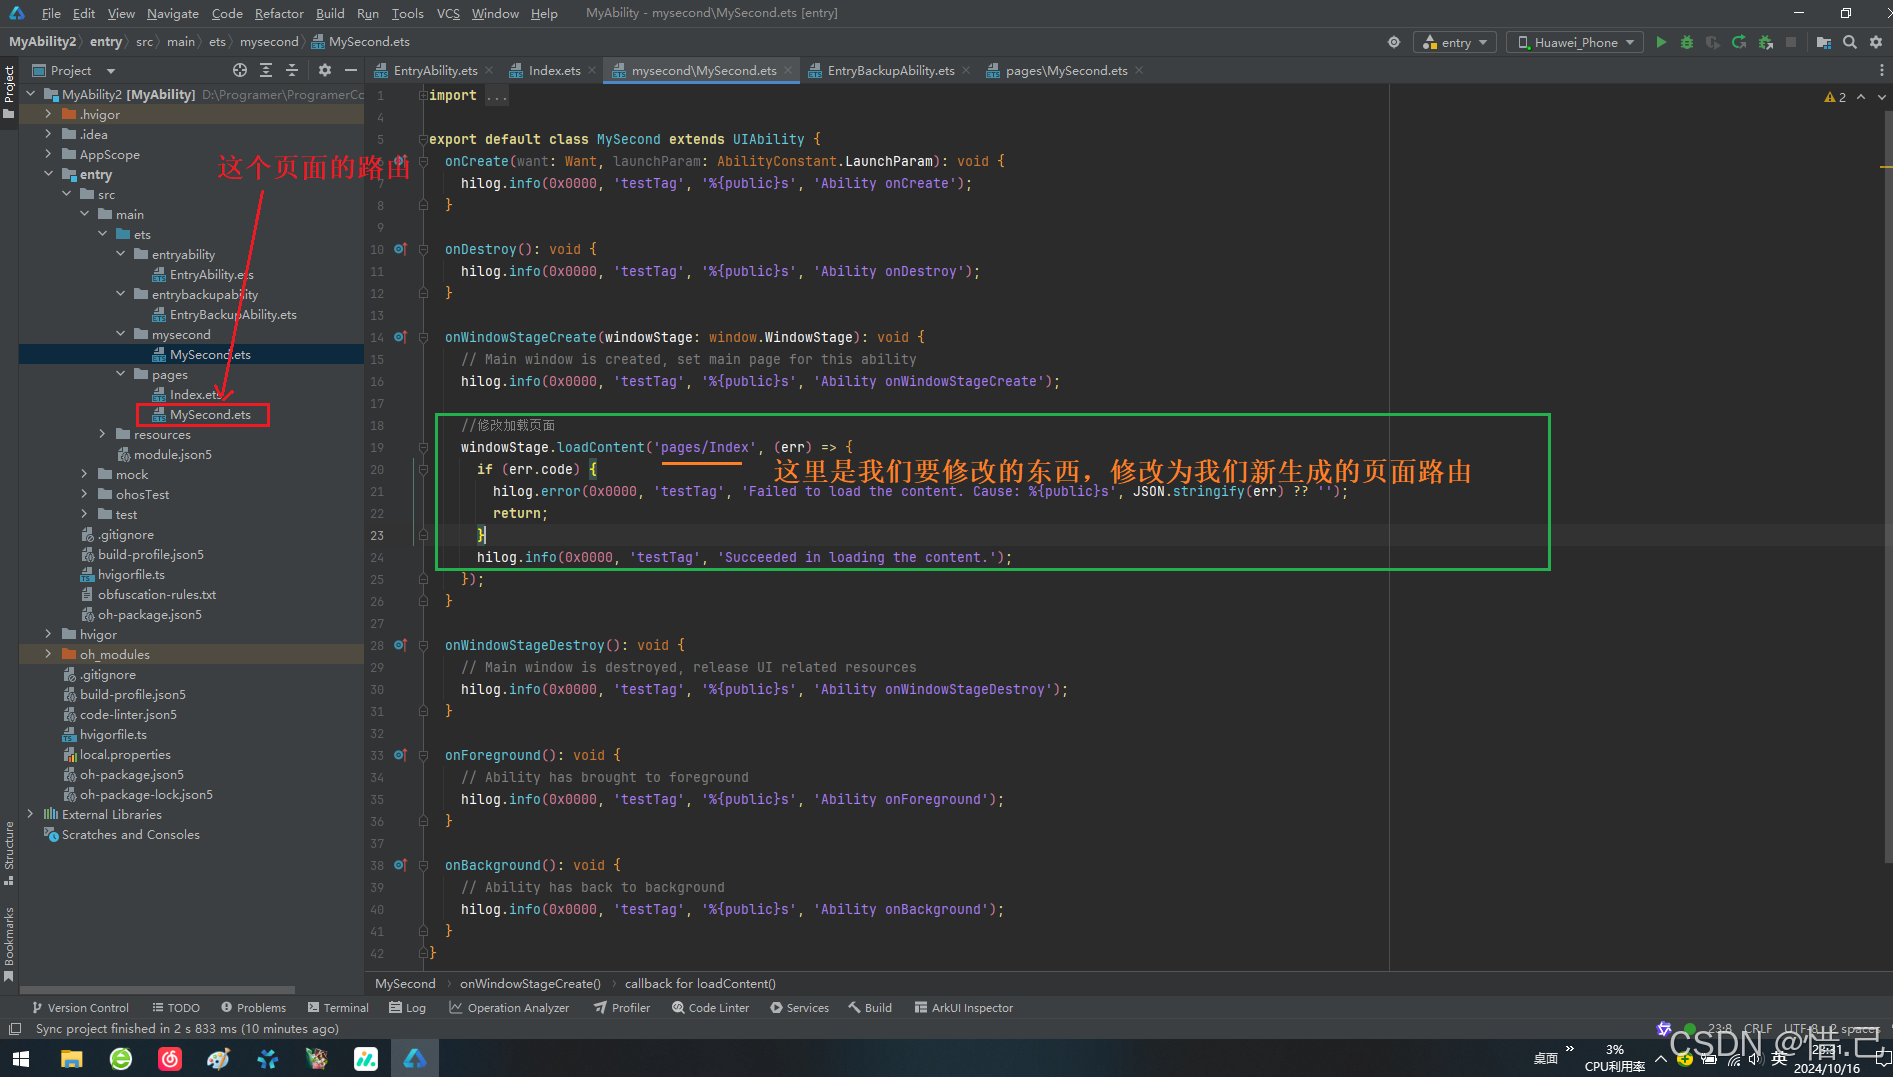
修改之后
5.编写Index.ets中的代码
//导入要使用的组件
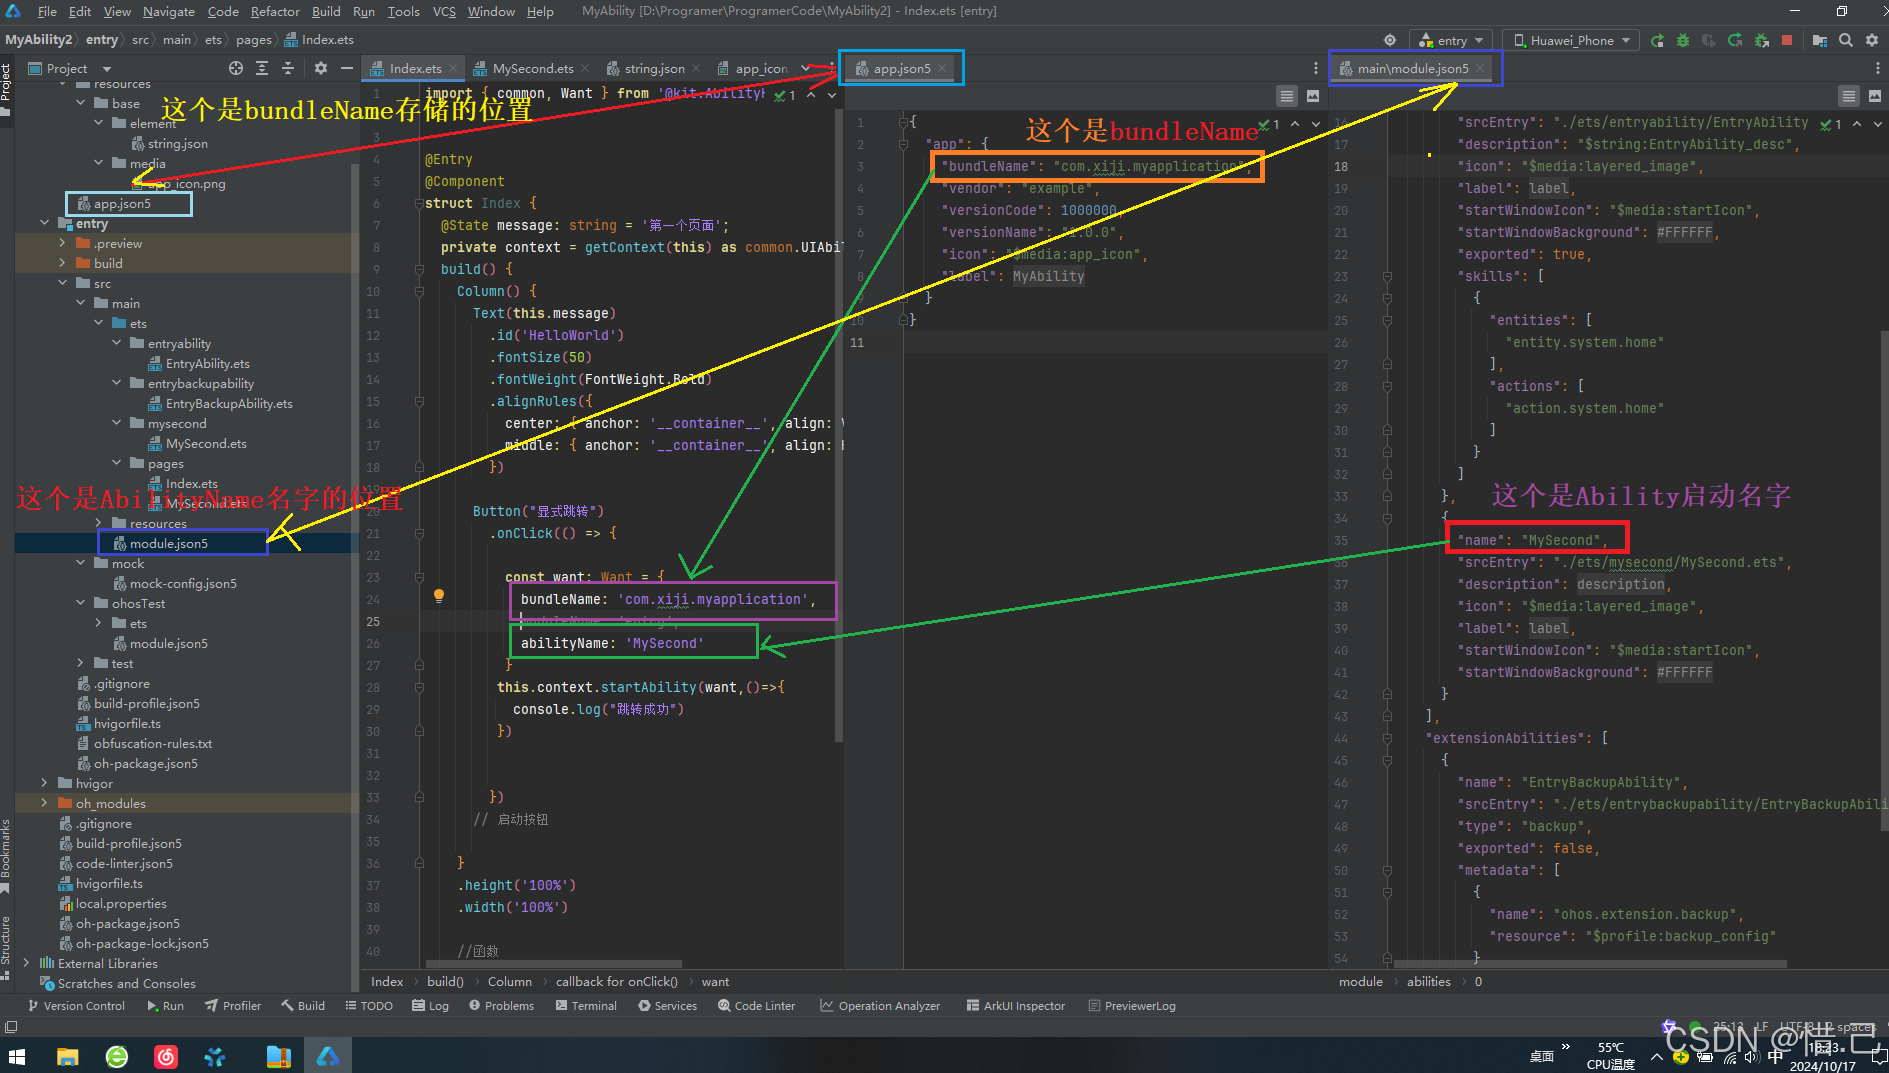
import { common, Want } from '@kit.AbilityKit';
//获取上下文
private context = getContext(this) as common.UIAbilityContext;
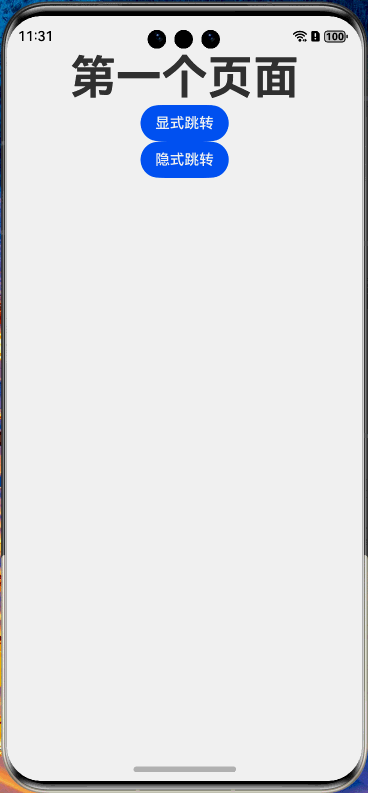
import { common, Want } from '@kit.AbilityKit';


@Entry
@Component
struct Index {
  @State message: string = '第一个页面';
  private context = getContext(this) as common.UIAbilityContext;
  build() {
    Column() {
      Text(this.message)
        .id('HelloWorld')
        .fontSize(50)
        .fontWeight(FontWeight.Bold)
        .alignRules({
          center: { anchor: '__container__', align: VerticalAlign.Center },
          middle: { anchor: '__container__', align: HorizontalAlign.Center }
        })

      Button("显式跳转")
        .onClick(() => {

          const want: Want = {
            bundleName: 'com.xiji.myapplication',
            abilityName: 'MySecond'
          }
         this.context.startAbility(want,()=>{
           console.log("跳转成功")
         })


        })
      // 启动按钮

    }
    .height('100%')
    .width('100%')

    //函数

  }


}
下面这张图搞懂BundleName和AbilityName
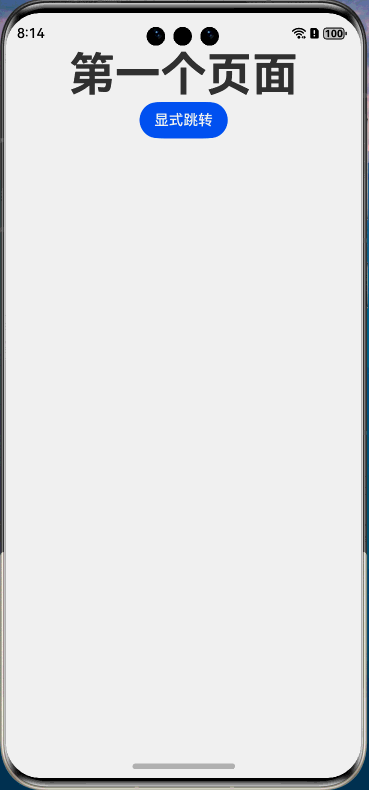
6.效果图
7.编写隐式启动代码
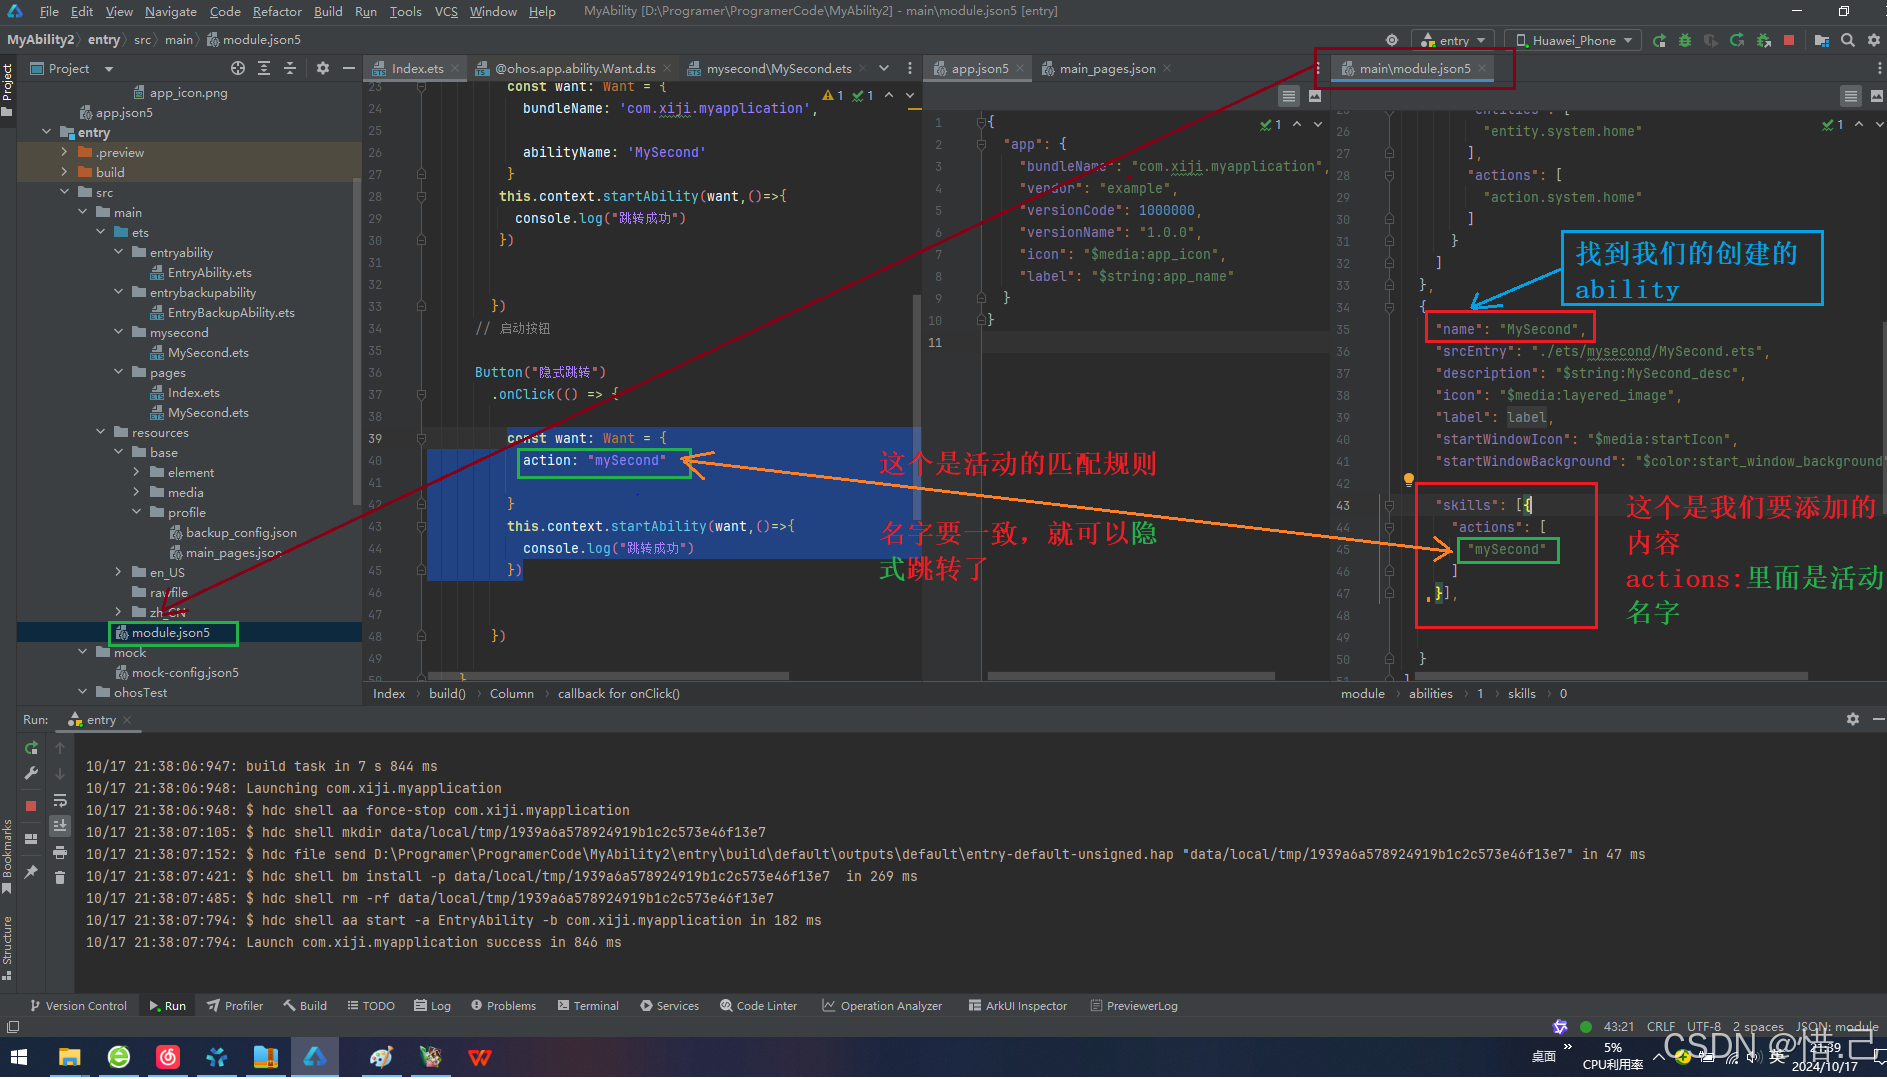
1)编写module.json5文件
找到module.json5中我们要启动的ability中的这一项,并且一下内容
"skills": [{
  "actions": [
    "mySecond"
  ]
}],
2)编写index.ets中的内容
import { common, Want, wantConstant } from '@kit.AbilityKit';


@Entry
@Component
struct Index {
  @State message: string = '第一个页面';
  private context = getContext(this) as common.UIAbilityContext;
  build() {
    Column() {
      Text(this.message)
        .id('HelloWorld')
        .fontSize(50)
        .fontWeight(FontWeight.Bold)
        .alignRules({
          center: { anchor: '__container__', align: VerticalAlign.Center },
          middle: { anchor: '__container__', align: HorizontalAlign.Center }
        })

      Button("显式跳转")
        .onClick(() => {

          const want: Want = {
            bundleName: 'com.xiji.myapplication',

            abilityName: 'MySecond'
          }
         this.context.startAbility(want,()=>{
           console.log("跳转成功")
         })


        })
      // 启动按钮

      Button("隐式跳转")
        .onClick(() => {

          const want: Want = {
            action: "mySecond"

          }
          this.context.startAbility(want,()=>{
            console.log("跳转成功")
          })


        })

    }
    .height('100%')
    .width('100%')

    //函数

  }


}
8.隐式启动效果图