嵌入式入门学习——7Protues导入Arduino IDE生成的固件和Arduino使用库文件开发
0 系列文章入口
嵌入式入门学习——0快速入门,Let‘s Do It!
1 Arduino IDE
请自行下载安装,点击标题链接即可,下载完成后
1新建工程并保存,注意工程名和工程所在的文件夹必须同名。
2新建工程的时候注意选择板子型号是Arduino UNO

3点击添加库文件的按钮
4输入SevSeg
5点击安装(需要联网)

6:点击Sketch
7点击include lib
8点击SevSeg

9 可见自动添加了头文件(当然你也可以收到添加,就不用做步骤6、7、8了)
10可见之前安装好SevSeg库的提示(当然做好第5步之后就可以看见了)

2 SevSeg
理解和使用库的最快方式就是看示例代码
我是怎么找到的呢?打开SevSeg头文件,里面给GitHub仓库链接了,直接看作者的原汁原味的一手资料。
当然也可以看整理好的资料中文说明文档
/* SevSeg Counter Example
Copyright 2020 Dean Reading
This example demonstrates a very simple use of the SevSeg library with a 4
digit display. It displays a counter that counts up, showing deci-seconds.
*/
#include "SevSeg.h"
SevSeg sevseg; //Instantiate a seven segment controller object
void setup() {
byte numDigits = 4;
byte digitPins[] = {2, 3, 4, 5};
byte segmentPins[] = {6, 7, 8, 9, 10, 11, 12, 13};
bool resistorsOnSegments = false; // 'false' means resistors are on digit pins
byte hardwareConfig = COMMON_ANODE; // See README.md for options
bool updateWithDelays = false; // Default 'false' is Recommended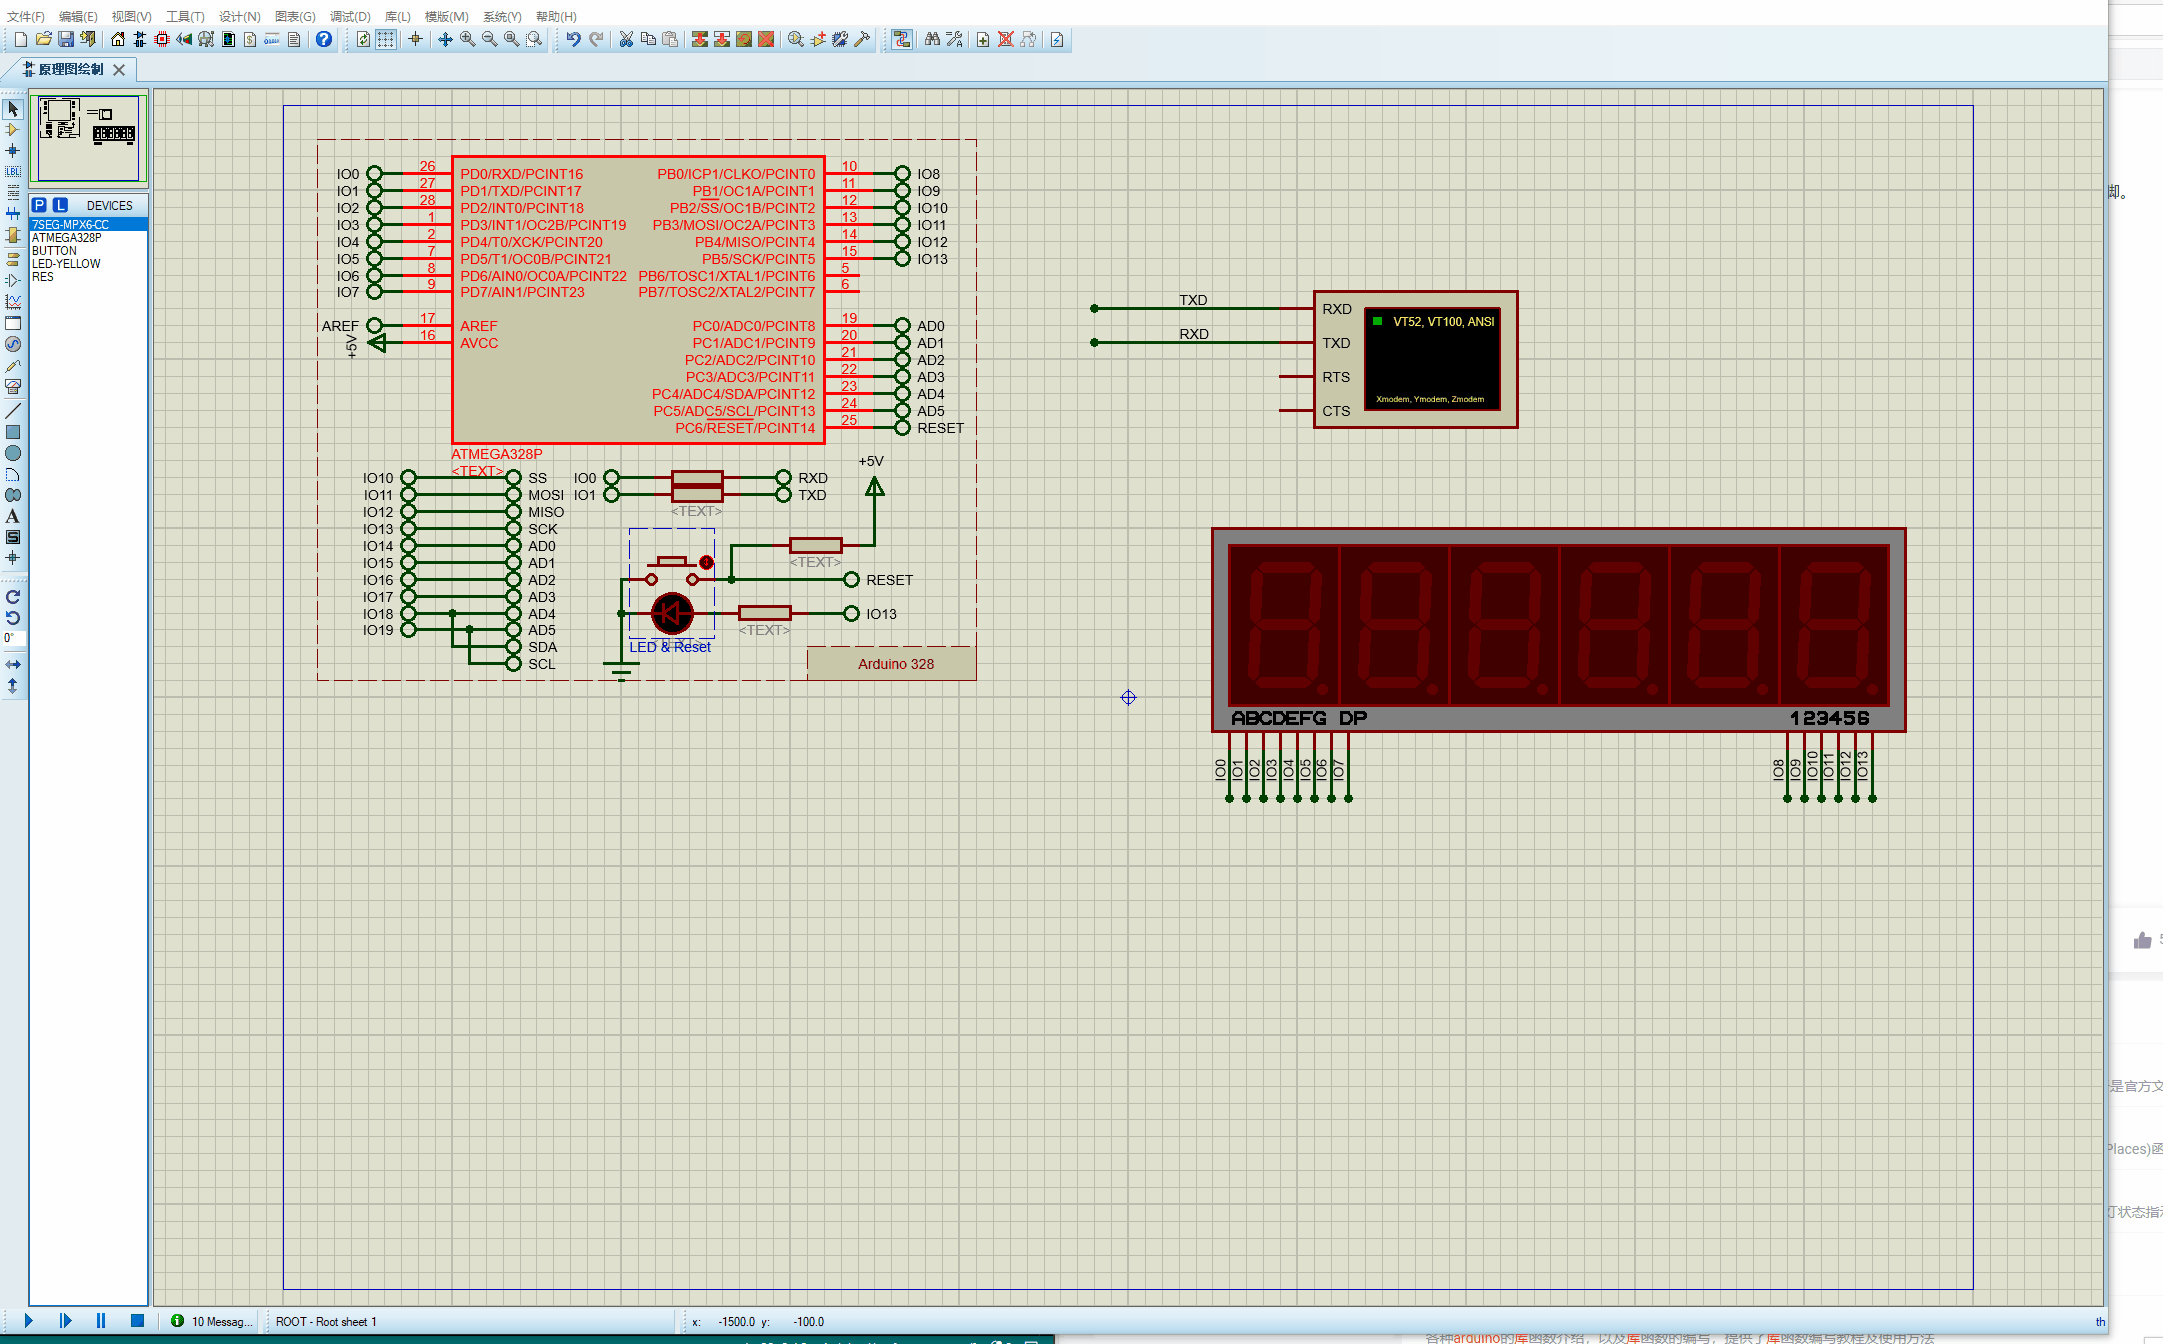
bool leadingZeros = false; // Use 'true' if you'd like to keep the leading zeros
bool disableDecPoint = false; // Use 'true' if your decimal point doesn't exist or isn't connected
sevseg.begin(hardwareConfig, numDigits, digitPins, segmentPins, resistorsOnSegments,
updateWithDelays, leadingZeros, disableDecPoint);
sevseg.setBrightness(90);
}
void loop() {
static unsigned long timer = millis();
static int deciSeconds = 0;
if (millis() - timer >= 100) {
timer += 100;
deciSeconds++; // 100 milliSeconds is equal to 1 deciSecond
if (deciSeconds == 10000) { // Reset to 0 after counting for 1000 seconds.
deciSeconds=0;
}
sevseg.setNumber(deciSeconds, 1);
}
sevseg.refreshDisplay(); // Must run repeatedly
}
/// END ///
我们简单修改一下例程,修改部分我加了中文注释
#include "SevSeg.h"
SevSeg sevseg; //Instantiate a seven segment controller object

void setup() {
  byte numDigits = 6;//我们是六位
  byte digitPins[] = {8, 9, 10, 11,12,13};//我们是IO8到13
  byte segmentPins[] = {0, 1, 2, 3, 4, 5, 6, 7};//我们是IO0到7
  bool resistorsOnSegments = false; // 'false' means resistors are on digit pins
  byte hardwareConfig = COMMON_CATHODE; // 我们是共阴
  bool updateWithDelays = false; // Default 'false' is Recommended
  bool leadingZeros = false; // Use 'true' if you'd like to keep the leading zeros
  bool disableDecPoint = false; // Use 'true' if your decimal point doesn't exist or isn't connected

  sevseg.begin(hardwareConfig, numDigits, digitPins, segmentPins, resistorsOnSegments,
  updateWithDelays, leadingZeros, disableDecPoint);
  sevseg.setBrightness(90);
}

void loop() {
  static unsigned long timer = millis();
  static int deciSeconds = 0;

  if (millis() - timer >= 100) {
    timer += 100;
    deciSeconds++; // 100 milliSeconds is equal to 1 deciSecond

    if (deciSeconds == 10000) { // Reset to 0 after counting for 1000 seconds.
      deciSeconds=0;
    }
    sevseg.setNumber(deciSeconds, 1);
  }
  sevseg.refreshDisplay(); // Must run repeatedly
}
添加Arduino编译出来的固件,但是可见最低位闪烁,是仿真的原因:这个库用了类似于pwm的方式控制LED显示的亮度,所以要的刷新速率非常高,而仿真的时候LED器件的刷新速率是100毫秒,远远低于要求的刷新速率。
真实硬件不会这样,看来光仿真也不行,必要的时候还是要上硬件,下周把硬件搞到我在硬件上跑一下,看一下效果。

3 看看底层
可见他把段码和位码都定义好了
static const int32_t powersOf16[] = {
  0x1, // 16^0
  0x10,
  0x100,
  0x1000,
  0x10000,
  0x100000,
  0x1000000,
  0x10000000
}; // 16^7

// digitCodeMap indicate which segments must be illuminated to display
// each number.
static const uint8_t digitCodeMap[] = {
  // GFEDCBA  Segments      7-segment map:
  0b00111111, // 0   "0"          AAA
  0b00000110, // 1   "1"         F   B
  0b01011011, // 2   "2"         F   B
  0b01001111, // 3   "3"          GGG
  0b01100110, // 4   "4"         E   C
  0b01101101, // 5   "5"         E   C
  0b01111101, // 6   "6"          DDD
  0b00000111, // 7   "7"
  0b01111111, // 8   "8"
  0b01101111, // 9   "9"
  0b01110111, // 65  'A'
  0b01111100, // 66  'b'
  0b00111001, // 67  'C'
  0b01011110, // 68  'd'
  0b01111001, // 69  'E'
  0b01110001, // 70  'F'
  0b00111101, // 71  'G'
  0b01110110, // 72  'H'
  0b00110000, // 73  'I'
  0b00001110, // 74  'J'
  0b01110110, // 75  'K'  Same as 'H'
  0b00111000, // 76  'L'
  0b00000000, // 77  'M'  NO DISPLAY
  0b01010100, // 78  'n'
  0b00111111, // 79  'O'
  0b01110011, // 80  'P'
  0b01100111, // 81  'q'
  0b01010000, // 82  'r'
  0b01101101, // 83  'S'
  0b01111000, // 84  't'
  0b00111110, // 85  'U'
  0b00111110, // 86  'V'  Same as 'U'
  0b00000000, // 87  'W'  NO DISPLAY
  0b01110110, // 88  'X'  Same as 'H'
  0b01101110, // 89  'y'
  0b01011011, // 90  'Z'  Same as '2'
  0b00000000, // 32  ' '  BLANK
  0b01000000, // 45  '-'  DASH
  0b10000000, // 46  '.'  PERIOD
  0b01100011, // 42 '*'  DEGREE ..
  0b00001000, // 95 '_'  UNDERSCORE
};
可见也是用For循环一个个引脚赋值
// segmentOn
/******************************************************************************/
// Turns a segment on, as well as all corresponding digit pins
// (according to digitCodes[])
void SevSeg::segmentOn(uint8_t segmentNum) {
  digitalWrite(segmentPins[segmentNum], segmentOnVal);
  for (uint8_t digitNum = 0 ; digitNum < numDigits ; digitNum++) {
    if (digitCodes[digitNum] & (1 << segmentNum)) { // Check a single bit
      digitalWrite(digitPins[digitNum], digitOnVal);
    }
  }
}