vue3实现一个无缝衔接、滚动平滑的列表自动滚屏效果,支持鼠标移入停止移出滚动
文章目录
- 前言
- 一、滚动元素相关属性回顾
- 一、实现分析
- 二、代码实现
- 示例:
- 2、继续添加功能,增加鼠标移入停止滚动、移出继续滚动效果
- 2、继续完善
前言
列表自动滚屏效果常见于大屏开发场景中,本文将讲解用vue3实现一个无缝衔接、滚动平滑的列表自动滚屏效果,并支持鼠标移入停止滚动、移出自动滚动。
一、滚动元素相关属性回顾

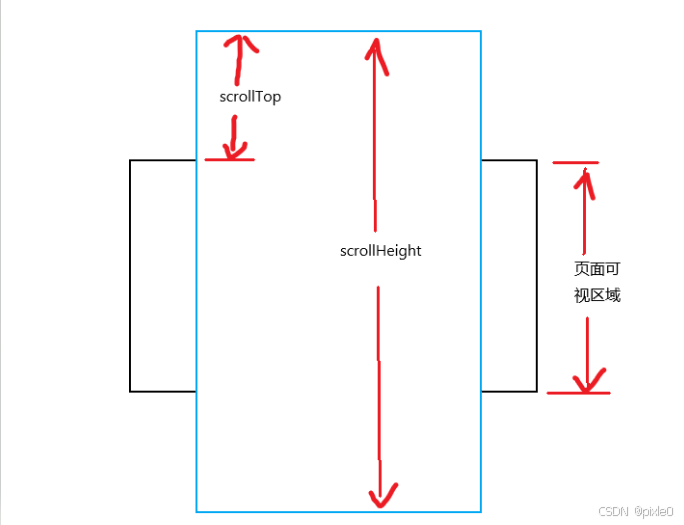
scrollHeight:滚动元素总高度,包括顶部被隐藏区域高度+页面可视区域高度+底部未显示区域高度
scrollTop:滚动元素顶部超出可视区域的高度,通过改变该值可以控制滚动条位置
一、实现分析
1、如何让滚动条自动滚动?
scrollTop属性表示滚动元素顶部与可视区域顶部距离,也即滚动条向下滚动的距离,只要设置一个定时器(setInterval)相同增量改变scrollTop值就能匀速向下滚动
2、如何做到滚动平滑无缝衔接?
无缝衔接要求滚动到最后一个数据下面又衔接上从头开始的数据造成一种无限滚屏假象,平滑要求从最后一数据衔接上首个数据不能看出滚动条或页面有跳动效果。实现方案可以多复制一份列表数据追加在原数据后面,当滚动到第一份数据的末尾由于后面还有复制的数据,滚动条依然可以向下滚动,直到第一份数据最后一个数据滚出可视区域再把滚动条重置到初始位置(scrollTop=0),此时从第二份数据首个位置变到第一份数据的首个位置由于页面数据一样视觉效果上看将感觉不到页面的滚动和变化,所以就能得到平滑无缝衔接效果。
二、代码实现
示例:
demo.vue
<template>
  <div class="page">
    <div class="warning-view">
      <div class="label">预警信息</div>
      <div
        class="scroll-view"
        ref="scrollViewRef"
      >
        <div ref="listRef" class="list" v-for="(p, n) in 2" :key="n">
          <div class="item" v-for="(item, index) in data" :key="index">
            <div class="content">预警消息 {{ index }}</div>
            <div class="time">2024-11-06</div>
          </div>
        </div>
      </div>
    </div>
  </div>
</template>

<script setup>
import { ref, onBeforeMount, onMounted, onBeforeUnmount, nextTick } from "vue";
const data = ref(); //列表数据
const listRef = ref(); //列表dom
const scrollViewRef = ref(); //滚动区域dom

let intervalId = null;

//获取列表数据
const getData = () => {
  //模拟接口请求列表数据
  return new Promise((resolve, reject) => {
    setTimeout(() => {
      //生成10条数据
      let list = new Array(10).fill().map((item, index) => index);
      resolve(list);
    }, 1000);
  });
};

onMounted(async () => {
  data.value = await getData();
  nextTick(()=>{
    autoScrolling()
  })
});
//设置自动滚动
const autoScrolling = () => {
  intervalId = setInterval(() => {
    if (scrollViewRef.value.scrollTop < listRef.value[0].clientHeight) {
      scrollViewRef.value.scrollTop += 1;
    } else {
      scrollViewRef.value.scrollTop = 0;
    }
  }, 20);
};

onBeforeUnmount(() => {
  //离开页面清理定时器
  intervalId && clearInterval(intervalId);
});

</script>

<style scoped>
.page {
  width: 100%;
  height: 100vh;
  display: flex;
  justify-content: center;
  align-items: center;
  background-color: #010c1e;
  color: #fff;
}
.warning-view {
  width: 400px;
  height: 400px;
  border: 1px solid #fff;
  display: flex;
  flex-direction: column;
}
.label {
  color: #fff;
  padding: 20px;
  font-size: 22px;
}
.scroll-view {
  flex: 1;
  height: 0;
  width: 100%;
  overflow-y: auto;
}
.list {
  width: 100%;
  padding: 0 20px;
  box-sizing: border-box;
}
.item {
  width: 100%;
  height: 50px;
  min-height: 50px;
  font-size: 16px;
  display: flex;
  align-items: center;
  justify-content: space-between;
  color: #eee;
}
/**
*隐藏滚动条
 */
 ::-webkit-scrollbar{
  display: none;
 }
</style>
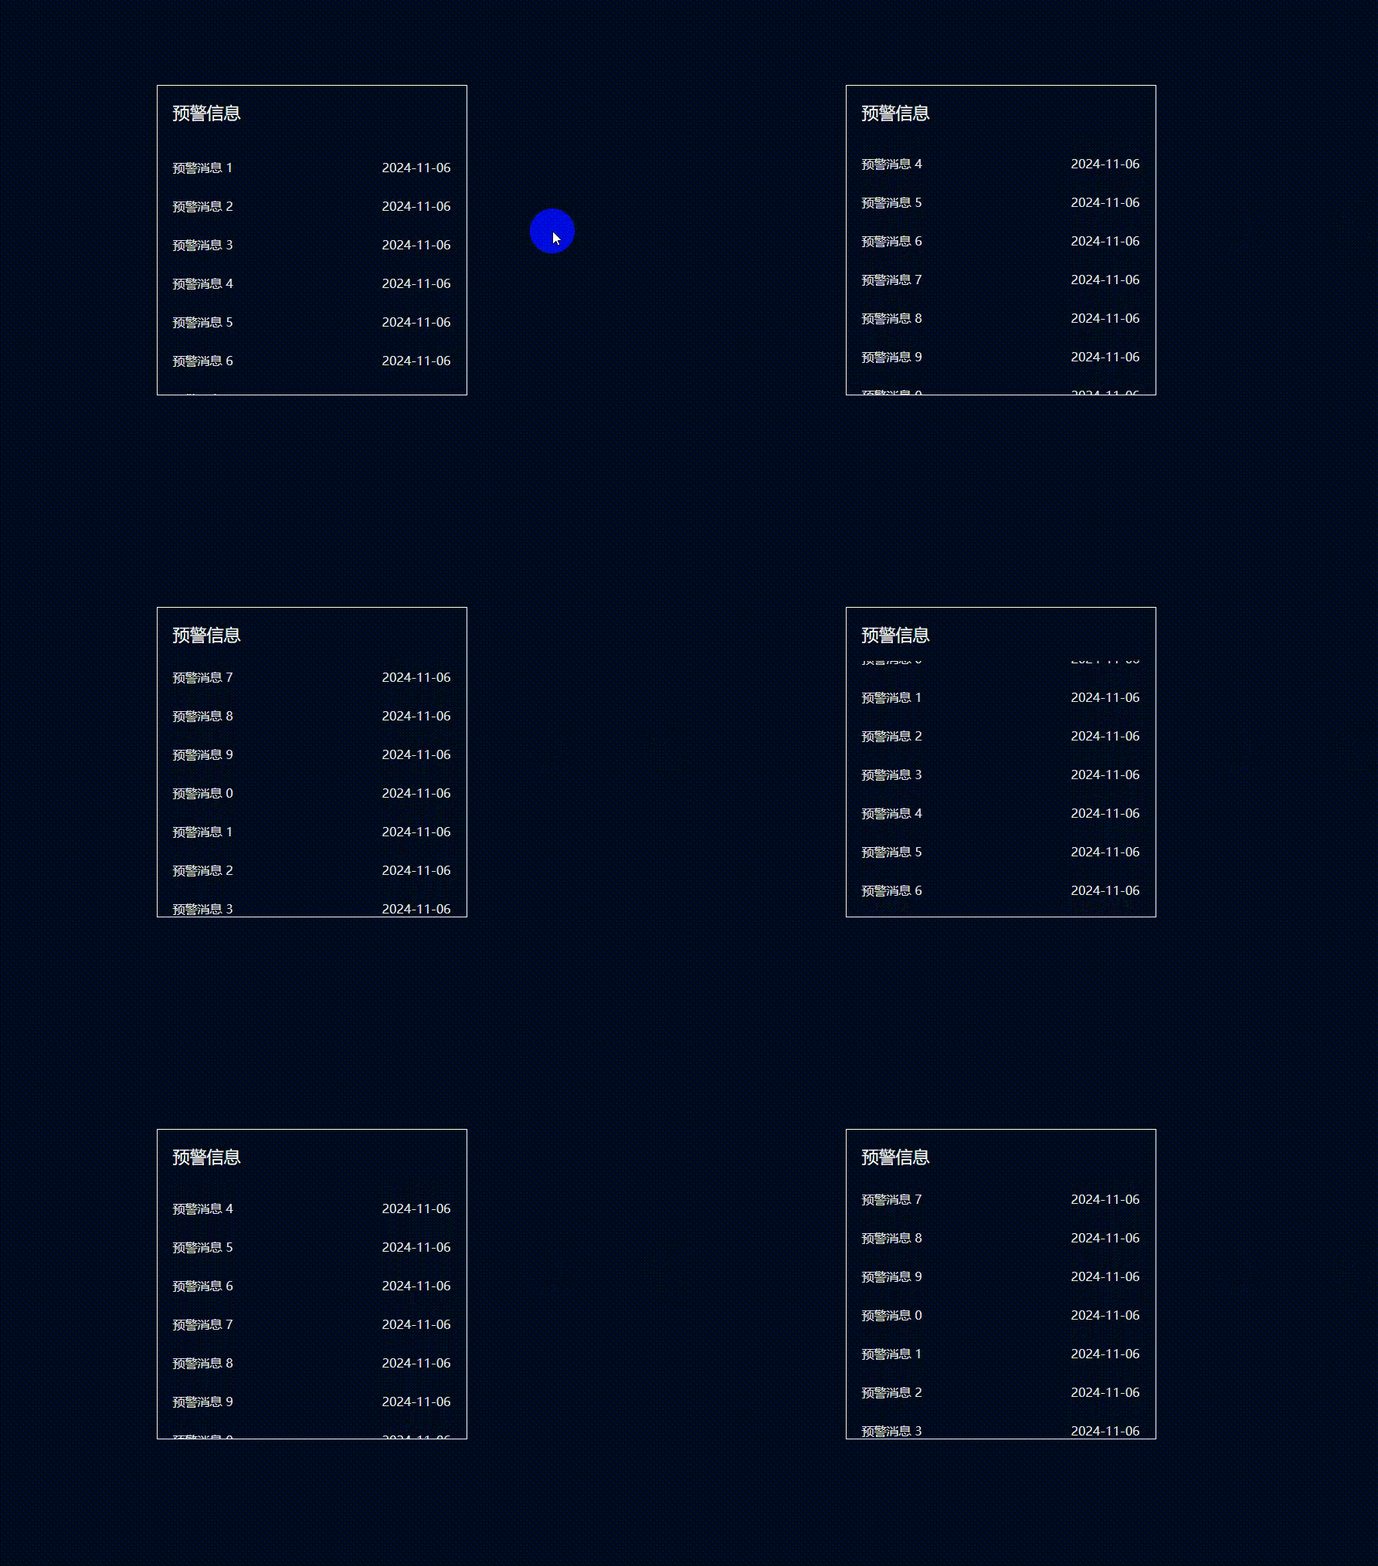
说明:布局方面 定义了一个可滚动父元素div(scrollViewRef),子元素 通过v-for="(p, n) in 2“ 循环渲染2份相同的列表数据并挂载在2个div(listRef)上,每隔20ms滚动条scrollTop+1,直到滚完第一个列表最后一个数据出了屏幕,滚动条重新回到初始位置。通过scrollViewRef.value.scrollTop < listRef.value[0].clientHeight判断。
运行效果:
(ps:由于视频转gif帧率变小造成看起来有些卡顿,实际滚动效果非常丝滑)

2、继续添加功能,增加鼠标移入停止滚动、移出继续滚动效果
demo.vue
<template>
  <div class="page">
    <div class="warning-view">
      <div class="label">预警信息</div>
      <div
        class="scroll-view"
        ref="scrollViewRef"
        @mouseenter="onMouseenter"
        @mouseleave="onMouseleave"
      >
        <div ref="listRef" class="list" v-for="(p, n) in 2" :key="n">
          <div class="item" v-for="(item, index) in data" :key="index">
            <div class="content">预警消息 {{ index }}</div>
            <div class="time">2024-11-06</div>
          </div>
        </div>
      </div>
    </div>
  </div>
</template>

<script setup>
import { ref, onBeforeMount, onMounted, onBeforeUnmount, nextTick } from "vue";
const data = ref(); //列表数据
const listRef = ref(); //列表dom
const scrollViewRef = ref(); //滚动区域dom


let intervalId = null;
let isAutoScrolling = true; //是否自动滚动标识

//获取列表数据
const getData = () => {
  //模拟接口请求列表数据
  return new Promise((resolve, reject) => {
    setTimeout(() => {
      //生成10条数据
      let list = new Array(10).fill().map((item, index) => index);
      resolve(list);
    }, 1000);
  });
};

onMounted(async () => {
  data.value = await getData();
  nextTick(() => {
    autoScrolling();
  });
});

//设置自动滚动
const autoScrolling = () => {
  intervalId = setInterval(() => {
    if (scrollViewRef.value.scrollTop < listRef.value[0].clientHeight) {
      scrollViewRef.value.scrollTop += isAutoScrolling ? 1 : 0;
    } else {
      scrollViewRef.value.scrollTop = 0;
    }
  }, 20);
};

onBeforeUnmount(() => {
  //离开页面清理定时器
  intervalId && clearInterval(intervalId);
});

//鼠标进入,停止滚动
const onMouseenter = () => {
  isAutoScrolling = false;
};
//鼠标移出,继续滚动
const onMouseleave = () => {
  isAutoScrolling = true;
};
</script>

<style scoped>
.page {
  width: 100%;
  height: 100vh;
  display: flex;
  justify-content: center;
  align-items: center;
  background-color: #010c1e;
  color: #fff;
}
.warning-view {
  width: 400px;
  height: 400px;
  border: 1px solid #fff;
  display: flex;
  flex-direction: column;
}
.label {
  color: #fff;
  padding: 20px;
  font-size: 22px;
}
.scroll-view {
  flex: 1;
  height: 0;
  width: 100%;
  overflow-y: auto;
}
.list {
  width: 100%;
  padding: 0 20px;
  box-sizing: border-box;
}
.item {
  width: 100%;
  height: 50px;
  min-height: 50px;
  font-size: 16px;
  display: flex;
  align-items: center;
  justify-content: space-between;
  color: #eee;
}
/**
*隐藏滚动条
 */
 ::-webkit-scrollbar{
  display: none;
 }
</style>
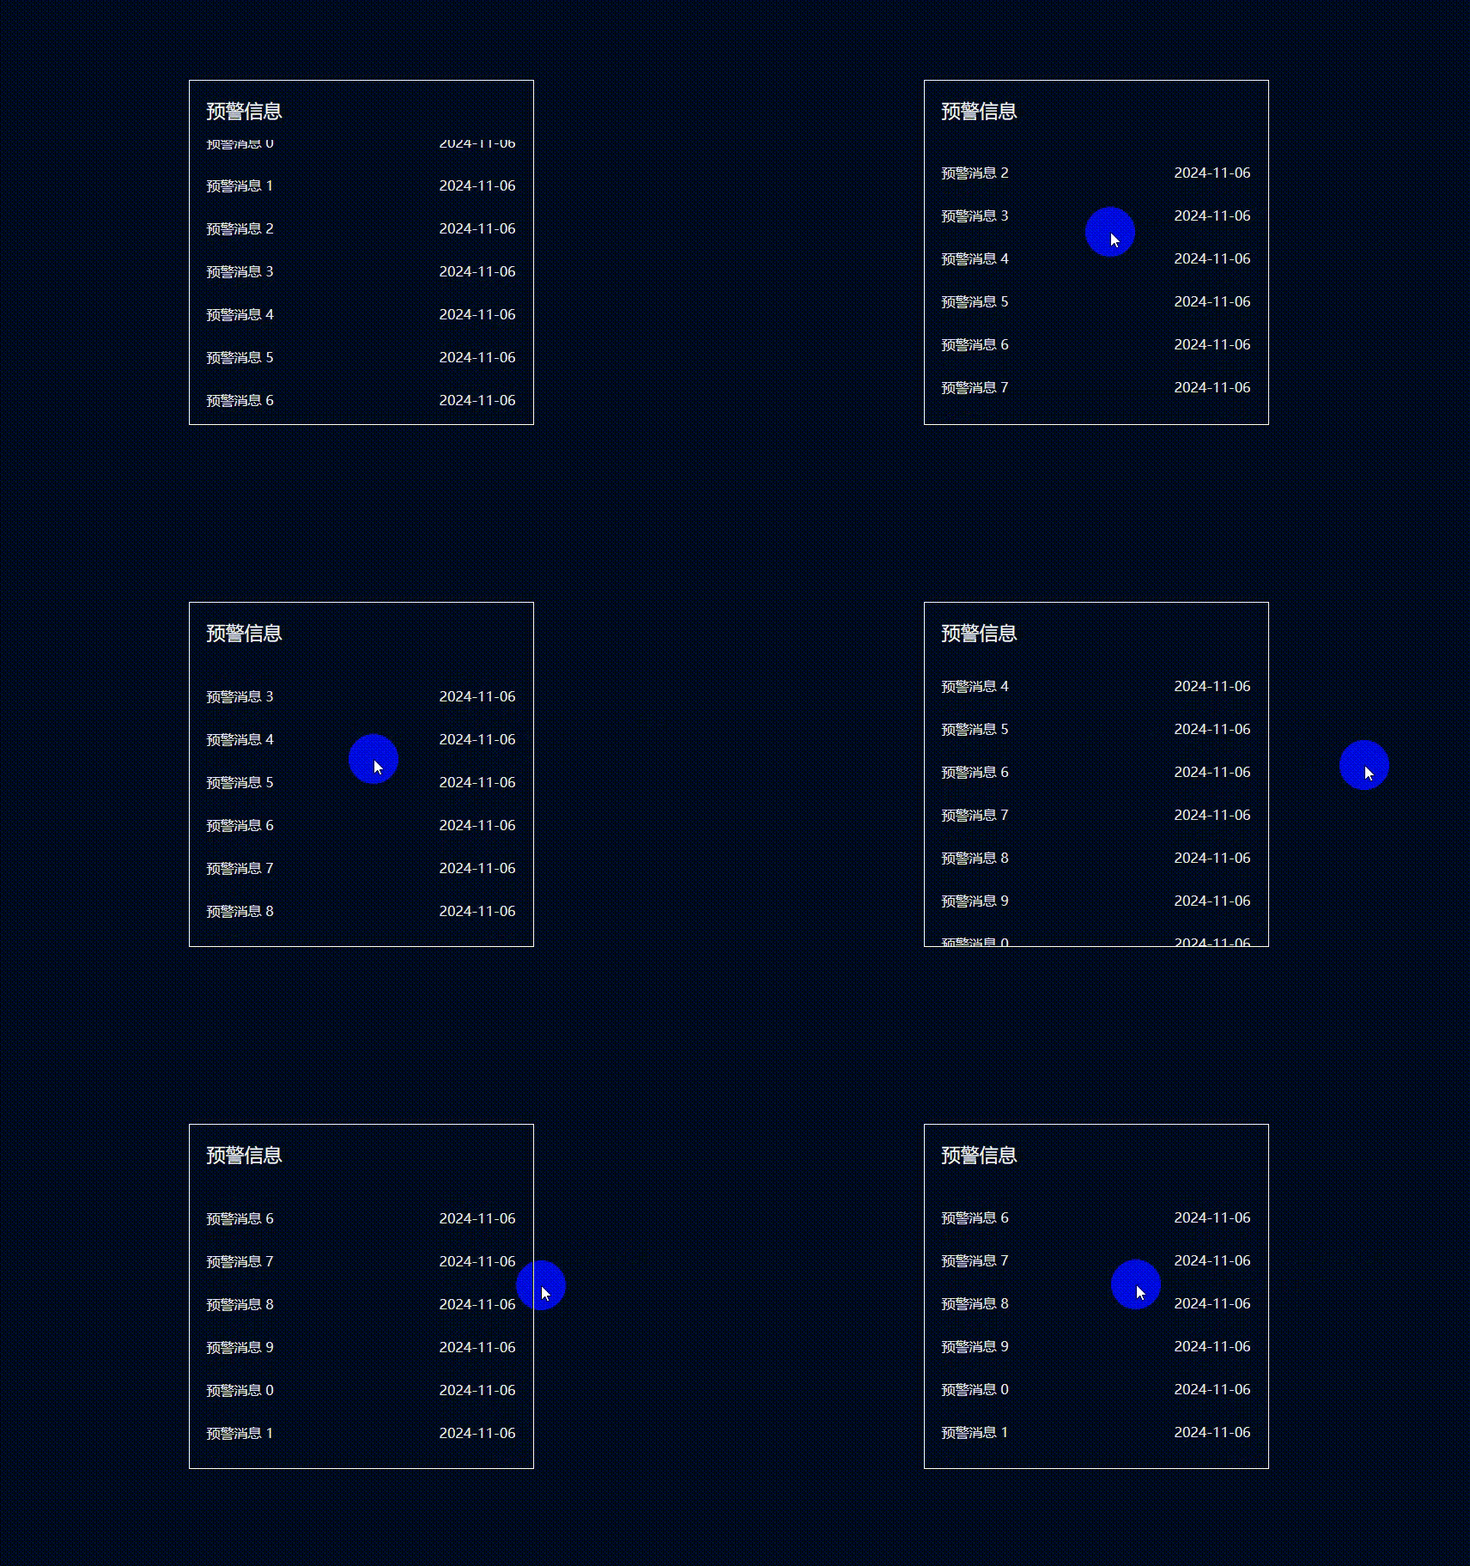
说明:定义一个全局变量isAutoScrolling标识鼠标是否移入,当鼠标移入isAutoScrolling为false,scrollTop增量为0,当鼠标移出scrollTop增量恢复到1,scrollViewRef.value.scrollTop += isAutoScrolling ? 1 : 0;
运行效果:(ps:由于视频转gif帧率变小造成看起来有些卡顿,实际滚动效果非常丝滑)

2、继续完善
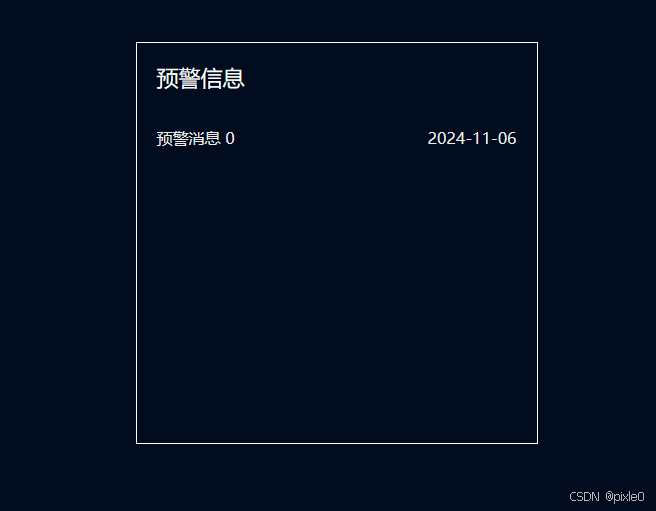
上面示例都是默认数据较多会出现滚动条情况下实现的,实际开发过程列表数据是不固定的,可能很多条也可能很少无法超出屏幕出现滚动条,比如列表只有一条数据情况下是不需要自动滚动的,这时候如果强制v-for="(p, n) in 2“ 复制一份数据页面会渲染2条一样数据而且无法出现滚动条,所以正确做法还需要动态判断列数是否会出现滚动条,满足出现的条件才去设置自动滚屏。
是否出现滚动条判断:滚动区域高度>自身可见区域高度(scrollHeight > clientHeight)说明有滚动条
完整代码示例:
demo.vue
<template>
  <div class="page">
    <div class="warning-view">
      <div class="label">预警信息</div>
      <div
        class="scroll-view"
        ref="scrollViewRef"
        @mouseenter="onMouseenter"
        @mouseleave="onMouseleave"
      >
        <div ref="listRef" class="list" v-for="(p, n) in count" :key="n">
          <div class="item" v-for="(item, index) in data" :key="index">
            <div class="content">预警消息 {{ index }}</div>
            <div class="time">2024-11-06</div>
          </div>
        </div>
      </div>
    </div>
  </div>
</template>

<script setup>
import { ref, onBeforeMount, onMounted, onBeforeUnmount, nextTick } from "vue";
const data = ref(); //列表数据
const listRef = ref(); //列表dom
const scrollViewRef = ref(); //滚动区域dom
const count = ref(1); //列表个数

let intervalId = null;
let isAutoScrolling = true; //是否自动滚动标识

//获取列表数据
const getData = () => {
  //模拟接口请求列表数据
  return new Promise((resolve, reject) => {
    setTimeout(() => {
      //生成10条数据
      let list = new Array(10).fill().map((item, index) => index);
      resolve(list);
    }, 1000);
  });
};

onMounted(async () => {
  data.value = await getData();
  nextTick(() => {
    //判断列表是否生成滚动条
    count.value = hasScrollBar() ? 2 : 1;
    //有滚动条开始自动滚动
    if (count.value == 2) {
      autoScrolling();
    }
  });
});
//判断列表是否有滚动条
const hasScrollBar = () => {
  return scrollViewRef.value.scrollHeight > scrollViewRef.value.clientHeight;
};
//设置自动滚动
const autoScrolling = () => {
  intervalId = setInterval(() => {
    if (scrollViewRef.value.scrollTop < listRef.value[0].clientHeight) {
      scrollViewRef.value.scrollTop += isAutoScrolling ? 1 : 0;
    } else {
      scrollViewRef.value.scrollTop = 0;
    }
  }, 20);
};

onBeforeUnmount(() => {
  //离开页面清理定时器
  intervalId && clearInterval(intervalId);
});

//鼠标进入,停止滚动
const onMouseenter = () => {
  isAutoScrolling = false;
};
//鼠标移出,继续滚动
const onMouseleave = () => {
  isAutoScrolling = true;
};
</script>

<style scoped>
.page {
  width: 100%;
  height: 100vh;
  display: flex;
  justify-content: center;
  align-items: center;
  background-color: #010c1e;
  color: #fff;
}
.warning-view {
  width: 400px;
  height: 400px;
  border: 1px solid #fff;
  display: flex;
  flex-direction: column;
}
.label {
  color: #fff;
  padding: 20px;
  font-size: 22px;
}
.scroll-view {
  flex: 1;
  height: 0;
  width: 100%;
  overflow-y: auto;
}
.list {
  width: 100%;
  padding: 0 20px;
  box-sizing: border-box;
}
.item {
  width: 100%;
  height: 50px;
  min-height: 50px;
  font-size: 16px;
  display: flex;
  align-items: center;
  justify-content: space-between;
  color: #eee;
}
/*隐藏滚动条
 */
 ::-webkit-scrollbar{
  display: none;
 }
</style>
运行效果:

把数据改成只有一条
//获取列表数据
const getData = () => {
  //模拟接口请求列表数据
  return new Promise((resolve, reject) => {
    setTimeout(() => {
      //生成1条数据
      let list = new Array(1).fill().map((item, index) => index);
      resolve(list);
    }, 1000);
  });
};
运行效果:

