由播客转向个人定制的音频频道(1)平台搭建
项目的背景
最近开始听喜马拉雅播客的内容,但是发现许多不方便的地方。
- 休息的时候收听喜马拉雅,但是还需要不断地选择喜马拉雅的内容,比较麻烦,而且黑灯操作反而伤眼睛。
- 喜马拉雅为代表的播客平台都是VOD 形式的,需要选择内容收听,有时候想听科技方面的访谈,但是许多访谈节目并不是连续更新播放的。免不了要去主动查找。
- 休闲或者开车时,希望收听收音机那样轻松一点地享受电台安排的节目,但是目前的电台广告太多,内容匮乏。
- 家里的老人更不习惯手机操作。老人目前主要是看短视频。
笔者看来,播客是一个被低估的服务,其实依靠短视频很难接收有效的信息,靠几分钟很难讲清楚一个观点和知识。所以,要完整地了解一些有用的内容,语音比短视频更好。
那么,能否通过AI 推荐技术,讲播客内容主动生成个人定制的音频频道吗?理论上是可能的,也十分有趣。作为一名创客,我想试试。
说干就干!本文介绍实验平台的搭建。
基于ardunio ESP32 的选台器
电子设备中经常使用旋钮来选择参数,最简单的是旋钮是电位器,它是一个滑动电阻,高端家电,汽车中使用的是编码器Encoder。编码器输出的是脉冲信号。本文介绍如何使用Ardunio ESP32-Nano 来设计一个蓝牙旋转编码器。
外观设计
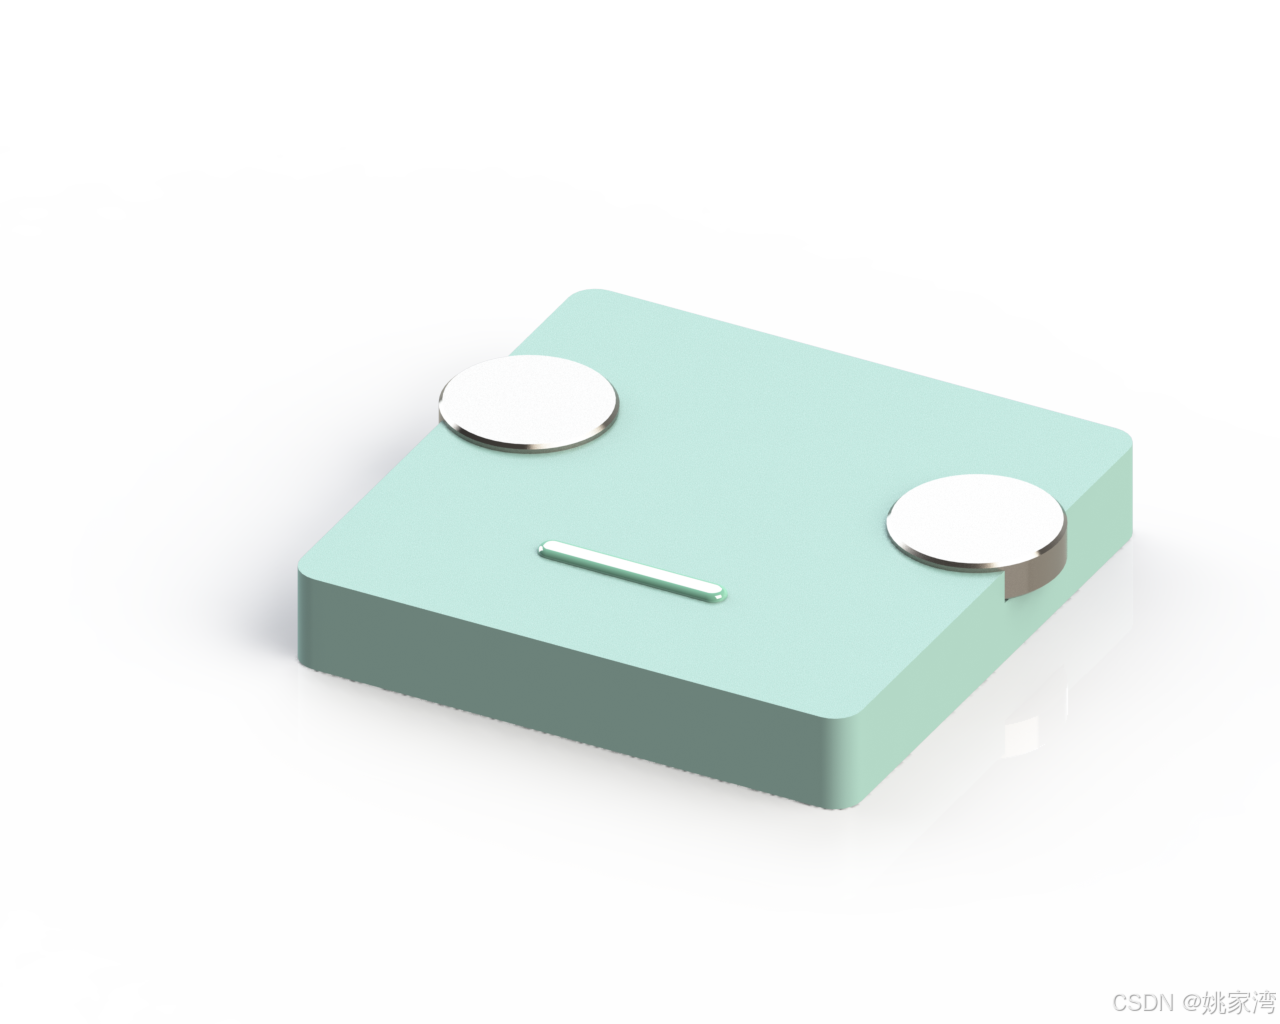
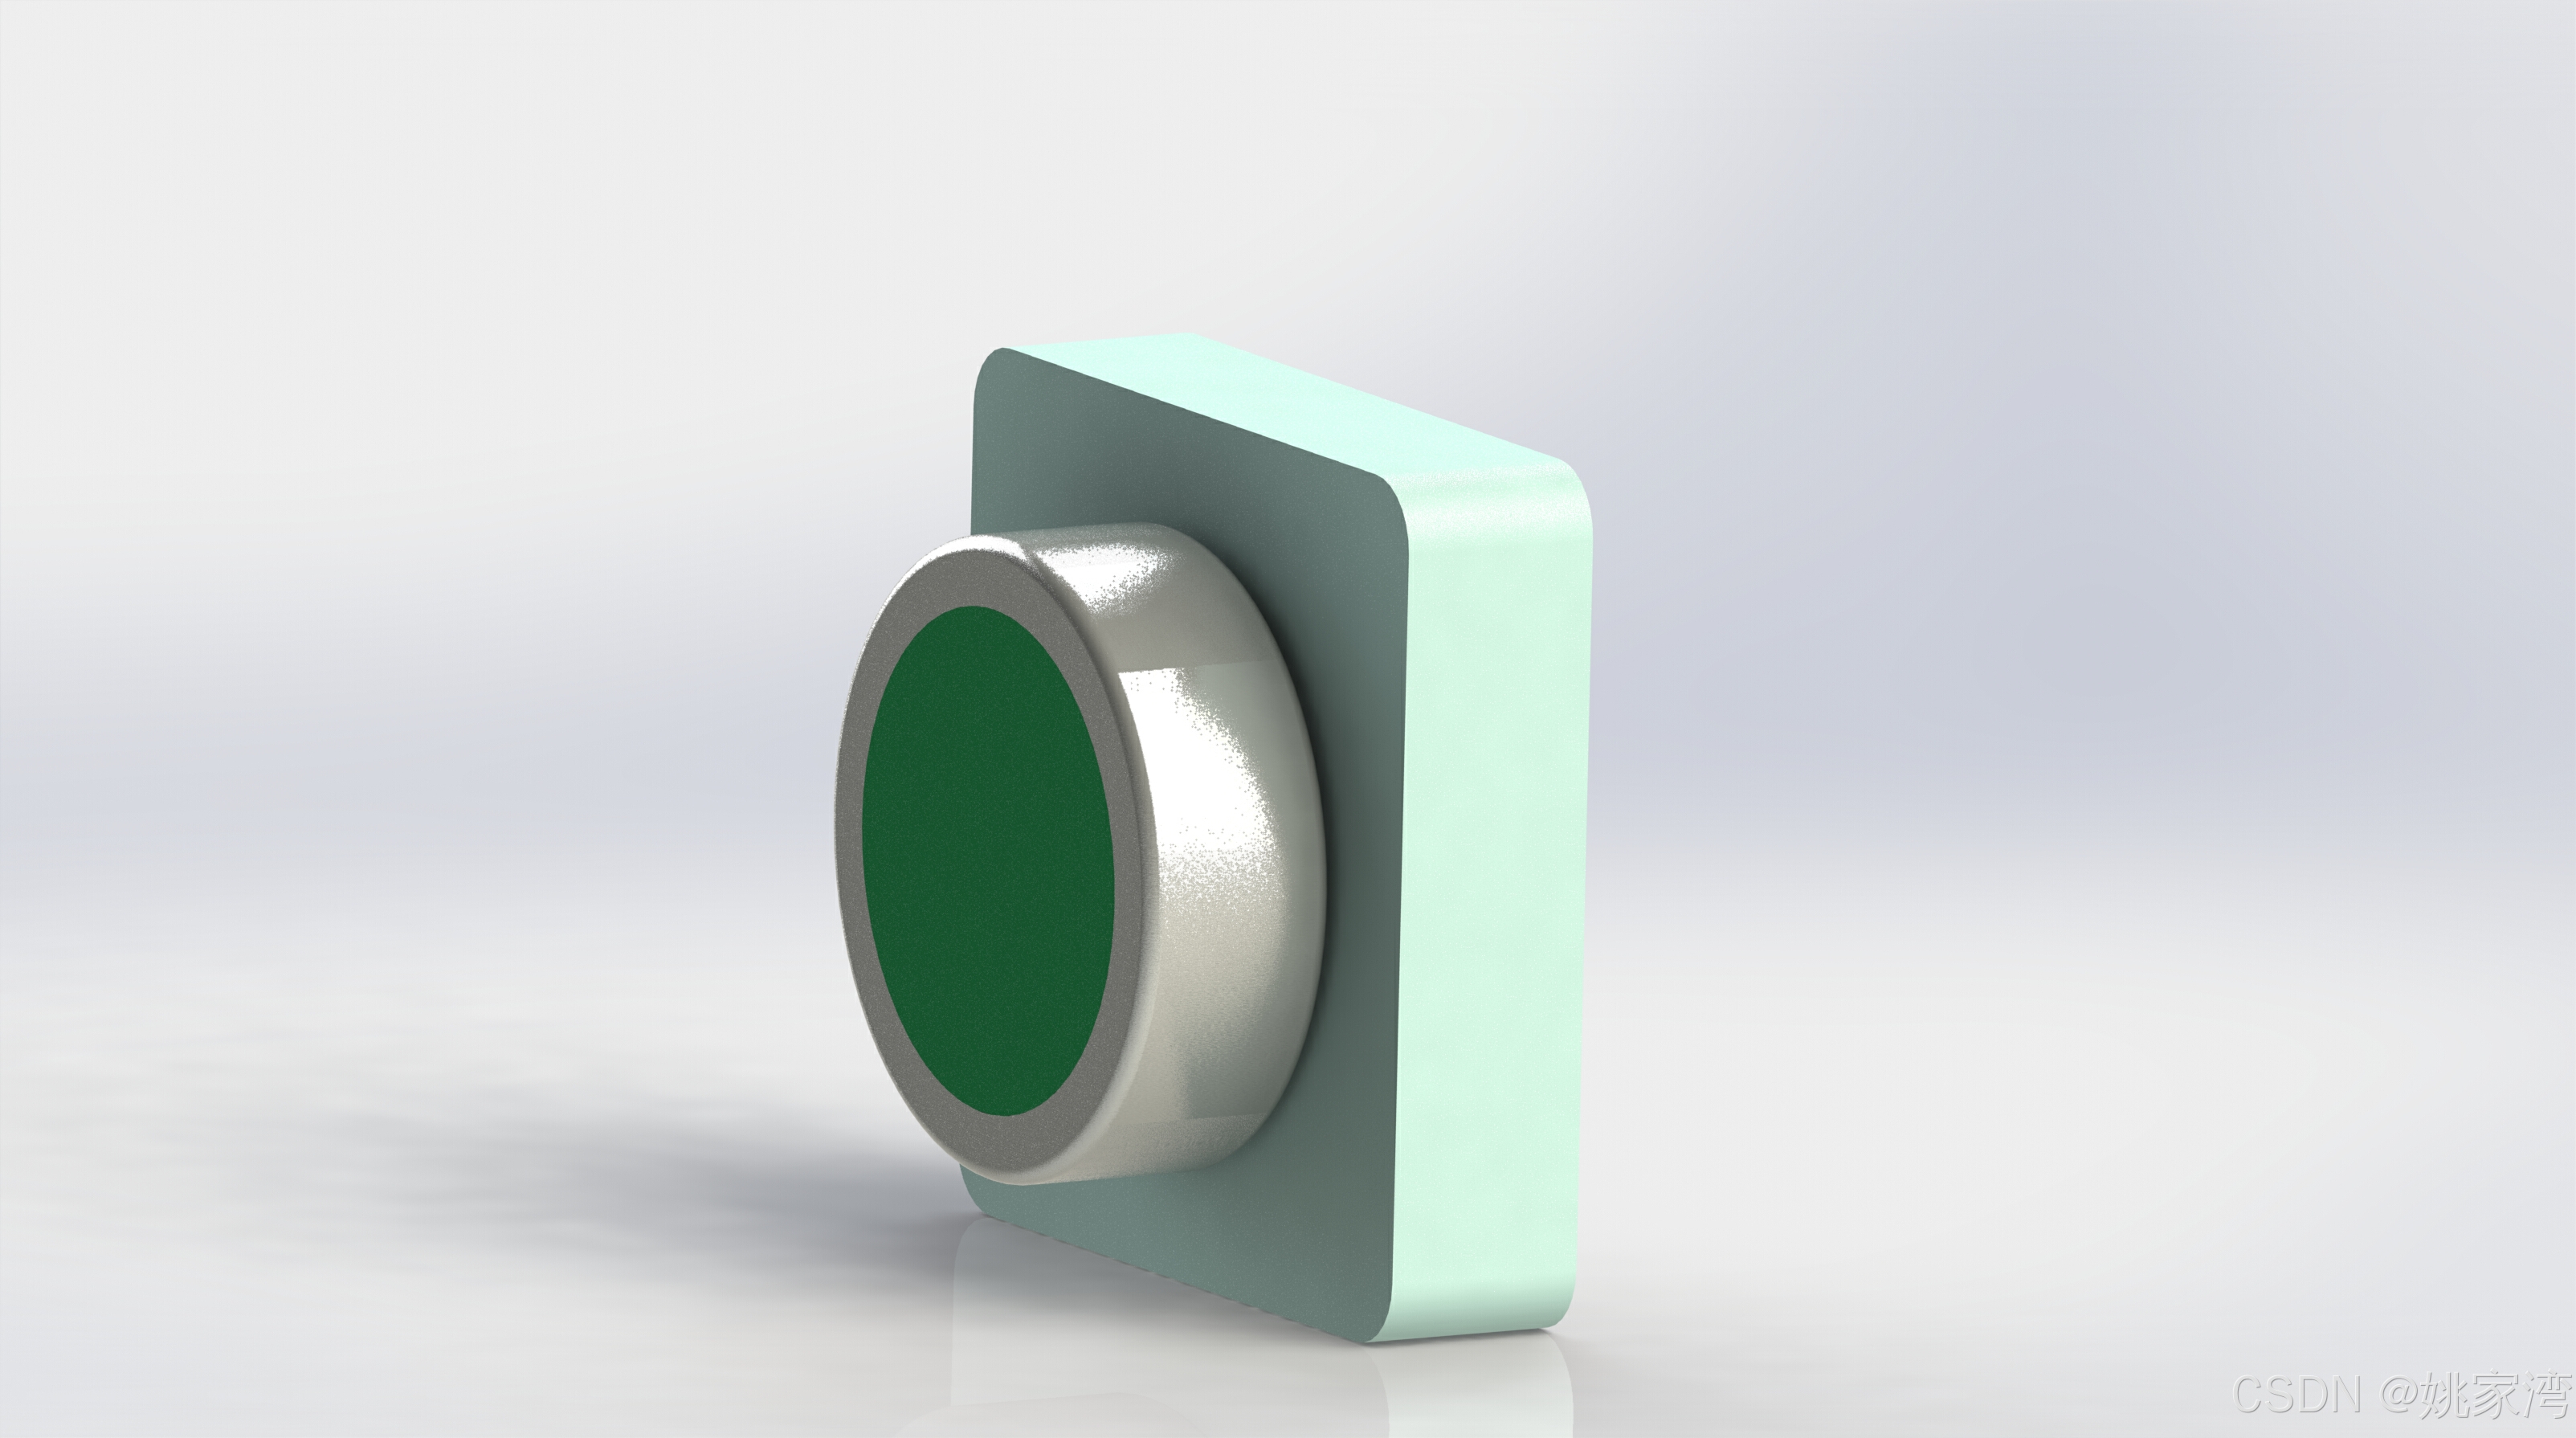
硬件设计
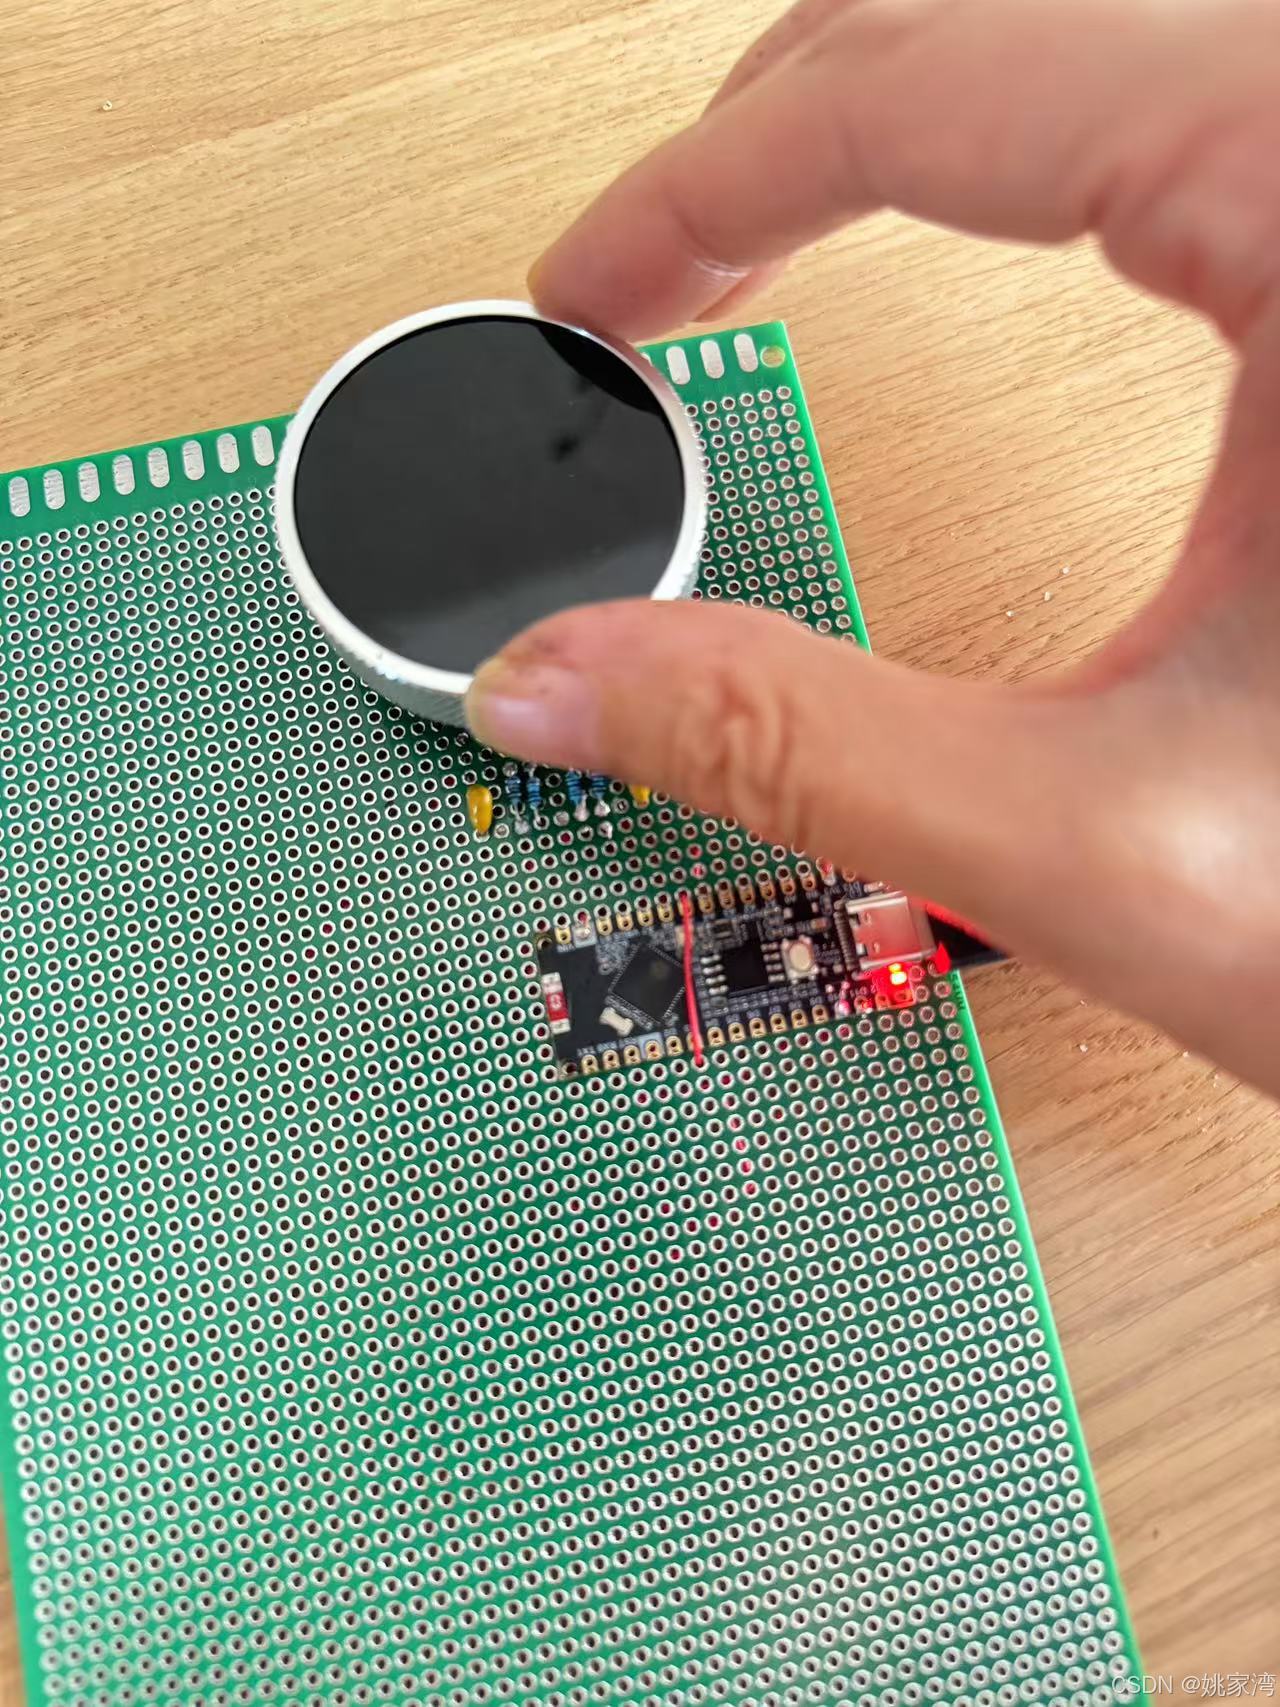
细节
编码器
下面是日本ALPS 公司的中空旋转编码器EC35A。
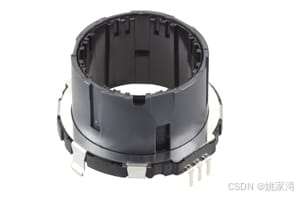
三个引脚分别是A,C,B。

接线图
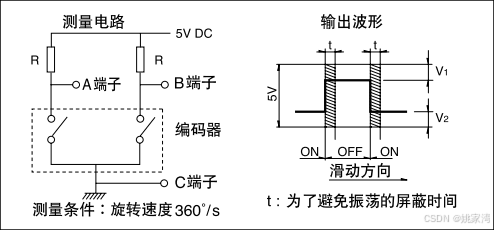
最好在编码器脉冲计数处理回路中设置下图所示的滤波器。

与Ardunio 的连接图。
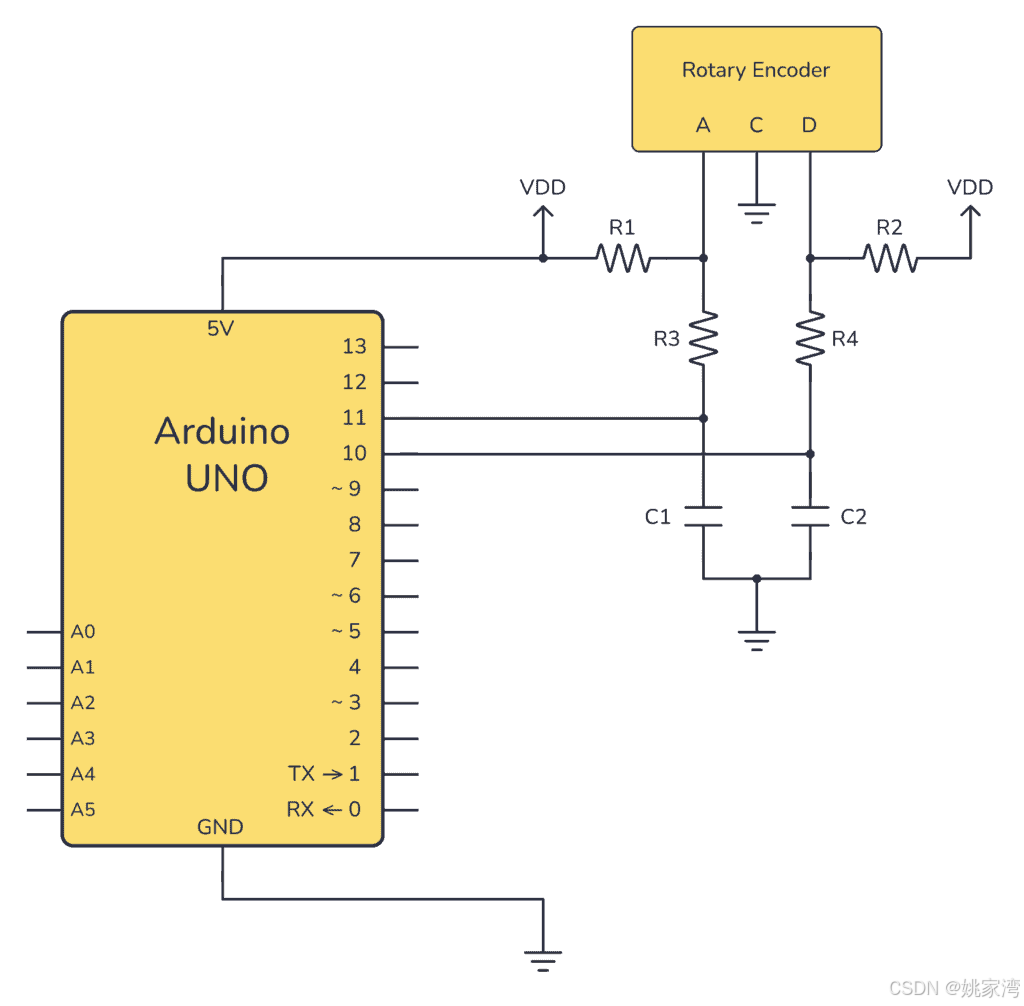
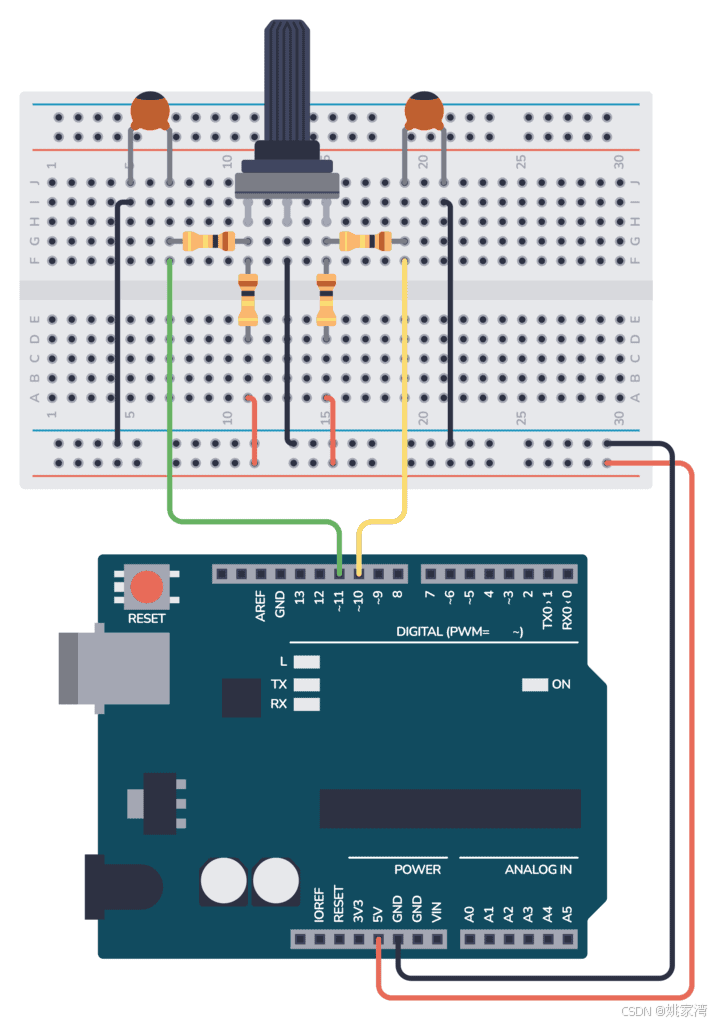
代码
目前的代码使用了蓝牙mouse 仿真,最终的程序也许要改成ble server 。
#include <BleMouse.h>
BleMouse bleMouse;
// Define the pins used for the encoder
const int encoderPinA = 11;
const int encoderPinB = 10;

// Variables to keep the current and last state
volatile int encoderPosCount = 0;
int lastEncoded = 0;
int MAX=60;
int channel=-1;
void setup() {
  Serial.begin(115200);

  // Set encoder pins as input with pull-up resistors
  pinMode(encoderPinA, INPUT_PULLUP);
  pinMode(encoderPinB, INPUT_PULLUP);

  // Attach interrupts to the encoder pins
 attachInterrupt(digitalPinToInterrupt(encoderPinA), updateEncoder, CHANGE);
  attachInterrupt(digitalPinToInterrupt(encoderPinB), updateEncoder, CHANGE);
   bleMouse.begin();
}

void loop() {

  static int lastReportedPos = -1; // Store the last reported position
  if (encoderPosCount != lastReportedPos) {
    if((encoderPosCount/2)>channel) {
      channel++;
    Serial.print("Encoder Position: ");
    Serial.println(channel);
    bleMouse.move(0,0,1);
    };
       if((encoderPosCount/2)<channel) {
      channel--;
    Serial.print("Encoder Position: ");
    Serial.println(channel);
    bleMouse.move(0,0,-1);
    }
    lastReportedPos = encoderPosCount;
    }

  delay(500) ;

}

void updateEncoder() {

  int MSB = digitalRead(encoderPinA); // MSB = most significant bit
  int LSB = digitalRead(encoderPinB); // LSB = least significant bit
  int encoded = (MSB << 1) | LSB; // Converting the 2 pin value to single number
  int sum  = (lastEncoded << 2) | encoded; // Adding it to the previous encoded value

  if(sum == 0b1101 || sum == 0b0100 || sum == 0b0010 || sum == 0b1011){

    if (encoderPosCount==MAX) encoderPosCount=0;
    else
      encoderPosCount++;
    }
  if(sum == 0b1110 || sum == 0b0111 || sum == 0b0001 || sum == 0b1000){
   if (encoderPosCount==0) encoderPosCount=MAX;
   else
    encoderPosCount--;

    }

  lastEncoded = encoded; // Store this value for next time
}
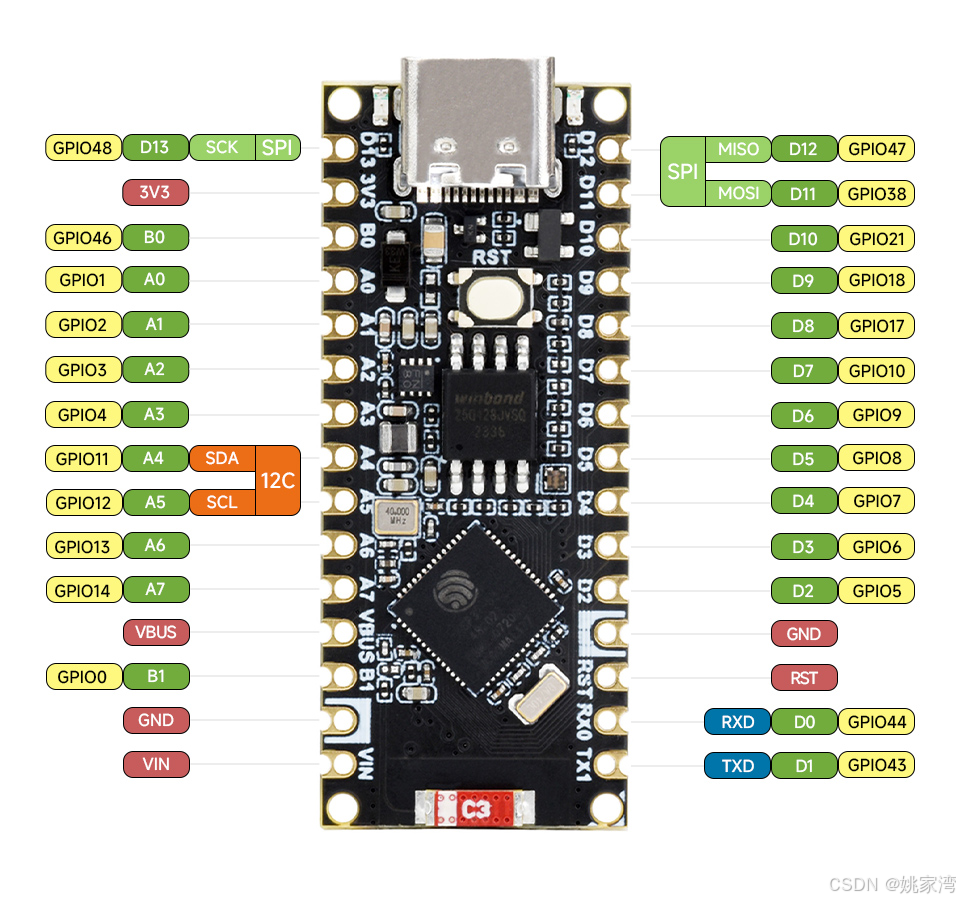
ardunio-ESP32-nano 开发板
外观
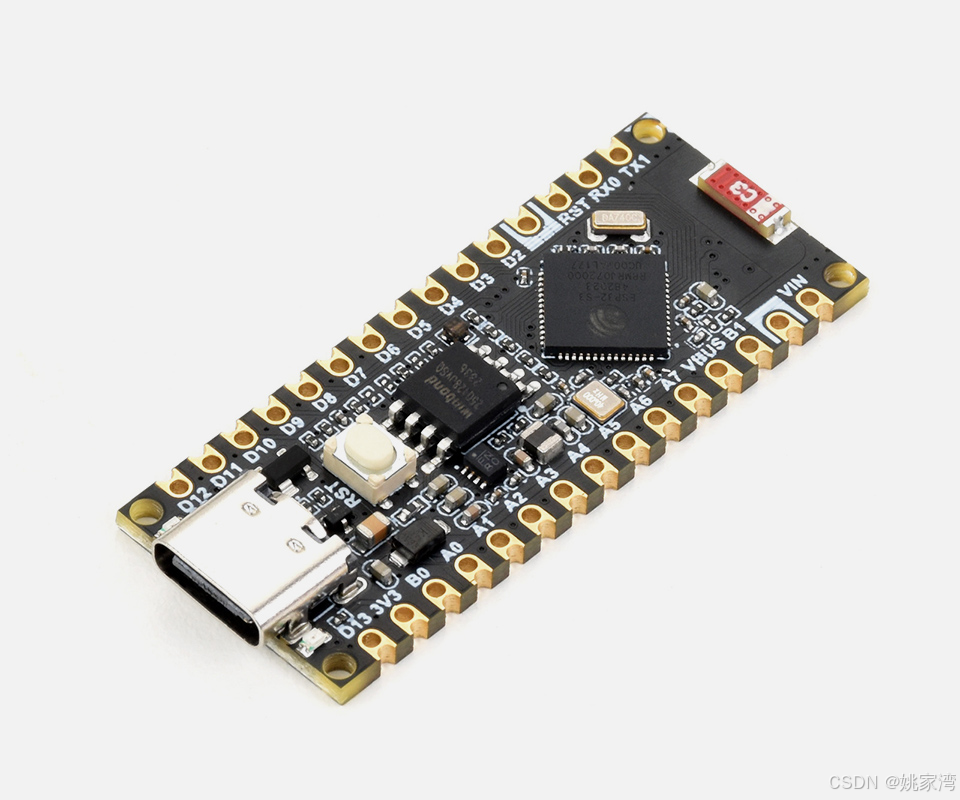
引脚图
HLS 网络电台的构建
HLS 全称是 HTTP Live Streaming, 是一个由 Apple 公司实现的基于 HTTP 的媒体流传输协议。 借助 HLS,视频和音频内容被分解为一系列块,经过压缩以便快速交付,并通过 HTTP 传输到最终用户的设备。
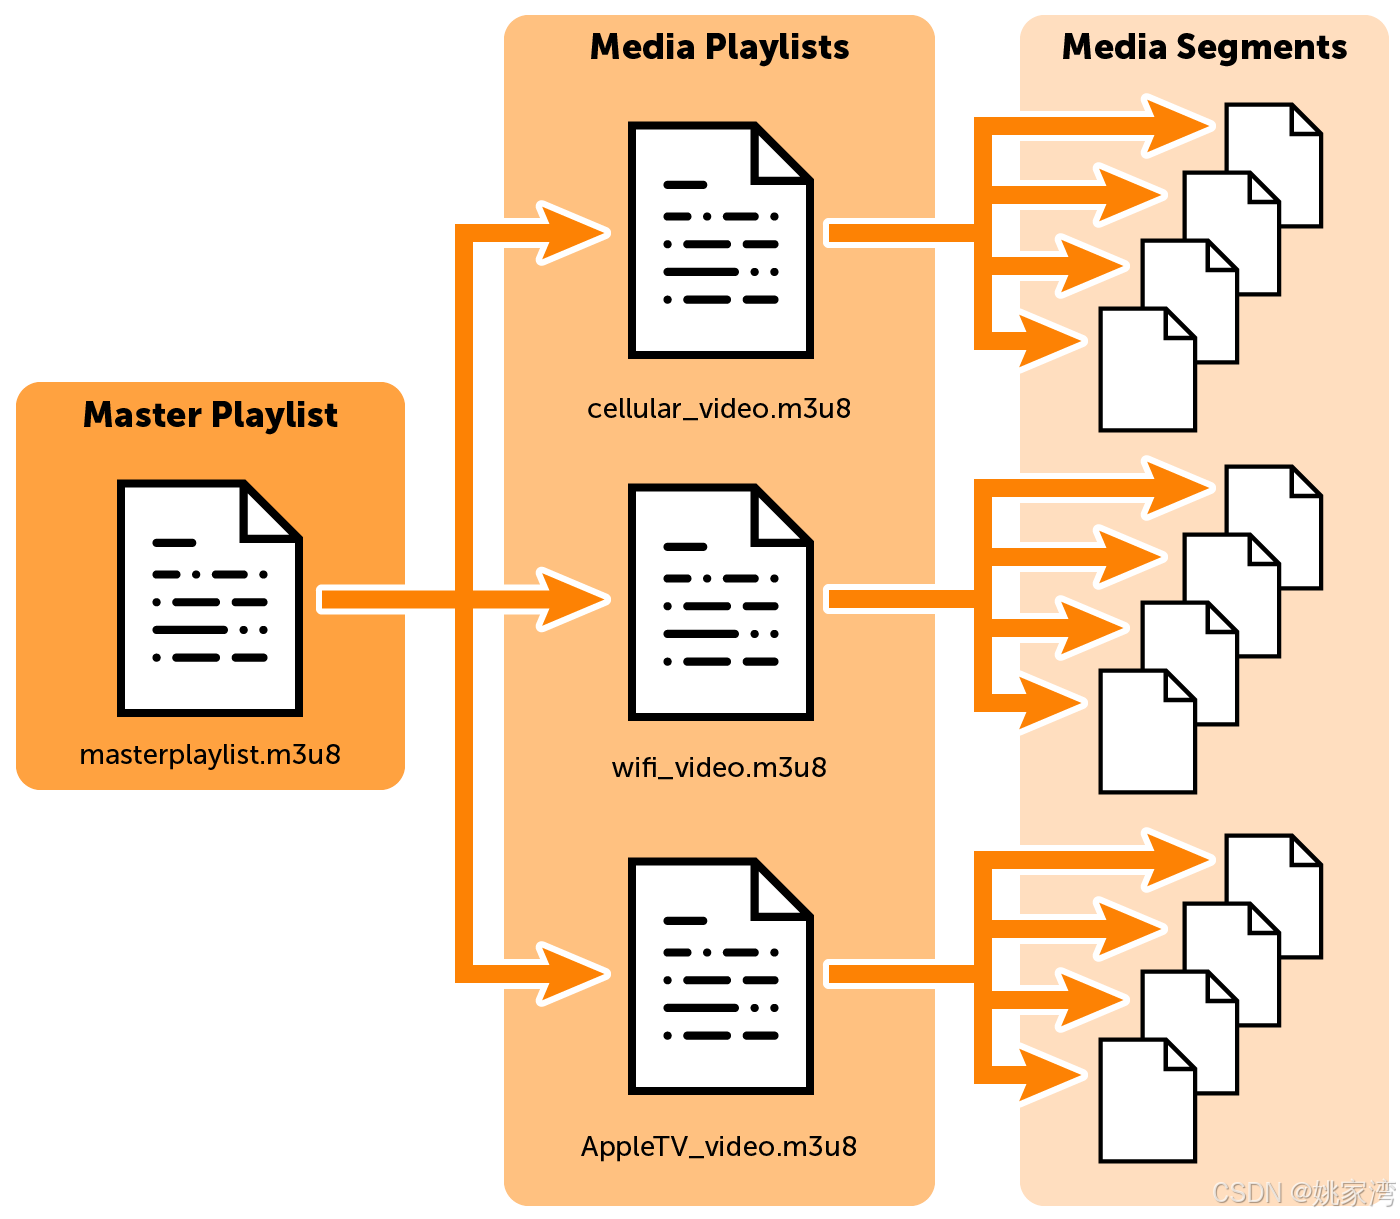
HLS 由一个m3u8 文件和多个ts 文件构成的。
节目源
网络上有许多网络广播电台的m3u8 的节目源地址,有的可以播放,有的不行。我们下载之后转换成为CSV 格式,然后通过CSV2JSON.js 软件转化为json 文件.下面是一部分
[
    {
        "StationName": "本地音乐台",
        "URL": "media/1.m3u8"
    },
    {
        "StationName": "CGTN Radio",
        "URL": "http://sk.cri.cn/am846.m3u8"
    },
    {
        "StationName": "CRI环球资讯广播",
        "URL": "http://satellitepull.cnr.cn/live/wxhqzx01/playlist.m3u8"
    },
    {
        "StationName": "CRI华语环球广播",
        "URL": "http://sk.cri.cn/hyhq.m3u8"
    },
    {
        "StationName": "CRI南海之声",
        "URL": "http://sk.cri.cn/nhzs.m3u8"
    },
    {
        "StationName": "CRI世界华声",
        "URL": "http://sk.cri.cn/hxfh.m3u8"
    }]
音频分发服务器
构建了一个HLS 音频测试平台,用于测试。
- 后台nodeJS 编写
- 前端 使用hlv.js 插件
自制HLS 媒体
除了网络上的节目源之外,我们也制作了一些测试语音媒体。要使用ffmpeg 工具转换。
使用ffmpeg 将mp3 转换成m3u8 的分段(1.mp3 )
ffmpeg -i 1.mp3 -c:v libx264 -c:a aac -strict -2 -f hls -hls_list_size 2 -hls_time 15 1.m3u8生成的效果是:
将 1.mp3 视频文件每 15 秒生成一个 ts 文件,最后生成一个 m3u8 文件(1.m3u8),m3u8 文件是 ts 的索引文件。和两个ts( 1.m3u8 ,10.ts 和11.ts)
将生成的文件放置在nodeJS/public/media 目录中。
我的代码
NodeJS代码
import express from 'express';
import path from 'path'
import url from 'url'
import   fs   from 'fs';
const router = express.Router();
const app = express();
const __filename = url.fileURLToPath(import.meta.url);
const __dirname = path.dirname(__filename);
app.use(express.static(path.join(__dirname, 'public')));
app.use(express.json())

router.get('/index', function (req, res) {
    res.sendFile(path.join(__dirname + '/views/index.html'));
});
router.post('/getStations', async function (req, res) {
    Request = req.body;
    //   console.log(Request)
    const Method = Request.Method;
    const Stations=JSON.parse(fs.readFileSync("public/doc/StationTable.json",'utf8'))

    console.log(Stations)
    res.send(JSON.stringify({
        Method: "getStations",
        Result: { Status: "OK", Stations: JSON.stringify(Stations) }
    }))
});
app.use('/', router);
app.listen(process.env.port || 3000);
console.log('Running at Port 3000');
前端Index.html
<!DOCTYPE html>
<html lang="en">

<head>
    <meta charset="utf-8">
    <meta name="viewport" content="width=device-width, initial-scale=1.0">
    <title>Radio Player</title>
    <link rel="stylesheet" href="css/bootstrap.min.css">
    <link rel="stylesheet" href="css/font-awesome.min.css">
    <link rel="stylesheet" href="font/bootstrap-icons.css">
    <script src="js/jquery-3.4.1.min.js"></script>
    <script src="js/bootstrap.min.js"></script>
    <script src="js/hls.js"></script>
    <script src="js/jquery.mousewheel.min.js"></script>
    <style>
        select {
            font-size: 24px;
            width: 320px;
        }
        audio {
            width: 320px;
        }
    </style>
    <script>
        var hls
        var CurrentChannel=0
        $(document).ready(function () {
            $("#Title").click()
            var audio = document.getElementById('audio');
            hls = new Hls();
            $("#Title").mousewheel(Mousewheel)
            getStations()

        });
        var Stations = null

        function Mousewheel(event){
            console.log(event.deltaX, event.deltaY, event.deltaFactor);
            if (event.deltaY>0) {
                CurrentChannel++;
                if (CurrentChannel==64) CurrentChannel==0
            }
            else  {
                if (CurrentChannel==0) CurrentChannel=64
                else
                CurrentChannel--;
            }
            $("#Selection").get(0).selectedIndex=CurrentChannel
            Selected()
        }
        function getStations() {
            var parameter = {
                Method: "getStations",
            }
            $.ajax({
                url: "/getStations",
                type: 'post',
                contentType: "application/json",
                dataType: "json",
                data: JSON.stringify(parameter),
                success: function (response) {
                    Stations = JSON.parse(response.Result.Stations)
                    console.log(Stations)
                    for (let i = 0; i < Stations.length; i++) {
                        $("#Selection").append("<option>" + Stations[i].StationName + "</option>")
                    }
                    $("#Selection").get(0).selectedIndex=CurrentChannel
                    Selected()
                }
            })
        }
        function Selected() {
            const StationName = $("#Selection").val()
            const Index = $("#Selection").get(0).selectedIndex
            CurrentChannel=Index
            console.log(StationName)
            console.log(Index)
            if (Hls.isSupported()) {

                var audio = document.getElementById('audio');

                hls.loadSource(Stations[Index].URL);
                hls.attachMedia(audio);
                hls.on(Hls.Events.MANIFEST_PARSED, function () {
                    audio.play();
                });
            }
        }
    </script>

</head>

<body>
    <div class="container" >
        <h1 class="text-info" id="Title">网络收音机</h1>
        <div class="form-group">
        <h3 class="text-info">选台</h3>
        <select class="form-select   " aria-label="Default select" id="Selection" onchange="Selected()"></select>
        </div>
        <div>
        <h3 class="text-info">播放器</h3>
        <audio id="audio" controls ></audio>

       </div>
    </div>
</body>

</html>
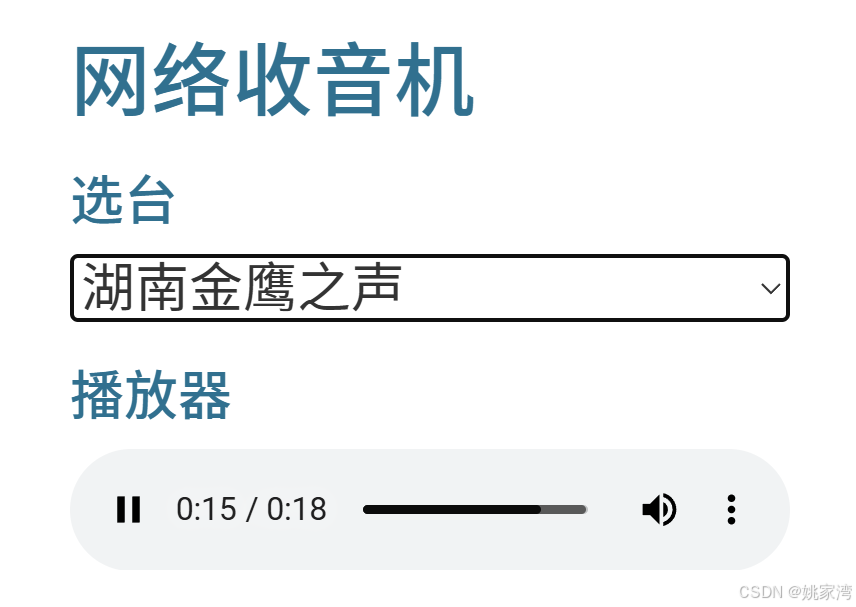
界面有点丑
结束语
下一步,开始研究个人定制的音频频道的构建和尝试。感兴趣的可以共同探讨。

