pyQT + OpenCV小练习
一 ,创建一个 PyQt 应用程序,该应用程序能够:
使用 OpenCV 加载一张图像。
在 PyQt 的窗口中显示这张图像。
提供四个按钮(QPushButton):
- 一个用于将图像转换为灰度图
- 一个用于将图像恢复为原始彩色图
- 一个用于将图像进行翻转
- 一个用于将图像进行旋转
当用户点击按钮时,相应地更新窗口中显示的图像
1.思路分析
读取图片
添加按钮
将功能函数与按钮使用信号与槽连接
2.设计到的函数方法
cv2.cvtColor(转换为灰度图)
cv2.flip(翻转)
cv2.getRotationMatrix2D(用于计算二维旋转矩阵的函数)
cv2.warpAffine(对图像进行放射变换)
3.代码
import cv2
import sys
from PyQt6.QtGui import QPixmap, QImage
from PyQt6.QtWidgets import QApplication, QWidget, QLabel, QPushButton


class MyWidget(QWidget):

    def __init__(self):
        super().__init__()

        self.resize(600, 400)


        self.lab3 = QLabel(self)
        self.lab3.resize(600, 400)
        self.lab3.setScaledContents(True)


        self.img = cv2.imread("./car5.png")
        self.update_image(self.img)


        btn1 = QPushButton("灰度", self)
        btn1.setStyleSheet("background-color:green")
        btn1.clicked.connect(self.change_image)
        btn1.move(10, 10)

        btn2 = QPushButton("彩色", self)
        btn2.setStyleSheet("background-color:green")
        btn2.clicked.connect(self.change_colours)
        btn2.move(90, 10)

        btn3 = QPushButton("翻转", self)
        btn3.setStyleSheet("background-color:green")
        btn3.clicked.connect(self.change_transform)
        btn3.move(170, 10)

        btn4 = QPushButton("旋转", self)
        btn4.setStyleSheet("background-color:green")
        btn4.clicked.connect(self.spin)
        btn4.move(260, 10)


    def update_image(self, img):

        img_rgb = cv2.cvtColor(img, cv2.COLOR_BGR2RGB)
        h, w, ch = img_rgb.shape
        bytes_per_line = ch * w
        qimage = QImage(img_rgb.data, w, h, bytes_per_line, QImage.Format.Format_RGB888)
        pixmap = QPixmap.fromImage(qimage)


        self.lab3.setPixmap(pixmap)

    def change_colours(self):
        self.update_image(self.img)

    def change_transform(self):
        img_filp = cv2.flip(self.img,0)
        self.update_image(img_filp)

    def spin(self):
        M = cv2.getRotationMatrix2D((self.img.shape[1]/2, self.img.shape[0]/2), 45, 0.5)

        img_warp = cv2.warpAffine(self.img,
                                  M,
                                  (700, 700),  大小
                                  flags=cv2.INTER_LINEAR,

                                  )

        self.update_image(img_warp)


    def change_image(self):

        img_gray = cv2.cvtColor(self.img, cv2.COLOR_BGR2GRAY)


        self.update_image(img_gray)


if __name__ == "__main__":
    app = QApplication(sys.argv)

    myWidget = MyWidget()

    myWidget.show()

    sys.exit(app.exec())
4.效果展示
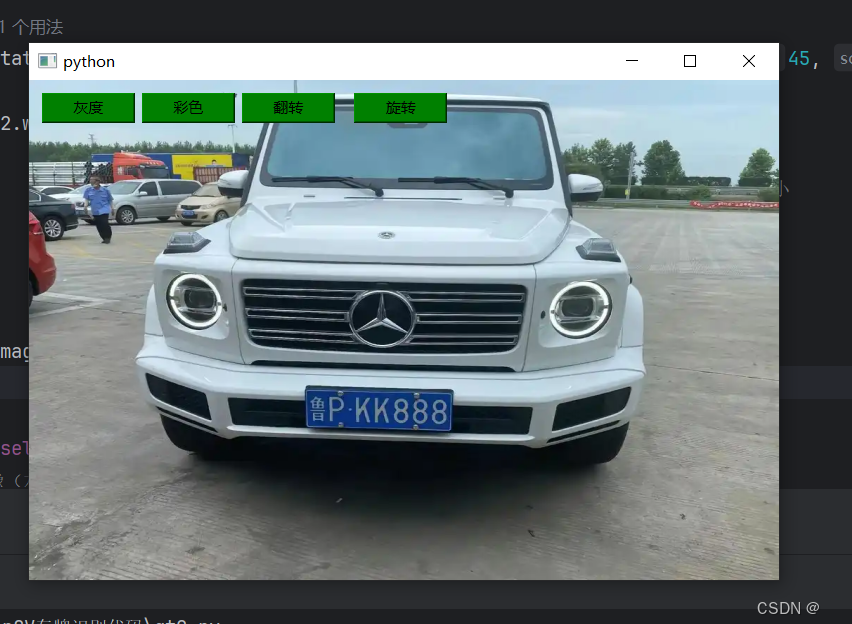
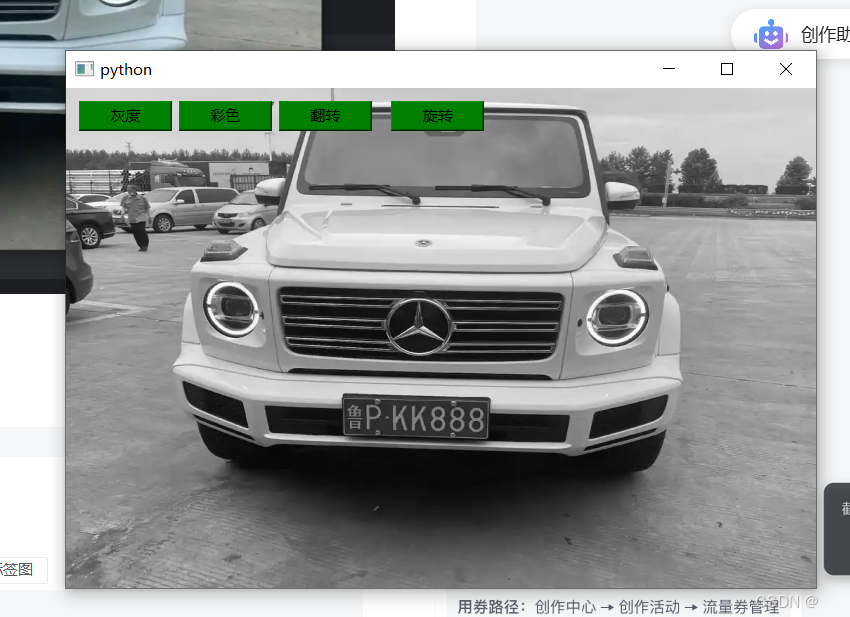
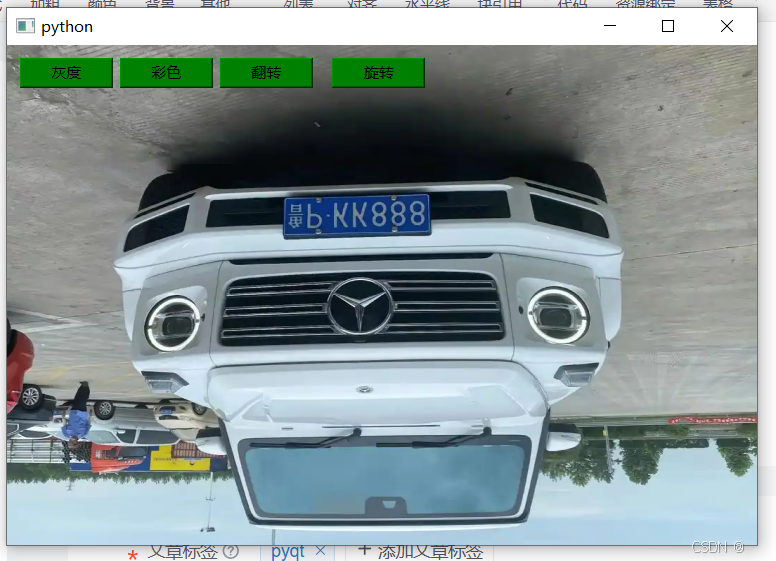

二,创建一个 PyQt 应用程序,该应用程序能够:
使用 OpenCV 加载一张图像。
在 PyQt 的窗口中显示这张图像。
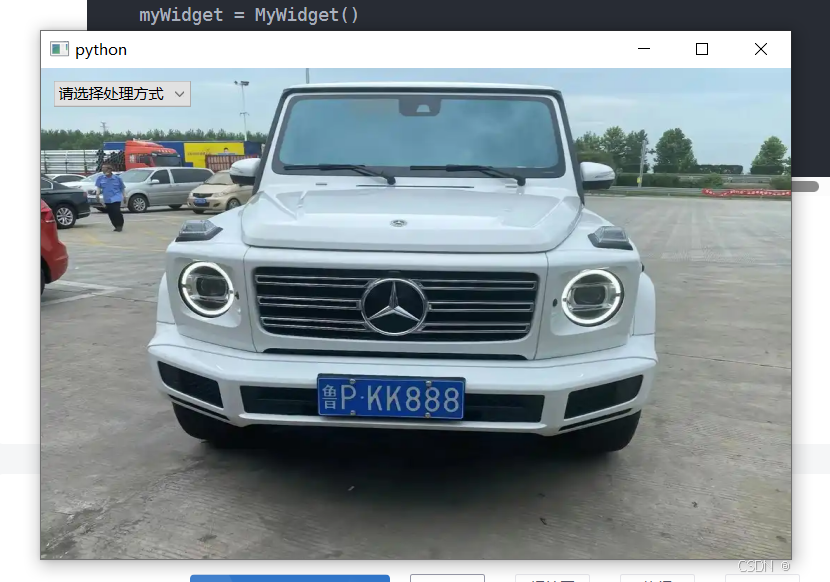
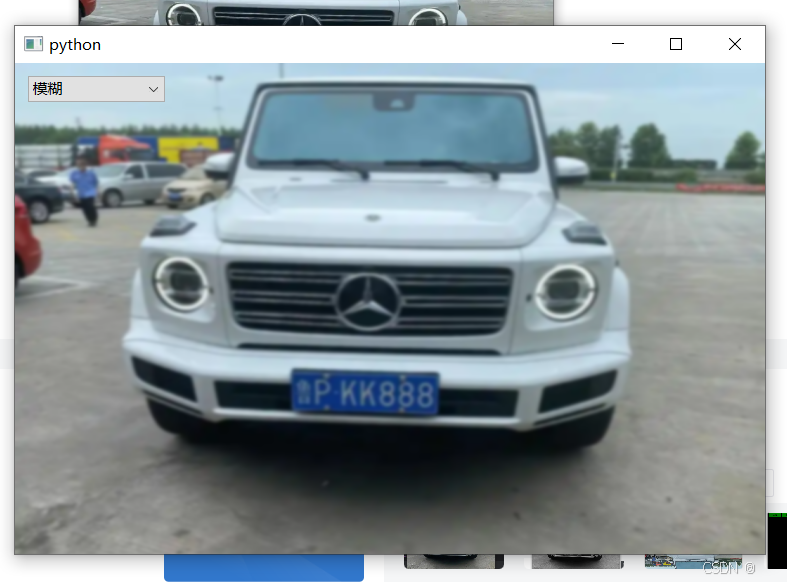
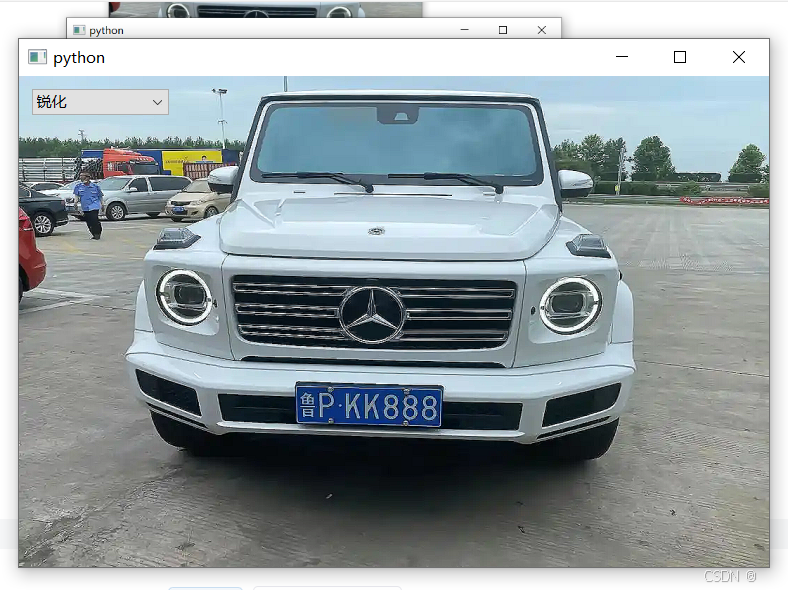
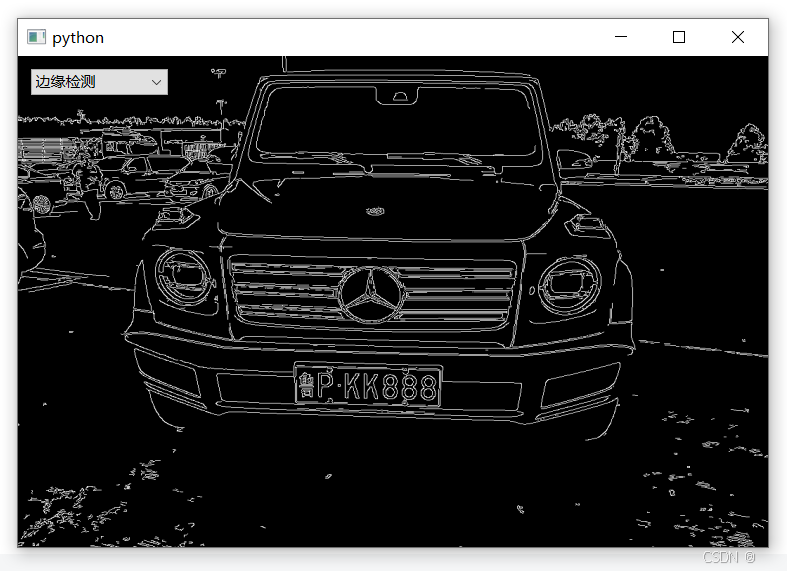
提供一个下拉列表(QComboBox),对图像做(模糊、锐化、边缘检测)处理:
当用户点击下拉列表选项时,相应地更新窗口中显示的图像。
提供一个按钮,当用户点击按钮时,能保存调整后的图像。
思路分析
使用下拉列表将功能函数写入进去
设计到的函数方法
提供一个下拉列表(QComboBox)
模糊——使用cv2.GaussianBlur()实现
锐化——使用cv2.Laplacian()、cv2.Sobel()实现
边缘检测——使用cv2.Canny()实现
代码
import cv2
import sys
import numpy as np
from PyQt6.QtGui import QPixmap, QImage
from PyQt6.QtWidgets import QApplication, QWidget, QLabel, QComboBox, QVBoxLayout


class MyWidget(QWidget):

    def __init__(self):
        super().__init__()

        self.resize(600, 400)


        self.lab3 = QLabel(self)
        self.lab3.resize(600, 400)
        self.lab3.setScaledContents(True)


        self.img = cv2.imread("./car5.png")
        self.update_image(self.img)


        self.combo_box = QComboBox(self)
        self.combo_box.addItem("请选择处理方式")
        self.combo_box.addItem("模糊")
        self.combo_box.addItem("锐化")
        self.combo_box.addItem("边缘检测")
        self.combo_box.currentIndexChanged.connect(self.process_image)
        self.combo_box.move(10, 10)

    def update_image(self, img):

        img_rgb = cv2.cvtColor(img, cv2.COLOR_BGR2RGB)
        h, w, ch = img_rgb.shape
        bytes_per_line = ch * w
        qimage = QImage(img_rgb.data, w, h, bytes_per_line, QImage.Format.Format_RGB888)
        pixmap = QPixmap.fromImage(qimage)

        self.lab3.setPixmap(pixmap)

    def process_image(self):

        selected_option = self.combo_box.currentText()

        if selected_option == "模糊":

            img_blurred = cv2.GaussianBlur(self.img, (15, 15), 0)
            self.update_image(img_blurred)

        elif selected_option == "锐化":

            kernel = np.array([[0, -1, 0], [-1, 5,-1], [0, -1, 0]])
            img_sharpened = cv2.filter2D(self.img, -1, kernel)
            self.update_image(img_sharpened)

        elif selected_option == "边缘检测":

            img_gray = cv2.cvtColor(self.img, cv2.COLOR_BGR2GRAY)
            img_edges = cv2.Canny(img_gray, 100, 200)
            img_edges_colored = cv2.cvtColor(img_edges, cv2.COLOR_GRAY2BGR)
            self.update_image(img_edges_colored)

        else:
            self.update_image(self.img)


if __name__ == "__main__":
    app = QApplication(sys.argv)

    myWidget = MyWidget()

    myWidget.show()

    sys.exit(app.exec())
效果展示
