js使用qrcode与canvas生成带logo的二维码
qrcode库
文档
https://www.npmjs.com/package/qrcode
安装
npm i qrcode使用
errorCorrectionLevel: 'H' // 容错率(H是最高,其它看文档)
width: 200 // 大小
margin: 2 // 边距
import QRCode from 'qrcode'

const testFn = async () => {
    const img= await QRCode.toDataURL('https://www.baidu.com/', { errorCorrectionLevel: 'H', width: 200, margin: 2 })
    console.log(img)
}
canvas绘图
文档
https://developer.mozilla.org/zh-CN/docs/Web/API/Canvas_API
使用
html
<canvas id="myCanvas" width="100" height="100" style="border: 1px solid #ccc"></canvas>js
const canvas = document.getElementById('myCanvas')

// 设置画布宽高(也可内联样式写标签上)
canvas.width = 200
canvas.height = 200

// 获取 2d 上下文对象
const ctx = canvas.getContext('2d')

// 绘制圆
// 设置圆的属性
const centerX = canvas.width / 2 // 圆心 X 坐标
const centerY = canvas.height / 2 // 圆心 Y 坐标
const radius = 30 // 圆的半径
ctx.beginPath() // 开始路径
ctx.arc(centerX, centerY, radius, 0, Math.PI * 2, false) // 绘制圆
ctx.fillStyle = '#f9f9f9' // 填充颜色
ctx.fill() // 填充圆
ctx.closePath() // 关闭路径

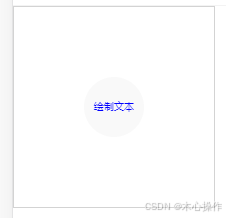
// 绘制文本
ctx.font = '10px' // 文本大小
ctx.fillStyle = 'blue' // 颜色
ctx.textAlign = 'center' // 水平对齐
ctx.textBaseline = 'middle' // 垂直对齐
ctx.fillText('绘制文本', canvas.width / 2, canvas.height / 2)
效果

合并图片方法
function mergeImages() {
  const canvas = document.createElement('canvas')
  const ctx = canvas.getContext('2d')

  // 创建两个图片对象
  const img1 = new Image()
  const img2 = new Image()
  img1.src = 'https://www.test.com/menu.png'
  img2.src = 'https://www.test.com//logo.png'

  // 等待两张图片加载完成
  let imagesLoaded = 0

  img1.onload = img2.onload = function () {
    imagesLoaded++
    if (imagesLoaded === 2) {
      // 当两张图片都加载完成后,绘制到 Canvas 上
      ctx.drawImage(img1, 0, 0) // 绘制第一张图片
      ctx.drawImage(img2, 50, 0) // 绘制第二张图片,x偏移 50 像素

      // 下载合并后的图片
      const link = document.createElement('a')
      link.download = 'merged-image.png'
      link.href = canvas.toDataURL('image/png')
      link.click()
    }
  }
}
结合使用实现二维码带logo
使用qrcode生成二维码,使用canvas绘制合并到一起
实现
html
<canvas id="myCanvas" width="100" height="100" style="border: 1px solid #ccc"></canvas>js
const onMounted = async () => {
  // await nextTick() // 使用vue加上
  const canvas = document.getElementById('myCanvas')
  canvas.width = 200
  canvas.height = 200
  const ctx = canvas.getContext('2d')

  // 生成二维码并绘制到canvas
  const img1 = new Image()
  img1.src = await QRCode.toDataURL('https://www.baidu.com/', { errorCorrectionLevel: 'H', width: 200, margin: 2 })
  await new Promise((resolve, reject) => {
    img1.onload = () => {
      resolve(ctx.drawImage(img1, 0, 0))
    }
  })

  // 绘制圆
  // 设置圆的属性
  const centerX = canvas.width / 2 // 圆心 X 坐标
  const centerY = canvas.height / 2 // 圆心 Y 坐标
  const radius = 30 // 圆的半径
  ctx.beginPath() // 开始路径
  ctx.arc(centerX, centerY, radius, 0, Math.PI * 2, false) // 绘制圆
  ctx.fillStyle = '#f9f9f9' // 填充颜色
  ctx.fill() // 填充圆
  ctx.closePath() // 关闭路径

  // 绘制文本
  ctx.font = '10px'
  ctx.fillStyle = 'blue'
  ctx.textAlign = 'center'
  ctx.textBaseline = 'middle'
  ctx.fillText('绘制文本', canvas.width / 2, canvas.height / 2)
}
效果

如需把文本替换成图片,参考上面 合并图片方法 即可
