Electron桌面应用开发:自定义菜单
完成初始应用的创建Electron桌面应用开发:创建应用,随后我们就可以自定义软件的菜单了。菜单可以帮助用户快速找到和执行命令,而不需要记住复杂的快捷键,通过将相关功能组织在一起,用户可以更容易地发现和使用应用程序的各种特性。同时菜单允许开发者提供更多的功能选项而不必担心界面会因此变得拥挤或难以导航,比如下拉菜单、弹出菜单等可以在有限的空间内提供大量的选项。
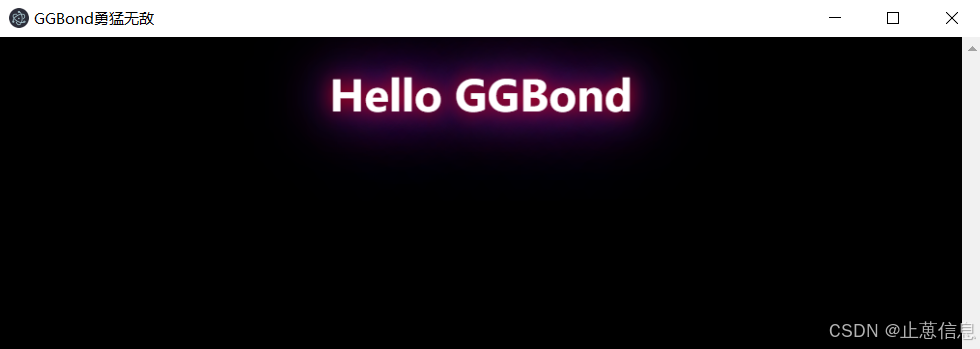
Electron的原始菜单为以下页面:

取消顶部菜单显示
这里可以使用两种常用的方法,第一种是在窗口创建函数中设置frame: false:
const {app, BrowserWindow, Menu} = require('electron');

let win = null;

function createWindow() {
    win = new BrowserWindow({
        width: 800,
        height: 600,
        frame: false,
        webPreferences: {
            nodeIntegration: true
        },
    });

    win.loadFile('index.html');

    win.on('closed', () => {
        win = null;
    });
}

app.on('ready', createWindow);

app.on('window-all-closed', () => {
    if (process.platform !== 'darwin') {
        app.quit();
    }
});
这样大小化和关闭按钮、标题也全部消失了,所以只适合个别情况使用。

第二种是在创建窗口函数中加入Menu.setApplicationMenu(null);设置,这样可以保留标题等内容:
const {app, BrowserWindow, Menu} = require('electron');

let win = null;

function createWindow() {
    win = new BrowserWindow({
        width: 800,
        height: 600,
        webPreferences: {
            nodeIntegration: true
        },
    });

    win.loadFile('index.html');
    Menu.setApplicationMenu(null);

    win.on('closed', () => {
        win = null;
    });
}

app.on('ready', createWindow);

app.on('window-all-closed', () => {
    if (process.platform !== 'darwin') {
        app.quit();
    }
});
自定义子菜单
这里我们可以在主文件main.js中直接添加自定义菜单的代码,也可以新建一个menu.js文件,随后在main.js中进行引用(个人推荐做法)
在Electron中定义菜单需要先引入Menu:
const {Menu} = require('electron')
定义格式如下:
    const template = [
        {
            label: '菜单1',
            submenu: [
                {
                    label: '子菜单1'
                },
                {
                    label: '子菜单2',
                }
            ]
        },

        {
            label: '菜单2',
            submenu: [
                {
                    label: '子菜单1'
                },
                {
                    label: '子菜单2',
                    submenu: [
                        {
                            label: '孙子菜单1'
                        },
                        {
                            label: '孙子菜单2'
                        }
                    ]
                }
            ]
        }
    ]
可以使用click来监听事件,例如:
            {
                label: '欧耶',
                accelerator: 'CmdOrCtrl+O',
                click: () => {
                    console.log('菜单被点击了');
                }
            },
在main.js中直接添加菜单代码的格式如下:
const { app, BrowserWindow, Menu } = require('electron');

let win = null;

function createWindow() {
    win = new BrowserWindow({
        width: 800,
        height: 600,
        webPreferences: {
            nodeIntegration: true
        },
    });

    win.loadFile('index.html');

    win.on('closed', () => {
        win = null;
    });
}

const template = [
    {
        label: '菜单1',
        submenu: [
            {
                label: '子菜单1'
            },
            {
                label: '子菜单2',
            }
        ]
    },

    {
        label: '菜单2',
        submenu: [
            {
                label: '子菜单1'
            },
            {
                label: '子菜单2',
                submenu: [
                    {
                        label: '孙菜单1'
                    },
                    {
                        label: '孙菜单2'
                    }
                ]
            }
        ]
    },

    {
        label: '帮助',
        role: 'help',
        click() { require('electron').shell.openExternal('https://example.com/help') }
    }
];

const menu = Menu.buildFromTemplate(template);
Menu.setApplicationMenu(menu);

app.on('ready', createWindow);

app.on('window-all-closed', () => {
    if (process.platform !== 'darwin') {
        app.quit();
    }
});

app.on('activate', () => {
    if (win === null) {
        createWindow();
    }
});
这里我们还是推荐使用将创建菜单的代码转移到其他文件中,比如新建一个menu.js,这样可以更加方便的进行代码编写和问题排查:
main.js:
const {app, BrowserWindow, Menu} = require('electron');
// 引入menu.js文件
const menuTemplate = require('./menu.js');

let win = null;

function createWindow() {
    win = new BrowserWindow({
        width: 800,
        height: 600,
        webPreferences: {
            nodeIntegration: true
        },
    });

    win.loadFile('index.html');

    win.on('closed', () => {
        win = null;
    });

	// 创建窗口
    const menu = Menu.buildFromTemplate(menuTemplate(win));
    Menu.setApplicationMenu(menu);
}

app.on('ready', createWindow);

app.on('window-all-closed', () => {
    if (process.platform !== 'darwin') {
        app.quit();
    }
});
menu.js:
const {Menu} = require('electron')

module.exports = function (win) {
    const template = [
        {
            label: '菜单1',
            submenu: [
                {
                    label: '子菜单1'
                },
                {
                    label: '子菜单2',
                }
            ]
        },

        {
            label: '菜单2',
            submenu: [
                {
                    label: '子菜单1'
                },
                {
                    label: '子菜单2',
                    submenu: [
                        {
                            label: '孙菜单1'
                        },
                        {
                            label: '孙菜单2'
                        }
                    ]
                }
            ]
        },

        {
            label: '帮助',
            role: 'help',
            click() { require('electron').shell.openExternal('https://example.com/help') }
        }
    ]
    return template;
}
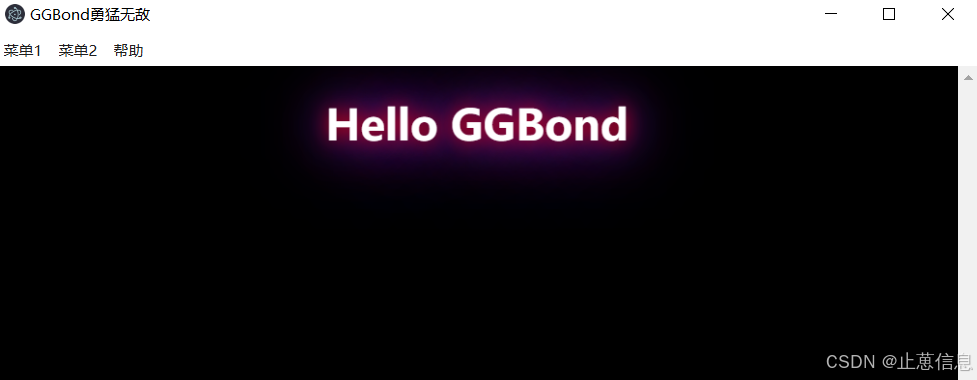
两种方法的最终效果如下:

上下文菜单
上下文菜单通常在用户右键点击某个元素时显示,通常通过监听事件来创建和显示上下文菜单。
在主文件中需要导入ipcMain模块,main.js:
const { app, BrowserWindow, Menu, ipcMain } = require('electron');
const menuTemplate = require('./menu.js');

let win = null;

function createWindow() {
    win = new BrowserWindow({
        width: 800,
        height: 600,
        webPreferences: {
            nodeIntegration: true,
            contextIsolation: false,
            preload: __dirname + './preload.js'
        },
    });

    win.loadFile('index.html');

    const menu = Menu.buildFromTemplate(menuTemplate(win));
    Menu.setApplicationMenu(menu);

    win.on('closed', () => {
        win = null;
    });
}

app.on('ready', createWindow);

app.on('window-all-closed', () => {
    if (process.platform !== 'darwin') {
        app.quit();
    }
});

app.on('activate', () => {
    if (win === null) {
        createWindow();
    }
});
renderer.js,DOM内容加载完成后执行的逻辑:
document.addEventListener('DOMContentLoaded', () => {
});
使用preload脚本处理上下文菜单的preload.js, 用于安全地暴露API给渲染进程:
const { contextBridge, ipcRenderer } = require('electron');

contextBridge.exposeInMainWorld('electronAPI', {
    send: (channel, data) => {
         // 向主进程发送消息
        ipcRenderer.send(channel, data);
    },
    receive: (channel, func) => {
        // 接收来自主进程的消息
        ipcRenderer.on(channel, (event, ...args) => func(...args));
    }
});
menu.js:
const {Menu} = require('electron')

module.exports = function (win) {
    const template = [
        {
            label: '菜单1',
            submenu: [
                {
                    label: '子菜单1'
                },
                {
                    label: '子菜单2',
                }
            ]
        },

        {
            label: '菜单2',
            submenu: [
                {
                    label: '子菜单1'
                },
                {
                    label: '子菜单2',
                    submenu: [
                        {
                            label: '孙菜单1'
                        },
                        {
                            label: '孙菜单2'
                        }
                    ]
                }
            ]
        },

        {
            label: '帮助',
            role: 'help',
            click() { require('electron').shell.openExternal('https://example.com/help') }
        }
    ]
    return template;
}
index.html:
<!DOCTYPE html>
<html lang="zh-CN">
<head>
    <meta charset="UTF-8">
    <meta name="viewport" content="width=device-width, initial-scale=1.0">
    <link rel="stylesheet" href="./style.css">
    <title>GGBond勇猛无敌</title>
</head>
<body>
    <h1>Hello GGBond</h1>

    <script src="./renderer.js"></script>
</body>
</html>
弹出式菜单
弹出式菜单可以通过编程方式手动显示,不需要特定的触发事件。
main.js:
const { app, BrowserWindow, Menu } = require('electron');
const menuTemplate = require('./menu.js'); // 引入自定义菜单模板

let win = null;

function createWindow() {
    win = new BrowserWindow({
        width: 800,
        height: 600,
        webPreferences: {
            nodeIntegration: true,
            contextIsolation: false, // 在使用nodeIntegration时需要禁用contextIsolation
            preload: __dirname + '/preload.js' // 使用preload脚本处理上下文菜单
        },
    });

    win.loadFile('index.html');

    win.on('closed', () => {
        win = null;
    });

    const menu = Menu.buildFromTemplate(menuTemplate(win));
    Menu.setApplicationMenu(menu); // 设置为应用菜单
}

app.on('ready', createWindow);

app.on('window-all-closed', () => {
    if (process.platform !== 'darwin') {
        app.quit();
    }
});

app.on('activate', () => {
    if (win === null) {
        createWindow();
    }
});
使用preload脚本处理上下文菜单的preload.js,使用contextBridge来安全地暴露API给渲染进程,允许渲染进程调用showPopupMenu方法。:
const { contextBridge, ipcRenderer } = require('electron');

contextBridge.exposeInMainWorld('electronAPI', {
    showPopupMenu: (x, y) => {
        ipcRenderer.invoke('show-popup-menu', x, y);
    }
});
renderer.js:
document.addEventListener('DOMContentLoaded', () => {
    document.body.addEventListener('click', (event) => {
        window.electronAPI.showPopupMenu(event.x, event.y);
    });
});
menu.js:
const {Menu} = require('electron')

module.exports = function (win) {
    const template = [
        {
            label: '菜单1',
            submenu: [
                {
                    label: '子菜单1'
                },
                {
                    label: '子菜单2',
                }
            ]
        },

        {
            label: '菜单2',
            submenu: [
                {
                    label: '子菜单1'
                },
                {
                    label: '子菜单2',
                    submenu: [
                        {
                            label: '孙菜单1'
                        },
                        {
                            label: '孙菜单2'
                        }
                    ]
                }
            ]
        },

        {
            label: '帮助',
            role: 'help',
            click() { require('electron').shell.openExternal('https://example.com/help') }
        }
    ]
    return template;
}
index.html:
<!DOCTYPE html>
<html lang="zh-CN">
<head>
    <meta charset="UTF-8">
    <meta name="viewport" content="width=device-width, initial-scale=1.0">
    <link rel="stylesheet" href="./style.css">
    <title>GGBond勇猛无敌</title>
</head>
<body>
    <h1>Hello GGBond</h1>
    <script src="./src/renderer.js"></script>
</body>
</html>