从零开发Chrome广告拦截插件:开发、打包到发布全攻略
从零开发Chrome广告拦截插件:开发、打包到发布全攻略
想打造一个属于自己的Chrome插件,既能拦截烦人的广告,又能优雅地发布到Chrome Web Store?别担心,这篇教程将带你从零开始,动手开发一个功能强大且美观的广告拦截插件,涵盖编码、打包和上架的全过程。无论你是新手还是老司机,跟着这篇指南,保证你能轻松上手,做出一个让人惊艳的小工具!
1 开发你的广告拦截插件:从创意到代码实现
开发Chrome插件的第一步是明确功能:我们要实现一个可切换开关、支持自定义规则的广告拦截器。让我们一步步把创意变成现实!
1.1 准备开发环境与文件结构
动手前,先把工具和文件准备好,就像搭积木前要整理好零件。
1.1.1 选择IDE
- 推荐工具:Visual Studio Code(简称VS Code),轻量且支持Chrome调试插件。
- 为什么选它:内置终端、代码高亮、扩展丰富,简直是开发插件的神器!
1.1.2 创建项目文件夹
- 目录结构:新建一个名为
AdBlocker的文件夹,包含以下文件:
AdBlocker/
├── manifest.json       # 插件的核心配置文件
├── background.js       # 后台脚本,处理拦截逻辑
├── popup.html          # 弹出窗口界面
├── popup.js            # 弹出窗口逻辑
├── options.html        # 设置页面
├── options.js          # 设置页面逻辑
└── images/             # 图标文件夹
    ├── icon16.png      # 16x16像素图标
    ├── icon48.png      # 48x48像素图标
    └── icon128.png     # 128x128像素图标
1.2 编写核心文件
现在,拿起键盘,开始敲代码吧!
1.2.1 配置manifest.json
- 作用:这是插件的“身份证”,告诉Chrome你的插件是谁、能干啥。
- 代码示例:
{
  "manifest_version": 3,
  "name": "Ad Blocker with Toggle",
  "version": "1.0",
  "description": "A customizable ad blocker",
  "permissions": [
    "declarativeNetRequest",
    "storage",
    "downloads"
  ],
  "host_permissions": ["<all_urls>"],
  "action": {
    "default_popup": "popup.html",
    "default_icon": {
      "16": "images/icon16.png",
      "48": "images/icon48.png",
      "128": "images/icon128.png"
    }
  },
  "background": {
    "service_worker": "background.js"
  },
  "options_page": "options.html"
}
亮点:Manifest V3是最新标准,支持Service Worker,权限声明清晰。
1.2.2 实现后台逻辑background.js
功能:拦截广告请求,根据用户设置动态更新规则。
代码示例:
const defaultRules = [
  { id: 1, priority: 1, action: { type: "block" }, condition: { urlFilter: "||example-ads.com^", resourceTypes: ["script"] } }
];

function updateRules(isEnabled, customAdList = []) {
  const rules = isEnabled ? [
    ...defaultRules,
    ...customAdList.map((url, index) => ({
      id: index + 2,
      priority: url.startsWith("@@") ? 2 : 1,
      action: { type: url.startsWith("@@") ? "allow" : "block" },
      condition: { urlFilter: url.startsWith("@@") ? url.slice(2) : url, resourceTypes: ["script", "image"] }
    }))
  ] : [];
  chrome.declarativeNetRequest.updateDynamicRules({
    removeRuleIds: Array.from({ length: defaultRules.length + customAdList.length }, (_, i) => i + 1),
    addRules: rules
  });
}

chrome.runtime.onInstalled.addListener(() => {
  chrome.storage.sync.get(["isEnabled", "customAdList"], (data) => {
    updateRules(data.isEnabled !== false, data.customAdList || []);
  });
});

chrome.runtime.onMessage.addListener((message) => {
  if (message.action === "updateRules") {
    chrome.storage.sync.get("customAdList", (data) => {
      updateRules(message.isEnabled, data.customAdList || []);
    });
  }
});
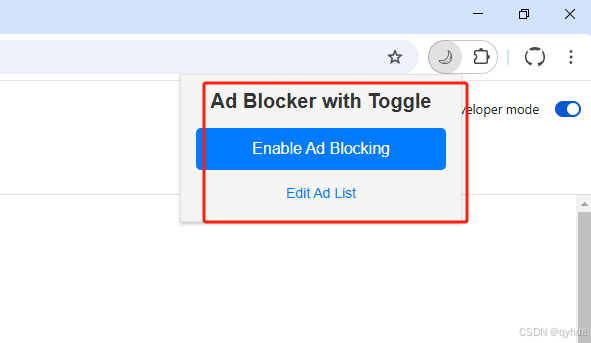
1.2.3 打造炫酷的弹出窗口popup.html
功能:提供开关按钮和跳转设置的入口。
代码示例:
<!DOCTYPE html>
<html>
<head>
  <title>Ad Blocker</title>
  <style>
    body { width: 250px; padding: 15px; font-family: Arial, sans-serif; background: #f5f5f5; box-shadow: 0 2px 10px rgba(0,0,0,0.1); }
    h2 { font-size: 20px; color: #333; text-align: center; }
    #toggleButton { width: 100%; padding: 12px; font-size: 16px; border: none; border-radius: 5px; background: #007bff; color: white; }
    #toggleButton:hover { background: #0056b3; }
    a { display: block; text-align: center; color: #007bff; text-decoration: none; }
    a:hover { color: #0056b3; text-decoration: underline; }
  </style>
</head>
<body>
  <h2>Ad Blocker</h2>
  <button id="toggleButton">Enable Ad Blocking</button>
  <a href="options.html" target="_blank">Edit Ad List</a>
  <script src="popup.js"></script>
</body>
</html>
菜单效果图如下:
1.2.4 添加交互逻辑popup.js
JavaScript (英语)
document.addEventListener("DOMContentLoaded", () => {
  const toggleButton = document.getElementById("toggleButton");
  chrome.storage.sync.get("isEnabled", (data) => {
    toggleButton.textContent = data.isEnabled !== false ? "Disable Ad Blocking" : "Enable Ad Blocking";
  });
  toggleButton.addEventListener("click", () => {
    chrome.storage.sync.get("isEnabled", (data) => {
      const newState = !data.isEnabled;
      chrome.storage.sync.set({ isEnabled: newState }, () => {
        toggleButton.textContent = newState ? "Disable Ad Blocking" : "Enable Ad Blocking";
        chrome.runtime.sendMessage({ action: "updateRules", isEnabled: newState });
      });
    });
  });
});
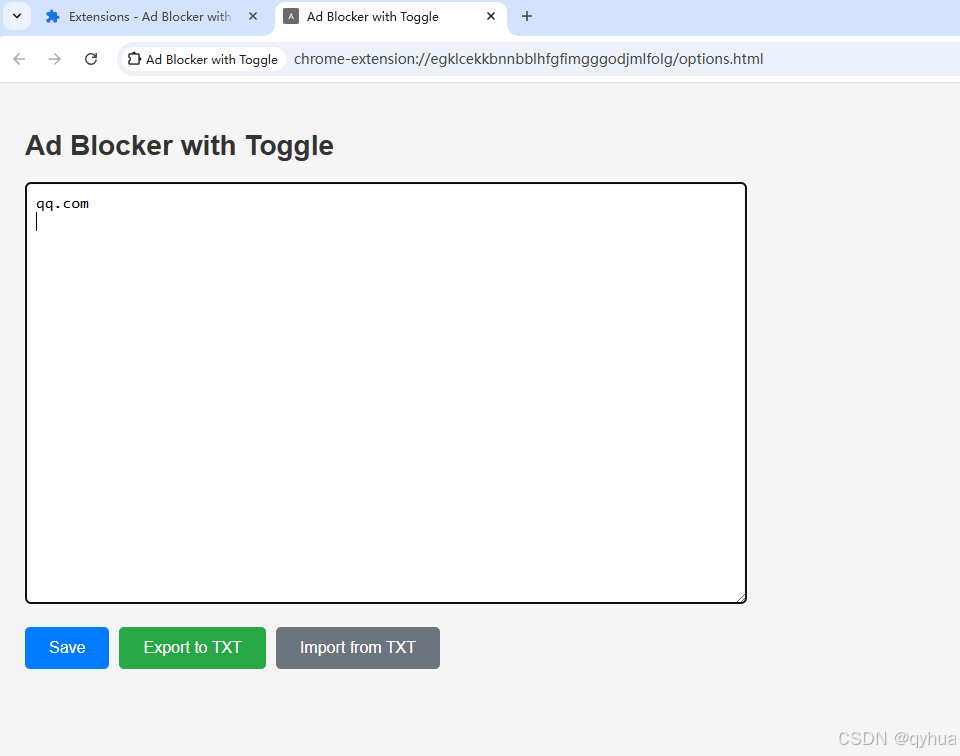
1.2.5 美化设置页面options.html与options.js
功能:支持规则编辑、导入导出。
代码示例(精简版):
HTML格式
<!DOCTYPE html>
<html>
<head>
  <title>Ad Blocker Options</title>
  <style>
    body { width: 700px; padding: 20px; font-family: Arial, sans-serif; background: #f5f5f5; }
    #adList { width: 100%; height: 400px; border-radius: 5px; }
    button { padding: 12px 24px; border-radius: 5px; background: #007bff; color: white; }
    button:hover { background: #0056b3; }
  </style>
</head>
<body>
  <h1>Edit Ad Block List</h1>
  <textarea id="adList"></textarea>
  <button id="saveButton">Save</button>
  <button id="exportButton">Export</button>
  <button id="importButton">Import</button>
  <input type="file" id="importFile" accept=".txt">
  <script src="options.js"></script>
</body>
</html>
效果图如下:
实现按钮逻辑代码:
document.addEventListener("DOMContentLoaded", () => {
  const adList = document.getElementById("adList");
  const saveButton = document.getElementById("saveButton");
  if (!adList || !saveButton) return;
  chrome.storage.sync.get("customAdList", (data) => {
    adList.value = (data.customAdList || []).map(url => url.startsWith("@@||") ? url.replace("@@||", "@@").replace("^", "") : url.replace("||", "").replace("^", "")).join("\n");
  });
  saveButton.addEventListener("click", () => {
    const formattedList = adList.value.split("\n").map(domain => domain.startsWith("@@") ? `@@||${domain.slice(2)}^` : `||${domain}^`);
    chrome.storage.sync.set({ customAdList: formattedList }, () => {
      chrome.runtime.sendMessage({ action: "updateRules", isEnabled: true });
    });
  });
});
2 测试与打包:让插件准备好“出道”
代码写好后,别急着发布,先测试一下,然后打包成正式文件。
2.1 本地测试
步骤:
打开chrome://extensions/,启用“开发者模式”。
点击“加载已解压的扩展程序”,选择AdBlocker文件夹。
点击图标,测试开关和规则编辑功能。
检查点:控制台无错误,广告被拦截。
测试正常,效果图如下:


2.2 打包为ZIP文件
方法1:Chrome打包:
在chrome://extensions/点击“打包扩展”。
选择AdBlocker文件夹,生成.crx和.pem文件。
将.crx改名为.zip。
方法2:手动压缩:
用压缩软件将AdBlocker文件夹打包为AdBlocker.zip,确保根目录有manifest.json。
3 发布到Chrome Web Store:让全世界用上你的插件
是时候让你的插件闪亮登场了!
3.1 创建开发者账户
步骤:
访问 Chrome Web Store Developer Dashboard。
用Google账户登录,支付$5注册费。
同意开发者条款。
3.2 上传与发布
详细流程:
点击“添加新项目”,上传AdBlocker.zip。
填写信息:
名称:Ad Blocker with Toggle
名称:带切换的广告拦截器
描述:A customizable ad blocker with toggle and list management.
描述:具有切换和列表管理的可自定义广告拦截器。
图标:上传icon128.png。
截图:准备1280x800的界面截图(弹出窗口和设置页面)。
声明权限理由:Used to block ads and manage user settings.
声明权限理由:用于拦截广告和管理用户设置。
点击“提交审核”,选择“公开”发布。
3.3 等待审核与后续维护
审核时间:1-7天。
更新方法:修改version,重新打包上传。
4 小贴士与注意事项
合规性:避免过度权限,确保描述清晰。
备份:保存.pem私钥和源代码。
完整源码:https://github.com/qyhua0/cp_ad_block_new