VSCode创建VUE项目(三)使用axios调用后台服务
1. 安装axios,执行命令
npm install axios
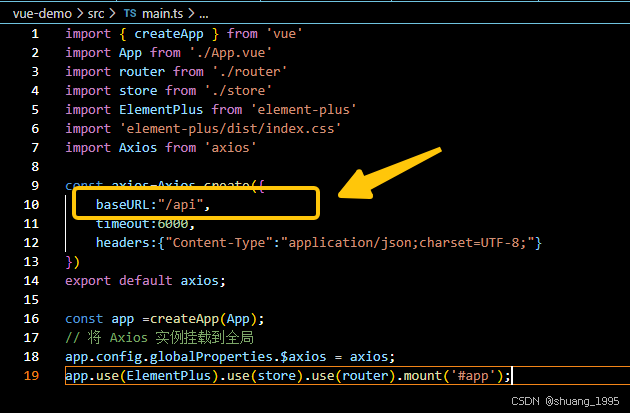
2. 在 main.ts 中引入并全局挂载 Axios 实例
修改后的 代码(也可以单独建一个页面处理Axios相关信息等,然后全局进行挂载)
import { createApp } from 'vue'
import App from './App.vue'
import router from './router'
import store from './store'
import ElementPlus from 'element-plus'
import 'element-plus/dist/index.css'
//引入axios
import Axios from 'axios'
//创建一个 axios 实例
const axios=Axios.create({
    baseURL:"http://10.101.21.1:9921",
    timeout:6000,
    headers:{"Content-Type":"application/json;charset=UTF-8;"}
})


//请求拦截器
axios.interceptors.request.use(
    (config) => {
        // 在发送请求之前做些什么,例如添加请求头的token什么的
        // const token = localStorage.getItem('token');
        // if (token) {
        //    config.headers.Authorization = `Bearer ${token}`;
        // }
        return config;
    },
    (error) => {
        // 对请求错误做些什么
        console.error('请求错误:', error);
        return Promise.reject(error);
    }
);
//响应拦截器
axios.interceptors.response.use(
    (response) => {
        // 对响应数据做点什么
        if(response&&response.data){
            return response.data;
        }
        else{
            return response;
        }
    },
    (error) => {
        // 对响应错误做点什么
        console.error('响应错误:', error);
        return Promise.reject(error);
    }
);

export default axios;

const app =createApp(App);
// 将 axios 实例挂载到全局
app.config.globalProperties.$axios = axios;
app.use(ElementPlus).use(store).use(router).mount('#app');
3.修改LoginView.vue的commit方法
我直接调用的我现有的一个后台服务,出参如下
{
  "code": 0,
  "data": {
    "pwd": "string",
    "emplCode": "string",
    "emplName": "string"
  }
}
注意:在 Vue 3 的 script setup 语法里,this 并不指向组件实例,所以无法直接使用 this.$axios。需要借助 getCurrentInstance 函数来获取当前组件实例,进而访问全局的 Axios 实例
修改后的代码
<script setup>
import { ref, getCurrentInstance } from "vue"
import router from '@/router';
import { ElMessage } from 'element-plus';

const { appContext } = getCurrentInstance()
const axios = appContext.config.globalProperties.$axios;
var loginform = ref({
   username: "",
   pwd: ""
})
var commit = async () => {

   try {
      var response = await axios.get('/v1/employee?emplCode=' + loginform.value.username);
      //保存日志信息
      console.log("--------------调用后台出参{"+loginform.value.username+"}--------------------");
      console.log(response);
      if (response && response.data) {
         if (response.data.pwd == loginform.value.pwd) {
            ElMessage.success("YES,成功啦啦啦啦啦!");
            router.replace("./about")
         }
         else {
            ElMessage.error("Sorry,请检查用户名和密码!失败!" );
         }
      }
      else {
         ElMessage.error("Sorry,请检查用户名!没有该用户!");
      }
   } catch (error) {
      //登录失败,提示错误信息
      console.log(error);
      ElMessage.error("Sorry,失败!" + error);
   }

}
</script>
如果后台服务允许跨域访问结束,这就成功啦啦啦啦

4. 跨域问题处理
4.1 前端处理跨域
在vue.config.js配置代理规则(修改该文件后需要重新启动服务才会生效)
const { defineConfig } = require('@vue/cli-service')
module.exports = defineConfig({
  transpileDependencies: true,
  devServer: {
    proxy: {
      '/api': {
        target: 'http://10.101.21.1:9921',  // 目标 API 服务器地址
        changeOrigin: true,                  // 允许跨域
        pathRewrite: {
          '^/api': ''                       // 去掉请求路径中的 `/api` 前缀
        }
      }
    }
  }
})
修改全局axios配置的baseURL为 /api
4.2 后端彻底解决
举例:Java使用Spring Boot 框架使用 @CrossOrigin 注解
5.其他问题
解决警告:runtime-core.esm-bundler.js:4570 Feature flag __VUE_PROD_HYDRATION_MISMATCH_DETAILS__ is not explicitly defined. You are running the esm-bundler build of Vue, which expects these compile-time feature flags to be globally injected via the bundler config in order to get better tree-shaking in the production bundle. For more details, see core/packages/vue at main · vuejs/core · GitHub.
解决方案:在vue.config.js配置configureWebpack
const { defineConfig } = require('@vue/cli-service')
module.exports = defineConfig({
  transpileDependencies: true,
  devServer: {
    proxy: {
      '/api': {
        target: 'http://10.101.17.31:9921',  // 目标 API 服务器地址
        changeOrigin: true,                  // 允许跨域
        pathRewrite: {
          '^/api': ''                       // 去掉请求路径中的 `/api` 前缀
        }
      }
    }
  },
  //configureWebpack:这是 Vue CLI 提供的一个配置选项,用于对内部的 Webpack 配置进行扩展。
  configureWebpack: {
    plugins: [
      //DefinePlugin:它是 Webpack 的一个插件,用于在编译时创建全局常量。这里使用它来定义 Vue 的特性标志
        new (require('webpack')).DefinePlugin({
            '__VUE_PROD_HYDRATION_MISMATCH_DETAILS__': JSON.stringify(false), //将其设置为 false 表示在生产环境中不包含详细的 hydration 不匹配信息。
            '__VUE_OPTIONS_API__': JSON.stringify(true), // 如果你使用了 Options API,通常设置为 true
            '__VUE_PROD_DEVTOOLS__': JSON.stringify(false) // 通常在生产环境关闭 DevTools 支持
        })
    ]
}
})