Drone+Gitea CICD环境搭建流程笔记
之前没有用过drone,现在公司有用到,看drone.yml配置文件有很多没搞清楚的地方,所以打算自己走一遍配置流程,理清一些概念,这里记下笔记。
为了方便,drone,gitea以及相关软件都是用docker的版本,用docker-compose管理。
概念介绍
在实际操作之前,有必要理清一下drone的概念,和操作流程,否则的话光看配置也是一头雾水。
什么是Drone
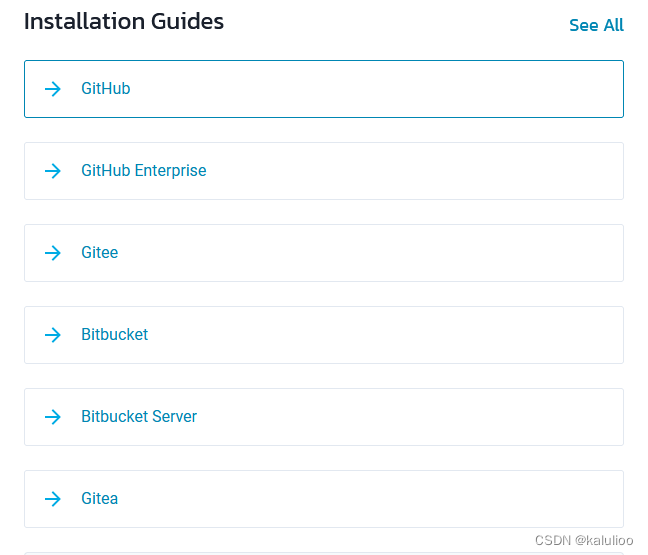
说白了就是一个CICD工具,当我们用git提交代码,发布版本,tag,pr等操作就会触发drone上面定义好的的一些流程,帮助我们自动完成发布和部署等一系列你想要完成的操作。下面是它支持的git仓库类型:
什么是Pipeline
Pipeline说白了就是任务组的概念,每个Pipeline包含一些子步骤(steps)。
---
kind: pipeline
type: docker
name: default

steps:
- name: backend
  image: golang
  commands:
  - go build
  - go test

- name: frontend
  image: node
  commands:
  - npm install
  - npm run test

...
比如看上面的配置文件,这个 Pipeline包含了两个steps,第一步build了golang程序,第二步install了node程序。
Pipeline分很多种类,主要是用来说明这个操作是以什么方式执行的,比如ssh 远程一些server执行命令,或者执行一些本地cmd等,下面是它支持的操作种类:

什么时候触发Pipeline
When you push code to your repository, open a pull request, or create a tag, your source control management system automatically sends a webhook to Drone which in turn triggers pipeline execution. Use the triggers section to limit pipeline execution.
在我们提交代码或者pr等操作时可以触发pipeline,因此pipeline需要配置触发条件以管理不同的流程。支持的条件种类有:
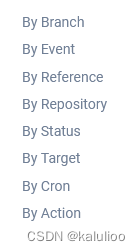
比如分支限制:
trigger:
  branch:
    include:
    - master
    - feature/*
trigger:
branch:
exclude:
- master
- feature/*比如事件限制:
trigger:
  event:
  - cron
  - custom
  - push
  - pull_request
  - tag
  - promote
  - rollback
trigger:
event:
include:
- push
- pull_requesttrigger:
event:
exclude:
- pull_request具体介绍请看官方文档:Triggers | Drone
step也有触发条件
pipeline有触发条件,它的子步骤也可以配置触发条件
kind: pipeline
type: docker
name: default

steps:
- name: build
  image: golang
  commands:
  - go build
  - go test
  when:
    branch:
    - master
    - feature/*
如上面的配置,when属性限制了这个步骤只在master和feature/*分支上的改动才触发。
其它的触发条件有:
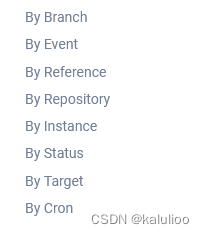
官方介绍:Conditions | Drone
什么是 Runner
可能是drone担心用户编排的任务消耗过多的资源,所以drone把执行任务交给了单独的runner来跑,这样一台drone server可以搭配很多runner来执行任务,类似master和slave的概念,server控制task的分发和执行状态的维护,runner跑对应的task。runner有很多种类,比如需要用docker容器跑的任务则必须先安装好docker runner才能把docker类型pipeline发给doker runner执行。
下面是runner的种类:

安装
我们这里选用gitea作为git仓库软件,官方帮助文档:Gitea | Drone
安装gitea
compose配置:
  mygitea:
    image: gitea/gitea:1.15.3
    environment:
     - USER_UID=1000
     - USER_GID=1000
     - GITEA__database__DB_TYPE=postgres
     - GITEA__database__HOST=db-pgsql:5432
     - GITEA__database__NAME=gitea
     - GITEA__database__USER=postgres
     - GITEA__database__PASSWD=123456
    restart: always
    networks:
      - web
    volumes:
      - ./gitea/data:/data
      - ./gitea/etc/timezone:/etc/timezone:ro
      - ./gitea/etc/localtime:/etc/localtime:ro
    ports:
      - "3000:3000"
      - "222:22"
    depends_on:
      - db-pgsql
这里gitea安装有用到postgres,当然你也可以选择别的数据库,这里不做过多说明,compose配置:
  db-pgsql:
    image: postgres:13
    environment:
      #POSTGRES_USER:abc #default:postgres
      POSTGRES_PASSWORD: 123456
    volumes:
      - "./db/pgsql/data:/var/lib/postgresql/data"
    ports:
      - 5432:5432
    networks:
      - web
配置完成后gitea就算装好了,这个文章主要是为了理解drone的流程,所以需要其它详细配置的话可以参考gitea官方文档:Installation with Docker - Docs,就不详细介绍了。
gitea开启OAuth2给drone使用
用户登录gitea后,进入账户设置页面,选择应用
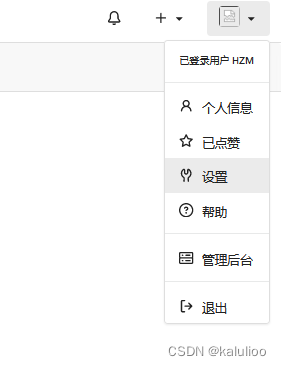
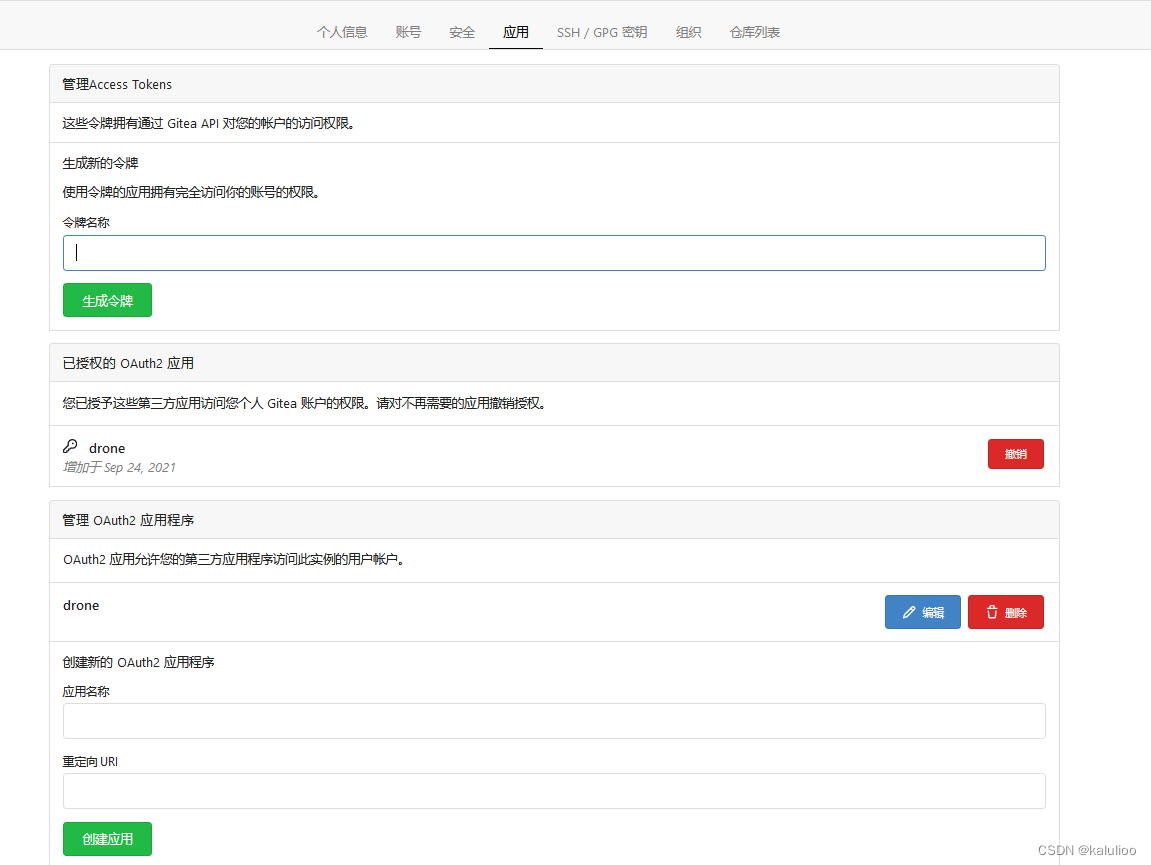
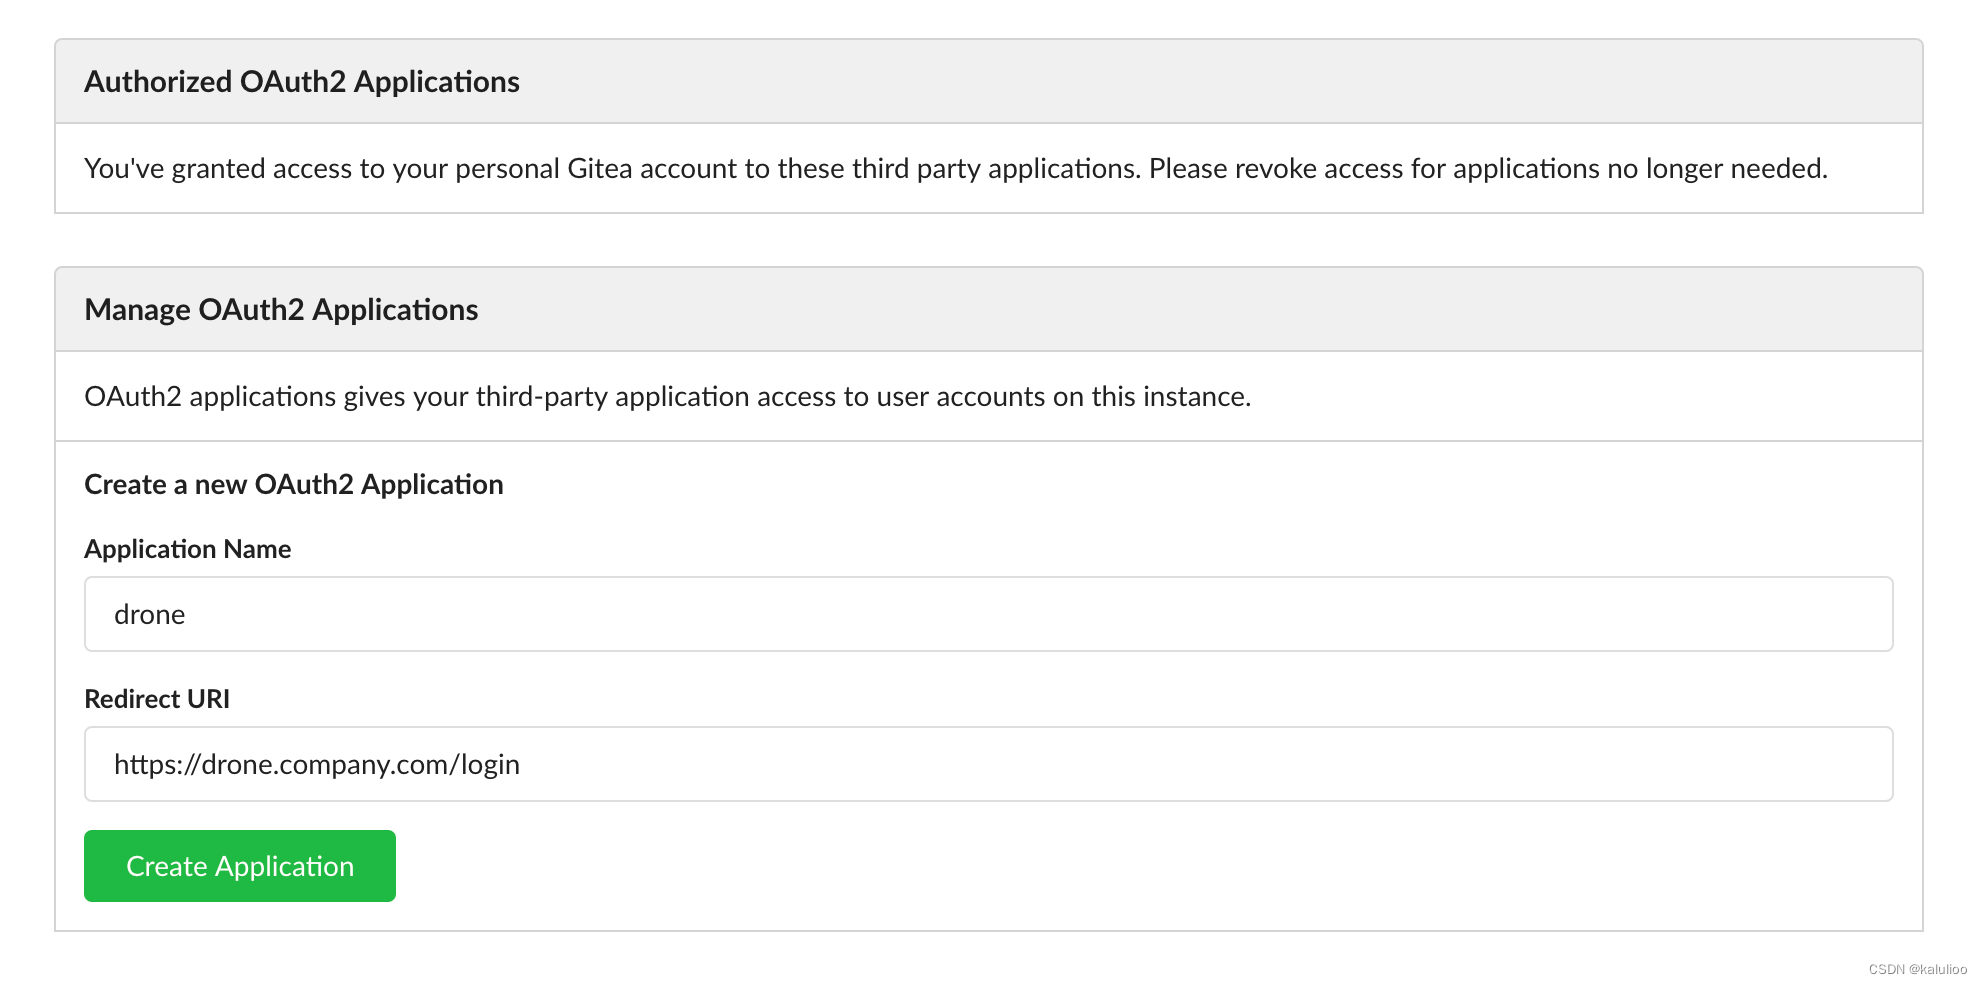
填写应用名称比如drone,输入调整url(drone的login地址,比如我们用docker启动drone server,映射出来的端口是3080,本地访问的话就是http://127.0.0.1:3080),点击创建应用
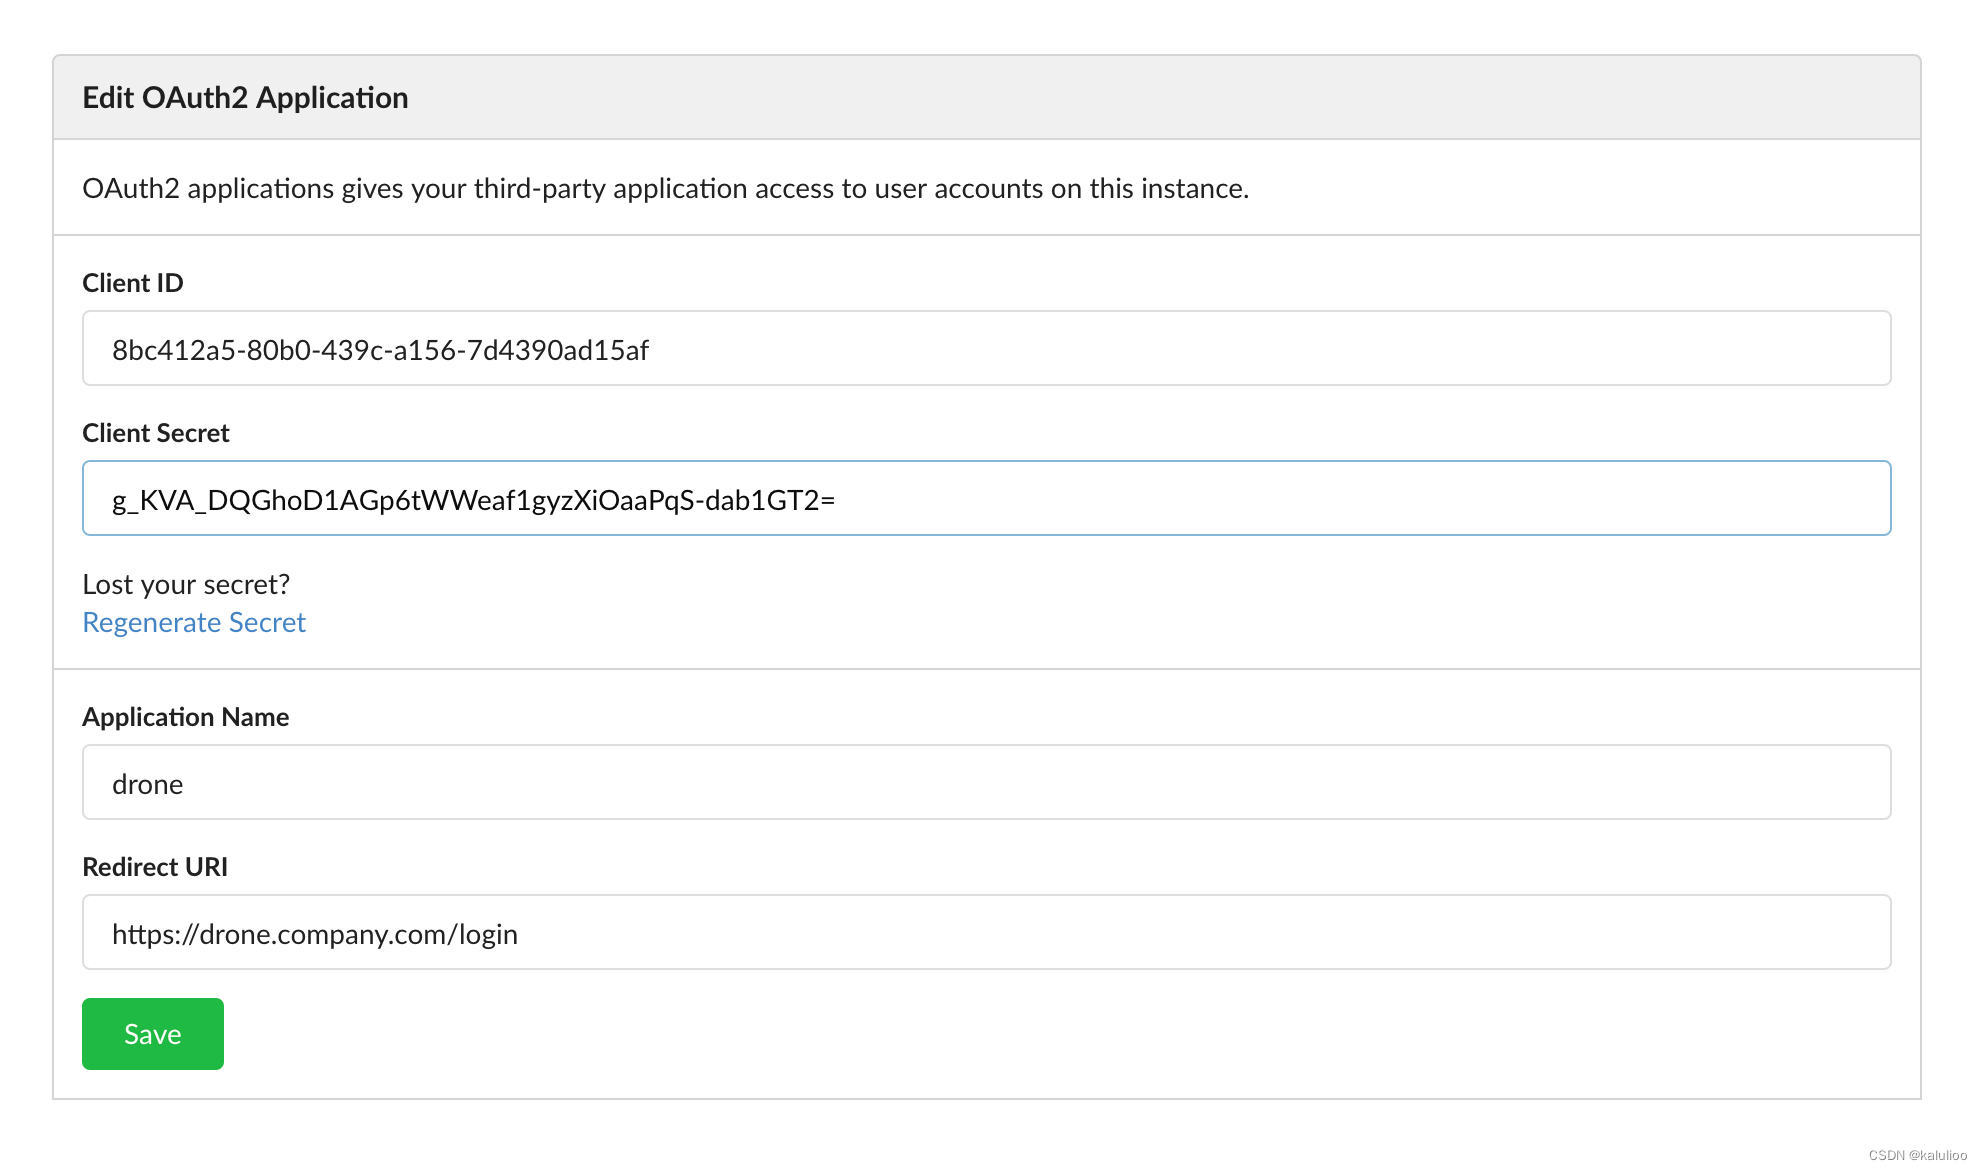
创建后你会得到该应用的client id和secret(这两个参数会配置给drone,让drone有权限访问该账户的git资源)
安装drone
安装前需要准备一些配置变量:
- DRONE_GITEA_CLIENT_ID 从gitea的OAuth2配置获取
- DRONE_GITEA_CLIENT_SECRET 从gitea的OAuth2配置获取
- DRONE_GITEA_SERVER gitea的访问地址,如果是同一个docker-compose中的网络的话直接用service的名称 例:http://mygitea:3000,如果oauth跳转到本机的话,还需要为mygitea配置host映射
- DRONE_RPC_SECRET 用于runner和server的通信秘钥,可以用openssl命令生成
$ openssl rand -hex 16
bea26a2221fd8090ea38720fc445eca6
- DRONE_SERVER_HOST 此drone server的访问地址,例:127.0.0.1:3080
上面这些变量准备好后,下面是compose的配置例子:
drone:
    image: drone/drone:2
#    container_name: drone
    environment:
     - DRONE_GITEA_CLIENT_ID=4b2e5019-8b6e-42c2-a249-b83347104e0a
     - DRONE_GITEA_CLIENT_SECRET=UIvGxmp6t13uI4lY4udAozTT98fx9ujZlRFqydTQE40F
     - DRONE_GITEA_SERVER=http://mygitea:3000
     - DRONE_RPC_SECRET=2e3cfc672dcf679f9ced820ab6a55db4
     - DRONE_SERVER_HOST=127.0.0.1:3080
     - DRONE_SERVER_PROTO=http
     - DRONE_GIT_ALWAYS_AUTH=false
    restart: always
    networks:
      - web
    ports:
      - "3080:80"
      - "30443:443"
安装runner
把drone server的地址(DRONE_RPC_HOST)和通信秘钥(DRONE_RPC_SECRET)配置给runner, compose例子:
drone-runner:
    image: drone/drone-runner-docker:1
    depends_on:
      - drone
    restart: always
    networks:
      - web
    environment:
      - DRONE_RPC_PROTO=http
      - DRONE_RPC_HOST=drone
      - DRONE_RPC_SECRET=2e3cfc672dcf679f9ced820ab6a55db4
      - DRONE_RUNNER_CAPACITY=2
      - DRONE_RUNNER_NAME=drone-runner
    ports:
      - "3090:3000"
配置
drone和gitea安装完成后,我们到gitea创建测试用的仓库

然后我们到drone中去查看这个仓库,发现还没有同步过来的话可以手动点sync按钮

点击对应的仓库,进去后发现还需要active它
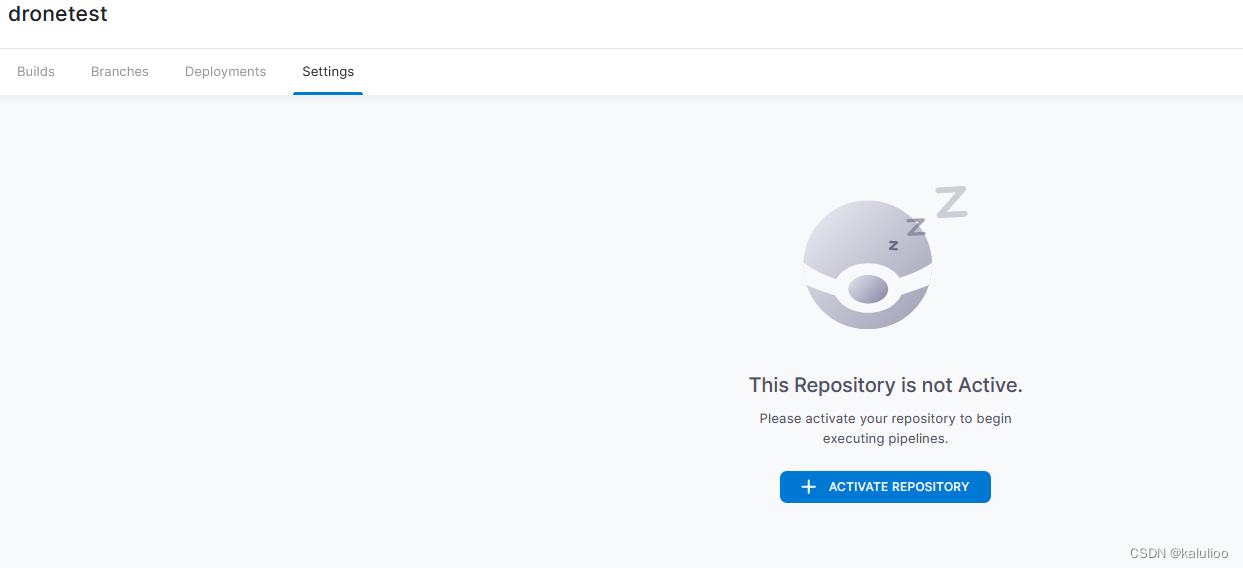
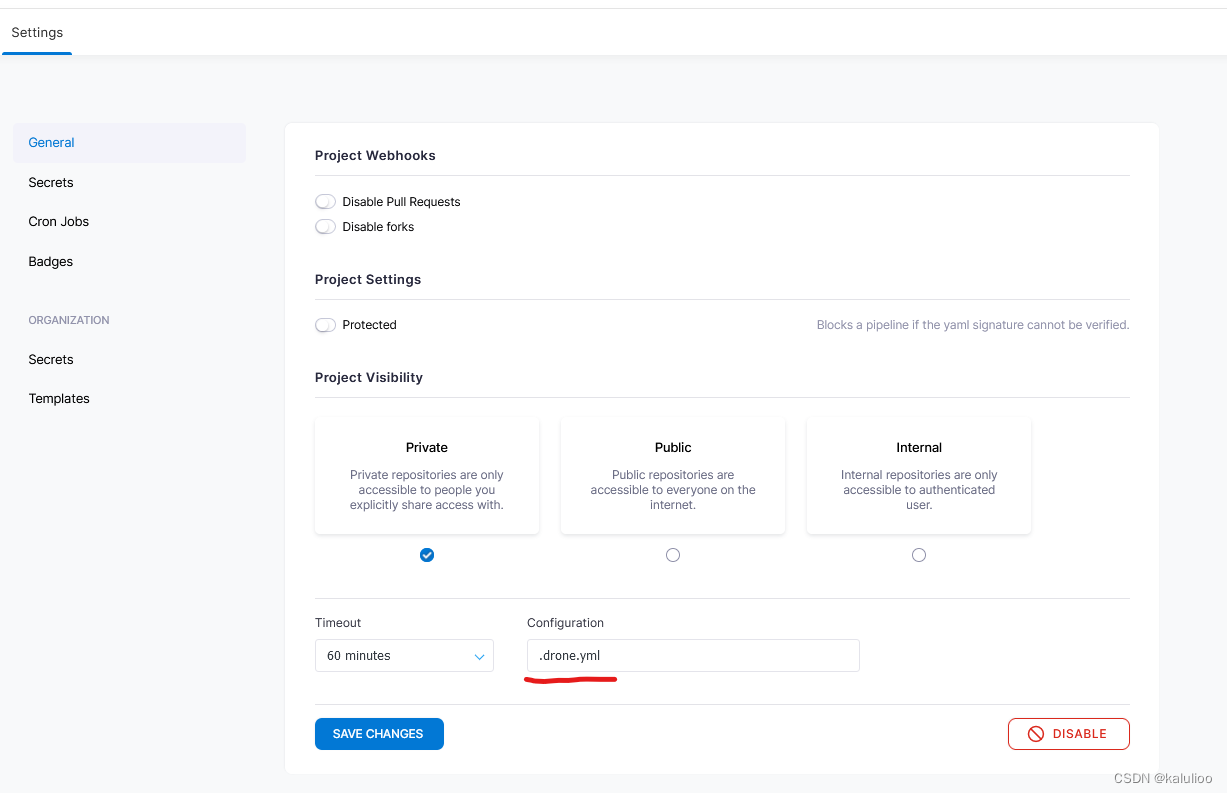
active后可以修改一些配置,默认drone会读取git仓库中根目录下 .drone.yml,但是你可以修改路径
比如修改为build/.drone.yml

接下来就是通过drone.yml来配置我们的CICD流程了
drone.yml例子
我们先看一个配置好的普通流程:
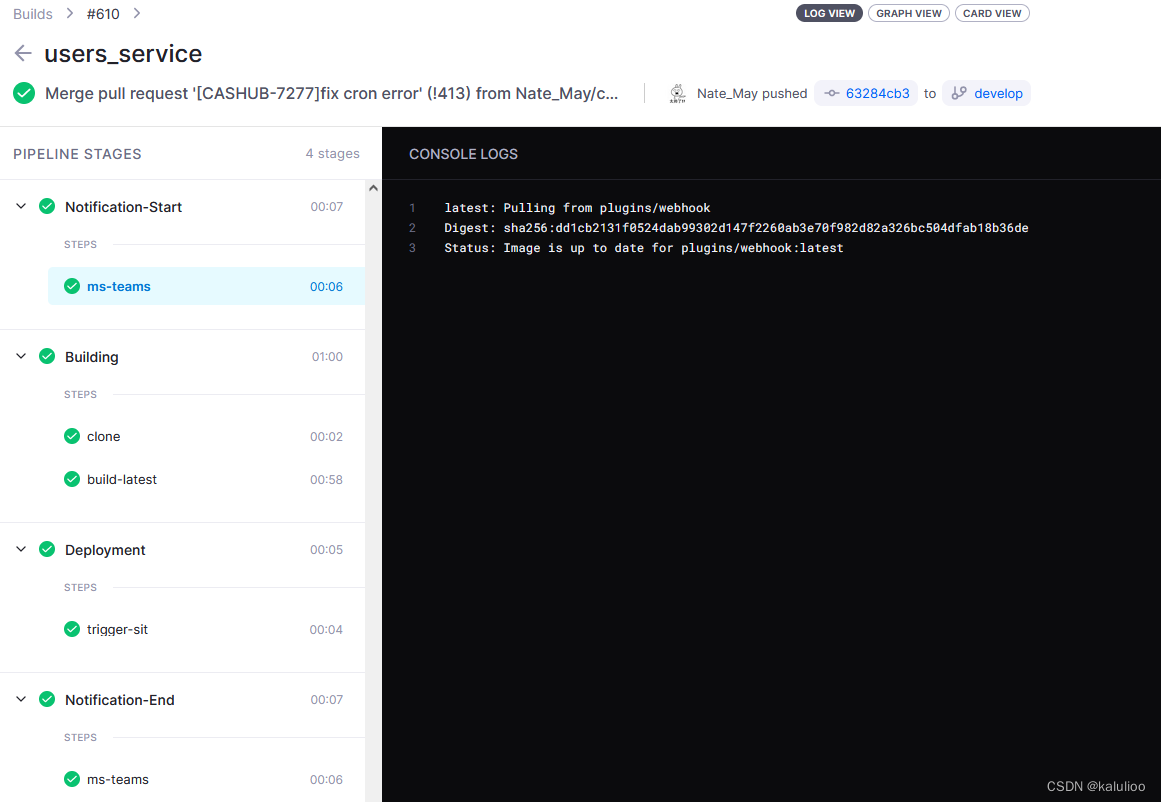
比如我们配置了四个pipeline:
- Notification-Start: 首先发一条消息通知到teams软件,有人合并了pr,正在进行自动部署
- Building:开始编译构建程序
- Deployment:把编译好的程序部署到对应的环境
- Notification-End: 向teams软件发送部署完成的消息
对应的yml:
---
kind: pipeline
type: docker
name: Notification-Start

platform:
  os: linux
  arch: amd64

clone:
  disable: true

steps:
- name: ms-teams
  image: plugins/webhook
  settings:
    urls:
      from_secret: msteams_webhook
    content_type: application/json
    template: |
      {
        "title": "⏳ {{ repo.owner }}/{{ repo.name }} - Build [#{{ build.number }}] 🙏",
        "text": "Continuous integration is in progress, please wait for the result.",
        "potentialAction": [{
                "@type": "OpenUri",
                "name": "Build #{{ build.number }}",
                "targets": [{
                        "os": "default",
                        "uri": "https://drone.xxx.cloud/{{ repo.owner }}/{{ repo.name }}/{{ build.number }}"
                    }
                ]
            }
        ]
      }

trigger:
  branch:
    exclude:
      - master

---
kind: pipeline
type: docker
name: Building

platform:
  os: linux
  arch: amd64

steps:
- name: build-latest
  image: plugins/docker
  environment:
    GOPROXY:
      from_secret: goproxy_host
  settings:
    auto_tag: false
    tags:
      - latest
    dockerfile: build/Dockerfile
    repo: reg.xxx.cloud/hzm/dronetest
    registry:
      from_secret: docker_registry_host
    username:
      from_secret: docker_registry_username
    password:
      from_secret: docker_registry_password
    build_args_from_env:
      - GOPROXY
  when:
    branch:
      include:
        - develop
    event:
      exclude:
        - tag
        - pull_request

depends_on:
  - Notification-Start

trigger:
  branch:
    exclude:
      - master

volumes:
- name: dsock
  host:
    path: /var/run/docker.sock

---
kind: pipeline
type: docker
name: Deployment

platform:
  os: linux
  arch: amd64

clone:
  disable: true

steps:
- name: trigger-sit
  image: plugins/downstream
  settings:
    server:
      from_secret: drone_server_url
    token:
      from_secret: drone_token
    fork: true
    deploy: users-service
    last_successful: true
    repositories:
      hzm/dronetest@develop
  when:
    branch:
      include:
        - develop

depends_on:
  - Notification-Start
  - Building

trigger:
  branch:
    exclude:
      - master
  event:
    exclude:
      - pull_request
      - tag

---
kind: pipeline
type: docker
name: Notification-End

platform:
  os: linux
  arch: amd64

clone:
  disable: true

steps:
- name: ms-teams
  image: plugins/webhook
  settings:
    urls:
      from_secret: msteams_webhook
    content_type: application/json
    template: |
      {
        "title": "{{#success build.status}}✅{{ else }}❌{{/success}} {{ repo.owner }}/{{ repo.name }} - Build {{#success build.status}}Successful{{ else }}Failure{{/success}} [#{{ build.number }}] {{#success build.status}}🆗{{ else }}❌{{/success}}",
        "text": "Duration: `{{ since build.started }}`, continuous integration is {{#success build.status}}successful!{{ else }}failure, please investigate and exclude as soon as possible!{{/success}}",
        "potentialAction": [{
                "@type": "OpenUri",
                "name": "Build #{{ build.number }}",
                "targets": [{
                        "os": "default",
                        "uri": "https://drone.xxx.cloud/{{ repo.owner }}/{{ repo.name }}/{{ build.number }}"
                    }
                ]
            }
        ]
      }

depends_on:
  - Notification-Start
  - Building
  - Deployment

trigger:
  branch:
    exclude:
      - master
  status:
    - success
    - failure
对于上面的yml想一些基本的配置比如trigger条件啊,depends_on控制顺序啊等从字面意思都很容易理解,如有不清楚的可以很容易从官方文档找说明文档。
这里对一些其它的配置做下说明,因为我一开始看配置文件时有很多疑惑的。
plugin说明
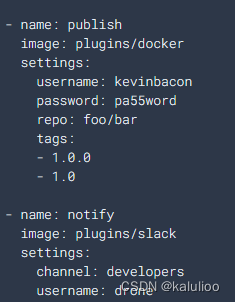
比如上面image:plugins/docker,还有一堆配置settings怎么理解?其实plugins开头的image是指给drone做的一些列docker插件,每个插件的参数是不一样的,也就是说settings是不一样的,具体的参数说明是要到Drone Plugins 这个里面找到对应的插件才能看到,目前集成了比较流程的应用集成插件,基本够用。

from_secret说明
由于一些配置不想明文配置到yml中,比如数据库密码等,所以提供了从from_secret方法类配置,只要在drone操作界面中提前设置好变量名和值,到drone.yml中就可以使用对应的变量名来引用。

drone环境变量

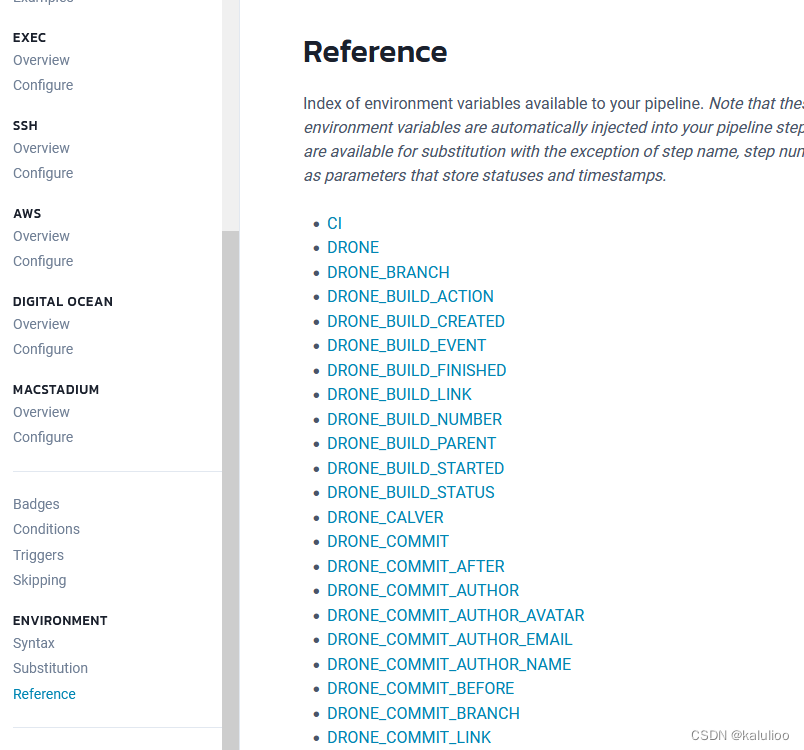
一开始看上面的变量有点疑问,这些变量代表什么,要从哪里配置?其实是drone的环境变量,一些git的对应的参数,比仓库名称,事件啊什么的都会被drone设置到运行的环境变量中。比如pipeline支持的环境变量说明:Reference | Drone
那为什么有的引用是一个$,而有的是两个$$ 呢?
正常来说我们引用环境变量前面只要加上一个$,也不用加上{ }

如果使用${...}的方式的话其实是drone的表达式,引用环境变量的表达式是${环境变量名},同时它还支持一些计算功能

其它用法:
${parameter^}
${parameter^^}
${parameter,}
${parameter,,}
${parameter:position}
${parameter:position:length}
${parameter#substring}
${parameter##substring}
${parameter%substring}
${parameter%%substring}
${parameter/substring/replacement}
${parameter//substring/replacement}
${parameter/#substring/replacement}
${parameter/%substring/replacement}
${#parameter}
${parameter=default}
${parameter:=default}
${parameter:-default}
因此表达式有一定的计算能力。所以如果你不想让表达式执行,比如:=或者##等表达式关键字符被理解成操作符,那么就需要带上两个$${...}。这样即使password变量中带有上述操作符也不会被执行,保留了原来的值。
drone配置模板
由于很多项目的配置都差不多,所以为了减少重复的配置文件和内容,drone提供了template功能
下面是一个简易的template
kind: pipeline
type: docker
name: default
steps:
   - name: {{ .input.name }}
     image: {{ .input.image }}
     commands:
        - {{ .input.commands }}
使用方式:
kind: template
load: plugin.yaml
data:
  name: name
  image: image
  commands: commands
同时drone也预定义了一些template参数
Variables | Drone
这些参数应该也可以用在plugin的template参数中?:

需要模板功能的话请参考官方文档:
Yaml | Drone
本人也是drone的初学者,有什么说的不对的地方欢迎一起讨论指正
