Ubuntu系统配置SonarQube + cppcheck + Jenkins
SonarQube
- 1. postgresql安装及配置
- 1.1 安装postgresql
- 1.2 创建sonarqube用户
- 1.3 设置数据库
- 2. 安装sonarqube
- 2.1 设置sonarqube
- 2.2 修改sonarqube目录权限
- 2.3 sonar.properties
- 2.4 设置systemd管理sonarqube
- 2.5 web
- 3. 配置sonarscanner
- 3.1 下载
- 3.2 配置
- 4. 配置cppcheck
- 4.1 下载安装cppcheck
- 4.2 遇到的问题
- 4.3 配置sonarqube
- 4.4 测试
- 5. 配置gitlab
- 5.1 搭建私人gitlab
- 5.2 获取gitlab信息
- 6. 配置jenkins
- 6.1 安装jenkins
- 6.2 配置
- 6.3 创建项目
- 6.4 运行
- 6.5 查看报告
在ubuntu 20.04搭建SonarQube
我们需要安装或配置的服务包括:
- postgresql
- sonarqube
- sonarscanner
- cppcheck
- gitlab
- jenkins
由于笔者在公司服务器进行搭建,该服务器除了配置好网络之外,其他内容都没有配置
- 配置域名解析
csmp@csmp-OptiPlex-7090:/etc/postgresql/12/main$ cat /etc/resolv.conf
nameserver 8.8.8.8
nameserver 114.114.114.114
- 更新资源
apt-get update
- 重置root密码
csmp@csmp-OptiPlex-7090:/etc/postgresql/12/main$ sudo passwd
新的 密码:
重新输入新的 密码:
passwd:已成功更新密码
csmp@csmp-OptiPlex-7090:/etc/postgresql/12/main$ su
密码:
root@csmp-OptiPlex-7090:/etc/postgresql/12/main#
1. postgresql安装及配置
1.1 安装postgresql
sudo apt install -y  postgresql
systemctl start postgresql
systemctl status postgresql
systemctl enable postgresql
1.2 创建sonarqube用户
# sudo ln -s  sonarqube-9.5.0.56709 sonarqube
# groupadd -g 2023 -o -r sonarqube
# useradd -M -N -g sonarqube -o -r -d /opt/sonarqube -s /bin/false -c "sonarqube server" -u 2023  sonarqube
1.3 设置数据库
链接数据库
csmp@csmp-OptiPlex-7090:/etc/postgresql/12/main$ sudo -u postgres psql
[sudo] csmp 的密码:
psql (12.14 (Ubuntu 12.14-0ubuntu0.20.04.1))
Type "help" for help.

postgres=#
创建数据库sonar
postgres=# create database sonar;     # 创建数据库
CREATE DATABASE
postgres=# create user sonar with encrypted password 'sonar';  # 创建用户并设置密码
CREATE ROLE
postgres=# grant all privileges on database sonar to sonar;  # 授权用户
GRANT
postgres=# alter database sonar owner to sonar;   # 执行变更
ALTER DATABASE
查看数据库sonar
postgres=# \l sonar;
                            List of databases
 Name  | Owner | Encoding |   Collate   |    Ctype    | Access privileges
-------+-------+----------+-------------+-------------+-------------------
 sonar | sonar | UTF8     | zh_CN.UTF-8 | zh_CN.UTF-8 | =Tc/sonar        +
       |       |          |             |             | sonar=CTc/sonar
(1 row)
连接数据库sonar
root@csmp-OptiPlex-7090:/etc/postgresql/12/main# su - postgres -c " psql -U sonar -d sonar  -h 127.0.0.1 -p 5432 "
Password for user sonar:
psql (12.14 (Ubuntu 12.14-0ubuntu0.20.04.1))
SSL connection (protocol: TLSv1.3, cipher: TLS_AES_256_GCM_SHA384, bits: 256, compression: off)
Type "help" for help.

sonar=>
2. 安装sonarqube
下载sonarqube
# wget https://binaries.sonarsource.com/Distribution/sonarqube/sonarqube-9.9.0.65466.zip
2.1 设置sonarqube
解压sonarqube
# unzip sonarqube-9.9.0.65466.zip -d /data/apps/sonarqube
# ln -sv /data/apps/sonarqube/sonarqube-9.9.0.65466.zip/ /opt/sonarqube
2.2 修改sonarqube目录权限
root@csmp-OptiPlex-7090:/opt# chown -R sonarqube.sonarqube sonarqube
root@csmp-OptiPlex-7090:/opt# ll
...
lrwxrwxrwx  1 sonarqube sonarqube   21 4月   4 11:30 sonarqube -> sonarqube-9.5.0.56709/
...
2.3 sonar.properties
创建数据目录
root@csmp-OptiPlex-7090:/opt# mkdir -p /data/apps/sonarqube
root@csmp-OptiPlex-7090:/opt# chown -R sonarqube.sonarqube /data/apps/sonarqube
mkdir /data/apps/sonarqube/{data,temp}
修改配置文件
egrep -v "^$|^#" /opt/sonarqube/conf/sonar.properties

sonar.jdbc.username=sonar
sonar.jdbc.password=sonar
sonar.jdbc.url=jdbc:postgresql://127.0.0.1/sonar
sonar.path.data=/data/apps/sonarqube/data
sonar.path.temp=/data/apps/sonarqube/temp
sonar.search.port=9001
sonar.web.port=9000
2.4 设置systemd管理sonarqube
在/lib/systemd/system中添加sonarqube.service
[Unit]
Description=SonarQube service
After=syslog.target network.target

[Service]
Type=simple
User=sonarqube
Group=sonarqube
PermissionsStartOnly=true
ExecStart=/usr/bin/nohup /usr/bin/java -Xms512m -Xmx512m -Djava.net.preferIPv4Stack=true -jar /opt/sonarqube/lib/sonar-application-9.5.0.56709.jar
StandardOutput=syslog
LimitNOFILE=131072
LimitNPROC=8192
TimeoutStartSec=5
Restart=always
SuccessExitStatus=143

[Install]
WantedBy=multi-user.target
root@csmp-OptiPlex-7090:/lib/systemd/system# systemctl daemon-reload
root@csmp-OptiPlex-7090:/lib/systemd/system# systemctl start sonarqube.service
root@csmp-OptiPlex-7090:/lib/systemd/system# systemctl status sonarqube.service
● sonarqube.service - SonarQube service
     Loaded: loaded (/lib/systemd/system/sonarqube.service; disabled; vendor preset: enabled)
     Active: active (running) since Tue 2023-04-04 13:35:45 CST; 105ms ago
   Main PID: 1302734 (java)
      Tasks: 21 (limit: 38126)
     Memory: 29.6M
     CGroup: /system.slice/sonarqube.service
             └─1302734 /usr/bin/java -Xms512m -Xmx512m -Djava.net.preferIPv4Stack=true -jar /opt/sonarqube/lib/sonar-application-9.5.0.56>

4月 04 13:35:45 csmp-OptiPlex-7090 systemd[1]: Started SonarQube service.
root@csmp-OptiPlex-7090:/lib/systemd/system# systemctl enable sonarqube.service
发现起来之后,又挂了,修改如下内容
sysctl.conf
# echo "vm.max_map_count=524288" >> /etc/sysctl.conf
# echo "fs.file-max=131072" >> /etc/sysctl.conf
# sysctl -p
limits.conf
# echo "sonarqube   -   nofile   131072" >> /etc/security/limits.conf
# echo "sonarqube   -   nproc    8192" >> /etc/security/limits.conf
如果sonarqube启动正常,但是无法链接网页,则可以查看/opt/sonarqube/logs/web文件
例如,数据库无法链接,或者es无法由root启动等等问题
Caused by: org.postgresql.util.PSQLException: Connection to 192.168.72.119:5432 refused. Check that the hostname and port are correct and that the postmaster is accepting TCP/IP connections.
        at org.postgresql.core.v3.ConnectionFactoryImpl.openConnectionImpl(ConnectionFactoryImpl.java:319)
        at org.postgresql.core.ConnectionFactory.openConnection(ConnectionFactory.java:49)
        at org.postgresql.jdbc.PgConnection.<init>(PgConnection.java:223)
        at org.postgresql.Driver.makeConnection(Driver.java:400)
        at org.postgresql.Driver.connect(Driver.java:259)
        at org.apache.commons.dbcp2.DriverConnectionFactory.createConnection(DriverConnectionFactory.java:52)
        at org.apache.commons.dbcp2.PoolableConnectionFactory.makeObject(PoolableConnectionFactory.java:374)
        at org.apache.commons.dbcp2.BasicDataSource.validateConnectionFactory(BasicDataSource.java:106)
        at org.apache.commons.dbcp2.BasicDataSource.createPoolableConnectionFactory(BasicDataSource.java:649)
        ... 56 common frames omitted
Caused by: java.net.ConnectException: 拒绝连接 (Connection refused)
        at java.base/java.net.PlainSocketImpl.socketConnect(Native Method)
        at java.base/java.net.AbstractPlainSocketImpl.doConnect(AbstractPlainSocketImpl.java:412)
        at java.base/java.net.AbstractPlainSocketImpl.connectToAddress(AbstractPlainSocketImpl.java:255)
        at java.base/java.net.AbstractPlainSocketImpl.connect(AbstractPlainSocketImpl.java:237)
        at java.base/java.net.SocksSocketImpl.connect(SocksSocketImpl.java:392)
        at java.base/java.net.Socket.connect(Socket.java:609)
        at org.postgresql.core.PGStream.createSocket(PGStream.java:241)
        at org.postgresql.core.PGStream.<init>(PGStream.java:98)
        at org.postgresql.core.v3.ConnectionFactoryImpl.tryConnect(ConnectionFactoryImpl.java:109)
        at org.postgresql.core.v3.ConnectionFactoryImpl.openConnectionImpl(ConnectionFactoryImpl.java:235)
        ... 64 common frames omitted
2.5 web
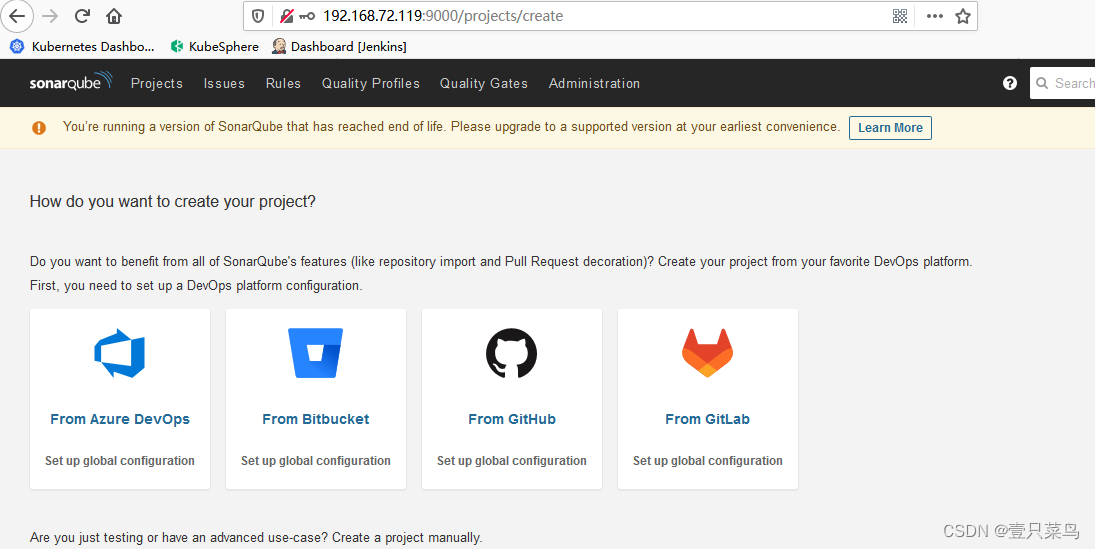
sonarqube的web登录账号密码为admin/admin
修改为admin/passwd(密码自定义)
3. 配置sonarscanner
3.1 下载
下载地址:
https://docs.sonarqube.org/latest/analyzing-source-code/scanners/sonarscanner/
下载,上传到服务器,解压到指定目录,笔者这里是/usr/share/sonar-scanner
3.2 配置
root@csmp-OptiPlex-7090:/usr/share/jenkins/workspace/test_sda# cat /usr/share/sonar-scanner/conf/sonar-scanner.properties
#Configure here general information about the environment, such as SonarQube server connection details for example
#No information about specific project should appear here

#----- Default SonarQube server
#sonar.host.url=http://localhost:9000

#----- Default source code encoding
#sonar.sourceEncoding=UTF-8
sonar.host.url=http://192.168.70.202:32069
sonar.sourceEncoding=UTF-8
[root@dbc-server-554 sonar-scanner-4.7.0.2747-linux]# sonar-scanner -h
INFO:
INFO: usage: sonar-scanner [options]
INFO:
INFO: Options:
INFO:  -D,--define <arg>     Define property
INFO:  -h,--help             Display help information
INFO:  -v,--version          Display version information
INFO:  -X,--debug            Produce execution debug output
当看到sonar-scanner的帮助信息,说明已经部署成功
4. 配置cppcheck
4.1 下载安装cppcheck
https://sourceforge.net/projects/cppcheck/files/
tar -zxvf cppcheck-2.10.tar.gz

cd cppcheck-2.10/

make CFGDIR=/usr/share/cppcheck-2.10/cfg/

sudo make install

$ which cppcheck
/usr/bin/cppcheck
4.2 遇到的问题
- 如果提示
cppcheck报错 Makefile322: *** FILESDIR must be set!,则需要配置几个参数的环境变量
root@csmp-OptiPlex-7090:/usr/share/cppcheck# tail -3 /etc/profile
export FILESDIR=/src
export DESTDIR=/
export PREFIX=usr
root@csmp-OptiPlex-7090:/usr/share/cppcheck# source /etc/profile
- 问题:
cppcheck: Failed to load library configuration file 'std.cfg'. File not found
解决:
① 先把make文件清除 make clean
② 添加后重新编译:make CFGDIR=/usr/share/cppcheck-2.10/cfg/
③ 安装:sudo make install
4.3 配置sonarqube
https://github.com/SonarQubeCommunity/sonar-cppcheck
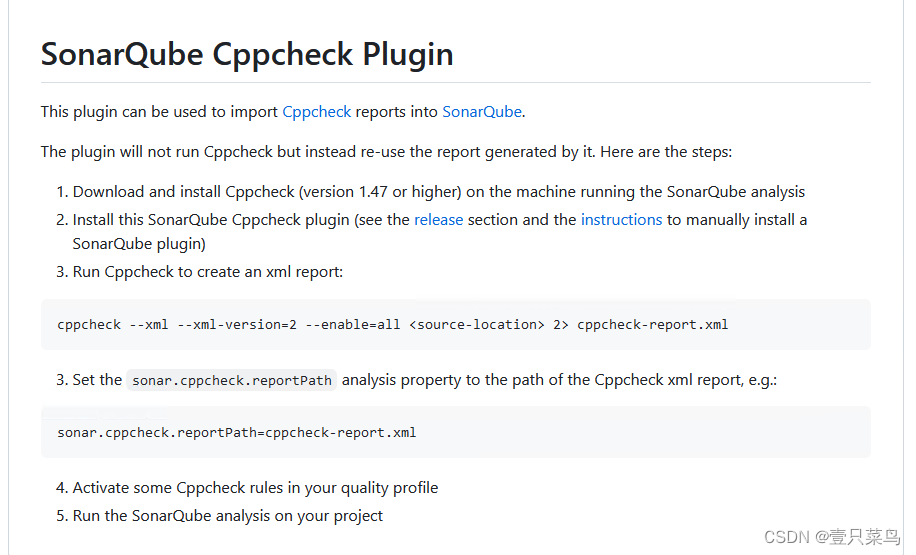
在sonarqube的配置文件修改
sonar.cxx.cppcheck.reportPath=cppcheck-report.xml
这样cppcheck就配置好了
4.4 测试
试试效果
root@csmp-OptiPlex-7090:/usr/share/jenkins/workspace/test_sda# cppcheck --xml --xml-version=2 --enable=all ./ 2> cppcheck-report.xml
Checking DelBkArea.cpp ...
root@csmp-OptiPlex-7090:/usr/share/jenkins/workspace/test_sda# cat cppcheck-report.xml
<?xml version="1.0" encoding="UTF-8"?>
<results version="2">
<cppcheck version="2.10"/>
<errors>
<error id="variableScope" severity="style" msg="The scope of the variable 'area' can be reduced." verbose="The scope of the variable 'area' can be reduced. Warning: Be careful when fixing this message, especially when there are inner loops. Here is an example where cppcheck will write that the scope for 'i' can be reduced:\012void f(int x)\012{\012 int i = 0;\012 if (x) {\012 // it's safe to move 'int i = 0;' here\012 for (int n = 0; n < 10; ++n) {\012 // it is possible but not safe to move 'int i = 0;' here\012 do_something(&i);\012 }\012 }\012}\012When you see this message it is always safe to reduce the variable scope 1 level." cwe="398" file0="DelBkArea.cpp">
<location file="DelBkArea.cpp" line="188" column="11"/>
<symbol>area</symbol>
...
5. 配置gitlab
5.1 搭建私人gitlab
当然,在公司的gitlab,可以直接打tag,代码下载等等操作,而不必搭建私人gitlab
3.2.1 搭建gitlab服务器(使用官方镜像搭建)
5.2 获取gitlab信息
获取的代码分支,例如
http://***/dbc_test_for_jenkins.git
获取能下载代码的账号及密码,当然也可以使用密钥对,主要用于配置jenkins
6. 配置jenkins
6.1 安装jenkins
CHAPTER 1 Jenkins部署与基础配置
安装插件,包括但不限于:
Git plugin
SonarQube Scanner for Jenkins
SSH Agent Plugin
Cppcheck
加节点,加凭据参考前文吧,这里不展开了
6.2 配置
-
系统管理>Configure System>
Jenkins Location
Jenkins URL
http://192.168.70.202:30351/
这里改成socket,默认的jenkins.local需要改域名 -
sonarqube设置
可以参考CHAPTER 5 Jenkins & SonarQube
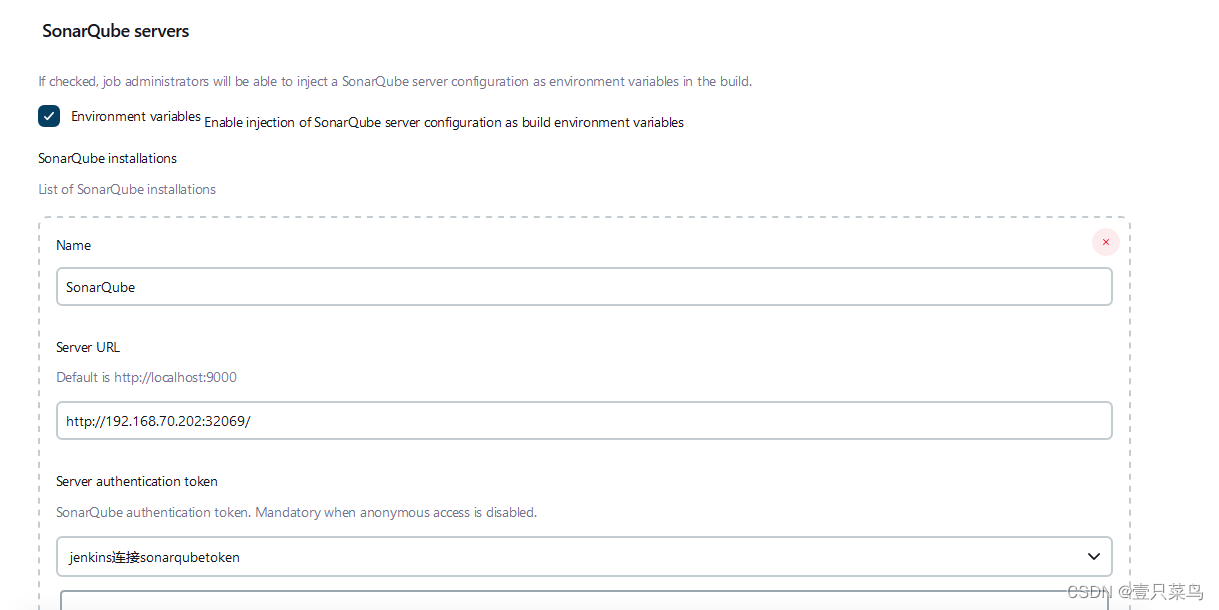
6.3 创建项目
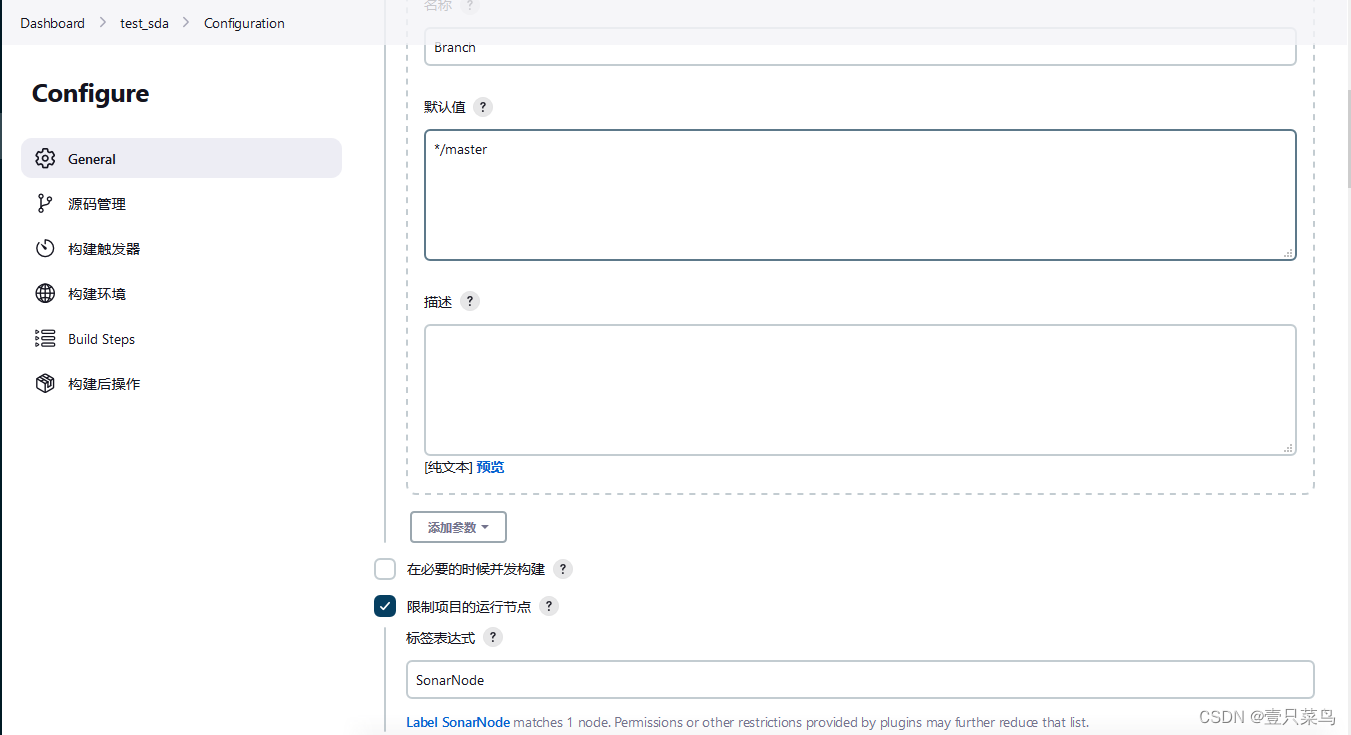
General部分:
添加参数,用于添加代码的tag或者branch
限制运行节点,选择节点
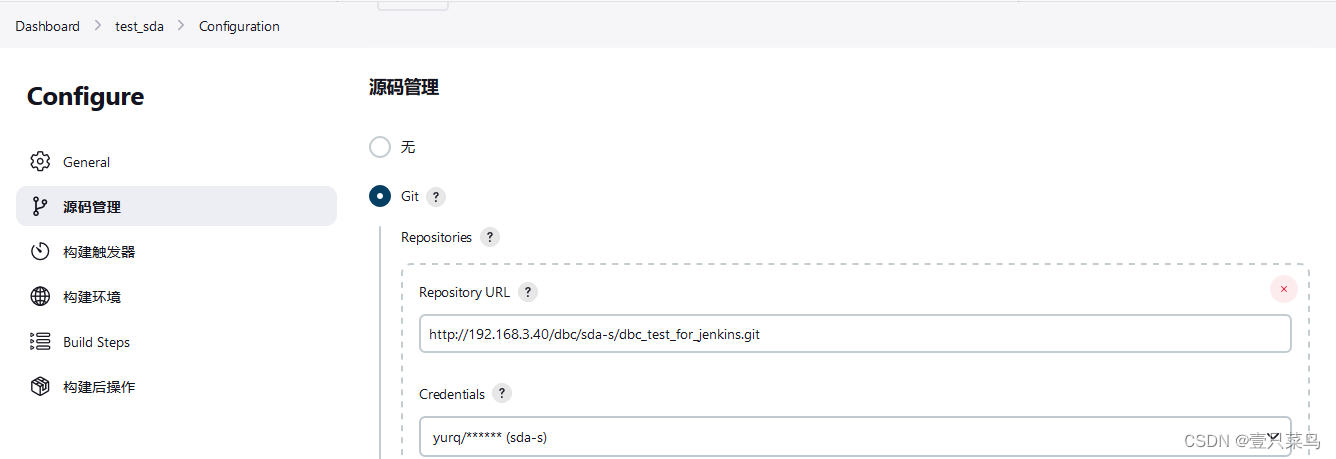
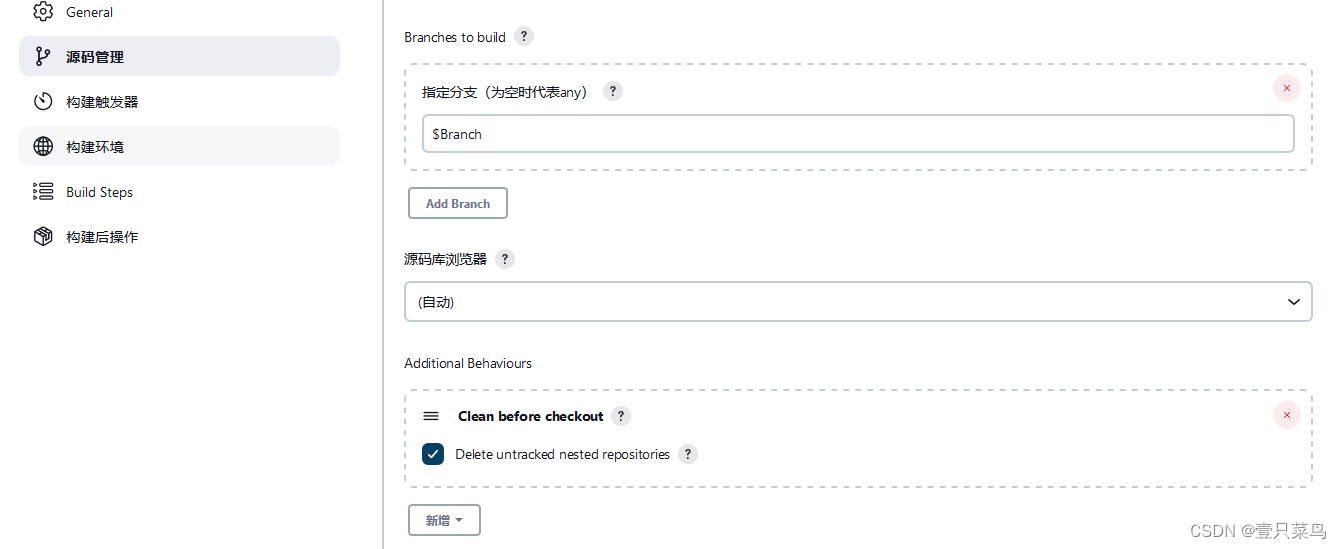
源码管理部分:这里有必要选择高级行为里的clean before checkout
构建部分:
添加cppcheck

添加sonar扫描

配置信息(Analysis properties):
# sonar平台中项目的标识(从项目信息中获取)
sonar.projectKey = ###
# sonar 平台中对应项目的名字
sonar.projectName = ###
# sonar 平台中对应项目的版本号
sonar.projectVersion=1.0

# sonar 检测的源文件目录,‘.’表示当前根目录下的所有文件
sonar.sources=.
# sonar 检测的语言种类
sonar.language=cxx
sonar.cxx.file.suffixes=.h,.cpp,.c
# sonar 平台中对应项目的编码格式
sonar.sourceEncoding=UTF-8
#排除文件,或文件夹
# sonar.exclusions=

# sonar服务的地址
sonar.host.url=http://192.168.70.202:32069
# sonar令牌(向管理员索要令牌)
sonar.login=squ_8a3df4a82bdaa8fc4909653195e2eeb95ed4ae26

sonar.scm.disabled=true
sonar.java.binaries=target/classes
sonar.cfamily.build-wrapper-output=build_wrapper_output_directory

# 配置本地扫描软件生成的报告路径,结合实际使用的软件进行配置,以下例子为cppcheck软件的内容,如需使用去掉前面的注释标识(#)
sonar.cxx.cppcheck.reportPaths=cppcheck-report.xml  #Cppcheck检查报告在根目录的上一级目录下
sonar.cxx.includeDirectories=/
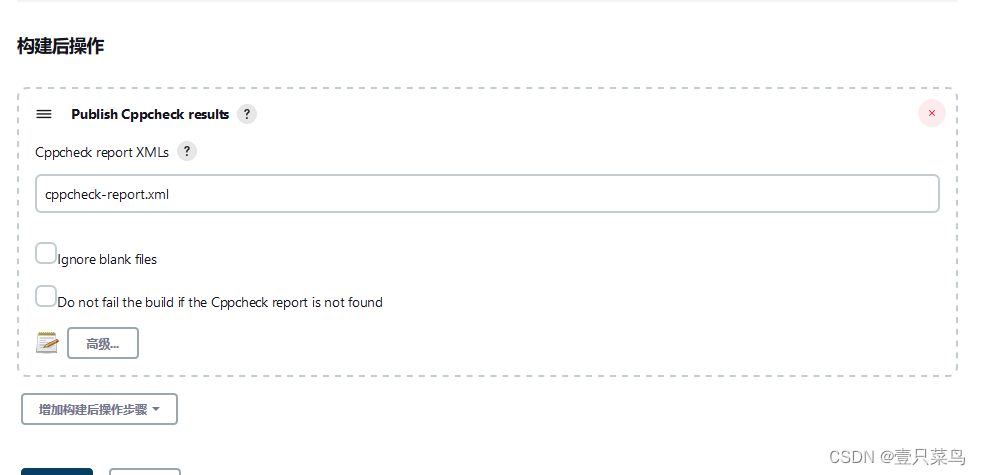
添加发布cppcheck结果
6.4 运行
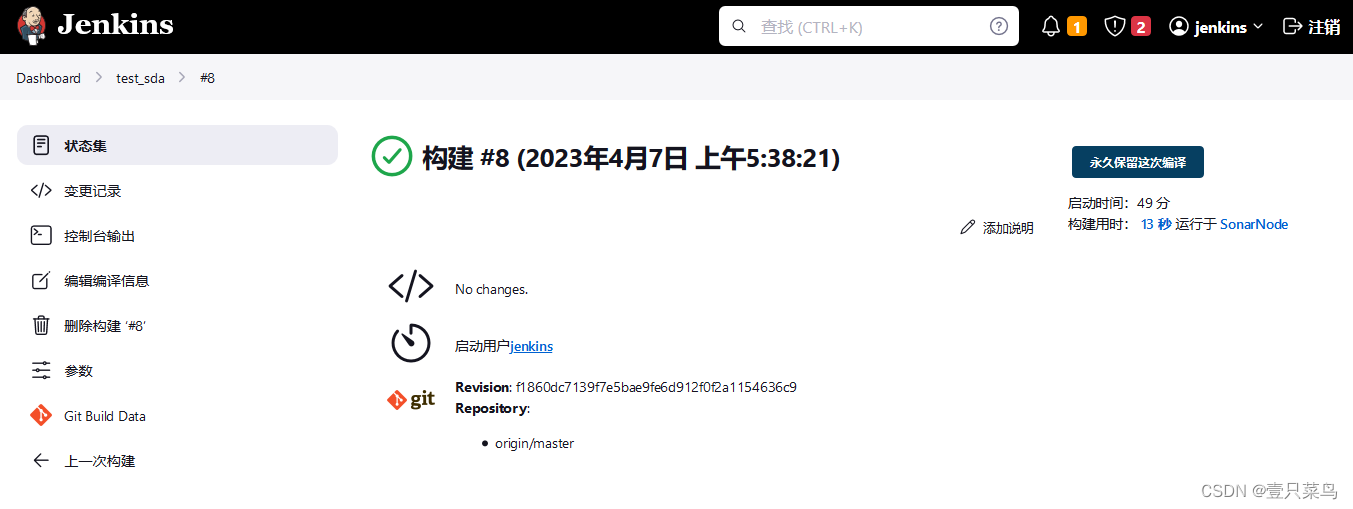
控制台输出:
Started by user jenkins
Running as SYSTEM
Building remotely on SonarNode (node sonarqube : 72.119,run) in workspace /usr/share/jenkins/workspace/test_sda
The recommended git tool is: NONE
...
INFO: Analysis total time: 10.086 s
INFO: ------------------------------------------------------------------------
INFO: EXECUTION SUCCESS
INFO: ------------------------------------------------------------------------
INFO: Total time: 11.269s
INFO: Final Memory: 18M/100M
INFO: ------------------------------------------------------------------------
Finished: SUCCESS
6.5 查看报告
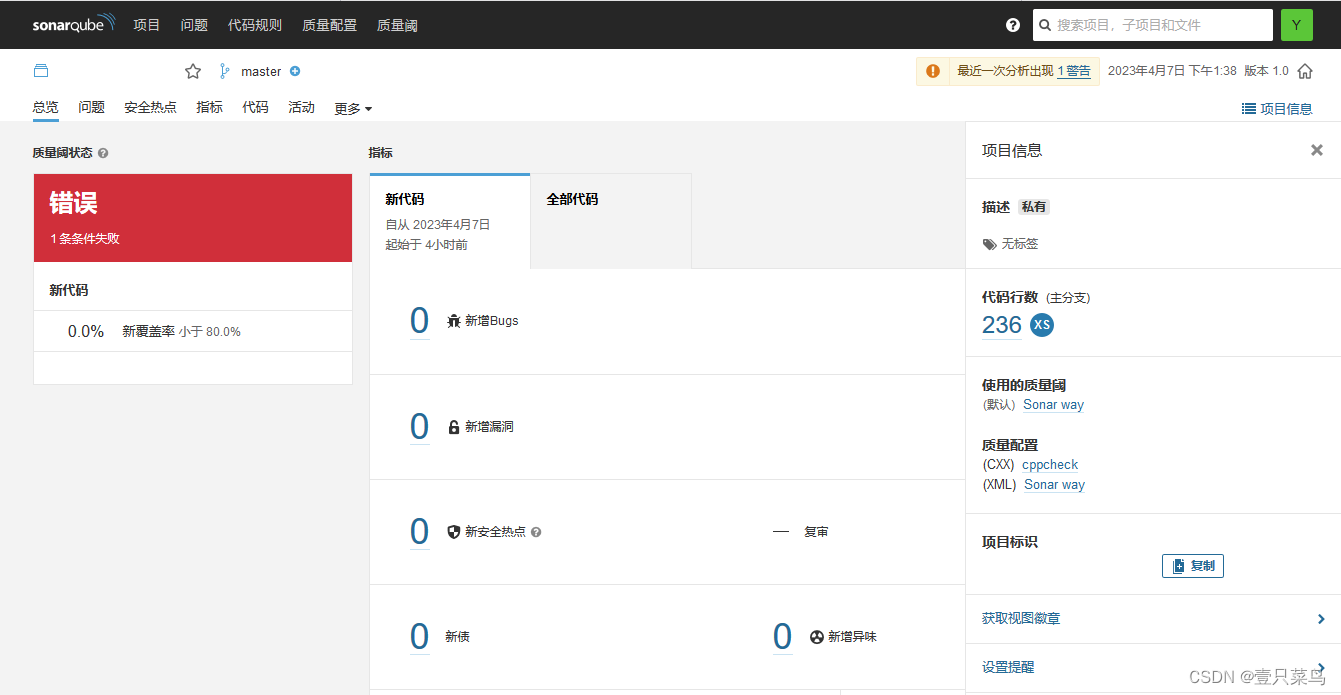
登录sonar的web界面,查看报告
