Django 4.0文档学习(一)
本系列文章基于Django4.0版本官方网站文档学习
使用开发工具为pycharm
> python -m django --version
4.0
文章目录
- 编写你的第一个 Django 应用,第 1 部分
- 创建项目
- 用于开发的简易服务器
- 创建应用
- 编写第一个视图
- 编写你的第一个 Django 应用,第 2 部分
- 数据库配置
- 创建模型
- 激活模型
- 初试 API
- 介绍 Django 管理页面
编写你的第一个 Django 应用,第 1 部分
创建项目
在pycharm终端窗口运行
django-admin startproject mysite

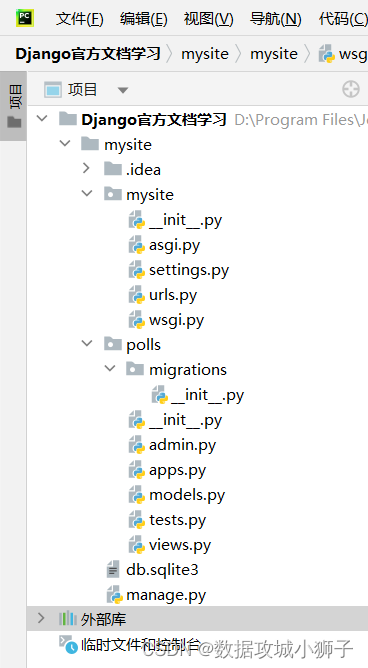
当前项目工作目录下会生成如下文件

- 最外层的
mysite/根目录只是项目的容器,根目录名称对django没有影响,可以重命名为任意名称。 manage.py:一个让你用各种方式管理django项目的命令行工具。- 里面一层的
mysite/目录包含你的项目,它是一个纯python包。 mysite/__init__.py:一个空文件,告诉 Python 这个目录应该被认为是一个 Python 包。mysite/settings.py:django项目的配置文件。mysite/urls.py:django项目的URL声明,就像你网站的目录。mysite/asgi.py:作为你的项目的运行在 ASGI 兼容的 Web 服务器上的入口。mysite/wsgi.py:作为你的项目的运行在 WSGI 兼容的Web服务器上的入口。
用于开发的简易服务器
确认一下你的 Django 项目是否真的创建成功了。
进入最外层的mysite/目录,并运行:
> cd .\mysite\
> python manage.py runserver
看到如下输出表示Django项目创建成功,ctrl+c结束运行

浏览器打开http://127.0.0.1:8000/

默认情况下,runserver 命令会将服务器设置为监听本机内部 IP 的 8000 端口。
如果需要更改,运行
python manage.py runserver 8080
重新运行python manage.py runserver就会看到链接变为 http://127.0.0.1:8080/
创建应用
Django 自带一个工具,可以帮你生成应用的基础目录结构
应用名随意
> python manage.py startapp polls
编写第一个视图
polls/views.py
from django.http import HttpResponse
def index(request):
    return HttpResponse("Hello,world.You're at the polls index.")
这是 Django 中最简单的视图。如果想看见效果,需要将一个 URL 映射到它——这就是我们需要 URLconf 的原因了。
为了创建 URLconf,需要在 polls 目录里新建一个 urls.py 文件。
polls/urls.py
from django.urls import path
from . import views
urlpatterns=[
    path('',views.index,name='index'),
]
下一步是要在根 URLconf 文件中指定我们创建的 polls.urls 模块。在 mysite/urls.py 文件的 urlpatterns 列表里插入一个 include()。
mysite/urls.py
from django.contrib import admin
from django.urls import include,path

urlpatterns = [
    path('polls/', include('polls.urls')),
    path('admin/', admin.site.urls),
]
验证是否正常工作
python manage.py runserver
http://127.0.0.1:8000/polls

编写你的第一个 Django 应用,第 2 部分
mysite/settings.py一些配置
#LANGUAGE_CODE = 'en-us'
LANGUAGE_CODE = 'zh-Hans'#中文

#TIME_ZONE = 'UTC'
TIME_ZONE = 'Asia/Shanghai'#中国时区
数据库配置
mysite/settings.py
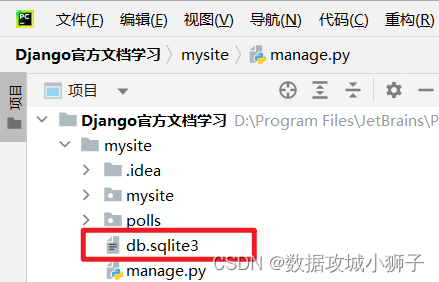
Django 默认配置的 sqlite3 数据库
'db.sqlite3' 将把数据库文件储存在项目的根目录。
DATABASES = {
    'default': {
        'ENGINE': 'django.db.backends.sqlite3',
        'NAME': BASE_DIR / 'db.sqlite3',
    }
}
如果配置 MySQL 数据库,得先进入 MySQL 命令行界面为项目建数据库,如:
create database xxx数据库名;
DATABASES = {
    'default': {
        'ENGINE': 'django.db.backends.mysql',
        'NAME': 'xxx数据库名',
        'USER': '用户名',
        'PASSWORD': '密码',
        'HOST': '127.0.0.1',
        'PORT': '3306',
    }
}
创建模型
在 Django 里写一个数据库驱动的 Web 应用的第一步是定义模型 - 也就是数据库结构设计和附加的其它元数据。
官网教程创建polls应用是一个投票应用,创建两个模型:问题 Question 和选项 Choice。Question 模型包括问题描述和发布时间。Choice 模型有两个字段,选项描述和当前得票数。每个选项属于一个问题。
polls/models.py
from django.db import models
class Question(models.Model):
    question_text = models.CharField(max_length=200)#CharField字符字段
    pub_date=models.DateTimeField('date published')#DateTimeField日期时间字段
class Choice(models.Model):
    question=models.ForeignKey(Question,on_delete=models.CASCADE)
    choice_text=models.CharField(max_length=200)
    votes=models.IntegerField(default=0)
激活模型
首先得把 polls 应用安装到我们的项目里
mysite/settings.py
INSTALLED_APPS列表里添加'polls.apps.PollsConfig'
> python manage.py makemigrations polls

Migrations for 'polls':
  polls\migrations\0001_initial.py
    - Create model Question
    - Create model Choice
通过运行 makemigrations 命令,Django 会检测你对模型文件的修改,并且把修改的部分储存为一次迁移。
迁移是 Django 对于模型定义(也就是你的数据库结构)的变化的储存形式。它被储存在 polls/migrations/0001_initial.py 里。

查看迁移命令会执行哪些 SQL 语句。sqlmigrate 命令接收一个迁移的名称,然后返回对应的 SQL:
> python manage.py sqlmigrate polls 0001

运行 migrate 命令,在数据库里创建新定义的模型的数据表:
> python manage.py migrate
迁移是非常强大的功能,它能让你在开发过程中持续的改变数据库结构而不需要重新删除和创建表。改变模型需要这三步:
- 编辑 models.py 文件,改变模型。
- 运行 python manage.py makemigrations为模型的改变生成迁移文件。
- 运行 python manage.py migrate 来应用数据库迁移。
初试 API
打开python命令行
python manage.py shell
试试数据库 API
>>> from polls.models import Choice,Question
>>> Question.objects.all()
<QuerySet []>
>>> from django.utils import timezone
>>> q = Question(question_text="What's new?", pub_date=timezone.now())
>>> q.save()
>>> q.id
1
>>> q.question_text
"What's new?"
>>> q.pub_date
datetime.datetime(2023, 3, 17, 7, 30, 17, 75596, tzinfo=datetime.timezone.utc)
>>> q.question_text="What's up?"
>>> q.save()
>>> Question.objects.all()
<QuerySet [<Question: Question object (1)>]>
<Question: Question object (1)> 对于我们了解这个对象的细节没什么帮助。通过编辑 Question 模型的代码(位于 polls/models.py 中)来修复这个问题。给 Question 和 Choice 增加 str() 方法。
给模型增加 str() 方法是很重要的,这不仅仅能给你在命令行里使用带来方便,Django 自动生成的 admin 里也使用这个方法来表示对象。
再为此模型添加一个自定义方法:
polls/models.py
import datetime
from django.db import models
from django.utils import timezone
class Question(models.Model):
    question_text = models.CharField(max_length=200)#CharField字符字段
    pub_date=models.DateTimeField('date published')#DateTimeField日期时间字段
    def __str__(self):
        return self.question_text
    def was_published_recently(self):
        return self.pub_date >= timezone.now() - datetime.timedelta(days=1)
class Choice(models.Model):
    question=models.ForeignKey(Question,on_delete=models.CASCADE)
    choice_text=models.CharField(max_length=200)
    votes=models.IntegerField(default=0)
    def __str__(self):
        return self.choice_text
quit()退出命令行。通过 python manage.py shell 命令再次打开 Python 交互式命令行。
>>> from polls.models import Choice,Question
>>> Question.objects.all()
<QuerySet [<Question: What's up?>]>
>>> Question.objects.filter(id=1)
<QuerySet [<Question: What's up?>]>
>>> Question.objects.filter(question_text__startswith='What')
<QuerySet [<Question: What's up?>]>
>>> from django.utils import timezone
>>> current_year=timezone.now().year
>>> Question.objects.get(pub_date__year=current_year)
<Question: What's up?>
>>> Question.objects.get(pk=1)
<Question: What's up?>
>>> q=Question.objects.get(pk=1)
>>> q.was_published_recently()
True
>>> q.choice_set.all()
<QuerySet []>
>>> q.choice_set.create(choice_text='Not much', votes=0)
<Choice: Not much>
>>> q.choice_set.create(choice_text='The sky', votes=0)
<Choice: The sky>
>>> c = q.choice_set.create(choice_text='Just hacking again', votes=0)
>>> c.question
<Question: What's up?>
>>> q.choice_set.all()
<QuerySet [<Choice: Not much>, <Choice: The sky>, <Choice: Just hacking again>]
>
>>> q.choice_set.count()
3
>>> Choice.objects.filter(question__pub_date__year=current_year)
<QuerySet [<Choice: Not much>, <Choice: The sky>, <Choice: Just hacking again>]
>
>>> c = q.choice_set.filter(choice_text__startswith='Just hacking')
>>> c.delete()
(1, {'polls.Choice': 1})
quit()退出。
介绍 Django 管理页面
创建一个管理员账号python manage.py createsuperuser
密码我写的admin
> python manage.py createsuperuser
用户名 (leave blank to use 'dell'): admin
电子邮件地址: admin@example.com
Password:
Password (again):
密码跟 用户名 太相似了。
密码长度太短。密码必须包含至少 8 个字符。
这个密码太常见了。
Bypass password validation and create user anyway? [y/N]: y
Superuser created successfully.
启动开发服务器python manage.py runserver
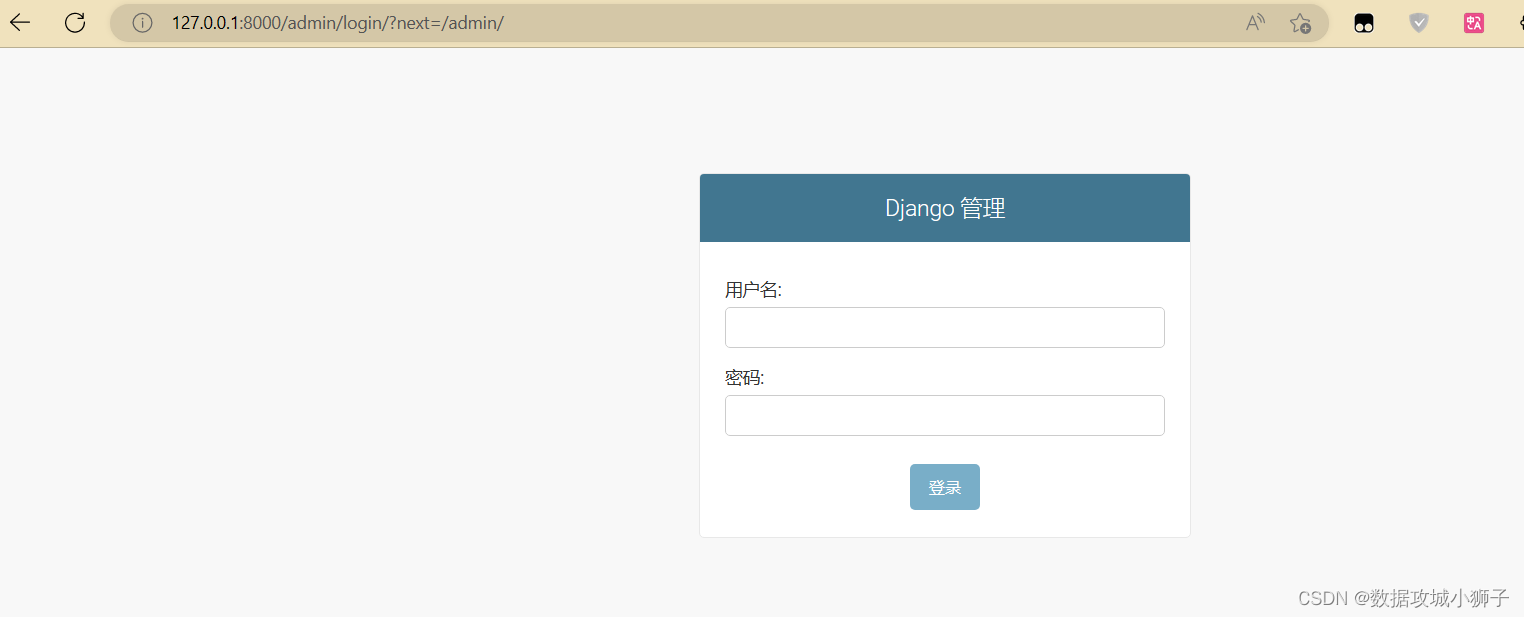
进入http://127.0.0.1:8000/admin
登录后

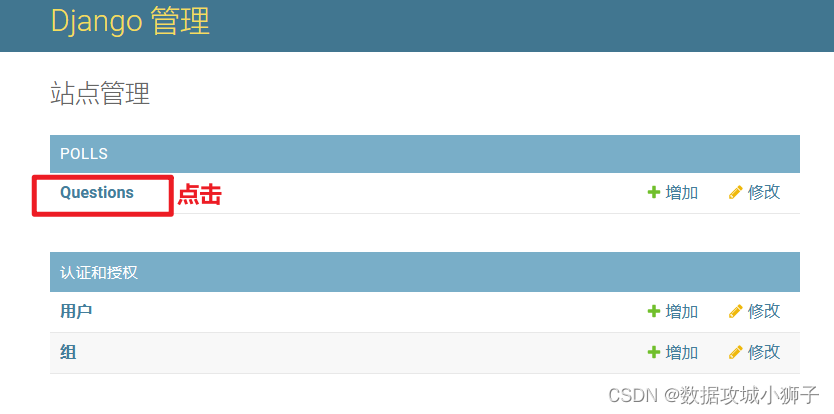
向管理页面中加入投票应用
polls/admin.py
from django.contrib import admin
from .models import Question
admin.site.register(Question)
刷新页面
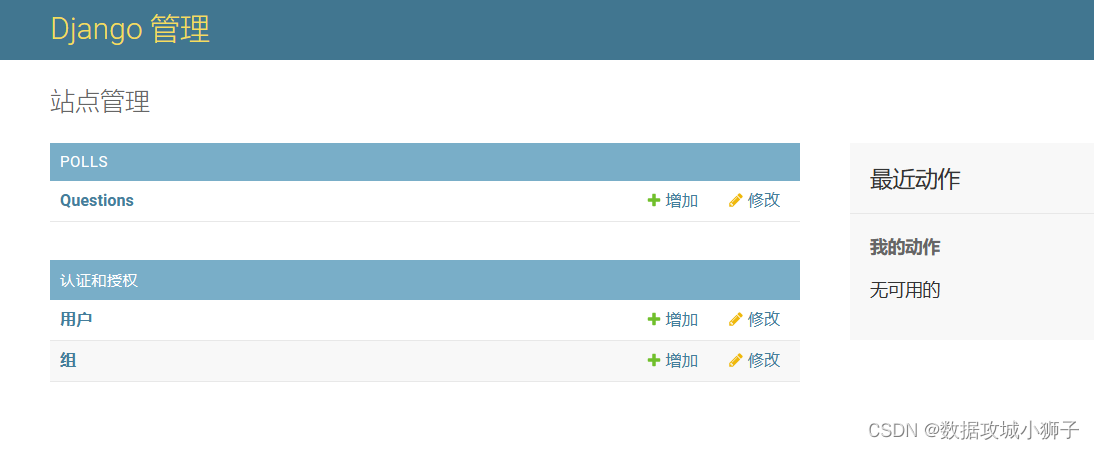
体验便捷的管理功能
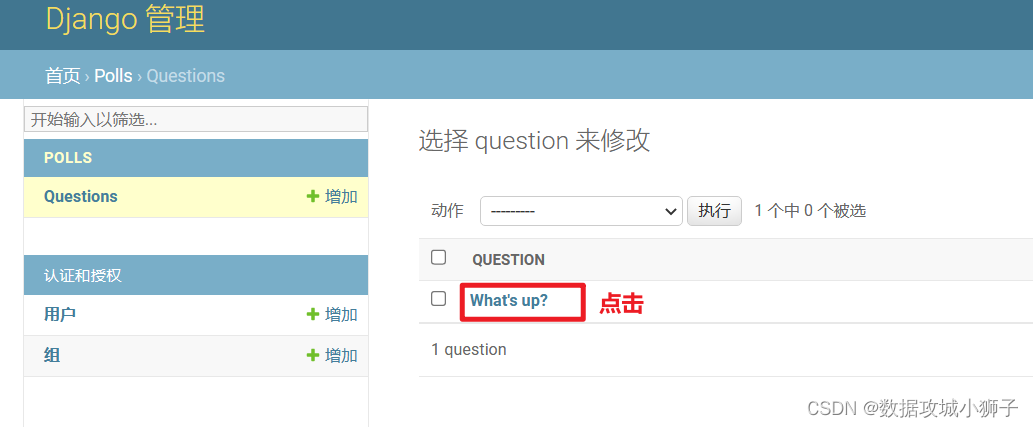


可以看到修改历史

