基于stm32mp157 linux开发板ARM裸机开发教程Cortex-A7 开发环境搭建(连载中)
前言:
目前针对ARM Cortex-A7裸机开发文档及视频进行了二次升级持续更新中,使其内容更加丰富,讲解更加细致,全文所使用的开发平台均为华清远见FS-MP1A开发板(STM32MP157开发板)
针对对FS-MP1A开发板,除了Cortex-A7裸机开发篇外,还包括其他多系列教程,包括Cortex-M4开发篇、FreeRTOS篇、Linux基础及应用开发篇、Linux系统移植篇、Linux驱动开发篇、硬件设计篇、人工智能机器视觉篇、Qt应用编程篇、Qt综合项目实战篇等。除此之外计划针对Linux系统移植篇、Linux驱动开发篇均会进行文档及视频的二次升级更新敬请关注!
评论区下方留言可领取开发板更多资料
进入正题 先来简单介绍一下该款开发板的Cortex-A 处理器
ARM 在 Cortex-A 系列处理器大体上按性能可以排序为:Cortex-A77 处理器、Cortex-A75 处理器、Cortex-A73 处理器、Cortex-A57 处理器、Cortex-A53 处理器、Cortex-A15 处理器、Cortex-A9 处理器、CortexA7 处理器、Cortex-A5 处理器等。需要指出的是,单从命名数字来看,Cortex-A7 似乎比 A9 低端,但是从ARM 的官方数据看,A7 的架构和工艺都是仿照 A15 来做的,单个性能超过 A9 并且能耗控制更好。截止2017 年 ARM 公司的 Cortex-A 系列处理器产品如下图所示。


处理器学习概括
STM32MP1 除了有 Cortex-M4 内核外,还包含 2 个 Cortex-A7 核心。接下来开始学习 STM32MP1 的Cortex-A7 核心相关知识。ARM Cortex-A 核的学习方法和 Cortex-M 核心有比较大的差别。基于 Cortex-M4的开发,因为有 STM32CubeMX 工具和 HAL 库函数的支持,基本上可以满足大部分开发者的需求,很少需要了解处理器的体系结构、汇编指令和汇编编程的内容。但 Cortex-A 核的复杂度高、灵活度高,需要有比较复杂的引导程序(例如:UBoot)和操作系统(例如:Linux)的支持。如果要深入学习嵌入式 Linux底层开发技术,需要很好的了解 Cortex-A 核的特性和汇编编程。后续章节会结合实验和仿真环境,陆续学习 Cortex-A7 内核的工作模式、寄存器组织、程序状态寄存器、存储系统、流水线、异常处理等处理器相关知识,以及汇编指令、汇编编程、C 混合编程等内容。
Cortex-A7 开发环境搭建
本章节主要介绍 windows 下的开发环境搭建。推荐使用 win10 64bit 系统进行安装。我们将安装以下软件。
Xshell 7(免费版)
STM32CubeProgrammer
Windows 下交叉编译工具链
Eclispse 与 OpenOCD
Xshell 7 安装
由于在后续的实验中需要使用到串口调试终端和 ssh 登陆 Linux 操作系统,因此需要安装一个调试工具,这里以 xshell 为例,读者也可以根据自己的个人习惯选择。
Xshell 7 免费版安装包可以从 xshell 官方网站 https://www.netsarang.com/zh/通过邮件申请免费版本,也可以使用资料光盘中【华清远见-FS-MP1A 开发资料\01-工具软件】的 Xshell-7.0.0108p.exe 安装包进行安装。
双击安装包后会先检查当前系统环境,如果系统依赖不满足则会自动安装缺失的部分。

环境安装完成后将会出现如下界面

点击“下一步”

点击“我接收许可协议中的条款”

选择要安装的默认目录后点击“下一步”

点击“安装”

安装完成会出现如下界面

安装完成后第一次启动需要指定一个配置文件默认保存路径,这里一般默认即可。

然后出现如下界面,由于是免费版本,所以直接点击“关闭”即可。

随后会弹出如下界面,点击“确定”

至此,xshell 7(免费版),就安装成功了。
STM32CubeProgrammer 安装
STM32CubeProgrammer 是 STMicroelectronics 的官方工具,用于在 STM32 平台上的 Flash 设备中创建分区并对各个分区进行镜像烧录。
可以使用 STM32CubeProgrammer 来烧录 STM32 MPU 板上支持的所有 Flash 设备。后续镜像烧录将会用 STM32CubeProgrammer 工具进行 eMMC 和 SDCsrd 的镜像更新。
STM32CubeProgrammer 安 装 包 可 以 从 ST 官 方 网 站https://www.st.com/en/developmenttools/stm32cubeprog.html 通过邮件申请最新版本,也可以使用资料光盘中【华清远见-FS-MP1A 开发资料 \01-工具软件】的 en.stm32cubeprog_v2-4-0.zip 安装包进行安装。
首先需要将安装包解压,解压完成后得到如下文件。

双击“SetupSTM32CubeProgrammer-2.4.0.exe”允许安装向导。

点击“Next”

点击“Next”

点击“I accept the terms of this license agreement”
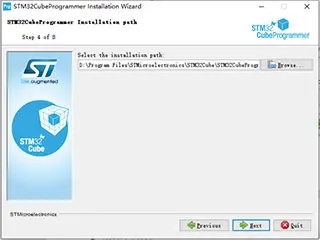
这里选择安装路径,用户可以自行指定。点击 Next 之后会提示,将要创建一个安装目录。

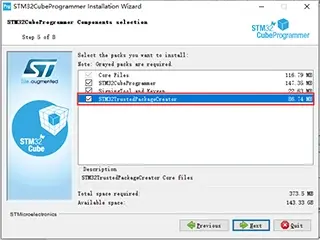
勾选 STM32TrustePackageCreator 选项

在安装的过程中会弹出如下界面,安装相关的驱动程序。点击“下一步”

程序将会自动安装所需的驱动程序,安装完成后会弹出如下界面。
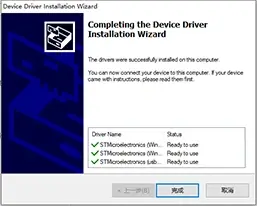
点击“完成”

切换到“STM32CubeProgrammer”界面后点击“Next”,创建桌面快捷键。

安装完成界面

出现上述界面后点击“Done”。至此 STM32CubeProgrammer 就安装完成了。
安装 GCC 编译工具
双击【华清远见-FS-MP1A 开发资料\01-工具软件\Yagarto 工具包】目录下的 yagarto-bu-2.21_gcc-4.6.2-c-c++_nl-1.19.0_gdb-7.3.1_eabi_20111119.exe 进行安装

点击 Next

继续点击 Next


点击 Install

点击 Next

点击 Finish,完成安装
安装 Yagarto 工具包
双击【华清远见-FS-MP1A 开发资料\01-工具软件\Yagarto 工具包】目录下的 yagarto-tools-20100703-setup.exe 进行安装

点击 Next

点击 Next

点击 Next

选择安装路径,然后点击 Next

点击 Install 进行安装


点击 Finish,完成安装
安装 JRE
双击【华清远见-FS-MP1A 开发资料\01-工具软件】目录下的文件 jre-6u7-windows-i586-p-s.exe 进行安装
点击“接受”,过程可能需要一段时间


点击“完成”即完成安装
Eclipse 与 OpenOCD 的安装
Eclipse 为我们后面学习裸机编程的主要开发工具,Eclipse 是一套集成的 IDE,可进行程序的编辑、编译、调试等操作。
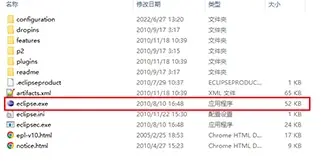
资料光盘【华清远见-FS-MP1A 开发资料\01-工具软件\eclipse\ eclipse-cpp-helios-SR1-win32.zip】下的eclipse-cpp-helios-SR1-win32.zip 是一套已经安装好各种插件的开发包,是一个绿色版的 eclipse,我们可以将它解压到电脑的任何位置,之后双击 eclipse.exe 就可以使用了。
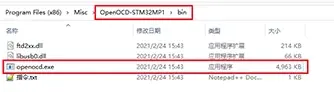
OpenOCD 是用来连接各种仿真器的一款工具,通过该工具我们就可以控制目标 CPU 的运行了。该工具位于【华清远见-FS-MP1A 开发资料\01-工具软件\OpenOCD-STM32MP1.zip】同样也是一个绿色版本,我们可以将它解压到电脑的任何位置即可。在该压缩包的 bin 目录下的 openocd.exe 即为可执行程序,在后面的章节里我们讲述如何使用该工具。