python 涉及opencv mediapipe知识,眨眼计数 供初学者参考
基本思路 我们知道正面侦测到人脸时,任意一只眼睛水平方向上的两个特征点构成水平距离,上下两个特征点构成垂直距离 当头像靠近或者远离摄像头时,垂直距离与水平距离的比值基本恒定
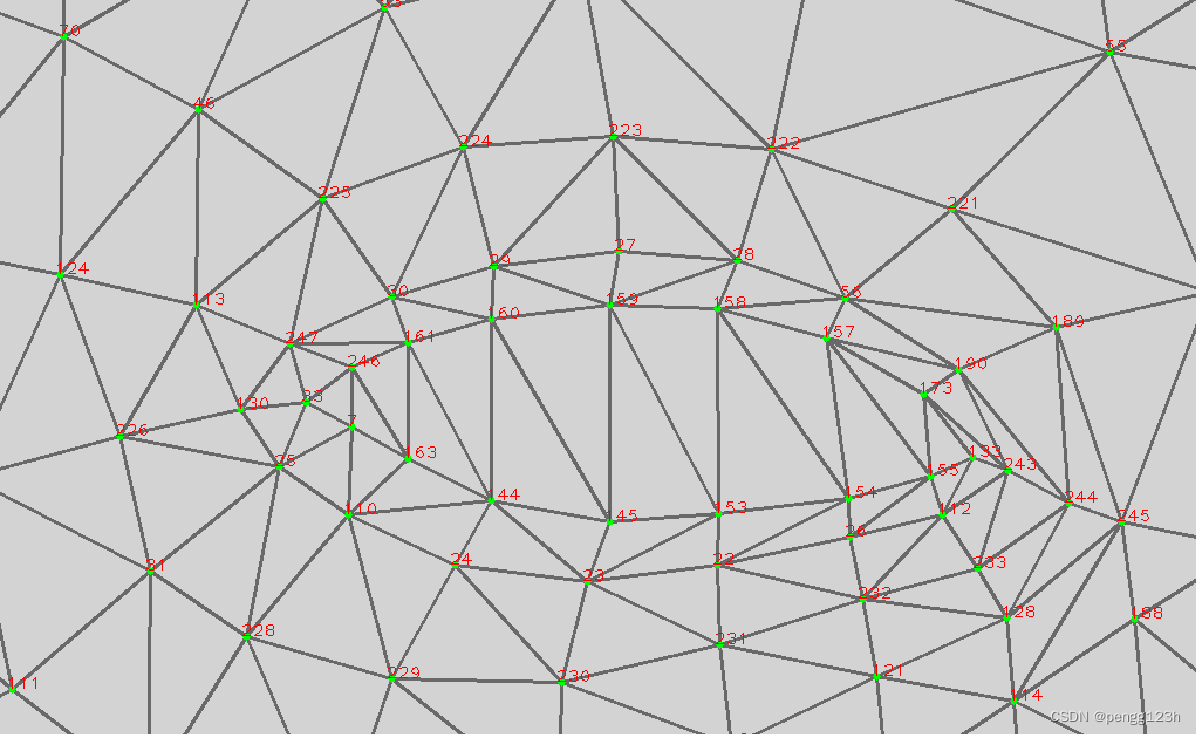
根据这一思路 当闭眼时 垂直距离变小 比值固定小于某一个值 当睁眼时 比值大于某个比率,比如35%,我们将比值扩大一百倍 (35% X 100) 这样我们认为大于35时是睁眼 小于为闭眼,根据程序侦测画面帧数 我们认为某一段连续的帧画面就是同一个事件 所以我们只处理其中一帧画面。基本背景知识需要用到mediapipe中人脸模型 下面给出右眼特征点编号

完整代码:
import cv2
import cvzone
from cvzone.FaceMeshModule import FaceMeshDetector
from cvzone.PlotModule import  LivePlot
from PIL import Image, ImageDraw, ImageFont
import numpy as np

def putText2(img,text,pos,size=36,color=(255,0,0)):

    img_pil = Image.fromarray(cv2.cvtColor(img, cv2.COLOR_BGR2RGB))
    font = ImageFont.truetype(font=r'simsun.ttc', size=size)
    draw = ImageDraw.Draw(img_pil)
    draw.text(pos, text, font=font, fill=color)  # PIL中RGB=(255,0,0)表示红色
    img_cv = np.array(img_pil)                         # PIL图片转换为numpy
    img = cv2.cvtColor(img_cv, cv2.COLOR_RGB2BGR)      # PIL格式转换为OpenCV的BGR格式
    return img

cap=cv2.VideoCapture("out.mp4")
detector=FaceMeshDetector(maxFaces=1)
#绘制Y坐标为20到50之间的实时波形图,宽度 高度 范围
plotY=LivePlot(480,640,[20,50],invert=True)
idEyeList=[22,23,24,26,110,157,158,159,160,161,162,130]

ratioList=[]
blinkCouter=0
counter=0
color=(255,0,255)
while True:
    if cap.get(cv2.CAP_PROP_POS_FRAMES)==cap.get(cv2.CAP_PROP_FRAME_COUNT):
        cap.set(cv2.CAP_PROP_POS_FRAMES,0)

    success,img=cap.read()
    # print(img.shape)

    img, faces = detector.findFaceMesh(img,draw=False)
    if faces:
        face=faces[0]
        for id in idEyeList:
            cv2.circle(img,face[id],5,(255,0,255),cv2.FILLED)
            cv2.line(img,face[159],face[23],(0,255,0),1)
            cv2.line(img, face[130], face[243], (0, 255, 0), 1)
        leftUp=face[159]
        leftDown=face[23]

        leftLeft=face[130]
        leftRight=face[243]
        #垂直距离与水平距离
        lengthVer,_=detector.findDistance(leftUp,leftDown)
        lengthHor, _ = detector.findDistance(leftLeft,leftRight)
        # print("比率",lengthVer/lengthHor)

        #获取随时变化的值
        ratio=int((lengthVer/lengthHor)*100)

        #让波形看起来平滑
        ratioList.append(ratio)
        if len(ratioList)>10:
            ratioList.pop(0)

        ratioAvg=sum(ratioList)/len(ratioList)
        # imgPlot=plotY.update(ratio)

        if ratioAvg<40 and counter==0:
            blinkCouter += 1
            color=(0,255,0)
            counter=1
        if counter !=0:
            counter +=1
            #保持20毫秒内不重复计数
            if counter>20:
                color=(255,0,255)
                counter=0

        # cvzone.putTextRect(img,f'blink count:{blinkCouter}',(50,50),colorR=(0,255,0))
        cv2.rectangle(img,(50,50),(260,85),color,cv2.FILLED)
        img=putText2(img,f'眨眼计数:{blinkCouter}',(50,50),color=(0,0,255))

        imgPlot = plotY.update(int(ratioAvg),color)
        # cv2.imshow("Imgplot",imgPlot)
        cv2.resize(img, (640, 480))
        imgStack=cvzone.stackImages([img,imgPlot],2,1)

    cv2.imshow("img",imgStack)

    cv2.waitKey(1)
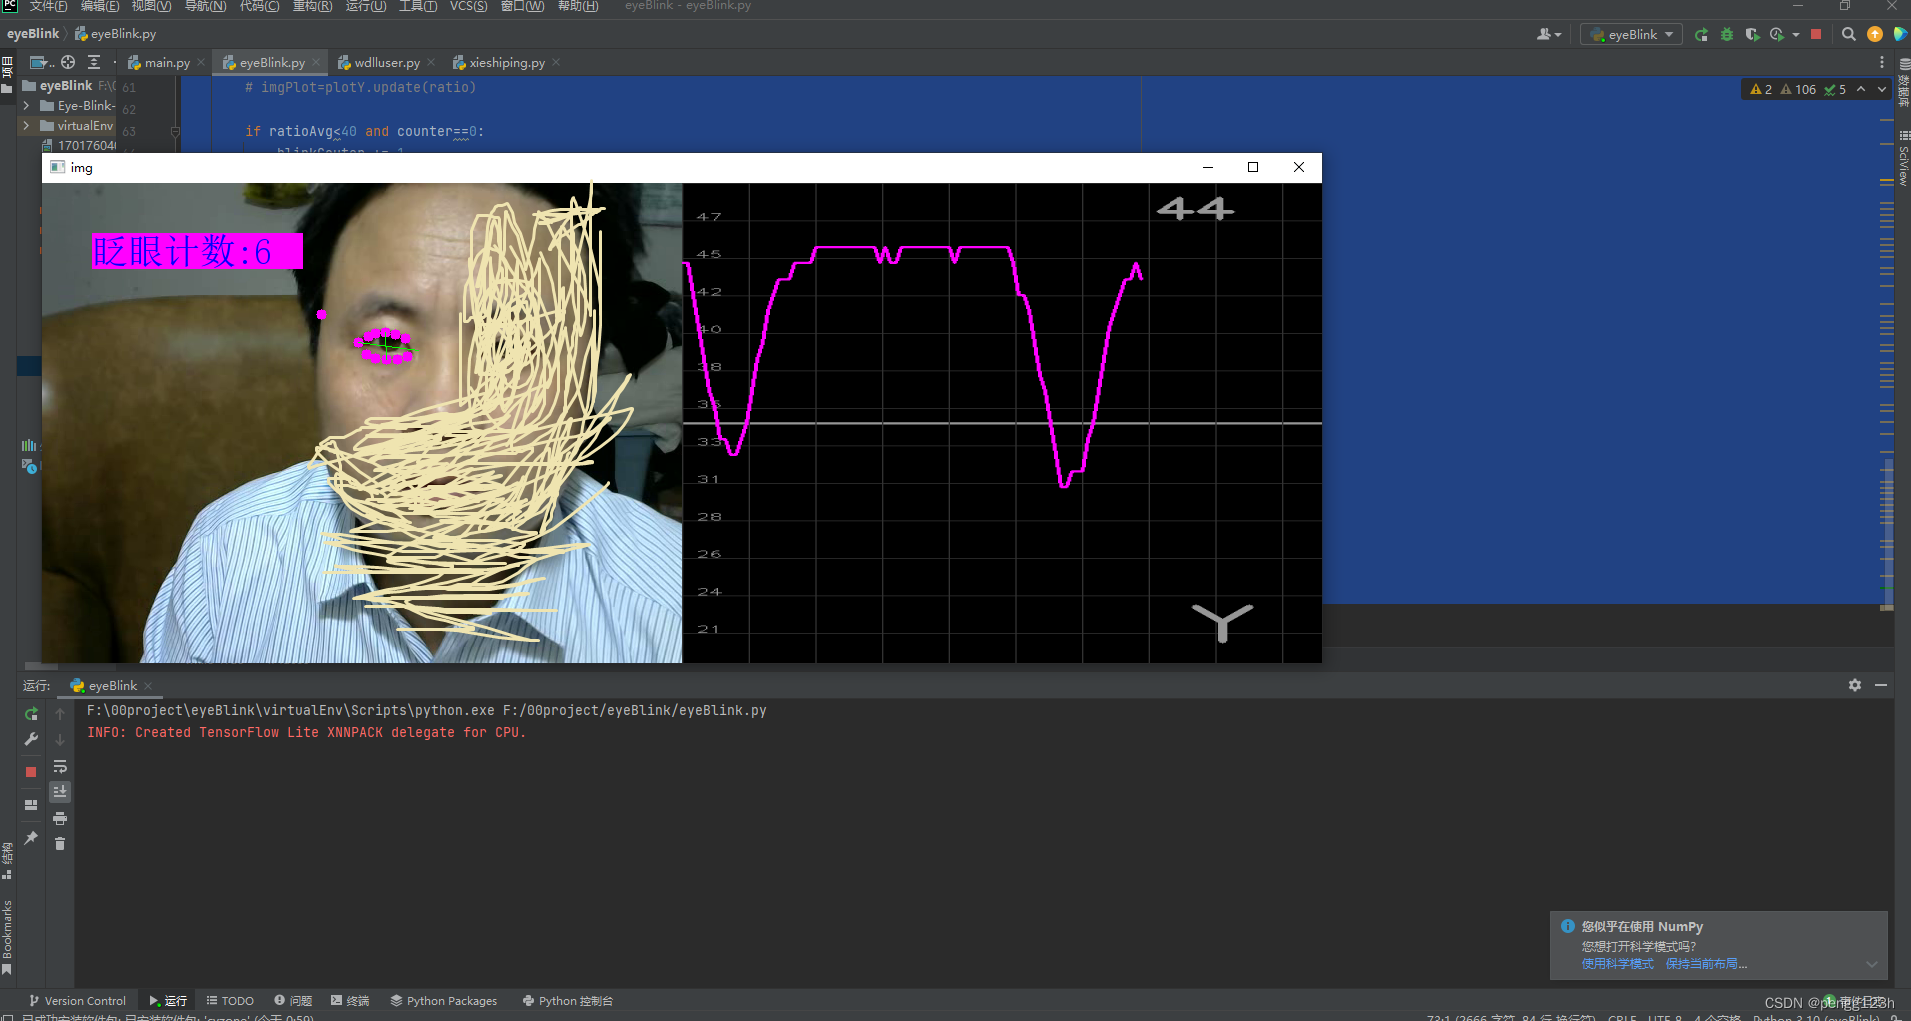
截取任意一帧画面演示效果:

