vue基本语法
目录
一、模板语法
(1)文本
(2)原始HTML
(3)属性Attribute
(4)使用JavaScript表达式
二、条件渲染
(1)v-if,v-else
(2)v-show
(3)v-show和v-if的区别
三、列表渲染
(1)v-for
(2)维护状态
四、事件处理
(1)监听事件
(2)事件处理方法
(3)内联处理器中的方法
一、模板语法
(1)文本
动态显现数据
使用{{}}一般配合js中的data()设置数据
<template>
  <div class="hello">
     <h3>vue学习</h3>
     <p>{{ s }}</p>>
  </div>
</template>

<script>
export default{
  name: 'HelloWorld',
  data() {
    return{
      s:'嘿嘿嘿'
    }
  }
}

</script>

(2)原始HTML
双大括号会将数据解释为普通文本,而非HTML代码。为了输出真正的HTML代码,需要使用v-html指令
<template>
  <div class="hello">
     <h3>vue学习</h3>
     <div>{{ s }}</div>
     <p v-html="s"></p>>
  </div>
</template>

<script>
export default{
  name: 'HelloWorld',
  data() {
    return{
      s:'<a href="http://www.baidu.com">百度</a>'
    }
  }
}

</script>

(3)属性Attribute
v-bind:直接加属性名,可以实现动态属性,如:v-bind:id
v-bind:也可以写成:
<template>
  <div class="hello">
     <h3>vue学习</h3>
     <div v-bind:id="io">2</div>
  </div>
</template>

<script>
export default{
  name: 'HelloWorld',
  data() {
    return{
      io:1010
    }
  }
}

</script>

(4)使用JavaScript表达式
注意可以实现的是单个表达式,如下:
<template>
  <div class="hello">
     <h3>vue学习</h3>
     <p>{{ n+2 }}</p>
     <div>{{ ok?'对啦':'错啦' }}</div>
     <div>{{ m.split("").reverse().join("") }}</div>
  </div>
</template>

<script>
export default{
  name: 'HelloWorld',
  data() {
    return{
      n:3,
      ok:false,
      m:"abcdefg"
    }
  }
}

</script>

二、条件渲染
(1)v-if,v-else
v-if指令值为true时渲染
v-else表示v-if的‘else’块
<template>
  <div class="hello">
     <h3>vue学习</h3>
     <div v-if="f1">
       我叫大力
    </div>
    <div v-else>
      我不叫大力
    </div>

    <div v-if="f2">
       我叫大力
    </div>
    <div v-else>
      我不叫大力
    </div>
  </div>
</template>

<script>
export default{
  name: 'HelloWorld',
  data() {
    return{
      f1:true,
      f2:false
    }
  }
}

</script>

(2)v-show
v-show也是用于条件性展示渲染
<template>
     <h3>vue学习</h3>
     <div v-show="f1">first</div>
     <div v-show="f2">second</div>
</template>

<script>
export default{
  name: 'HelloWorld',
  data() {
    return{
      f1:true,
      f2:false
    }
  }
}

</script>

(3)v-show和v-if的区别
v-if是“真正”的条件渲染。如果在初始渲染时条件为假,则什么也不做,直到条件第一次变为真时,才会开始渲染条件块。
而v-show就简单得多,不管初始条件是什么,元素总是会被渲染。一般来说,
v-if有更高的切换开销,而v-show有更高的初始渲染开销。因此,如果需要非常频繁地切换,则使用v-show较好;如果在运行时条件很少改变,则使用v-if较好
三、列表渲染
(1)v-for
使用v-for对列表进行遍历
<template>
     <h3>vue学习</h3>
     <ul>
      <li v-for="i in list">
         id:{{ i.id }}
         name:{{ i.name }}
       </li>
     </ul>
</template>

<script>
export default{
  name: 'HelloWorld',
  data() {
    return{
     list:[
      {
        id:11,
        name:'小红'
      },
      {
        id:13,
        name:'小明'
      },
      {
        id:18,
        name:'大大'
      }
     ]
    }
  }
}
</script>

(2)维护状态
一般每个列表中都会有一个唯一ID,而我们正是通过这个唯一id的变化来判断是否渲染。
如:<li v-for="i in items":key="i.id">
<template>
     <h3>vue学习</h3>
     <ul>
      <li v-for="i in list" :key="i.id">
         id:{{ i.id }}
         name:{{ i.name }}
       </li>
     </ul>
</template>

<script>
export default{
  name: 'HelloWorld',
  data() {
    return{
     list:[
      {
        id:11,
        name:'小红'
      },
      {
        id:13,
        name:'小明'
      },
      {
        id:18,
        name:'大大'
      }
     ]
    }
  }
}

</script>
四、事件处理
(1)监听事件
监听事件我们可以使用v-on指令(通常简写成@符号)监听DOM事件,
用法:v-on:click="first"或者@click="second" (click是点击事件)
<template>
     <h3>vue学习</h3>
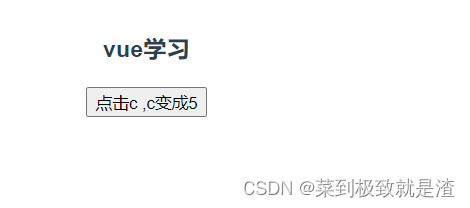
     <button v-on:click="c+=1">点击c ,c变成{{ c }}</button>
</template>

<script>
export default{
  name: 'HelloWorld',
  data() {
    return{
     c:1
    }
  }
}

</script>

(2)事件处理方法
使用函数作为处理方法
<template>
     <h3>vue学习</h3>
     <button @click="num1">点击</button>
</template>

<script>
export default{
  name: 'HelloWorld',
  data() {
    return{
     c:1
    }
  },
  methods: {
     num1(){
      console.log('来了');
     }
  }
}

</script>

(3)内联处理器中的方法
说简单点就是传递参数,具体看下面的例子就懂了
<template>
     <h3>vue学习</h3>
    <button @click="say('12345')">我来</button>
    <button @click="say('abcdefg')">我不来</button>
</template>

<script>
export default{
  name: 'HelloWorld',
  data() {
    return{
     c:1
    }
  },
  methods: {
     num1(){
      console.log('来了');
     },
     say(sh){
      alert(sh);
     }
  }
}

</script>

