本地使用3台centos7虚拟机搭建K8S集群教程
第一步 准备3台centos7虚拟机
3台虚拟机与主机的网络模式都是桥接的模式,也就是他们都是一台独立的“主机”

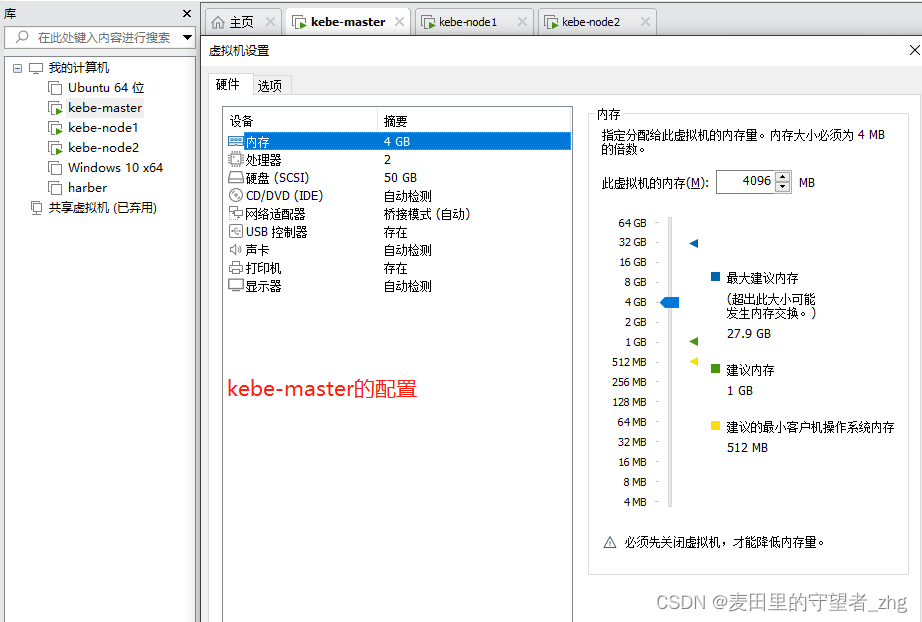
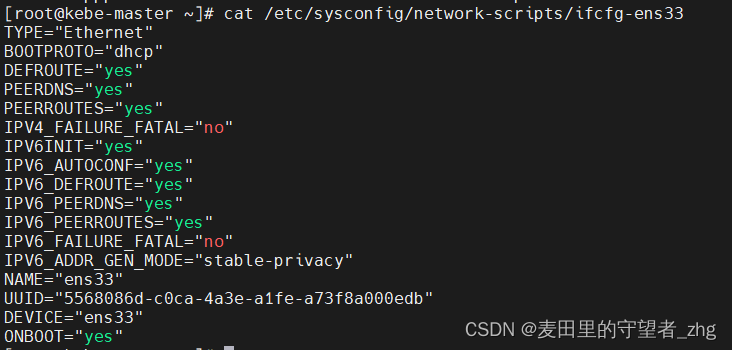
(1)kebe-master的配置
虚拟机配置:
网络配置:
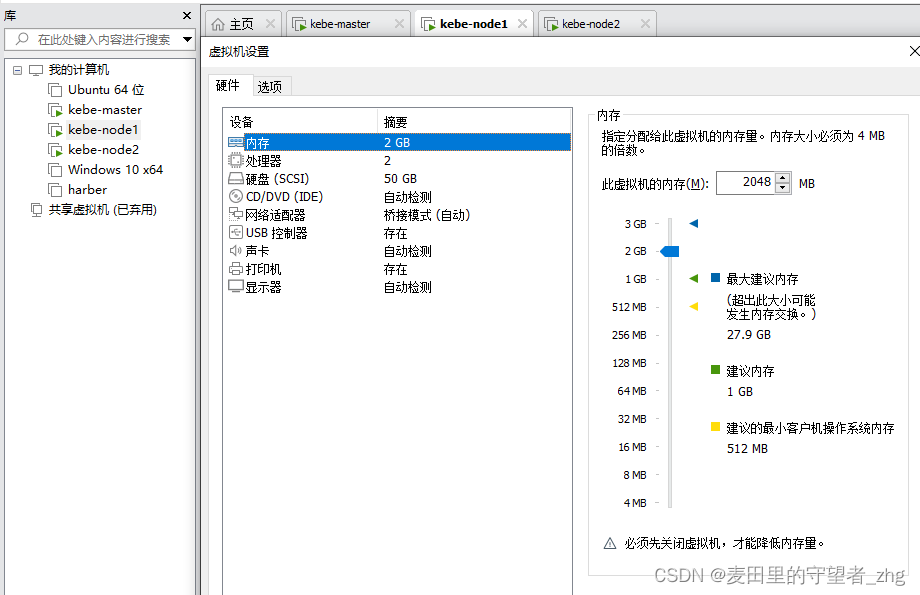
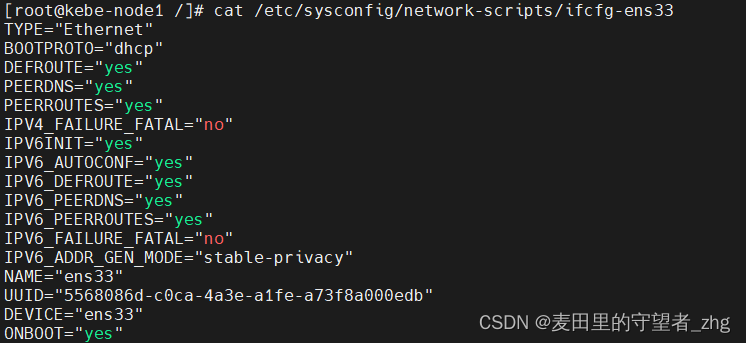
(2)kebe-node1的配置
虚拟机配置:
网络配置:
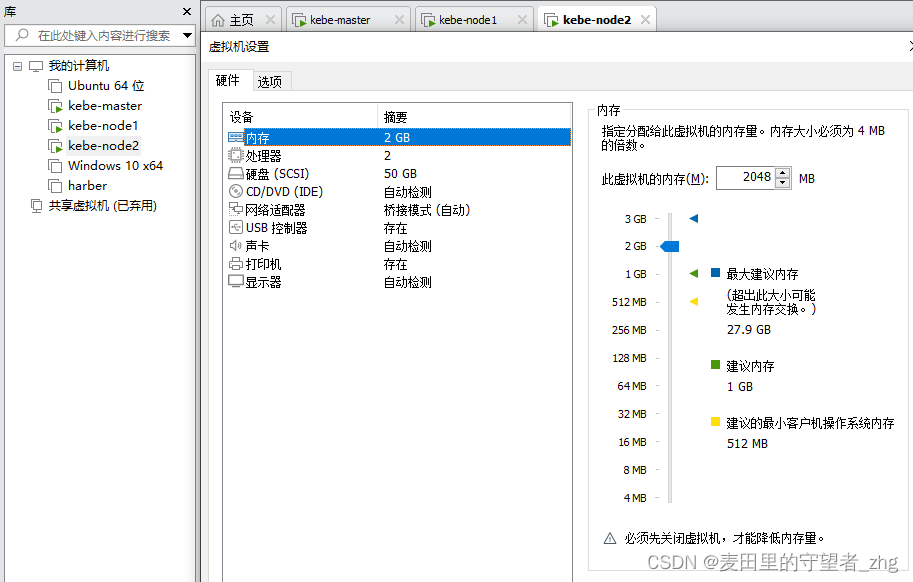
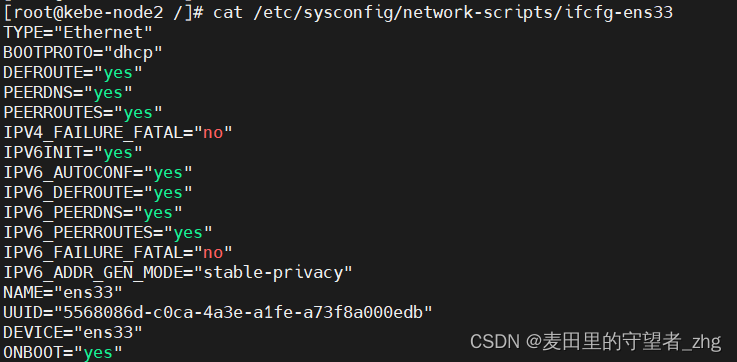
(3)kebe-node2的配置
虚拟机配置:
网络配置:
第二步 开始搭建集群
(1)系统初始化(所有节点都要安装)
关闭防火墙:
$ systemctl stop firewalld
$ systemctl disable firewalld
关闭selinux:
$ sed -i 's/enforcing/disabled/' /etc/selinux/config # 永久
$ setenforce 0 # 临时
关闭 swap:
$ swapoff -a # 临时
$ vim /etc/fstab # 永久
设置主机名:
$ hostnamectl set-hostname <hostname>
在kebe-master虚拟机添加hosts:
$ cat >> /etc/hosts << EOF
192.168.31.61 k8s-master
192.168.31.62 k8s-node1
192.168.31.63 k8s-node2
EOF
将桥接的 IPv4 流量传递到 iptables 的链:
$ cat > /etc/sysctl.d/k8s.conf << EOF
net.bridge.bridge-nf-call-ip6tables = 1
net.bridge.bridge-nf-call-iptables = 1
EOF
$ sysctl --system # 生效
时间同步:
$ yum install ntpdate -y
$ ntpdate time.windows.com
(2)开始安装K8S
添加安装源:(所有节点都要安装)
# 添加 k8s 安装源
$ cat <<EOF > kubernetes.repo
[kubernetes]
name=Kubernetes
baseurl=https://mirrors.aliyun.com/kubernetes/yum/repos/kubernetes-el7-x86_64
enabled=1
gpgcheck=0
repo_gpgcheck=0
gpgkey=https://mirrors.aliyun.com/kubernetes/yum/doc/yum-key.gpg https://mirrors.aliyun.com/kubernetes/yum/doc/rpm-package-key.gpg
EOF
mv kubernetes.repo /etc/yum.repos.d/

# 添加 Docker 安装源
$ yum-config-manager --add-repo http://mirrors.aliyun.com/docker-ce/linux/centos/docker-ce.repo
安装所需组件:(所有节点都要安装)
$ yum install -y kubelet-1.22.4 kubectl-1.22.4 kubeadm-1.22.4 docker-ce
注意,据学员反馈,1.24 以上的版本会报错,跟教程有差异,所以建议大家指定版本号安装,版本号确保跟老师的一样
启动docker:
$ systemctl enable docker && systemctl start d
修改docker配置:(所有节点都要安装)
# kubernetes 官方推荐 docker 等使用 systemd 作为 cgroupdriver,否则 kubelet 启动不了
cat <<EOF > daemon.json
{
  "exec-opts": ["native.cgroupdriver=systemd"],
  "registry-mirrors": ["https://ud6340vz.mirror.aliyuncs.com"]
}
EOF
mv daemon.json /etc/docker/

# 重启生效
systemctl daemon-reload
systemctl restart docker
在master节点安装网络插件(仅master节点安装)
# 很有可能国内网络访问不到这个资源,你可以网上找找国内的源安装 flannel
kubectl apply -f https://raw.githubusercontent.com/coreos/flannel/master/Documentation/kube-flannel.yml

# 如果上面的插件安装失败,可以选用 Weave,下面的命令二选一就可以了。
kubectl apply -f https://github.com/weaveworks/weave/releases/download/v2.8.1/weave-daemonset-k8s.yaml
kubectl apply -f http://static.corecore.cn/weave.v2.8.1.yaml

# 更多其他网路插件查看下面介绍,自行网上找 yaml 安装
https://blog.csdn.net/ChaITSimpleLove/article/details/117809007
使用kubeadm初始化主节点:(仅master节点安装)
# 初始化集群控制台 Control plane
# 失败了可以用 kubeadm reset 重置
$ kubeadm init --image-repository=registry.aliyuncs.com/google_containers

# 记得把 kubeadm join xxx 保存起来
# 忘记了重新获取:kubeadm token create --print-join-command

# 复制授权文件,以便 kubectl 可以有权限访问集群
# 如果你其他节点需要访问集群,需要从主节点复制这个文件过去其他节点
mkdir -p $HOME/.kube
cp -i /etc/kubernetes/admin.conf $HOME/.kube/config
chown $(id -u):$(id -g) $HOME/.kube/config

$ kubectl get nodes
NAME          STATUS     ROLES                  AGE     VERSION
kebe-master   NotReady   control-plane,master   2m47s   v1.22.4
执行完kubeadm init … 命令之后的输出如下内容表示成功:
I0508 23:08:47.648647  119886 version.go:255] remote version is much newer: v1.27.1; falling back to: stable-1.22
[init] Using Kubernetes version: v1.22.17
[preflight] Running pre-flight checks
[preflight] Pulling images required for setting up a Kubernetes cluster
[preflight] This might take a minute or two, depending on the speed of your internet connection
[preflight] You can also perform this action in beforehand using 'kubeadm config images pull'
[certs] Using certificateDir folder "/etc/kubernetes/pki"
[certs] Generating "ca" certificate and key
[certs] Generating "apiserver" certificate and key
[certs] apiserver serving cert is signed for DNS names [kebe-master kubernetes kubernetes.default kubernetes.default.svc kubernetes.default.svc.cluster.local] and IPs [10.96.0.1 192.168.1.19]
[certs] Generating "apiserver-kubelet-client" certificate and key
[certs] Generating "front-proxy-ca" certificate and key
[certs] Generating "front-proxy-client" certificate and key
[certs] Generating "etcd/ca" certificate and key
[certs] Generating "etcd/server" certificate and key
[certs] etcd/server serving cert is signed for DNS names [kebe-master localhost] and IPs [192.168.1.19 127.0.0.1 ::1]
[certs] Generating "etcd/peer" certificate and key
[certs] etcd/peer serving cert is signed for DNS names [kebe-master localhost] and IPs [192.168.1.19 127.0.0.1 ::1]
[certs] Generating "etcd/healthcheck-client" certificate and key
[certs] Generating "apiserver-etcd-client" certificate and key
[certs] Generating "sa" key and public key
[kubeconfig] Using kubeconfig folder "/etc/kubernetes"
[kubeconfig] Writing "admin.conf" kubeconfig file
[kubeconfig] Writing "kubelet.conf" kubeconfig file
[kubeconfig] Writing "controller-manager.conf" kubeconfig file
[kubeconfig] Writing "scheduler.conf" kubeconfig file
[kubelet-start] Writing kubelet environment file with flags to file "/var/lib/kubelet/kubeadm-flags.env"
[kubelet-start] Writing kubelet configuration to file "/var/lib/kubelet/config.yaml"
[kubelet-start] Starting the kubelet
[control-plane] Using manifest folder "/etc/kubernetes/manifests"
[control-plane] Creating static Pod manifest for "kube-apiserver"
[control-plane] Creating static Pod manifest for "kube-controller-manager"
[control-plane] Creating static Pod manifest for "kube-scheduler"
[etcd] Creating static Pod manifest for local etcd in "/etc/kubernetes/manifests"
[wait-control-plane] Waiting for the kubelet to boot up the control plane as static Pods from directory "/etc/kubernetes/manifests". This can take up to 4m0s
[apiclient] All control plane components are healthy after 8.504213 seconds
[upload-config] Storing the configuration used in ConfigMap "kubeadm-config" in the "kube-system" Namespace
[kubelet] Creating a ConfigMap "kubelet-config-1.22" in namespace kube-system with the configuration for the kubelets in the cluster
[upload-certs] Skipping phase. Please see --upload-certs
[mark-control-plane] Marking the node kebe-master as control-plane by adding the labels: [node-role.kubernetes.io/master(deprecated) node-role.kubernetes.io/control-plane node.kubernetes.io/exclude-from-external-load-balancers]
[mark-control-plane] Marking the node kebe-master as control-plane by adding the taints [node-role.kubernetes.io/master:NoSchedule]
[bootstrap-token] Using token: 0ohedz.hg6dij9dvfxv8ywy
[bootstrap-token] Configuring bootstrap tokens, cluster-info ConfigMap, RBAC Roles
[bootstrap-token] configured RBAC rules to allow Node Bootstrap tokens to get nodes
[bootstrap-token] configured RBAC rules to allow Node Bootstrap tokens to post CSRs in order for nodes to get long term certificate credentials
[bootstrap-token] configured RBAC rules to allow the csrapprover controller automatically approve CSRs from a Node Bootstrap Token
[bootstrap-token] configured RBAC rules to allow certificate rotation for all node client certificates in the cluster
[bootstrap-token] Creating the "cluster-info" ConfigMap in the "kube-public" namespace
[kubelet-finalize] Updating "/etc/kubernetes/kubelet.conf" to point to a rotatable kubelet client certificate and key
[addons] Applied essential addon: CoreDNS
[addons] Applied essential addon: kube-proxy

Your Kubernetes control-plane has initialized successfully!

To start using your cluster, you need to run the following as a regular user:

  mkdir -p $HOME/.kube
  sudo cp -i /etc/kubernetes/admin.conf $HOME/.kube/config
  sudo chown $(id -u):$(id -g) $HOME/.kube/config

Alternatively, if you are the root user, you can run:

  export KUBECONFIG=/etc/kubernetes/admin.conf

You should now deploy a pod network to the cluster.
Run "kubectl apply -f [podnetwork].yaml" with one of the options listed at:
  https://kubernetes.io/docs/concepts/cluster-administration/addons/

Then you can join any number of worker nodes by running the following on each as root:

kubeadm join 192.168.1.19:6443 --token 0ohedz.hg6dij9dvfxv8ywy \
        --discovery-token-ca-cert-hash sha256:6fbf85e95ebf4260c2ef9e7643bcbbe30a4c55b0a1a39386d54d8e3c0fad1894
node节点连接加入master节点,将kubeadm init …的输出结果中的最下面一行命令复制到node1和node2节点,把两个node节点加入mater:
kubeadm join 192.168.1.19:6443 --token 0ohedz.hg6dij9dvfxv8ywy \
        --discovery-token-ca-cert-hash sha256:6fbf85e95ebf4260c2ef9e7643bcbbe30a4c55b0a1a39386d54d8e3c0fad1894
然后在master节点使用命令查看2个node节点是否加入成功:
$ kubectl get nodes
NAME          STATUS     ROLES                  AGE   VERSION
kebe-master   Ready      control-plane,master   26m   v1.22.4
kebe-node1    NotReady   <none>                 33s   v1.22.4
kebe-node2    NotReady   <none>                 29s   v1.22.4
