Vue-Vue3 集成编辑器功能
1、安装依赖
编辑器插件需要安装 @wangeditor/editor 和 @wangeditor/editor-for-vue 两个插件
npm install @wangeditor/editor --save
vue3运行如下命令安装
npm install @wangeditor/editor-for-vue@next --save
vue2运行如下命令安装
npm install @wangeditor/editor-for-vue --save
安装后可在 Vue 项目的 package.json 中查看安装依赖项

2、插件使用
本文章针对 Vue3 项目,在 Vue 组件中使用方式如下:
<script setup>
import '@wangeditor/editor/dist/css/style.css' // 引入 css
import {DomEditor} from '@wangeditor/editor'
import {computed, onBeforeUnmount, ref, shallowRef} from 'vue'
import {Editor, Toolbar} from '@wangeditor/editor-for-vue'
const emit = defineEmits(["update:modelValue"])
const props = defineProps({
modelValue: {
type: String,
default: ''
},
placeholder: {
type: String,
default: '请输入...'
}
})
const inputValue = computed({
get() {
return props.modelValue
},
set(value) {
emit("update:modelValue", value)
}
})
// 编辑器实例,必须用 shallowRef
const editorRef = shallowRef()
const mode = ref('default')
const test = ref(false)
const editorConfig = {placeholder: props.placeholder}
// 默认工具栏配置
const toolbarConfig = {}
/** 排除菜单组,写菜单组 key 的值即可 */
toolbarConfig.excludeKeys = [
'group-image',
'group-video',
'fullScreen'
]
/** 组件销毁时,也及时销毁编辑器 */
onBeforeUnmount(() => {
const editor = editorRef.value
if (editor == null) return
editor.destroy()
})
/** 记录 editor 实例,重要!*/
const handleCreated = (editor) => {
editorRef.value = editor
}
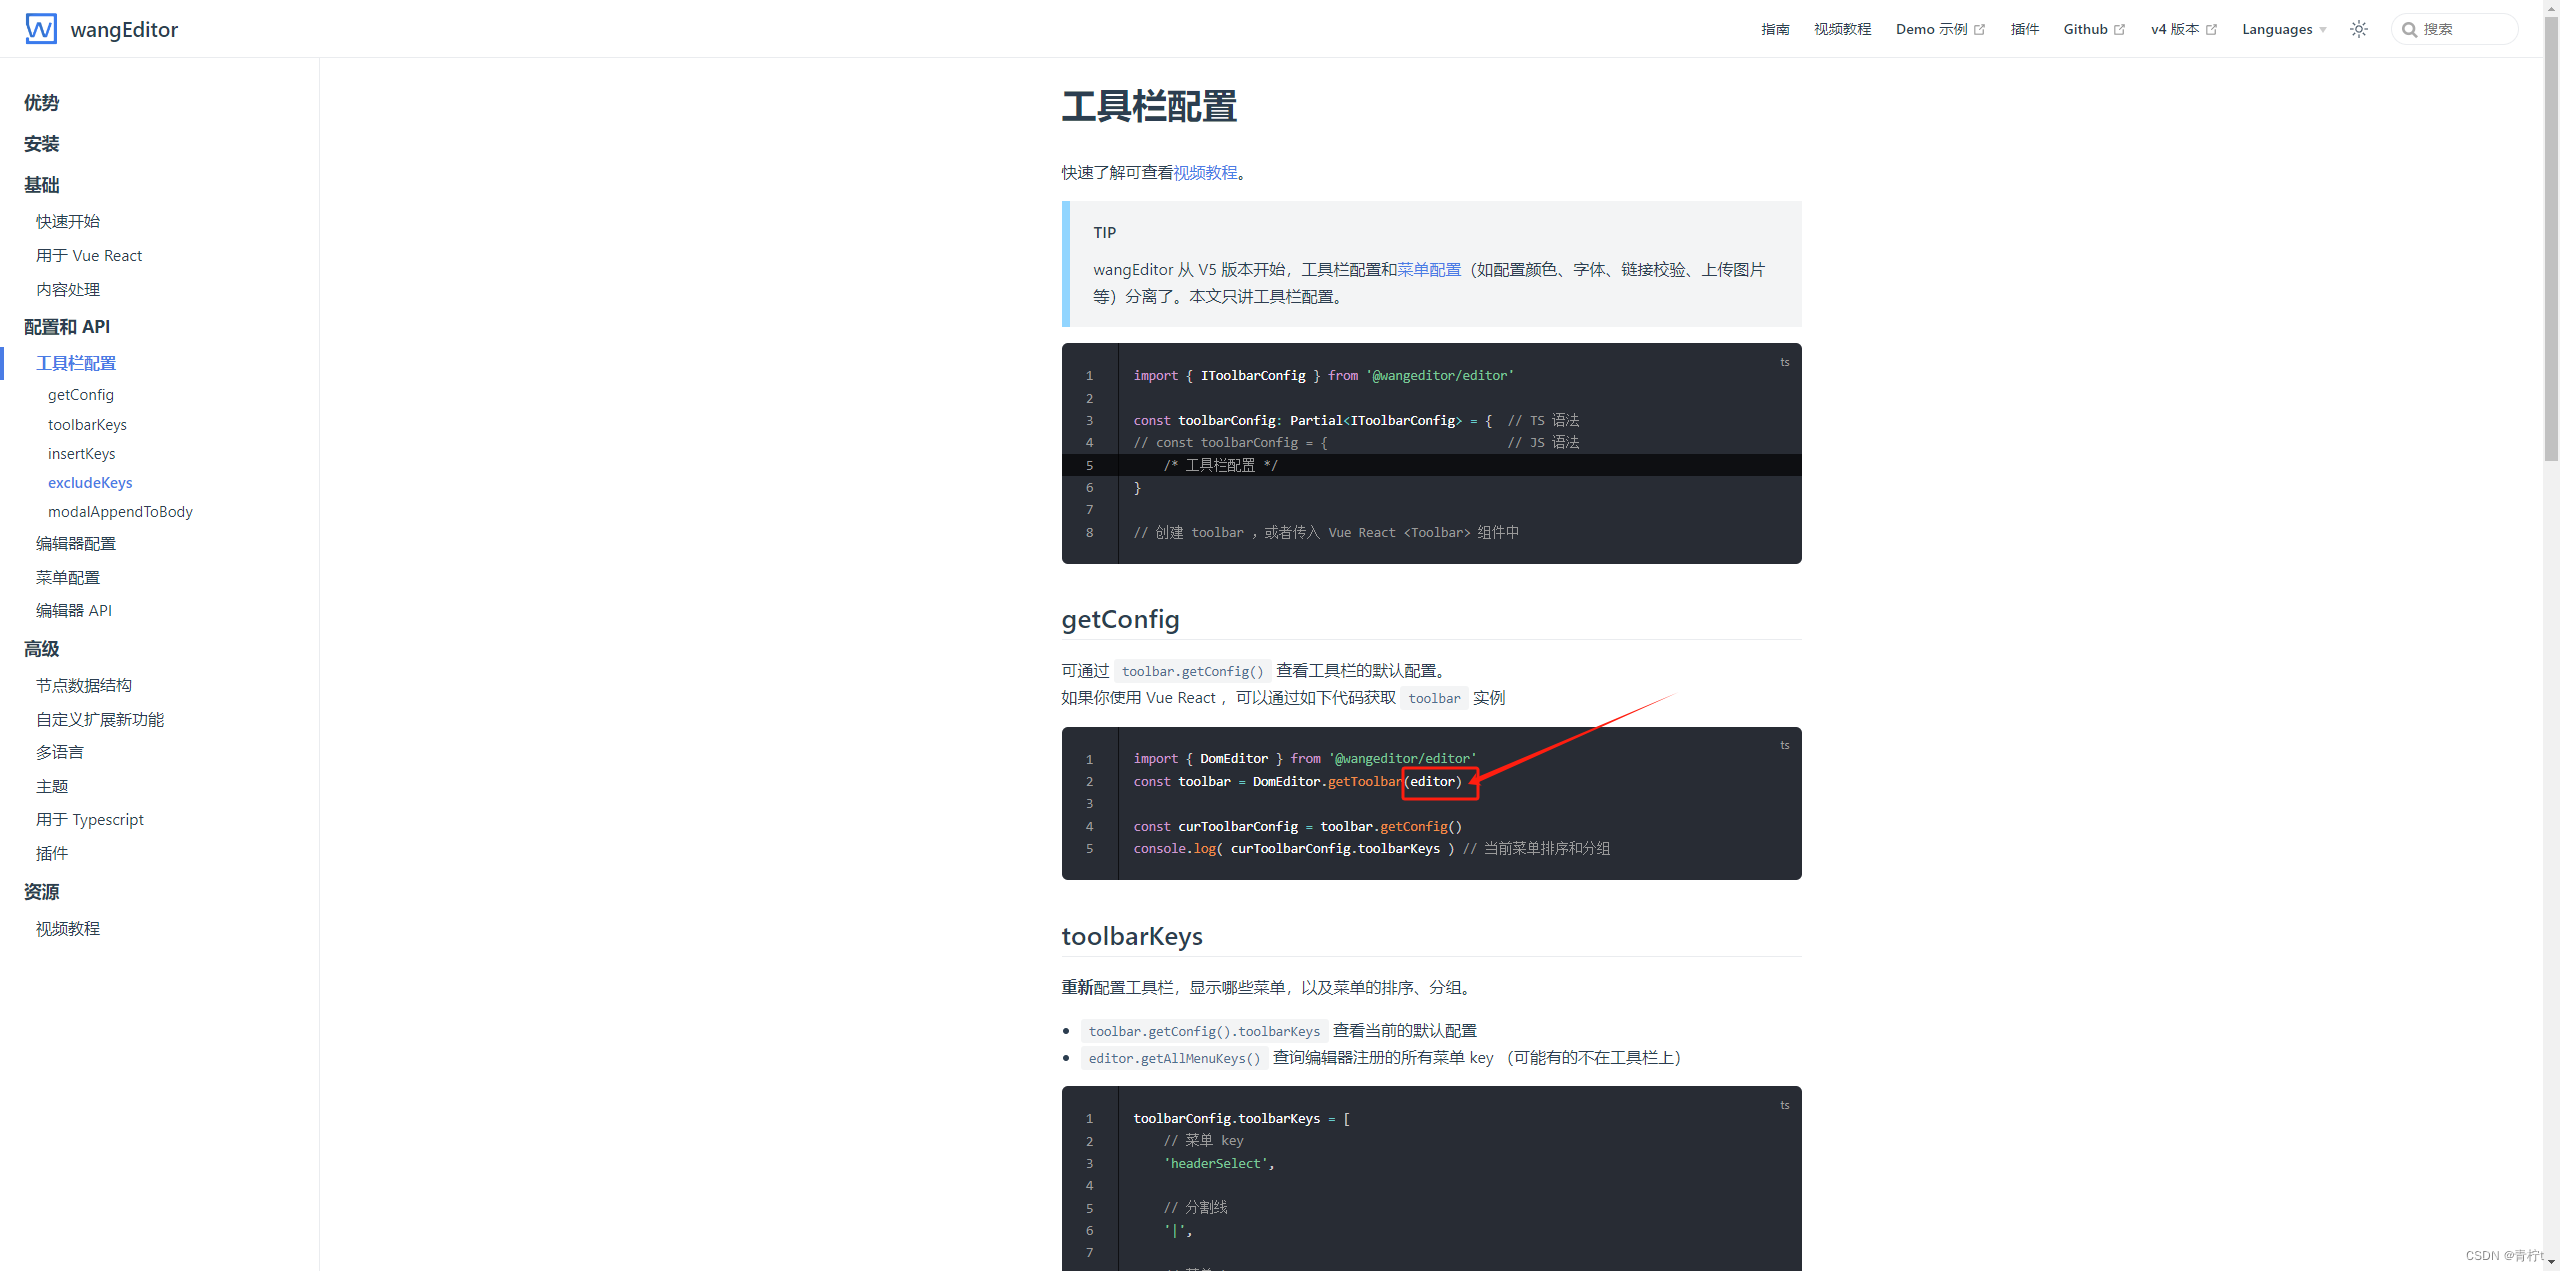
const print = () => {
const toolbar = DomEditor.getToolbar(editorRef.value)
const curToolbarConfig = toolbar.getConfig()
console.log(curToolbarConfig.toolbarKeys) // 当前菜单排序和分组
// const menu = editorRef.value.getAllMenuKeys()
// console.log(menu)
// console.log(editorRef.value.getMenuConfig('bgColor'))
// console.log(valueHtml.value)
}
/** 获取HTML格式内容方法 */
const getHtml = () => {
return editorRef.value.getHtml()
}
/** 获取原始文本内容方法 */
const getText = () => {
return editorRef.value.getText()
}
/** 暴露方法 */
defineExpose({getHtml, getText})
</script>
<template>
<el-button v-if="test" @click="print">打印</el-button>
<div style="border: 1px solid #ccc">
<Toolbar
style="border-bottom: 1px solid #ccc"
:editor="editorRef"
:defaultConfig="toolbarConfig"
:mode="mode"
/>
<Editor
style="height: 500px; overflow-y: hidden;"
v-model="inputValue"
:defaultConfig="editorConfig"
:mode="mode"
@onCreated="handleCreated"
/>
</div>
</template>
<style scoped lang="less">
.el-button {
margin: 1%;
}
</style>
效果

更多
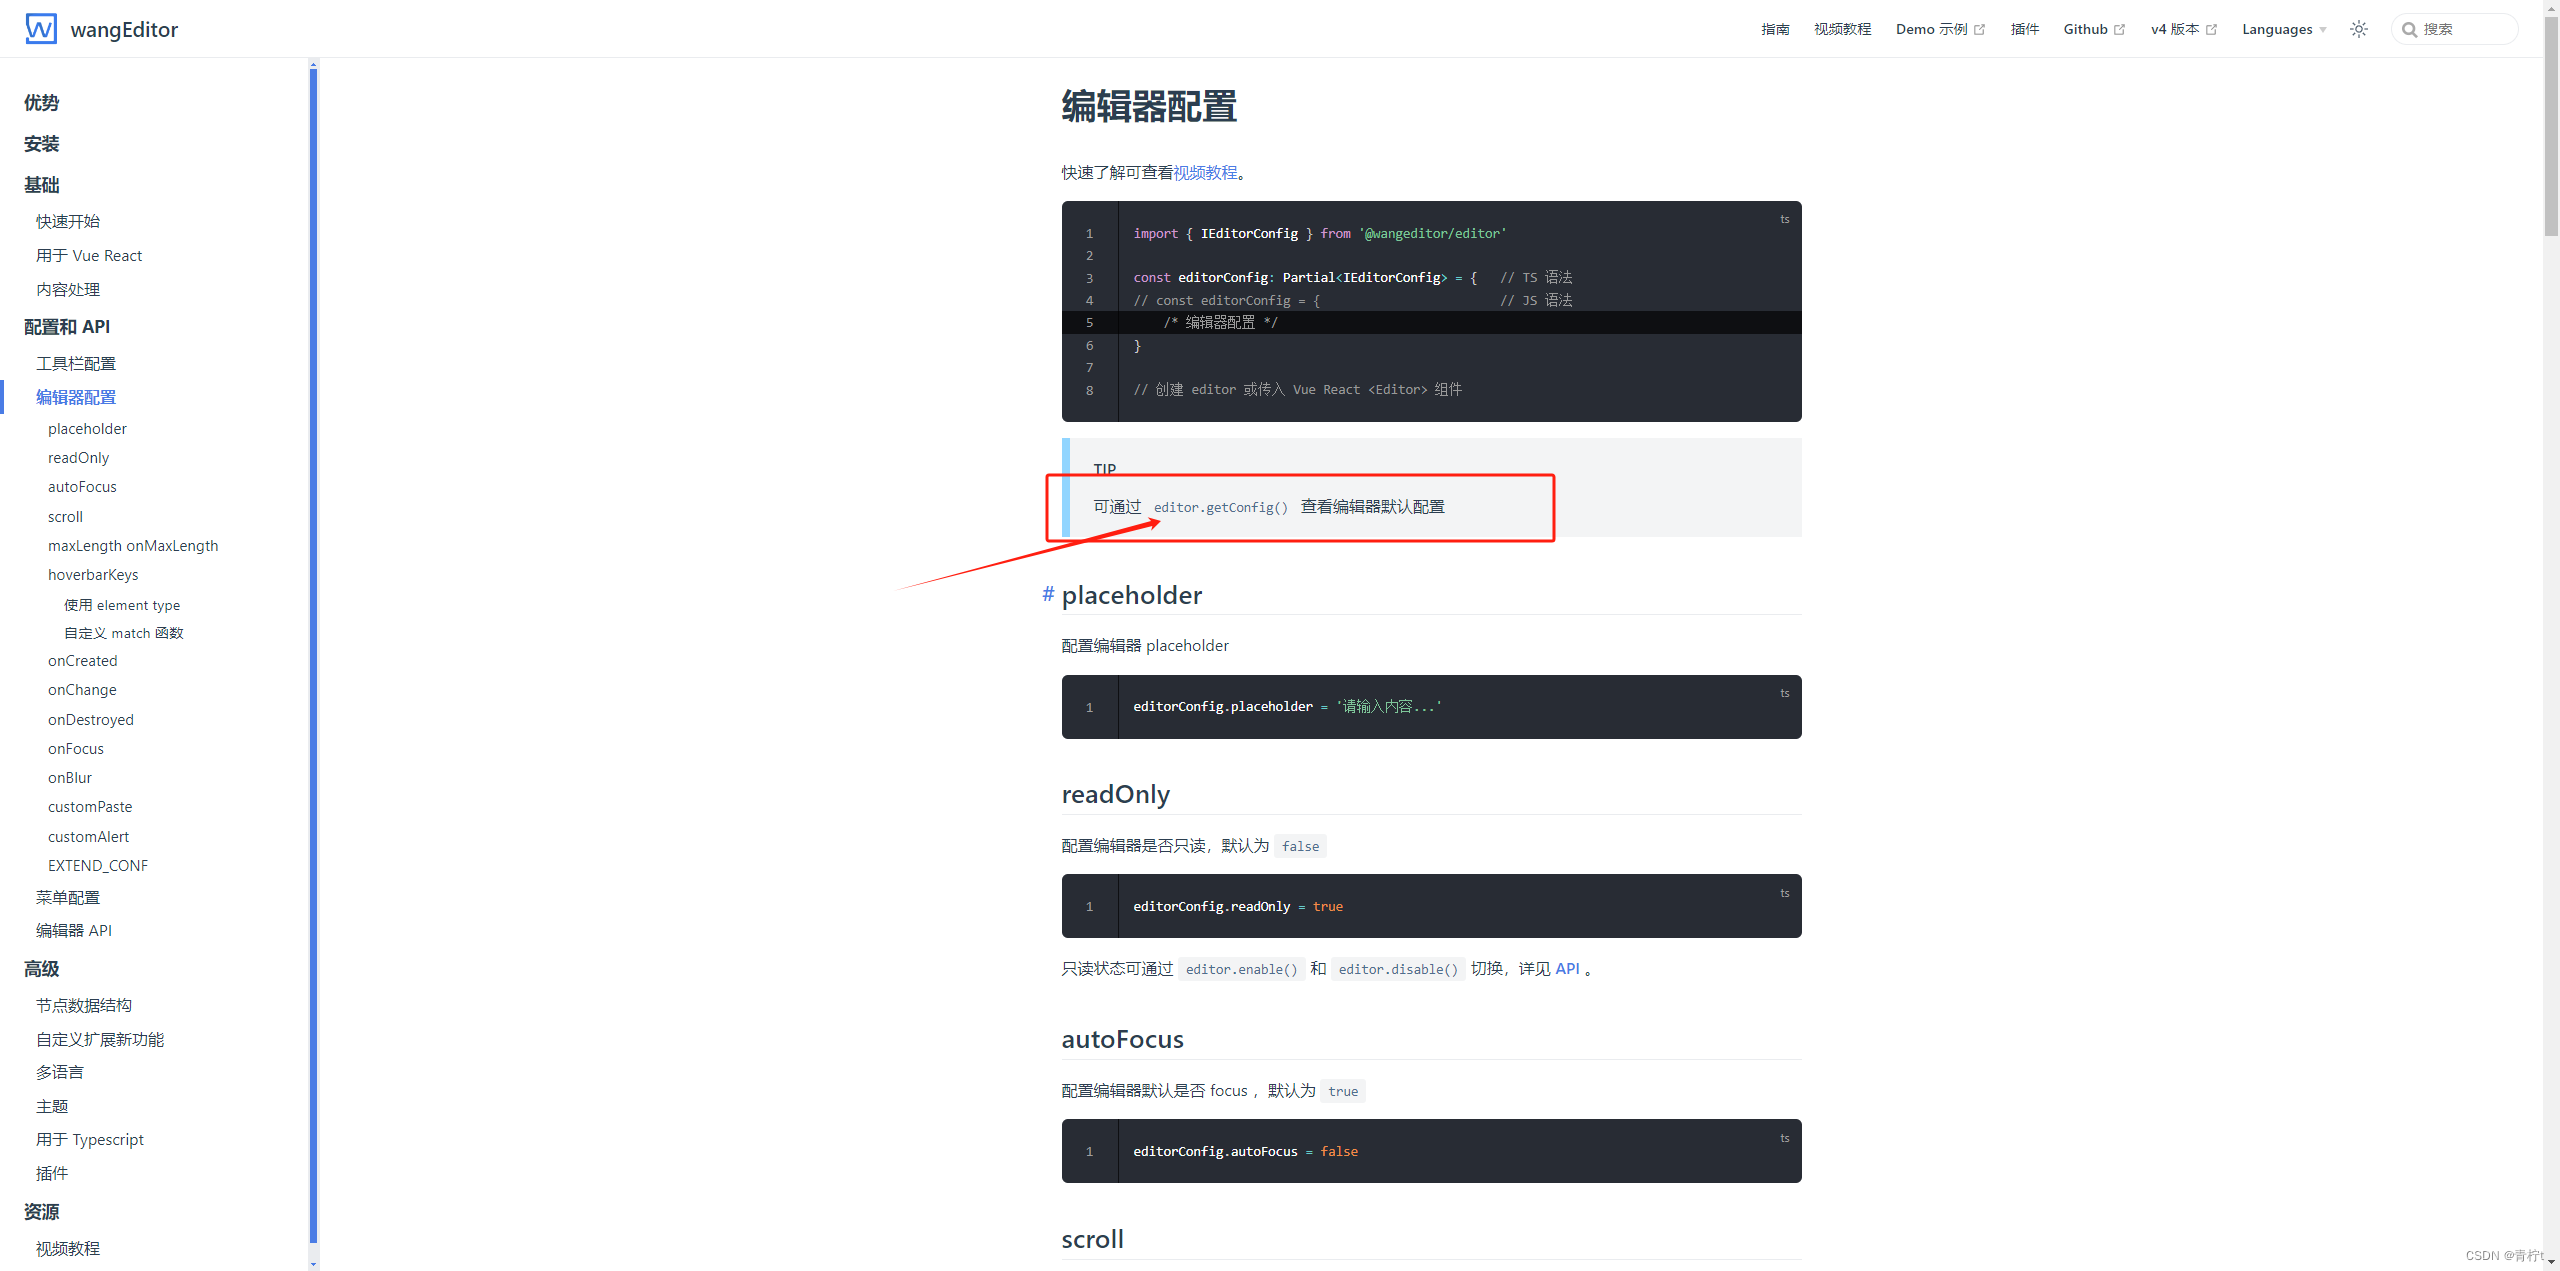
插件详细使用说明请查阅官网文档:
https://www.wangeditor.com/
提示:
官网示例当中的 editor 在 Vue3 中需要通过 ref 方式获取组件实例,官网示例中组件方法调用需要加上 .value,如管网 “编辑器配置” 一说明文档中,editor.getConfig() 对应 Vue3 写法是 editor.value.getConfig()
组件实例获取方式如下:
<script setup>
import '@wangeditor/editor/dist/css/style.css' // 引入 css
import {DomEditor} from '@wangeditor/editor'
import {computed, onBeforeUnmount, ref, shallowRef} from 'vue'
import {Editor, Toolbar} from '@wangeditor/editor-for-vue'

//
/**
  * 编辑器实例,必须用 shallowRef
  * 此处的 editor 对应官网的 editor
  * 后续组件方法调用可能也是此处的 editor
  * 如:editor.getConfig() 对应 Vue3 写法是 editor.value.getConfig()
  * **/
const editor = shallowRef()
const mode = ref('default')
const editorConfig = {placeholder: props.placeholder}
// 默认工具栏配置
const toolbarConfig = {}

const test= () => {
  const toolbar = DomEditor.getToolbar(editor.value)
  const curToolbarConfig = toolbar.getConfig()
  console.log(curToolbarConfig.toolbarKeys) // 当前菜单排序和分组

  // const menu = editor.value.getAllMenuKeys()
  // console.log(menu)
  // console.log(editor.value.getMenuConfig('bgColor'))
  // console.log(valueHtml.value)
}
</script>
<template>
    <Toolbar
        style="border-bottom: 1px solid #ccc"
        :editor="editor"
        :defaultConfig="toolbarConfig"
        :mode="mode"
    />
    <Editor
        style="height: 500px; overflow-y: hidden;"
        v-model="inputValue"
        :defaultConfig="editorConfig"
        :mode="mode"
        @onCreated="handleCreated"
    />
</template>