unity3d入门教程五
unity3d入门教程五
- 13鼠标事件处理
- 13.2鼠标跟随
- 13.3鼠标拖拽(选中对象,拖动对象)
- 13.4几个问题
- 14.1事件函数
- 14.2脚本的执行顺序
- 14.3脚本的参数
- 14.4引用类型的参数(进行图片更换,人物换装)
13鼠标事件处理
需要好好学习,不然一些有趣的操作就无法实现了
鼠标跟随
飞机飞行的方向会根据鼠标进行移动,鼠标移到哪,飞机就朝哪飞
在B站没有发布此相关视频,需要去网盘中寻找


在 Update() 里,可以探测鼠标事件
if(Input.GetMouseButtonDown(0))
{
  Debug.Log("鼠标按下" + Input.mousePosition);
}
其中,0代表左键,1为右键,2为中键 (滚轮)
           Input.mousePosition 代表此时鼠标的位置 ( 屏幕坐标 )


注意区分事件和状态是不同的,如鼠标按下不同,BUTTONDOWN事件只触发一次,只打印一次,而BUTTN状态是一直被触发,显示是否一直按着的状态的。
区分:
Input.GetMouseButtonDown(0)  检查鼠标按下事件
Input.GetMouseButtonUp(0)      检查鼠标抬起事件
Input.GetMouseButton(0)           检查鼠标状态 ( 是否是按下状态 )
其中,Input.GetMouseButtonDown(0) 事件不会重复触发
验证:保持鼠标一直按下,观察打印输出。。


鼠标的位置 Input.mousePosition
屏幕坐标 世界坐标
示例:
 Vector3 pos = Camera.main.ScreenToWorldPoint(Input.mousePosition);
 Debug.Log("世界坐标: " + pos);
 pos.z = 0;    // 把Z坐标置0,放到2D平面上来

13.2鼠标跟随
飞机自动调整前进的方向,使其自动朝着鼠标所在的方向进行追随
当鼠标按下时,可以控制飞机转向,而鼠标抬起就不控制了
后期还是有很多优化的,你可以让它有渐变的效果,让一开始转头的时候不至于太过于突兀
所有代码如下
using System.Collections;
using System.Collections.Generic;
using UnityEngine;

public class gensui : MonoBehaviour
{
    // Start is called before the first frame update
    void Start()
    {
        Application.targetFrameRate = 60;
    }

    // Update is called once per frame
    void Update()
    {

        // 检查 ‘当前鼠标左键是否按下’ ,此为状态检查
        if (Input.GetMouseButton(0))
        {
            Vector3 pos = Camera.main.ScreenToWorldPoint(Input.mousePosition);
            pos.z = 0;    // 把Z坐标置0,放到2D平面上来

            // 控制机头的指向
            SetDirection(pos);
        }

        float step = 1.2f * Time.deltaTime;
        transform.Translate(0, step, 0, Space.Self);
    }

    void SetDirection(Vector3 targetPos)
    {
        Vector3 face = transform.up; // 头部指向
        Vector3 direction = targetPos - transform.position;

        // 参考第11,12章
        float angle = Vector3.SignedAngle(face, direction, Vector3.forward);
        transform.Rotate(0, 0, angle);
    }
}
13.3鼠标拖拽(选中对象,拖动对象)
运行后通过鼠标可以拖拽物体
第一层优化代码如下:
此处效果是,不点击飞机,在平面任意位置点击,飞机会直接出现在鼠标的位置,按住移动鼠标,飞机也会跟着移动
有问题,没有按住飞机,它跳过来了

using System;
using System.Collections;
using System.Collections.Generic;
using UnityEditor.Build.Reporting;
using UnityEngine;
using UnityEngine.UIElements;

public class MyJet : MonoBehaviour
{
    // Start is called before the first frame update
    void Start()
    {
        Application.targetFrameRate = 60;
    }

    // Update is called once per frame
    void Update()
    {

        // 检查 ‘当前鼠标左键是否按下’ ,此为状态检查
        if ( Input.GetMouseButton(0) )
        {
            Vector3 pos = Camera.main.ScreenToWorldPoint(Input.mousePosition);
            pos.z = 0;    // 把Z坐标置0,放到2D平面上来


            transform.position = pos;

        }

    }

}
第二层优化
对上方是否选中飞机进行判断,判断按下鼠标的坐标与飞机中心坐标的距离,处于范围内则是选中飞机了,鼠标只要抬起选中状态就为false
效果:虽然只有在点击飞机的时候才会选中移动,但是当点击与飞机中心有一定距离时会跳一下,飞机中心会瞬移到鼠标所在位置。
我们应该记住鼠标位置,进行相对一定,鼠标移动的距离其再一定这一定距离
using System;
using System.Collections;
using System.Collections.Generic;
using UnityEditor.Build.Reporting;
using UnityEngine;
using UnityEngine.UIElements;

public class MyJet : MonoBehaviour
{
    private bool drag = false;//此为选中状态,处于选中择为TRUE,否则false

    // Start is called before the first frame update
    void Start()
    {
        Application.targetFrameRate = 60;
    }

    // Update is called once per frame
    void Update()
    {
        if ( Input.GetMouseButtonDown(0) )
        {
            Vector3 pos = Camera.main.ScreenToWorldPoint(Input.mousePosition);
            pos.z = 0;    // 把Z坐标置0,放到2D平面上来

            float distance = (pos - transform.position).magnitude;
            if(distance < 1.5f)
            {
                drag = true;

            }
        }

        if( Input.GetMouseButtonUp(0))
        {
            drag = false;
        }


        // 检查 ‘当前鼠标左键是否按下’ ,此为状态检查
        if ( drag )
        {
            Vector3 pos = Camera.main.ScreenToWorldPoint(Input.mousePosition);
            pos.z = 0;    // 把Z坐标置0,放到2D平面上来


            transform.position = pos;

        }

    }

}
第三层优化
进行更精细的操作,记录鼠标的位置,根据鼠标的相对位移进行计算
飞机的位置,鼠标移动的相对位置,飞机之前的位置加上鼠标相对位置得到飞机移动位置,并且再次更新飞机上次位置。
此时的效果,点击飞机时就不会突然跳动一下了
代码如下:
using System;
using System.Collections;
using System.Collections.Generic;
using UnityEditor.Build.Reporting;
using UnityEngine;
using UnityEngine.UIElements;

public class MyJet : MonoBehaviour
{
    private bool drag = false;
    private Vector3 lastMousePos;

    // Start is called before the first frame update
    void Start()
    {
        Application.targetFrameRate = 60;
    }

    // Update is called once per frame
    void Update()
    {
        if ( Input.GetMouseButtonDown(0) )
        {
            Vector3 pos = Camera.main.ScreenToWorldPoint(Input.mousePosition);
            pos.z = 0;    // 把Z坐标置0,放到2D平面上来

            float distance = (pos - transform.position).magnitude;
            if(distance < 1.5f)
            {
                drag = true;
                lastMousePos = pos;
            }
        }

        if( Input.GetMouseButtonUp(0))
        {
            drag = false;
        }


        // 检查 ‘当前鼠标左键是否按下’ ,此为状态检查
        if ( drag )
        {
            Vector3 pos = Camera.main.ScreenToWorldPoint(Input.mousePosition);
            pos.z = 0;    // 把Z坐标置0,放到2D平面上来

            Vector3 delta = pos - lastMousePos;
            transform.position += delta;

            lastMousePos = pos;
        }

    }


}
13.4几个问题
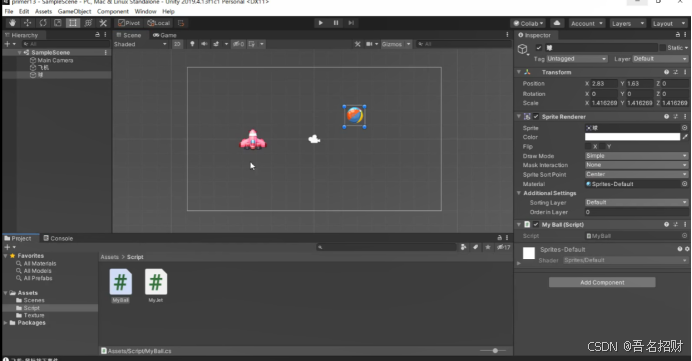
飞机处理了点击事件,那小球还有没有机会处理这个点击事件哪

在飞机和小球下各挂载一个脚本,第一个脚本和第二个脚本都接收鼠标点击事件,看输出结果如何

发现都触发了
鼠标点击事件所有的对象都会发送


内部执行即所有脚本会按照自定义的顺序进行执行
14.1事件函数
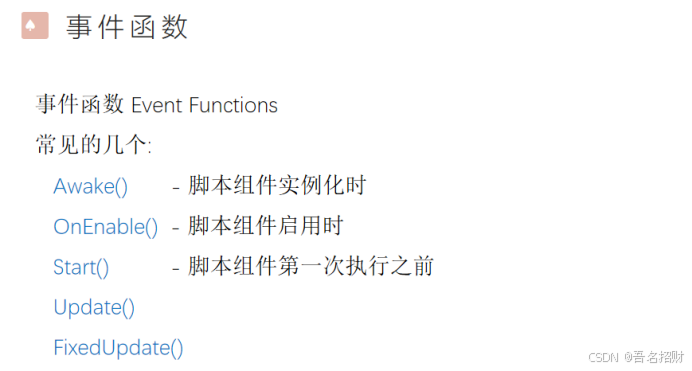
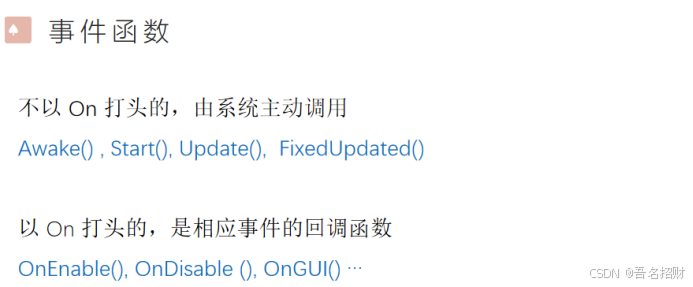
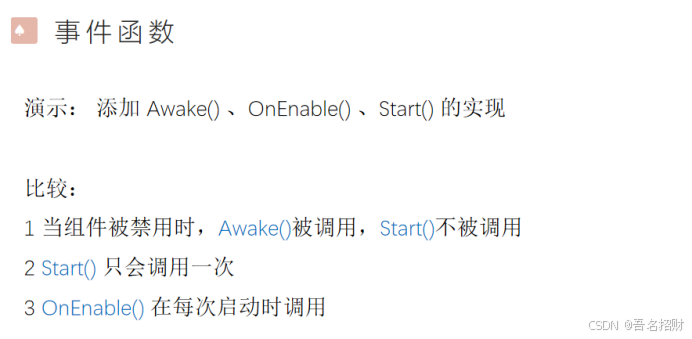

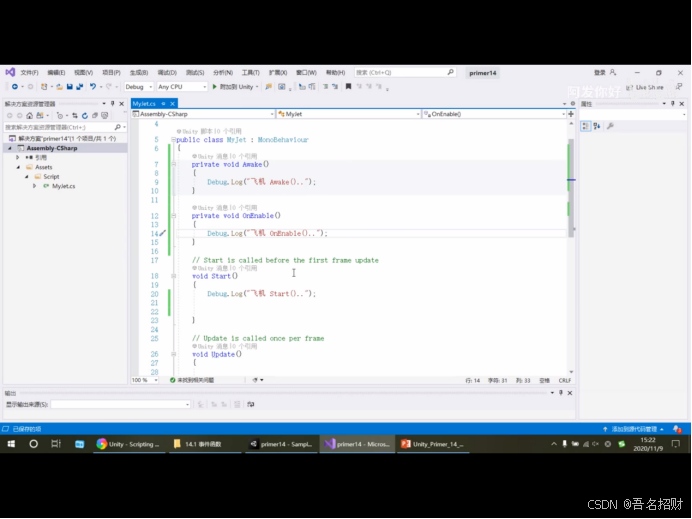
先执行awake后执行start,都只执行一次,可以初始化放在其中
Awake是实例化,即在对象下有脚本组件,但脚本组件的对勾没打,在运行游戏时,此脚本的awake会被执行,但其他的如start是不被执行的
创建C#文件时,自动创建两个函数start(),update()
14.2脚本的执行顺序
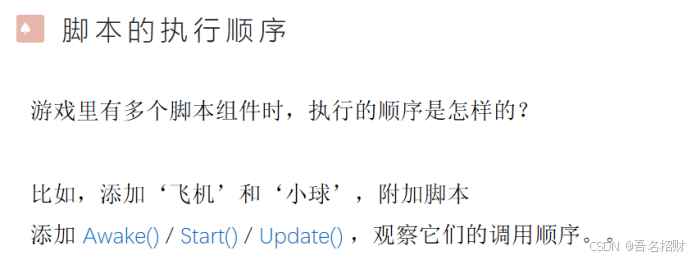


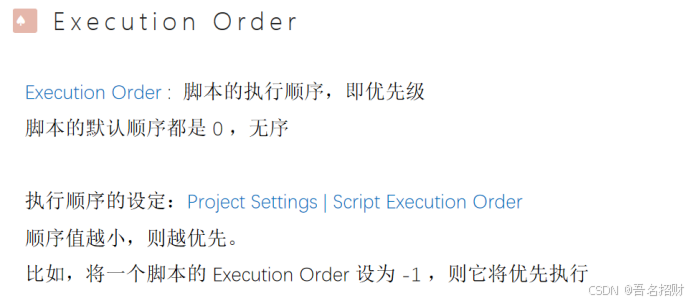
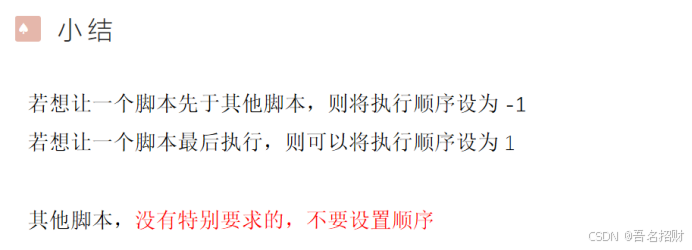
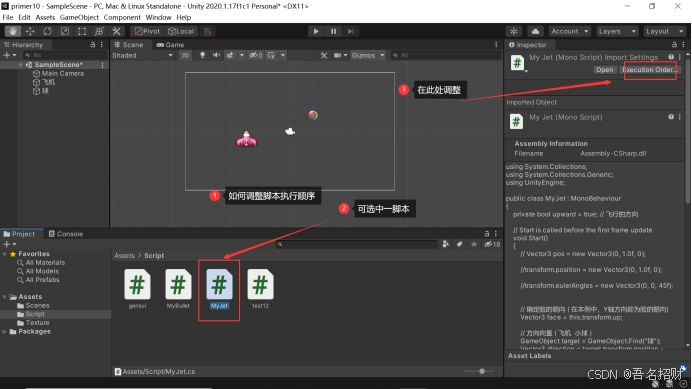
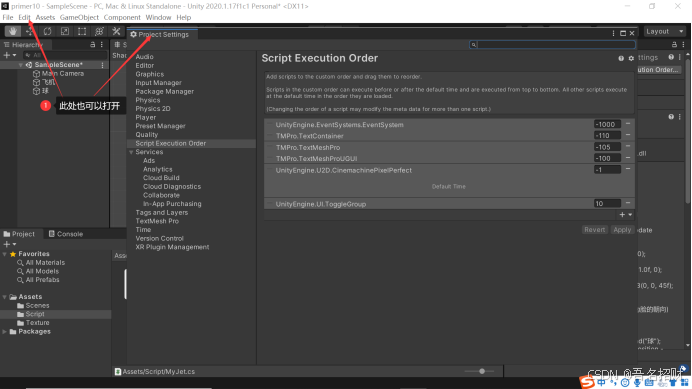
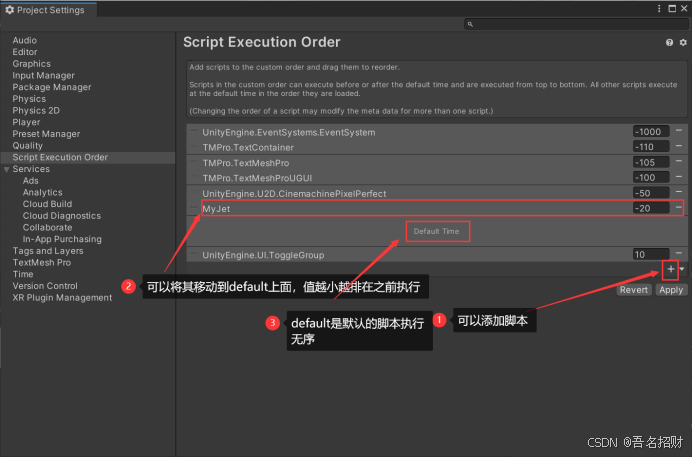
一般用不到执行顺序设置
可能设置为全局脚本,让其在最先执行设为负值,默认脚本执行的都是0,或者最后执行设为正值,其他脚本,没有特别要求的不要进行设计
14.3脚本的参数


using JetBrains.Annotations;
using System.Collections;
using System.Collections.Generic;
using UnityEngine;

public class Fly : MonoBehaviour
{
    // 飞行速度
    public Vector3 speed ;

    // Start is called before the first frame update
    void Start()
    {
        Application.targetFrameRate = 60;
    }

    // Update is called once per frame
    void Update()
    {
        Vector3 step = speed * Time.deltaTime; // 标量乘法

        transform.Translate(step, Space.Self);
    }
}
14.4引用类型的参数(进行图片更换,人物换装)
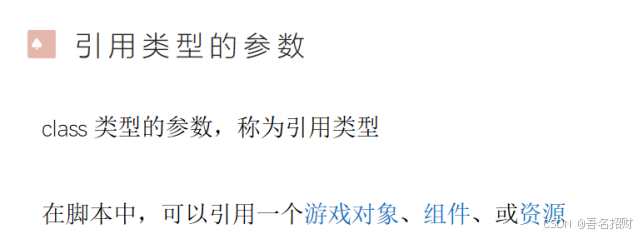
在游戏中看到的游戏对象,资源,游戏组件都可以在脚本中直接使用

实现换装功能,准备两种图片
当鼠标点击时,图片换成另外一张图片
如何实现:
将script render组件取出,修改其sprite属性即可,此属性就是其显示的哪张图片
演示:点击人物,实现换装功能。。
SpriteRenderer renderer = GetComponent<SpriteRenderer>();//取出组件
renderer.sprite = …
显然,在脚本中需要指定2张图片,以便动态的切换

步骤:
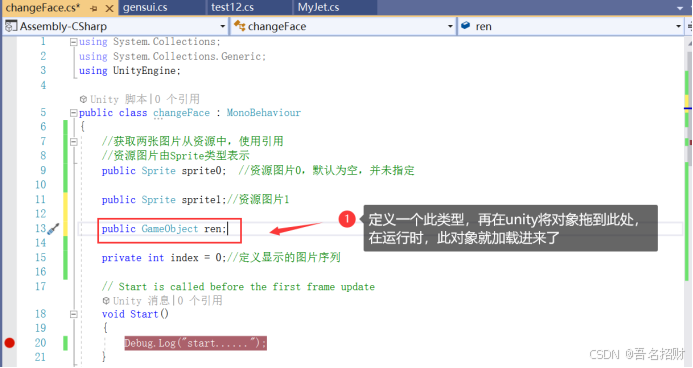
1 在脚本中添加资源的引用
public Sprite sprite0;
2 在Inspector中指定参数
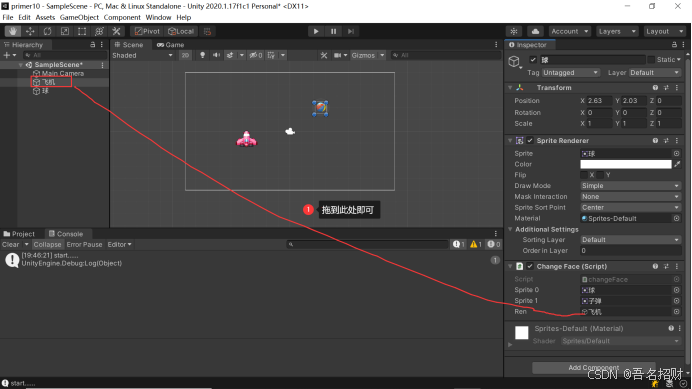
把图片Sprite资源拖到 Inspector相应参数位置
3 在代码中切换图片显示
renderer.sprite = this.sprite1;


注意在VS附加到unity之后,虽然在断点处停下来了,还要在unity点击游戏运行

如上图,此时的sprite0和1就有值了
using System.Collections;
using System.Collections.Generic;
using UnityEngine;

public class changeFace : MonoBehaviour
{
    //获取两张图片从资源中,使用引用
    //资源图片由Sprite类型表示
    public Sprite sprite0;  //资源图片0,默认为空,并未指定

    public Sprite sprite1;//资源图片1

    private int index = 0;//定义显示的图片序列

    // Start is called before the first frame update
    void Start()
    {
        Debug.Log("start......");
    }

    // Update is called once per frame
    void Update()
    {
        //如果鼠标点击了
        if (Input.GetMouseButtonDown(0))
        {
            DoChange();
        }
    }

    //定义一个方法用于换图
    void DoChange()
    {
        //先拿到当前对象的渲染器
        SpriteRenderer renderer = GetComponent<SpriteRenderer>();
        if(index == 0)
        {
            index = 1;
            renderer.sprite = this.sprite1;//当前渲染为1
        }
        else
        {
            index = 0;
            renderer.sprite = this.sprite0;//当前渲染为0
        }
    }
}
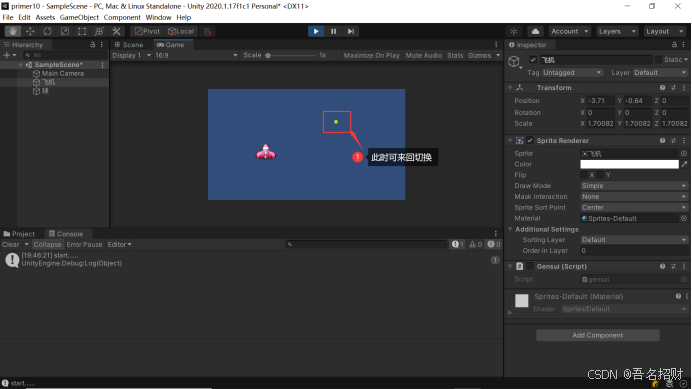
当我们还要操作另一个对象人的时候,
如下
