ElasticSearch7整合es-head,ES配置密码
其他 UI 工具:cerebro
https://github.com/lmenezes/cerebro/releases
【1】环境准备
- CentOS7
- ElasticSearchv7.7.0
- Nodejs
es-head需要nodejs环境编译,先看看机器中是否已经有nodejs环境,如果没有的话我们先要安装nodejs环境:
【1.1】node环境配置
nodjs官网:https://nodejs.org/en/download/
我下载的是:node-v14.16.1-linux-x64.tar.xz
wget https://nodejs.org/dist/v16.13.0/node-v16.13.0-linux-x64.tar.xz
#解压
tar -xJf node-v14.16.1-linux-x64.tar.xz

#换目录
mv node-v14.16.1-linux-x64 /opt/app/

#环境变量配置
echo "export NODE_HOME=/opt/app/node-v14.16.1-linux-x64">>/etc/profile
source /etc/profile
echo "export PATH=${PATH}:${NODE_HOME}/bin">>/etc/profile
source /etc/profile
测试:
![]()
【1.2】es-head插件
(1)下载
地址:https://github.com/mobz/elasticsearch-head
可使用git命令在线下载,或者下载zip包之后,离线安装都可以。
使用git命令下载:

git clone https://github.com/mobz/elasticsearch-head.git

下载zip包并解压:

https://github.com/mobz/elasticsearch-head/archive/master.zip

unzip elasticsearch-head-master.zip
cd elasticsearch-head-master/
npm install
(2)如果报错
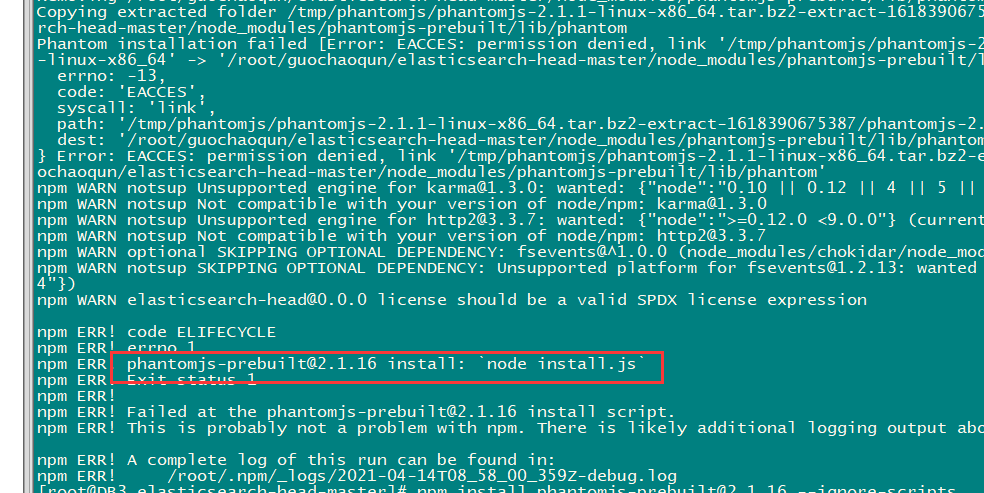
则重新单独装一下这个:
npm install phantomjs-prebuilt@2.1.16 --ignore-scripts
如下图就成了

(3)启动验证
前提:ES配置文件中有参数
http.cors.enabled: true
http.cors.allow-origin: "*"
修改完ES配置重启ES后,在es-head目录下使用下面的命令启动es-head:
npm run start
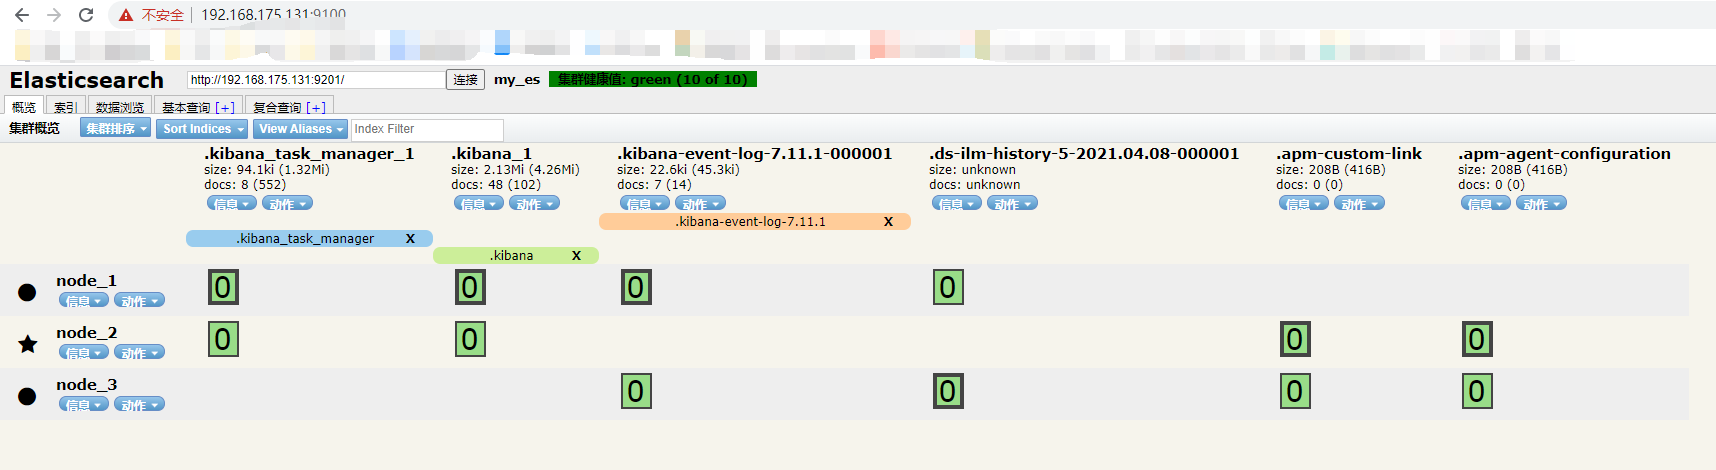
登录验证:IP+9100端口

【2】 ES配置密码
【2.1】修改配置文件:加载插件
http.cors.enabled: true
http.cors.allow-origin: "*"
http.cors.allow-headers: Authorization,X-Requested-With,Content-Length,Content-Type
xpack.security.enabled: true    #核心是这2个参数,如果设置了这一行参数,下面那行也必须加上
xpack.security.transport.ssl.enabled: true
重启ES生效
sudo -u elk nohup $ES_HOME/bin/elasticsearch >> $ES_HOME/output.log 2>&1 &
【2.2】配置ES:创建用户
cd $ES_HOME
bin/elasticsearch-setup-passwords interactive
交互界面:
[root@node01 elasticsearch-7.7.0]# bin/elasticsearch-setup-passwords interactive
future versions of Elasticsearch will require Java 11; your Java version from [/opt/app/jdk1.8.0_181/jre] does not meet this requirement
Initiating the setup of passwords for reserved users elastic,apm_system,kibana,logstash_system,beats_system,remote_monitoring_user.
You will be prompted to enter passwords as the process progresses.
Please confirm that you would like to continue [y/N]y

Enter password for [elastic]:
Reenter password for [elastic]:
Enter password for [apm_system]:
Reenter password for [apm_system]:
Enter password for [kibana]:
Reenter password for [kibana]:
Enter password for [logstash_system]:
Reenter password for [logstash_system]:
Enter password for [beats_system]:
Reenter password for [beats_system]:
Enter password for [remote_monitoring_user]:
Reenter password for [remote_monitoring_user]:
Changed password for user [apm_system]
Changed password for user [kibana]
Changed password for user [logstash_system]
Changed password for user [beats_system]
Changed password for user [remote_monitoring_user]
Changed password for user [elastic]
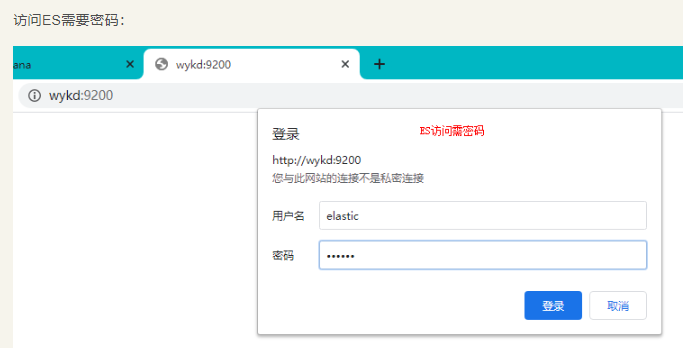
【2.3】验证
ES需要密码了;
【2.4】使用curl命令访问带有安全认证的ES
curl --user elastic:123456 -X GET http://uathd02:9200/noah/_doc/1?pretty

【3】整合
【3.1】kibana整合修改,用密码
修改Kibana配置
vim /opt/app/kibana-7.7.0-linux-x86_64/config/kibana.yml

elasticsearch.username: "kibana"
elasticsearch.password: "123456"
重启kibana 生效
sudo -u elk nohup $KB_HOME/bin/kibana > $KB_HOME/output.log 2>&1 &
验证:

可以用它做用户管理

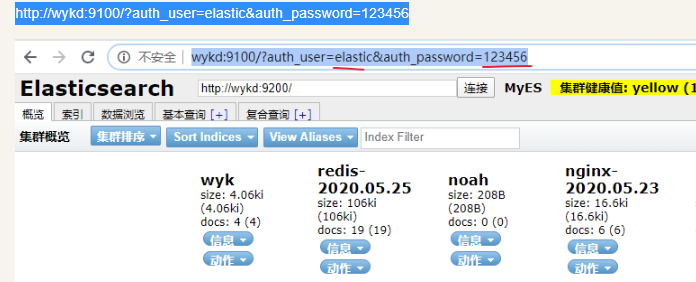
【3.2】es-head使用密码访问ES
前面我们介绍过,推荐大家的ES开启安全认证,那么es-head怎么访问开启了XPACK安全认证的ES集群呢? 把集群修改其中一项配置然后重启ES集群:
vim $ES_HOME/config/elasticsearch.yml
http.cors.enabled: true
http.cors.allow-origin: "*"
#http.cors.allow-headers: Authorization #这个配置改为下面的
http.cors.allow-headers: Authorization,X-Requested-With,Content-Length,Content-Type
xpack.security.enabled: true
xpack.security.transport.ssl.enabled: true
http://wykd:9100/?auth_user=elastic&auth_password=123456