普元DWS - Linux下安装DWS标准版
1 前言
普元DWS全称是普元数据开发平台。
功能是对不同结构的数据进行转换处理,比如将MySQL的数据转换到达梦数据库中。
本文讲解如何在Linux下安装DWS标准版

2 DWS的版本
普元DWS有两个版本:微服务版和标准版。
微服务版是基于分布式部署的,适用于大型的项目
标准版是单机的,适合于小型项目
3 环境准备
Linux操作系统,CentOS或Ubuntu都可以,本文采用的是Rocky Linux。
MySQL Server,本文采用MySQL Server 8.0。 本文创建了用户 dws ,密码是 111111
JDK1.8 ,建议就选择1.8,普元系列产品都是基于JDK1.8开发的。
4 DWS介质
普元DWS标准版的介质,请联系普元客户获取。
Primeton_DWS_Standalone_7.0LA2.tar.gz
5 安装
解压缩 Primeton_DWS_Standalone_7.0LA2.tar.gz 到 /opt/dws 文件夹

5.1 文件夹说明
|- Primeton_DWS_Standalone
    |- server
        |- dws                  # ~ dws server 所在目录
        |- ...                  # ~ 集成的其他组件放这里
    |- service                  # ~ 引擎服务将被安装到这里
        |- primeton-di          # ~ DI Server批作业执行引擎
        |- dolphin              # ~ dolphin 调度引擎
        |- seatunnel            # ~ 实时作业执行引擎
        |- zookeeper            # ~ zookeeper
    |- web                      # ~ nginx 配置文件
    |- shutdown.sh              # ~ 一键启动脚本
    |- startup.sh               # ~ 一键停止脚本
5.2 创建dws用户
创建免密用户、配置用户免密及权限
创建用户 dws,并且一定要配置 sudo 免密,产品默认用 dws 用户来运行。
# 创建用户需使用 root 登录
useradd dws

# 添加密码
echo "dws" | passwd --stdin dws

# 配置 sudo 免密
sed -i '$adws  ALL=(ALL)  NOPASSWD: NOPASSWD: ALL' /etc/sudoers
sed -i 's/Defaults    requirett/#Defaults    requirett/g' /etc/sudoers
注意:
因为任务执行服务是以 sudo -u {linux-user} 切换不同 linux 用户的方式来实现多租户运行作业,所以部署用户需要有 sudo 权限。
配置机器SSH免密登陆
由于安装的时候需要向不同机器发送资源,所以要求各台机器间能实现SSH免密登陆。配置免密登陆的步骤如下:
su dws

ssh-keygen -t rsa -P '' -f ~/.ssh/id_rsa
cat ~/.ssh/id_rsa.pub >> ~/.ssh/authorized_keys
chmod 600 ~/.ssh/authorized_keys
注意: 配置完成后,可以通过运行命令 ssh localhost 判断是否成功,如果不需要输入密码就能 ssh 登陆则证明成功。
#将目录权限赋予

chown -R dws:dws /opt/dws
5.3 配置/etc/hosts
此步骤必须执行,否则会导致zookeeper连接超时异常问题
在/etc/hosts中增加一行,添加服务器ip及域名
vim /etc/hosts
192.168.16.80 server80
5.4 修改dws配置文件
修改 $DWS_HOME/server/dws/config/DWS/config/user-config.xml 文件
本文章使用MySQL8.0 作为数据库,修改数据源部分如下
<group name="default">
<configValue key="Database-Type">MySql</configValue>
<configValue key="Jdbc-Type"/>
<configValue key="C3p0-DriverClass">com.mysql.jdbc.Driver</configValue>
<configValue key="C3p0-Url">jdbc:mysql://127.0.0.1:3306/dws?characterEncoding=utf-8&serverTimezone=Asia/Shanghai</configValue>
<configValue key="C3p0-UserName">dws</configValue>
<configValue key="C3p0-Password">111111</configValue>
<configValue key="C3p0-PoolSize">10</configValue>
<configValue key="C3p0-MaxPoolSize">50</configValue>
<configValue key="C3p0-MinPoolSize">10</configValue>
<!-- //seconds, 0 means connections never expire -->
<configValue key="C3p0-MaxIdleTime">600</configValue>
<!-- //idle connections never tested -->
<configValue key="C3p0-IdleConnectionTestPeriod">900</configValue>
<configValue key="C3p0-MaxStatements">0</configValue>
<configValue key="C3p0-NumHelperThreads">1</configValue>
<configValue key="Transaction-Isolation">ISOLATION_DEFAULT</configValue>
<configValue key="Test-Connect-Sql">SELECT count(*) from EOS_UNIQUE_TABLE</configValue>
<configValue key="Retry-Connect-Count">-1</configValue>
</group>5.5 修改dolphin配置文件
配置文件有两个,其中一个是 $DWS_HOME/service/dolphin/bin/env/dolphinscheduler_env.sh
(略)
# JAVA_HOME, will use it to start DolphinScheduler server
export JAVA_HOME=${JAVA_HOME:-/opt/java/openjdk}

# Database related configuration, set database type, username and password
#DATABASE目前支持 mysql,dm,postgresql,gaussdb,oracle
export DATABASE=${DATABASE:-mysql}
export SPRING_PROFILES_ACTIVE=${DATABASE}
export SPRING_DATASOURCE_URL="jdbc:mysql://127.0.0.1:3306/dolphinscheduler?serverTimezone=Asia/Shanghai&useSSL=false"
export SPRING_DATASOURCE_USERNAME="dws"
export SPRING_DATASOURCE_PASSWORD="111111"
(略)
# Registry center configuration, determines the type and link of the registry center
export REGISTRY_TYPE=${REGISTRY_TYPE:-zookeeper}
export REGISTRY_ZOOKEEPER_CONNECT_STRING=${REGISTRY_ZOOKEEPER_CONNECT_STRING:-localhost:2181}
(略)
另一个是 $DWS_HOME/service/dolphin/standalone-server/conf/application.yaml
spring:
  # 略
  sql:
    init:
      schema-locations: classpath:sql/dolphinscheduler_mysql.sql
  datasource:
    driver-class-name: com.mysql.cj.jdbc.Driver
    url: jdbc:mysql://127.0.0.1:3306/dolphinscheduler?serverTimezone=Asia/Shangh                                                                                        ai&useUnicode=true&characterEncoding=UTF-8
    username: dws
    password: 111111

# 略
registry:
  type: zookeeper
  zookeeper:
    namespace: dws
    connect-string: localhost:2181
    retry-policy:
      base-sleep-time: 60ms
      max-sleep: 300ms
      max-retries: 5
    session-timeout: 30s
    connection-timeout: 9s
    block-until-connected: 600ms
    digest: ~


# 略
master:
  listen-port: 5678

#略
worker:
  # worker listener port
  listen-port: 1234


# 略
# Override by profile
---
spring:
  config:
    activate:
      on-profile: mysql
  datasource:
    driver-class-name: com.mysql.cj.jdbc.Driver
    url: jdbc:mysql://127.0.0.1:3306/dolphinscheduler?serverTimezone=Asia/Shangh                                                                                        ai&useSSL=false
    username: dws
    password: 111111

# 略
还有两个配置文件, /opt/dws/service/primeton-di/diserver/config/di_server.properties 和 bft-server-config.xml
5.6 初始化数据库
- 创建 DWS 数据库:dws,执行数据库初始化脚本
server/dws/db-scripts/all-Mysql.sql
- 创建 dolphin 数据库:dolphinscheduler,执行数据库初始化脚本
service/dolphin/standalone-server/conf/sql/dolphinscheduler_mysql.sql另外,创建了两个空数据库 di70 和 testerror 。这两个是 primeton-di 配置文件里面的写的两个数据库,有什么用其实也不清楚。
5.7 license文件
Primeton_DWS_Standalone_7.0LA2.tar.gz 是商用产品,内置的license文件是已经过期的,需要替换成有效的license文件。
license文件路径在: /works/apps/dws/server/dws/config/DWS/license/primetonlicense.xml
6 启动
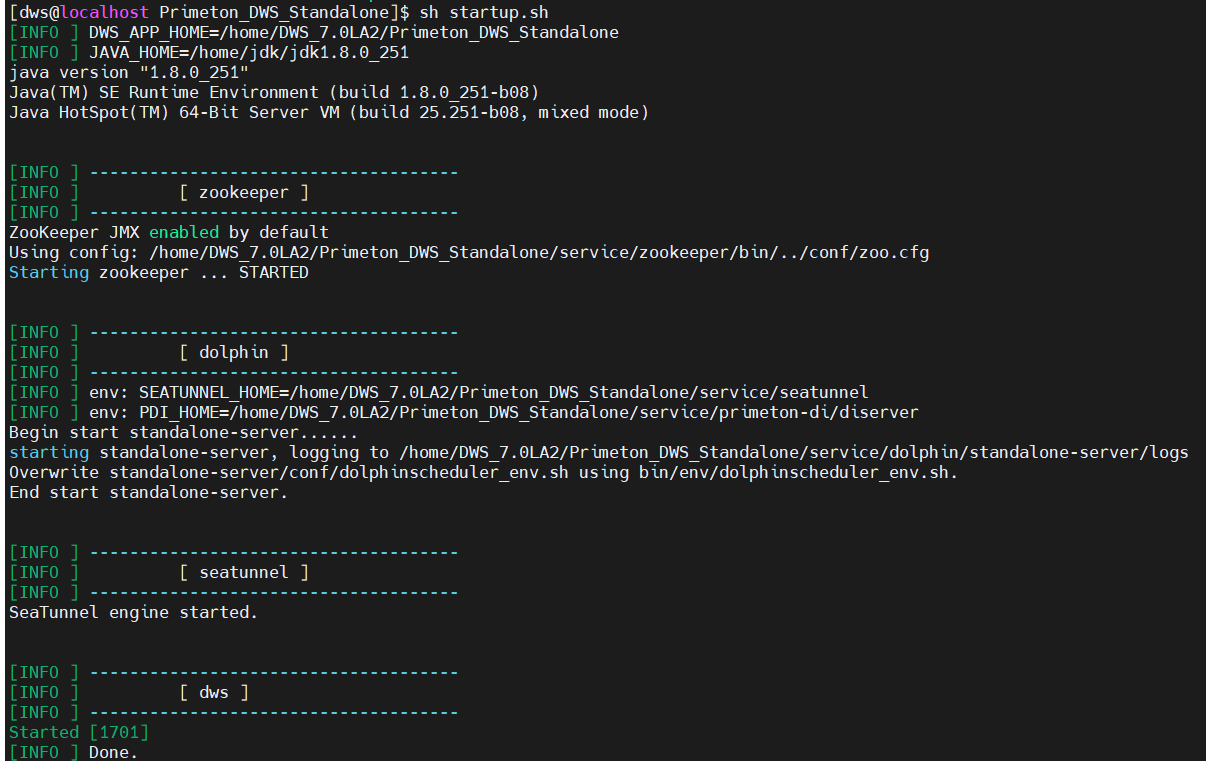
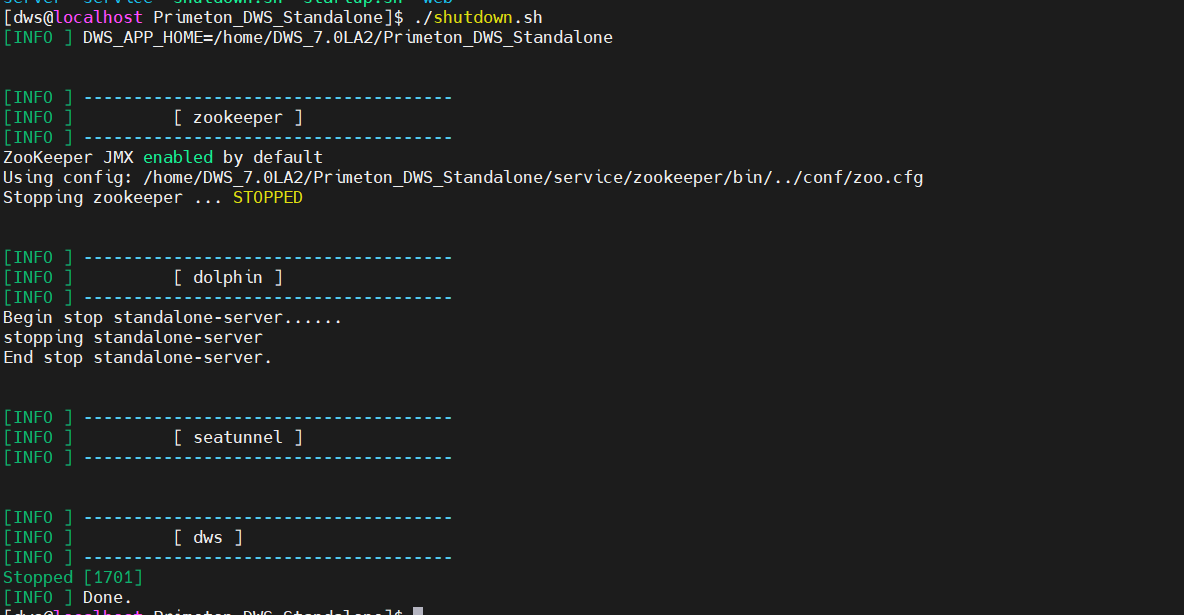
一键启动/停止会将所有服务启动/停止。
 #切换 dws 用户
 su dws

 #启动服务
 ./startup.sh

 #切换 dws 用户
 su dws

 #停止服务
 ./shutdown.sh

如果需要单独启动某个服务,参考如下命名:
- 启动/停止 zookeeper 服务
 #启动服务
 ./startup.sh zookeeper
 #停止服务
 ./shutdown.sh zookeeper
- 启动/停止 dolphin 服务
 #启动服务
 ./startup.sh dolphin
 #停止服务
 ./shutdown.sh dolphin
- 启动/停止 seatunnel 服务
 #启动服务
 ./startup.sh seatunnel
 #停止服务
 ./shutdown.sh seatunnel
- 启动/停止 dws 服务
 #启动服务
 ./startup.sh dws
 #停止服务
 ./shutdown.sh dws
7 访问地址
 http://localhost:11110
 默认账号、密码:admin、000000