鸿蒙网络编程系列33-TLS回声服务器示例
1. 网络通讯的安全性问题
在本系列的第1、2、3、25篇文章,分别讲解了使用UDP以及TCP进行通讯的方式,并且以回声服务器的形式分别演示了客户端与服务端之间的通讯。这种通讯方式一般来说没什么问题,但是在需要对内容保密的情况下就不可取了,毕竟它们都是通过明文进行通讯的,如果数据包在传输过程中被拦截,攻击者可以直接读取其中的信息,这使得用户的敏感信息(如密码、个人资料等)容易遭受窃听或篡改。要避免这种情况的发生,可以使用TLS通讯,它通过加密技术确保数据的保密性和完整性,防止数据在传输过程中被窃听或篡改。当使用TLS进行通讯时,客户端和服务器会先进行一个握手过程,在这个过程中双方协商加密算法、交换加密密钥等,之后所有传输的数据都会被加密,即使数据包被第三方截获,由于没有解密密钥,第三方也无法读取数据的真实内容。
在本系列的第7、8篇文章,介绍了TLS客户端的使用,本篇将介绍TLS服务端的使用,TLS服务端在HarmonyOS NEXT的KIT开放能力模型中,归属于系统相关Kit开放能力中的Network Kit(网络服务),对应的类名称为TLSSocketServer,使用如下的代码导入模块:
import { socket } from '@kit.NetworkKit';
在使用其方法前需要先通过socket.constructTLSSocketServerInstance方法创建实例。
本文将演示TLS服务端的用法,创建一个TLS回声服务器,并通过TLS客户端和其进行通讯。
2. TLS回声服务器演示
本示例运行后的界面如图所示:
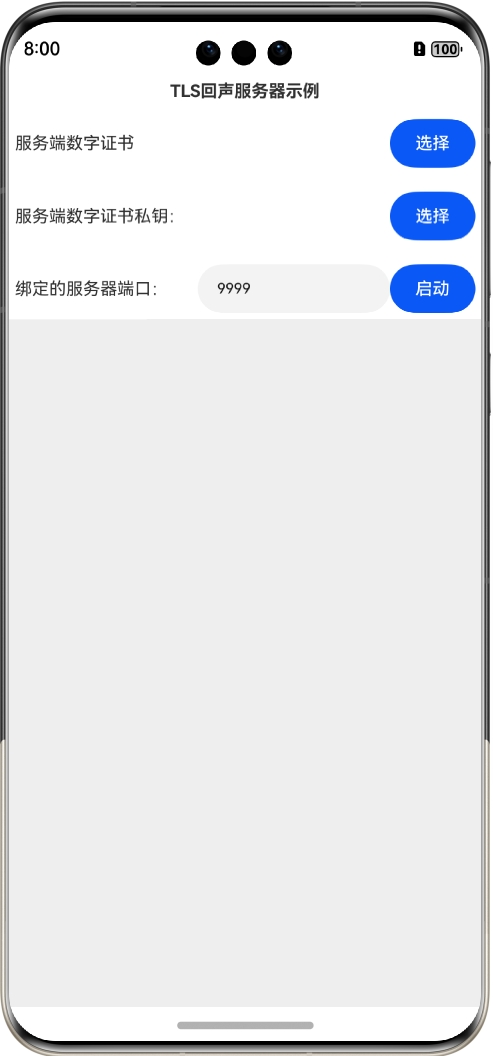
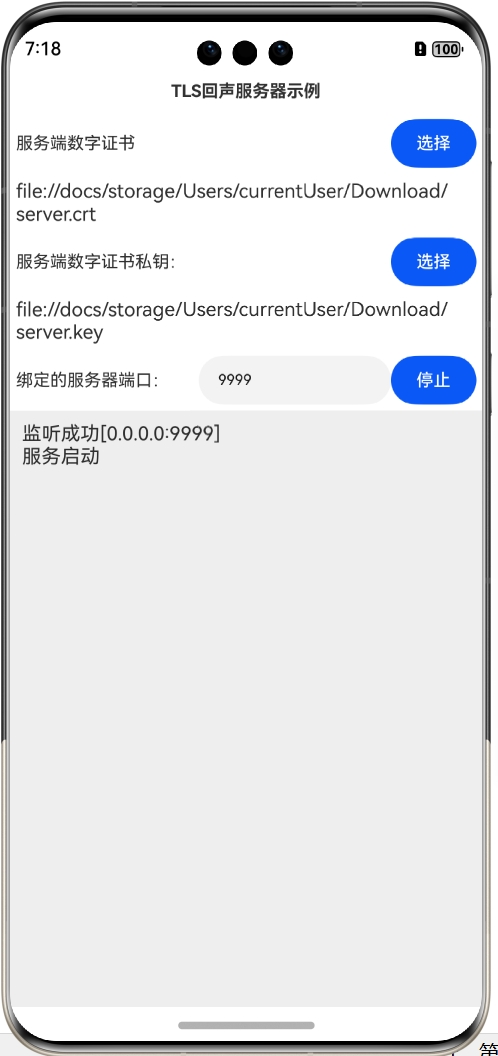
选择服务端数字证书及数字证书对应的私钥,输入要绑定的服务端端口,然后单击“启动”按钮即可启动TLS服务,如图所示:
然后启动TLS客户端,可以使用本系列前述文章介绍的客户端,也可以使用其他客户端,启动后,再选择服务端CA证书,输入服务端地址和端口,最后连接服务端,如图所示:
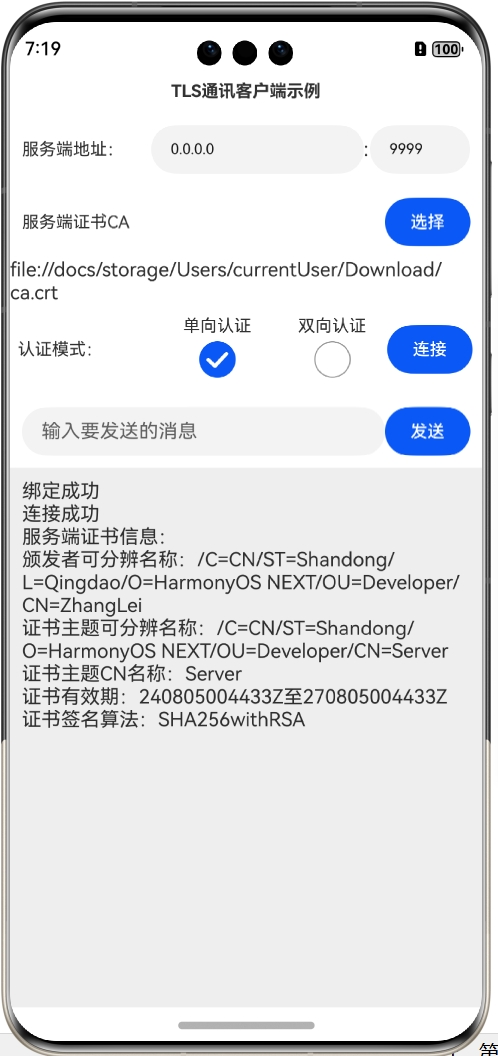
可以看到,TLS服务端连接成功了,并且在日志区域输出了服务端的证书信息。
下面测试TLS通讯,输入要发送的信息,然后单击“发送”按钮,就会收到服务端自动回复的消息,如图所示:
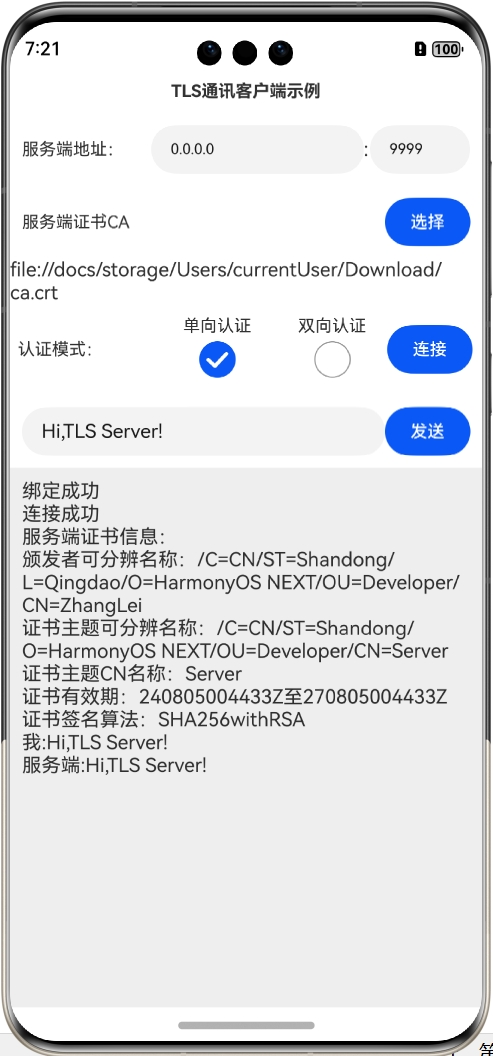
此时,查看TLS服务端界面,可以看到服务端也收到了客户端的消息:

3. TLS回声服务器示例编写
下面详细介绍创建该示例的步骤。
步骤1:创建Empty Ability项目。
步骤2:在module.json5配置文件加上对权限的声明:
"requestPermissions": [
      {
        "name": "ohos.permission.INTERNET"
      }
    ]
这里添加了访问互联网的权限。
步骤3:在Index.ets文件里添加如下的代码:
import { socket } from '@kit.NetworkKit';
import { BusinessError } from '@kit.BasicServicesKit';
import { ArrayList, buffer, util } from '@kit.ArkTS';
import fs from '@ohos.file.fs';
import { picker } from '@kit.CoreFileKit';

//TLS服务端实例
let tlsSocketServer: socket.TLSSocketServer = socket.constructTLSSocketServerInstance()

@Entry
@Component
struct Index {
  @State title: string = 'TLS回声服务器示例';
  @State running: boolean = false
  //连接、通讯历史记录
  @State msgHistory: string = ''
  //本地端口
  @State port: number = 9999
  //选择的证书文件
  @State certFileUri: string = ''
  //选择的私钥文件
  @State keyFileUri: string = ''
  scroller: Scroller = new Scroller()
  //已连接的客户端列表
  clientList = new ArrayList<socket.TLSSocketConnection>()

  build() {
    Row() {
      Column() {
        Text(this.title)
          .fontSize(14)
          .fontWeight(FontWeight.Bold)
          .width('100%')
          .textAlign(TextAlign.Center)
          .padding(10)

        Flex({ justifyContent: FlexAlign.SpaceBetween, alignItems: ItemAlign.Center }) {
          Text("服务端数字证书")
            .fontSize(14)
            .flexGrow(1)

          Button("选择")
            .onClick(async () => {
              this.certFileUri = await selectSingleDocFile(getContext(this))
            })
            .width(70)
            .fontSize(14)
        }
        .width('100%')
        .padding(5)

        Text(this.certFileUri)
          .width('100%')
          .padding(5)

        Flex({ justifyContent: FlexAlign.SpaceBetween, alignItems: ItemAlign.Center }) {
          Text("服务端数字证书私钥:")
            .fontSize(14)
            .flexGrow(1)

          Button("选择")
            .onClick(async () => {
              this.keyFileUri = await selectSingleDocFile(getContext(this))
            })
            .width(70)
            .fontSize(14)
        }
        .width('100%')
        .padding(5)

        Text(this.keyFileUri)
          .width('100%')
          .padding(5)


        Flex({ justifyContent: FlexAlign.Start, alignItems: ItemAlign.Center }) {
          Text("绑定的服务器端口:")
            .fontSize(14)
            .width(150)

          TextInput({ text: this.port.toString() })
            .type(InputType.Number)
            .onChange((value) => {
              this.port = parseInt(value)
            })
            .fontSize(12)
            .width(100)
            .flexGrow(1)

          Button(this.running ? "停止" : "启动")
            .onClick(() => {
              if (!this.running) {
                this.startServer()
              } else {
                this.stopServer()
              }
            })
            .width(70)
            .fontSize(14)
        }
        .width('100%')
        .padding(5)

        Scroll(this.scroller) {
          Text(this.msgHistory)
            .textAlign(TextAlign.Start)
            .padding(10)
            .width('100%')
            .backgroundColor(0xeeeeee)
        }
        .align(Alignment.Top)
        .backgroundColor(0xeeeeee)
        .height(300)
        .flexGrow(1)
        .scrollable(ScrollDirection.Vertical)
        .scrollBar(BarState.On)
        .scrollBarWidth(20)
      }
      .width('100%')
      .justifyContent(FlexAlign.Start)
      .height('100%')
    }
    .height('100%')
  }

  //停止服务
  stopServer() {
    tlsSocketServer.off('connect')
    for (let client of this.clientList) {
      client.off('message')
    }
    this.running = false
    this.msgHistory += "停止服务\r\n"
  }

  //获取tls监听配置信息
  getTlsConnOptions(): socket.TLSConnectOptions {
    let listenAddress: socket.NetAddress = { address: '0.0.0.0', port: this.port }
    let context = getContext(this)
    let tlsSecOptions: socket.TLSSecureOptions = {
      cert: copy2SandboxAndReadContent(context, this.certFileUri),
      key: copy2SandboxAndReadContent(context, this.keyFileUri)
    }

    return { address: listenAddress, secureOptions: tlsSecOptions }
  }

  //启动服务
  async startServer() {
    //获取tls监听配置
    let tlsConnOptions = this.getTlsConnOptions()
    //绑定到指定的端口并启动客户端连接监听
    await tlsSocketServer.listen(tlsConnOptions).then(this.onListenSuccessful)
      .catch((err: BusinessError) => {
        this.msgHistory += `监听失败: 错误码 ${err.code}, 错误信息 ${JSON.stringify(err)}\r\n`;
      })
    //订阅连接事件消息
    tlsSocketServer.on('connect', this.onNewClientConnected);
  }

  //监听成功的回调
  onListenSuccessful = async () => {
    let listenAddr: socket.NetAddress = await tlsSocketServer.getLocalAddress()
    this.msgHistory += `监听成功[${listenAddr.address}:${listenAddr.port}]\r\n`
    this.running = true
    this.msgHistory += "服务启动\r\n"
  }
  //接受新的客户端连接的回调
  onNewClientConnected = async (clientSocket: socket.TLSSocketConnection) => {
    this.clientList.add(clientSocket)
    //客户端地址
    let clientAddr: socket.NetAddress = await clientSocket.getRemoteAddress()
    this.msgHistory += `接受新的客户端连接[${clientAddr.address}:${clientAddr.port}]\r\n`

    clientSocket.on('message', (msgInfo: socket.SocketMessageInfo) => {
      //收到的信息转化为字符串
      let content = buf2String(msgInfo.message)
      //显示信息日志,最后加上回车换行
      this.msgHistory += `[${msgInfo.remoteInfo.address}:${msgInfo.remoteInfo.port}]${content}\r\n`
      //把收到的信息发回客户端
      clientSocket.send(buffer.from(content).buffer)
    })
  }
}

//选择一个文件
async function selectSingleDocFile(context: Context): Promise<string> {
  let selectedFilePath: string = ""
  let documentPicker = new picker.DocumentViewPicker(context);
  await documentPicker.select({ maxSelectNumber: 1 }).then((result) => {
    if (result.length > 0) {
      selectedFilePath = result[0]
    }
  })
  return selectedFilePath
}

//复制文件到沙箱并读取文件内容
function copy2SandboxAndReadContent(context: Context, filePath: string): string {
  let segments = filePath.split('/')
  let fileName = segments[segments.length-1]
  let realUri = context.cacheDir + "/" + fileName
  let file = fs.openSync(filePath);
  fs.copyFileSync(file.fd, realUri)
  fs.closeSync(file)

  return fs.readTextSync(realUri)
}

//ArrayBuffer转utf8字符串
export function buf2String(buf: ArrayBuffer) {
  let msgArray = new Uint8Array(buf);
  let textDecoder = util.TextDecoder.create("utf-8");
  return textDecoder.decodeToString(msgArray)
}
步骤4:编译运行,可以使用模拟器或者真机。
步骤5:按照本节第2部分“TLS回声服务器演示”操作即可。
4. 代码分析
本示例关键点在于TLS服务器的配置,特别是配置TLS服务端的证书,因为文件权限的关系,本示例在用户选择证书和证书私钥文件后,把这些文件首选复制到沙箱,然后再读取文件内容,TLS配置的代码如下所示:
  getTlsConnOptions(): socket.TLSConnectOptions {
    let listenAddress: socket.NetAddress = { address: '0.0.0.0', port: this.port }
    let context = getContext(this)
    let tlsSecOptions: socket.TLSSecureOptions = {
      cert: copy2SandboxAndReadContent(context, this.certFileUri),
      key: copy2SandboxAndReadContent(context, this.keyFileUri)
    }

    return { address: listenAddress, secureOptions: tlsSecOptions }
  }
复制文件到沙箱并读取文件内容的代码如下所示:
function copy2SandboxAndReadContent(context: Context, filePath: string): string {
  let segments = filePath.split('/')
  let fileName = segments[segments.length-1]
  let realUri = context.cacheDir + "/" + fileName
  let file = fs.openSync(filePath);
  fs.copyFileSync(file.fd, realUri)
  fs.closeSync(file)

  return fs.readTextSync(realUri)
}
(本文作者原创,除非明确授权禁止转载)
本文源码地址:
https://gitee.com/zl3624/harmonyos_network_samples/tree/master/code/tls/TLSEchoServer
本系列源码地址:
https://gitee.com/zl3624/harmonyos_network_samples