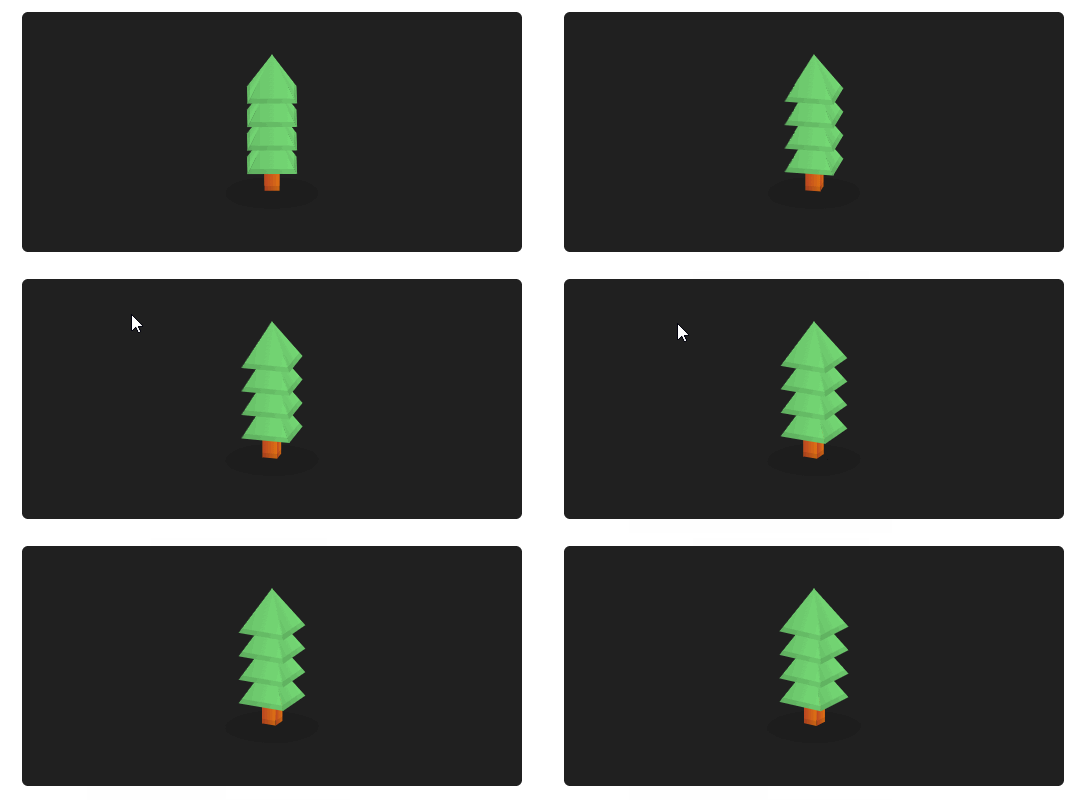
HTMLCSS:呈现的3D树之美
效果演示
这段代码通过HTML和CSS创建了一个具有3D效果的树的图形,包括分支、树干和阴影,通过自定义属性和复杂的变换实现了较为逼真的立体效果。

HTML
<div class="container">
    <div class="tree">
        <div class="branch" style="--x:0">
            <span style="--i:0;"></span>
            <span style="--i:1;"></span>
            <span style="--i:2;"></span>
            <span style="--i:3;"></span>
        </div>
        <div class="branch" style="--x:1">
            <span style="--i:0;"></span>
            <span style="--i:1;"></span>
            <span style="--i:2;"></span>
            <span style="--i:3;"></span>
        </div>
        <div class="branch" style="--x:2">
            <span style="--i:0;"></span>
            <span style="--i:1;"></span>
            <span style="--i:2;"></span>
            <span style="--i:3;"></span>
        </div>
        <div class="branch" style="--x:3">
            <span style="--i:0;"></span>
            <span style="--i:1;"></span>
            <span style="--i:2;"></span>
            <span style="--i:3;"></span>
        </div>
        <div class="stem">
            <span style="--i:0;"></span>
            <span style="--i:1;"></span>
            <span style="--i:2;"></span>
            <span style="--i:3;"></span>
        </div>
        <span class="shadow"></span>
    </div>
</div>
- container:外层容器,用于水平居中放置树的容器。
- tree:树的主要容器。
- branch,代表树的分支,每个分支内部有四个span元素,可能用于构建分支的细节。
- stem代表树的树干,内部也有四个span元素。
- shadow用于创建树的阴影效果。
CSS
.container {
    width: 100%;
    display: flex;
    justify-content: center;
    align-items: center;
}

.tree {
    position: relative;
    width: 50px;
    height: 50px;
    transform-style: preserve-3d;
    transform: rotateX(-20deg) rotateY(30deg);
    animation: treeAnimate 5s linear infinite;
}

@keyframes treeAnimate {
    0% {
        transform: rotateX(-20deg) rotateY(360deg);
    }

    100% {
        transform: rotateX(-20deg) rotateY(0deg);
    }
}

.tree div {
    position: absolute;
    top: -50px;
    left: 0;
    width: 100%;
    height: 100%;
    transform-style: preserve-3d;
    transform: translateY(calc(25px * var(--x))) translateZ(0px);
}

.tree div.branch span {
    position: absolute;
    top: 0;
    left: 0;
    width: 100%;
    height: 100%;
    background: linear-gradient(90deg, #69c069, #77dd77);
    clip-path: polygon(50% 0%, 0% 100%, 100% 100%);
    border-bottom: 5px solid #00000019;
    transform-origin: bottom;
    transform: rotateY(calc(90deg * var(--i))) rotateX(30deg) translateZ(28.5px);
}

.tree div.stem span {
    position: absolute;
    top: 110px;
    left: calc(50% - 7.5px);
    width: 15px;
    height: 50%;
    background: linear-gradient(90deg, #bb4622, #df7214);
    border-bottom: 5px solid #00000019;
    transform-origin: bottom;
    transform: rotateY(calc(90deg * var(--i))) translateZ(7.5px);
}

.shadow {
    position: absolute;
    top: 0;
    left: 0;
    width: 100%;
    height: 100%;
    background: rgba(0, 0, 0, 0.4);
    filter: blur(20px);
    transform-style: preserve-3d;
    transform: rotateX(90deg) translateZ(-65px);
}
- .container类:width: 100%;占据整个宽度。display: flex; justify-content: center; align-items: center;使内部内容水平和垂直居中。
- .tree类:position: relative;相对定位,作为内部元素定位的参考。width: 50px; height: 50px;设置树的容器大小。transform-style: preserve-3d;启用 3D 变换效果。transform: rotateX(-20deg) rotateY(30deg);对树进行初始的 3D 旋转。animation: treeAnimate 5s linear infinite;应用名为treeAnimate的动画,持续 5 秒,线性过渡,无限循环。
- @keyframes treeAnimate:定义树的动画,使树在 Y 轴上从初始的旋转 360 度逐渐变为 0 度,实现旋转效果。
- .tree div选择器:position: absolute; top: -50px; left: 0;绝对定位在树容器的顶部左侧。width: 100%; height: 100%;占据整个树容器的大小。transform-style: preserve-3d;启用 3D 变换效果。transform: translateY(calc(25px * var(–x))) translateZ(0px);根据自定义属性–x的值在 Y 轴上进行平移,用于创建不同层次的分支。
- .tree div.branch span选择器:position: absolute; top: 0; left: 0;绝对定位在分支容器内。width: 100%; height: 100%;占据整个分支容器的大小。background: linear-gradient(90deg, #69c069, #77dd77);设置背景为绿色渐变。clip-path: polygon(50% 0%, 0% 100%, 100% 100%);创建一个三角形形状。border-bottom: 5px solid #00000019;添加底部的深色边框模拟阴影效果。transform-origin: bottom;设置变换的原点在底部。transform: rotateY(calc(90deg * var(–i))) rotateX(30deg) translateZ(28.5px);根据自定义属性–i的值在 Y 轴上进行旋转,并在 X 轴上倾斜一定角度,同时在 Z 轴上进行平移,用于创建分支的立体效果。
- .tree div.stem span选择器:position: absolute; top: 110px; left: calc(50% - 7.5px);绝对定位在树干的特定位置。width: 15px; height: 50%;设置树干的大小。background: linear-gradient(90deg, #bb4622, #df7214);设置背景为棕色渐变。border-bottom: 5px solid #00000019;添加底部的深色边框模拟阴影效果。transform-origin: bottom;设置变换的原点在底部。transform: rotateY(calc(90deg * var(–i))) translateZ(7.5px);根据自定义属性–i的值在 Y 轴上进行旋转,并在 Z 轴上进行平移,用于创建树干的立体效果。
- .shadow类:position: absolute; top: 0; left: 0;绝对定位在树容器的左上角。width: 100%; height: 100%;占据整个树容器的大小。background: rgba(0, 0, 0, 0.4);设置半透明的黑色背景作为阴影。filter: blur(20px);添加模糊效果以模拟阴影的柔和度。transform-style: preserve-3d;启用 3D 变换效果。transform: rotateX(90deg) translateZ(-65px);在 X 轴上旋转并在 Z 轴上进行平移,以放置阴影在树的下方。
