实现 Toy-React , 实现 JSX 渲染
一、简介
JSX 是属于 React 中的一大特性,因此,本文将实现自定义 JSX 渲染功能,同时也会实现部分 React 中拥有的功能,以便加深理解.
二、准备工作
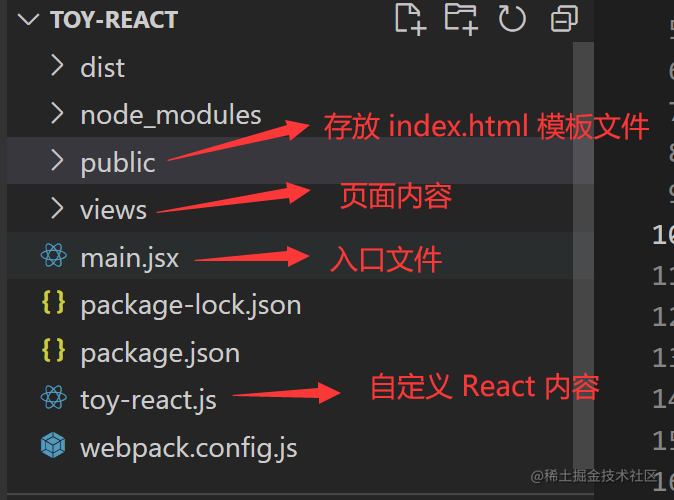
目录结构
目录结构比较简单,就不详细说明了
webpack 配置
- 由于我们需要在 .js 或者 .jsx 文件中编写 jsx 语法,同时,也为了我们可以使用一些 js 新特性,因此需要通过 webpack 中的 loader 配置进行编译.
- 这里我们需要用到的 loader 如下:
babel-loader@babel/core@babel/preset-env: 将 js 转换为运行环境能识别的语法@babel/plugin-transform-react-jsx: 将 JSX 语法转换为对应内容的输出结果
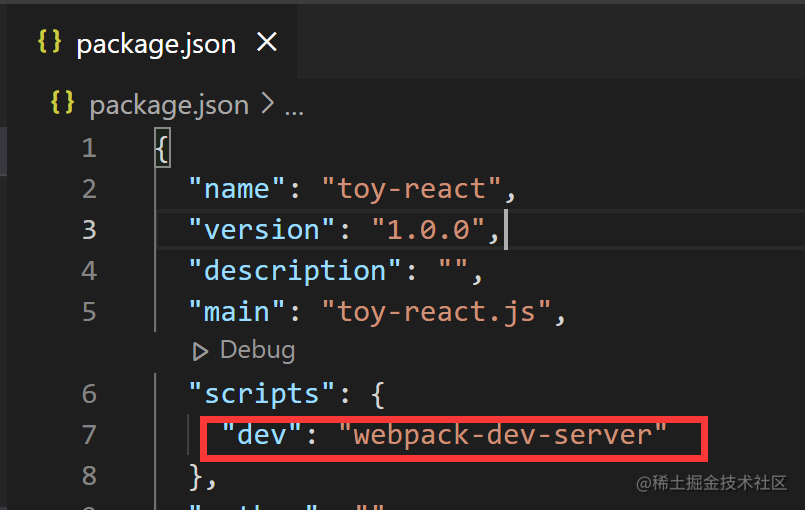
- 为了避免多次手动执行 webpack 编译命令,这里是使用了
webpack-dev-server来监听文件变化,自动执行编译命令
- 配置文件内容如下
const path =  require('path');
const HtmlWebpackPlugin = require("html-webpack-plugin");

module.exports = {
  mode: "development",
  entry: {
    main: "./main.jsx",
  },
  module: {
    rules: [
      {
        test: /\.jsx$/,
        use: {
          loader: "babel-loader",
          options: {
            presets: ["@babel/preset-env"],
            plugins: [
              [
                "@babel/plugin-transform-react-jsx",
                { pragma: "createElement" },
              ],
            ],
          },
        },
        exclude: /node_modules/,
      },
    ],
  },
  output: {
    path: path.resolve(__dirname, 'dist'),
    filename: '[name].js',
  },
  plugins: [
    new HtmlWebpackPlugin({
      title: "My App",
      template: "public/index.html",
    }),
  ],
  optimization: {
    minimize: false,
  },
};
三、编写 JSX
1. 首先在 main.jsx 中编写一段简单的 JSX 内容
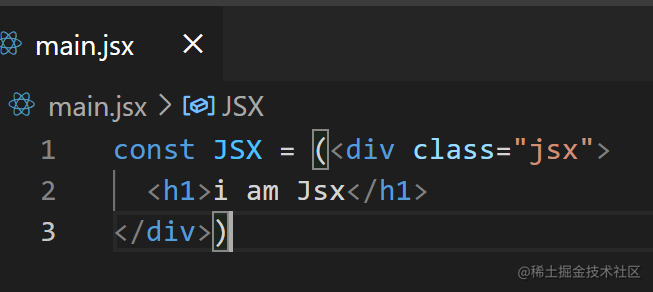
2. 观察被编译的结果
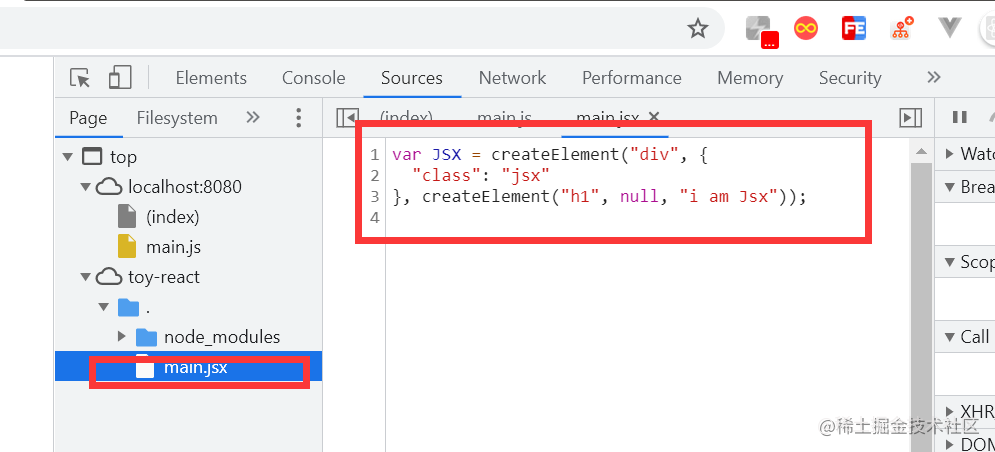
- 从以上结果可以看到,最终 JSX 语法被 @babel/plugin-transform-react-jsx 被编译成了 React.createElement 方法,由此可见,要实现 JSX 渲染的关键就是要实现 createElement
- 这里我们要调整一下编译后的结果,我们需要 jsx 被编译为我们自定义的 createElement 方法,而不是 React.createElement,因此我们修改 webpack 配置文件中与 “@babel/plugin-transform-react-jsx” 相关的配置为
module: {
    rules: [
      {
        test: /\.jsx$/,
        use: {
          loader: "babel-loader",
          options: {
            presets: ["@babel/preset-env"],
            plugins: [
              [
                "@babel/plugin-transform-react-jsx",
                { pragma: "createElement" }, // 这里就是控制 jsx 语法被编译后要调用的方法名
              ],
            ],
          },
        },
        exclude: /node_modules/,
      },
    ],
3. 自定义实现 createElement 方法
从编译后的结果来看 createElement 方法具有三个参数:
- type —— 当前元素的类型:HTML标签名、Class 组件、Function 组件
- attributes —— 当前元素上的拥有的属性:{ } || null
- children —— 除了前两个参数,默认后面的参数全部为当前元素的子节点:[ ]
function createElement(type, attributes,...children){
  // 创建 dom 实例
  const currentElement = document.createElement(type);

  // 处理属性
  if(attributes){
    for (const name in attributes) {
      currentElement.setAttribute(name, attributes[name]);
    }
  }

  // 处理子节点
  if(children.length){
    for (let child of children) {
      // 处理文本节点
      if(typeof child === "string"){
        child = document.createTextNode(child);
      }

      currentElement.appendChild(child);
    }
  }

  return currentElement;
}

const JSX = (<div class="jsx">
  <h1>i am Jsx</h1>
</div>);

document.body.appendChild(JSX);
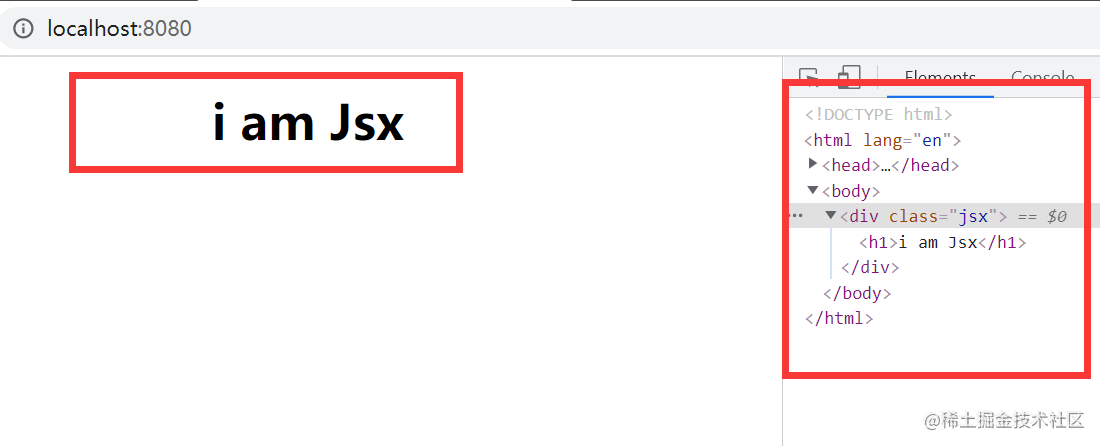
到这里,现在已经可以将简单的 JSX 渲染成了视图
四、升级改造 createElement
- 虽然现在我们已经可以渲染简单的 JSX 内容了,但是如果要渲染 Class 组件或者 Function 组件的话,createElement 方法明显还无法做到,于是我们需要对其进行升级改造.
- 同样,我们先观察如果使用 Class 组件,那么最终会被编译为什么呢?
class MyComponent {
  render() {
    return (<div>
      <h1>i am MyComponent</h1>
      </div>);
  }
}

const JSX = (
  <div id="jsx">
    <h1>i am Jsx</h1>
    <MyComponent id="MyComponent">
      <h1>i am MyComponent child</h1>
    </MyComponent>
  </div>
);
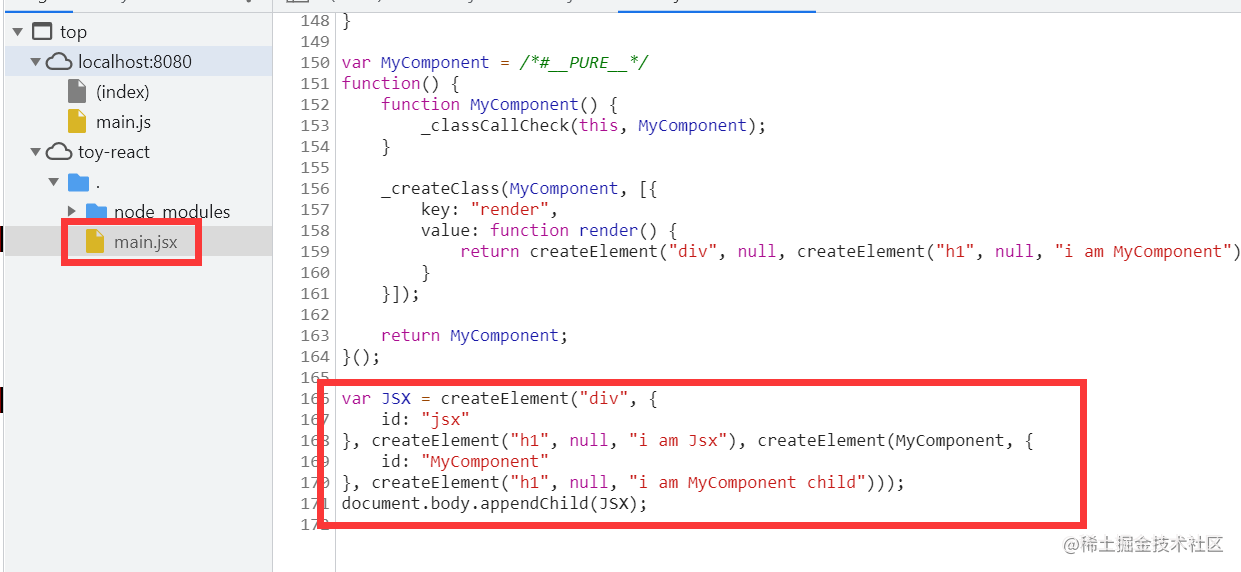
- 可以看到 createElement 的第一个参数已经不再是 string ,而是我们定义的 Class 类,于是可以进行第一步改造,根据 type 进行对应的处理
function createElement(type, attributes, ...children) {
  let currentElement;
  if (typeof type === "string") {
    // 创建 dom 实例
    currentElement = document.createElement(type);
  }else {
    // 获取对应的 dom 实例
    currentElement = new type().render();
  }

  // 处理属性
  if (attributes) {
    for (const name in attributes) {
      currentElement.setAttribute(name, attributes[name]);
    }
  }

  // 处理子节点
  if (children.length) {
    for (let child of children) {
      // 处理文本节点
      if (typeof child === "string") {
        child = document.createTextNode(child);
      }

      // 往当前元素中插入子节点
      currentElement.appendChild(child);
    }
  }

  return currentElement;
}
这样一来,我们就可以成功渲染 Class 组件

五、抽离逻辑实现 Toy-React
尽管上面我们实现了对 JSX 的渲染,但所有操作都在 main.jsx 中进行,包括 createElement 方法也是直接在该文件中声明和实现的,既然我们要实现 Toy-React , 那么我们应该要保证其在使用上要和 React 保持一致.
- 1. createElement 中要实现的功能有:
获取或创建 dom 实例为 dom 实例设置 attribute创建文本节点为 dom 实例添加子节点返回最终的 dom 实例
-
- 为了让 createElement 中所有的 type 都能拥有正常调用 DOM API 的能力,我们需要给所有的 type 定义一个通用 ElmentWrapper,同时也为文本节点定义一个对应的 TextWrapper.
-
- 同样的,为了让所有的 Class 组件拥有共同的一些功能特性,我们需要实现 Component 这个类,来保证所有 Class 组件拥有统一性
-
- 在 main.jsx 中最后是通过 document.body.appendChild(JSX) 的方式,把 JSX 转换后的结果最终渲染在页面上的,因此,在这里我们要实现 render 方法去替换这种方式.
toy-react.js 最终实现如下:
// ElementWrapper
class ElementWrapper {
  constructor(type) {
    this.root = document.createElement(type);
  }
  setAttribute(name, value) {
    this.root.setAttribute(name, value);
  }
  appendChild(component) {
    this.root.appendChild(component.root);
  }
}

// TextWrapper
class TextWrapper {
  constructor(content) {
    this.root = document.createTextNode(content);
  }
}

// Component
export class Component {
  constructor() {
    this._root = null;
    this.props = {};
    this.children = [];
  }

  setAttribute(name, value) {
    this.props[name] = value;
  }

  appendChild(component) {
    this.children.push(component);
  }

  get root() {
    if (!this._root) {
      this._root = this.render().root;
    }
    return this._root;
  }
}

// createElement
export function createElement(type, attributes, ...children) {
  // 1. 获取 dom 实例
  let currentElement;
  if (typeof type === "string") {
    currentElement = new ElementWrapper(type);
  } else {
    currentElement = new type();
  }

  // 2. 处理 dom 实例属性
  if (attributes) {
    for (const name in attributes) {
      currentElement.setAttribute(name, attributes[name]);
    }
  }

  // 3. 处理子节点
  const insertChildren = (children) => {
    if (children.length) {
      for (let child of children) {
        // 处理文本节点
        if (typeof child === "string") {
          child = new TextWrapper(child);
        }
        // 当子节点拥有子节点时,递归处理
        // 即在组件中使用了 { this.children } 表达式
        if (typeof child === "object" && child instanceof Array) {
          insertChildren(child);
        } else {
          currentElement.appendChild(child);
        }
      }
    }
  };

  // 初始化调用
  insertChildren(children);

  return currentElement;
}

// render
export function render(component, parentElement) {
  parentElement.appendChild(component.root);
}
在 main.jsx 中使用如下:
import { createElement, render, Component } from './toy-react';

class MyComponent extends Component {
  render() {
    return (<div id="MyComponent">
      <h1>i am MyComponent</h1>
      { this.children }
      </div>);
  }
}

const JSX = (
  <div id="jsx">
    <h1>i am Jsx</h1>
    <MyComponent>
      <h1>i am MyComponent child</h1>
    </MyComponent>
  </div>
);

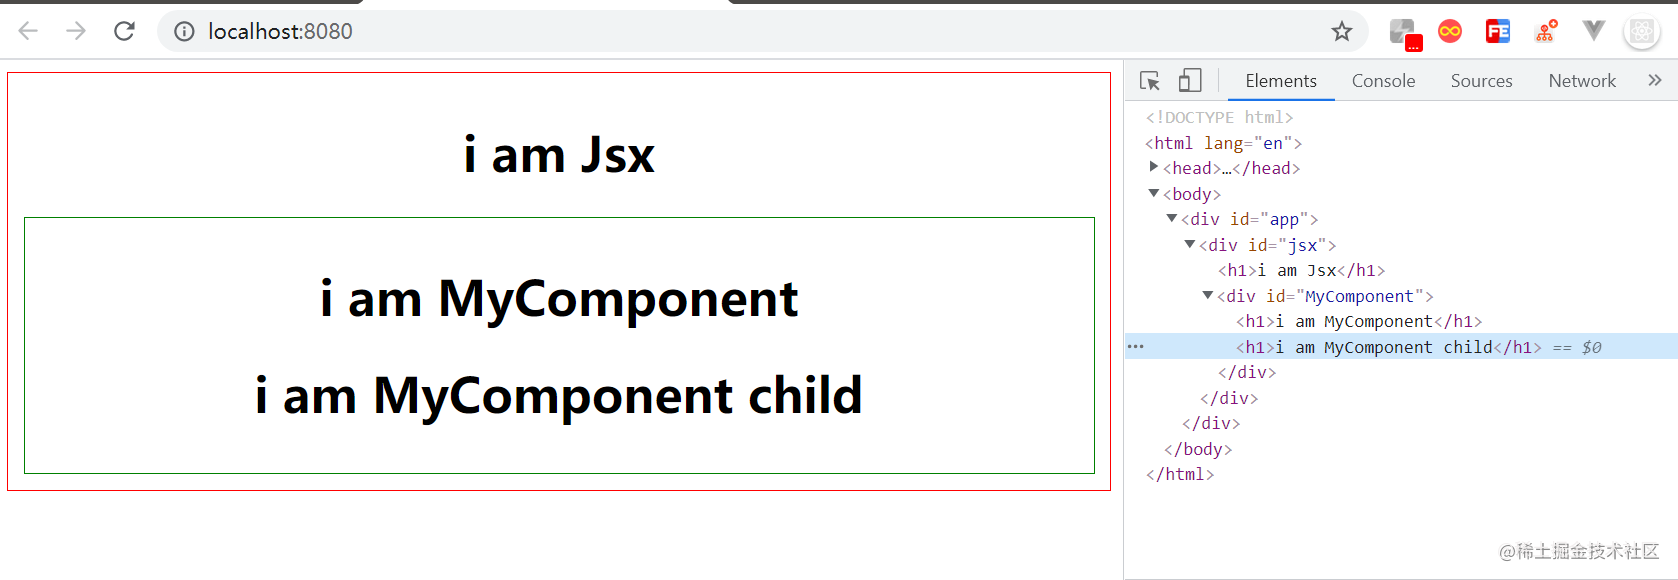
render(JSX, document.querySelector("#app"));
渲染结果
