UniApp + SpringBoot 实现接入支付宝支付功能和退款功能
一、支付宝开放平台设置
注册支付宝支付功能需要个体工商户或企业才可以!需要有营业执照才能去申请哦!
1、登录到控制台
进入支付宝开放平台 控制台

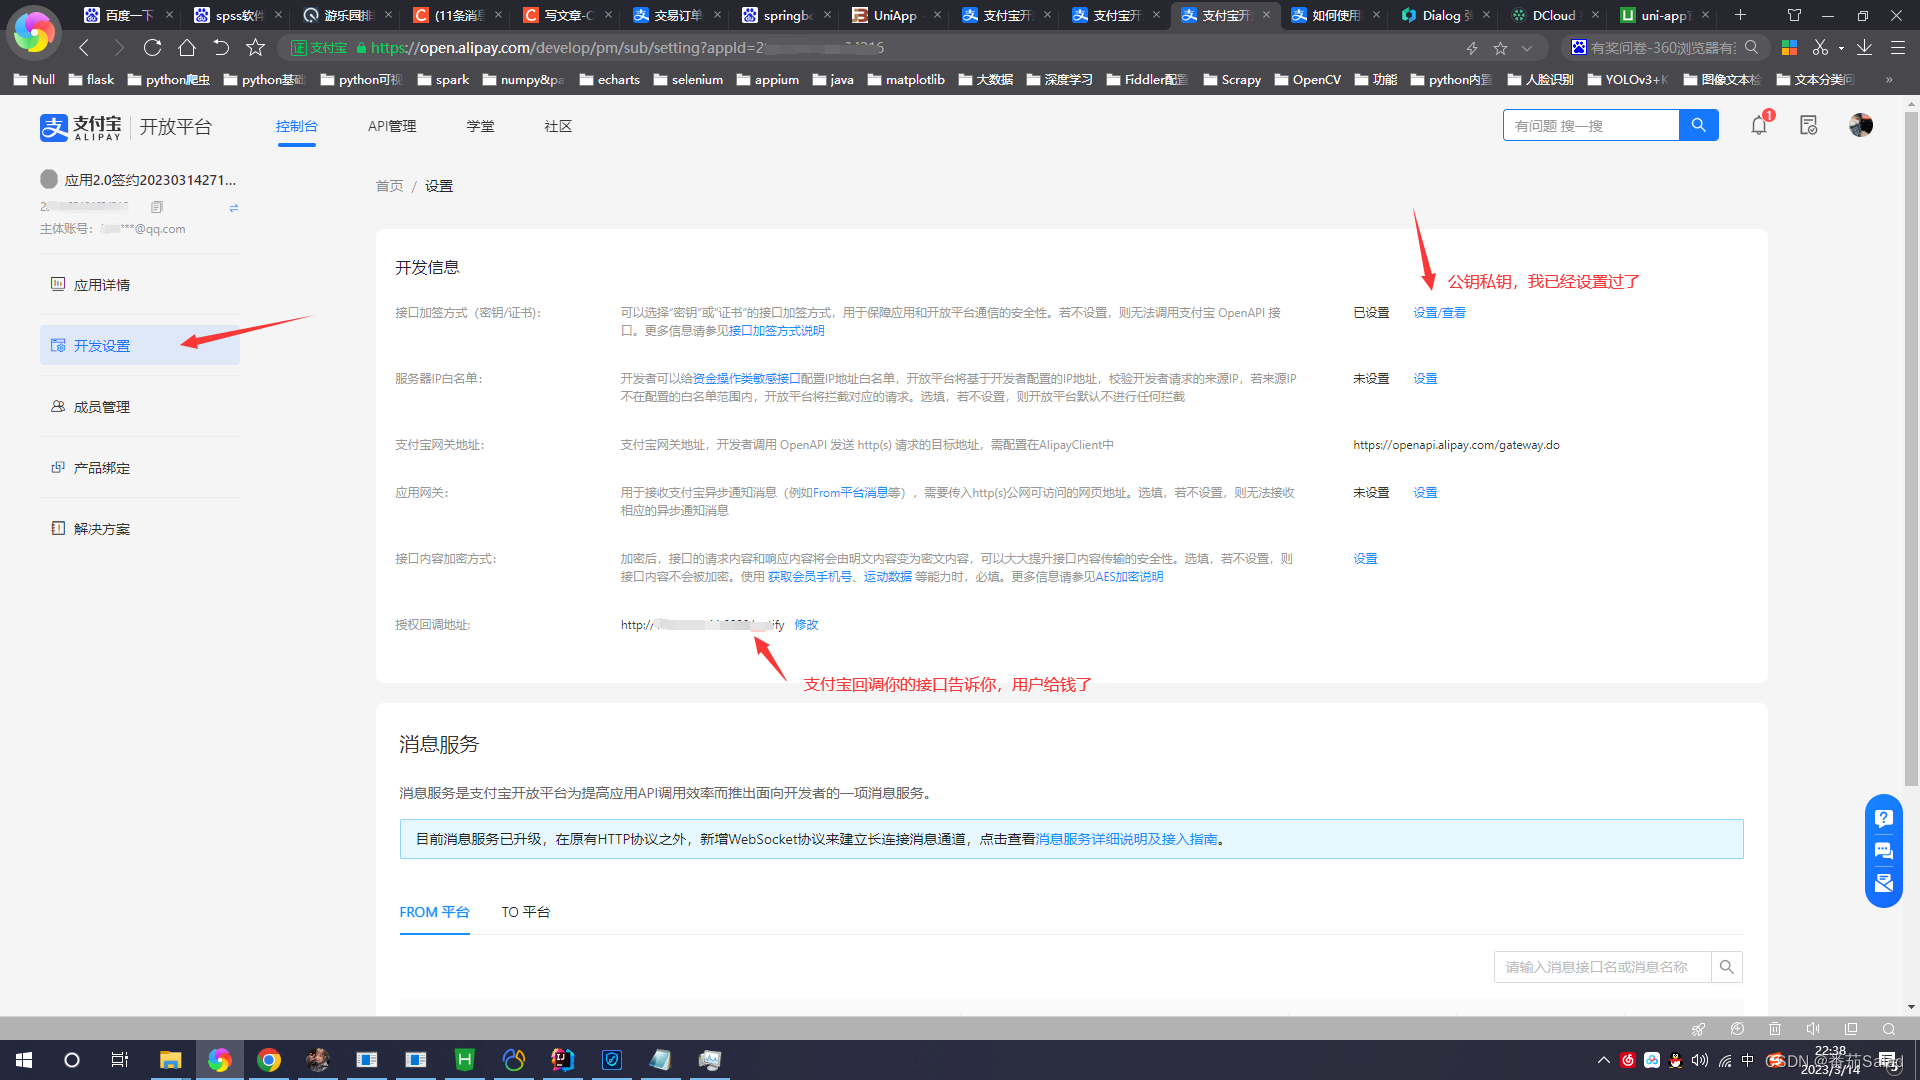
2、开发设置
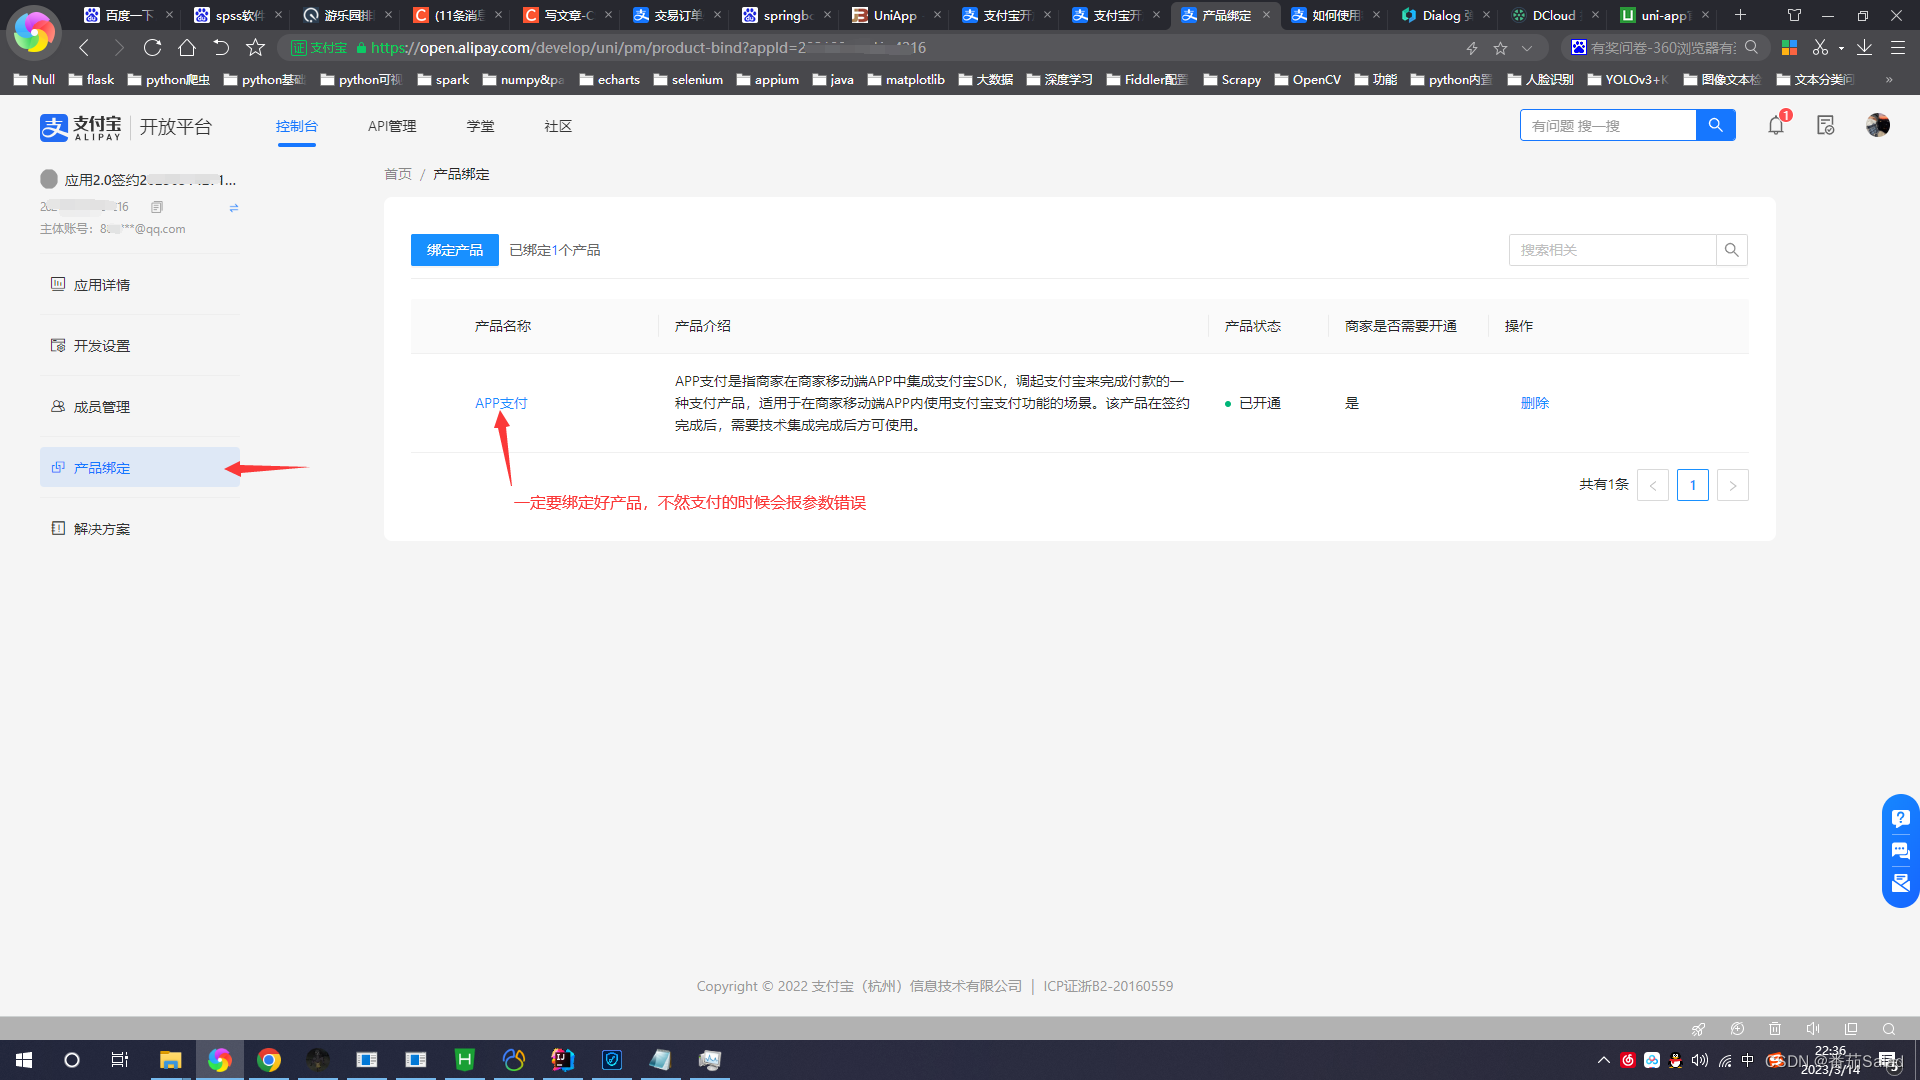
3、产品绑定APP支付
如果没有绑定APP支付就会报商家订单参数异常,请重新发起支付的错误
二、Springboot后端代码
1、pom.xml中导入两个包

<!-- 支付宝官方 SDK-->
<dependency>
    <groupId>com.alipay.sdk</groupId>
    <artifactId>alipay-sdk-java</artifactId>
    <version>4.22.32.ALL</version>
</dependency>
<dependency>
    <groupId>org.springframework.boot</groupId>
    <artifactId>spring-boot-configuration-processor</artifactId>
    <optional>true</optional>
</dependency>
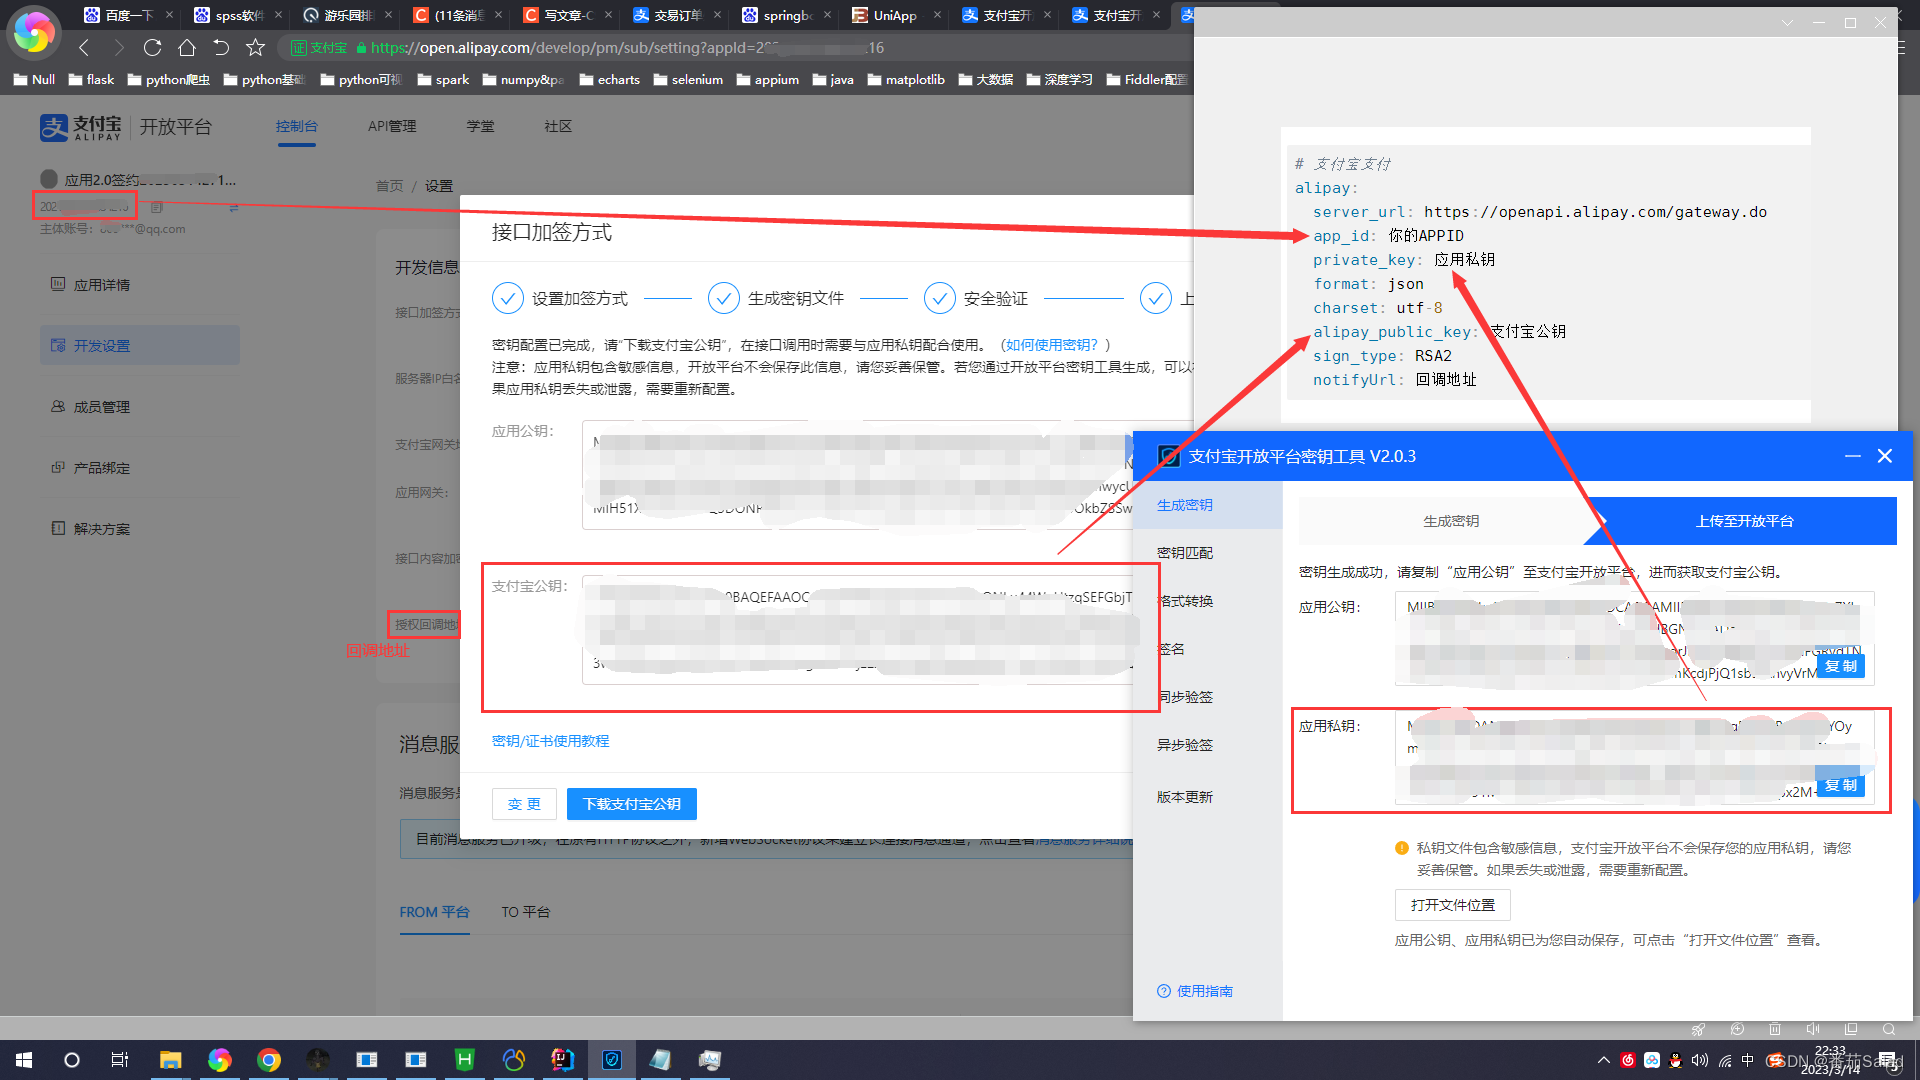
2、application.yml中添加以下配置

# 支付宝支付
alipay:
  server_url: https://openapi.alipay.com/gateway.do
  app_id: 你的APPID
  private_key: 应用私钥
  format: json
  charset: utf-8
  alipay_public_key: 支付宝公钥
  sign_type: RSA2
  notifyUrl: 回调地址
3、新建AlipayConfig类和BizAlipayService类
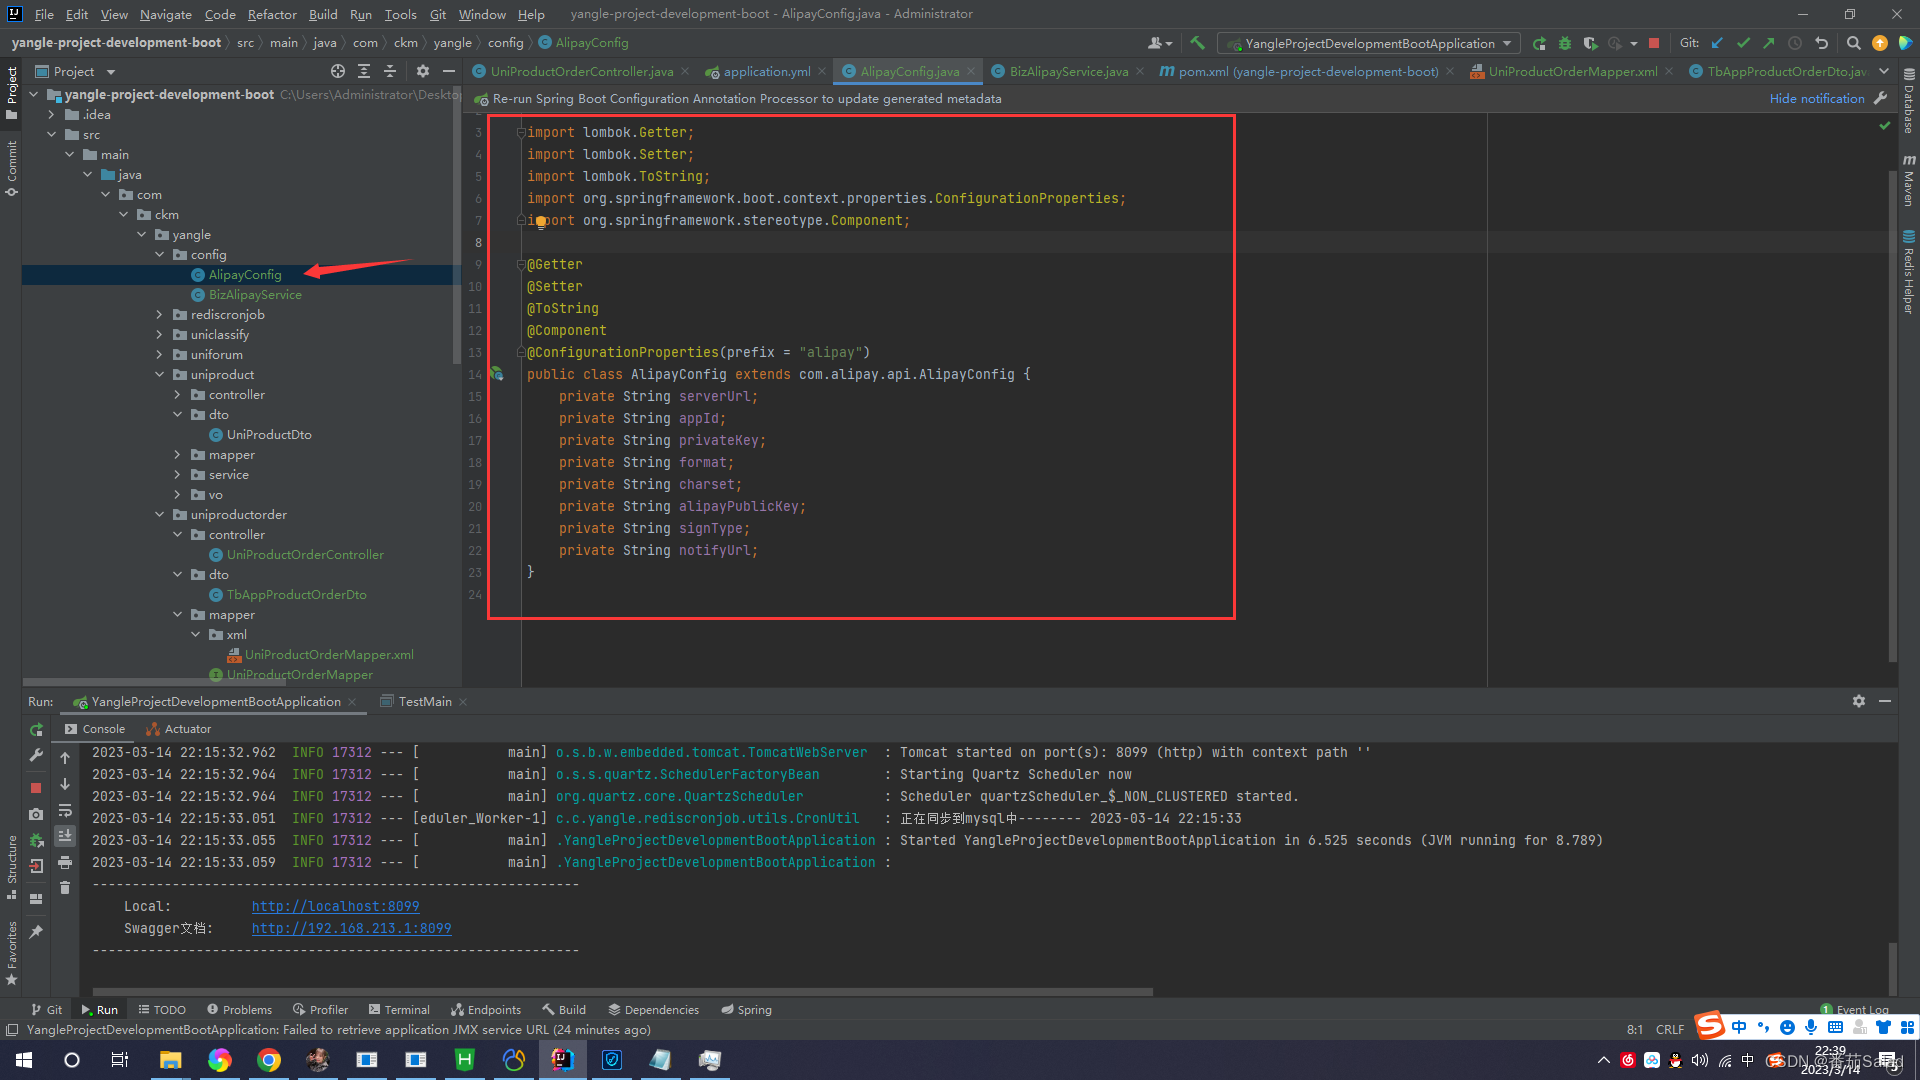
AlipayConfig类代码
import lombok.Getter;
import lombok.Setter;
import lombok.ToString;
import org.springframework.boot.context.properties.ConfigurationProperties;
import org.springframework.stereotype.Component;

@Getter
@Setter
@ToString
@Component
@ConfigurationProperties(prefix = "alipay")
public class AlipayConfig extends com.alipay.api.AlipayConfig {
    private String serverUrl;
    private String appId;
    private String privateKey;
    private String format;
    private String charset;
    private String alipayPublicKey;
    private String signType;
    private String notifyUrl;
}
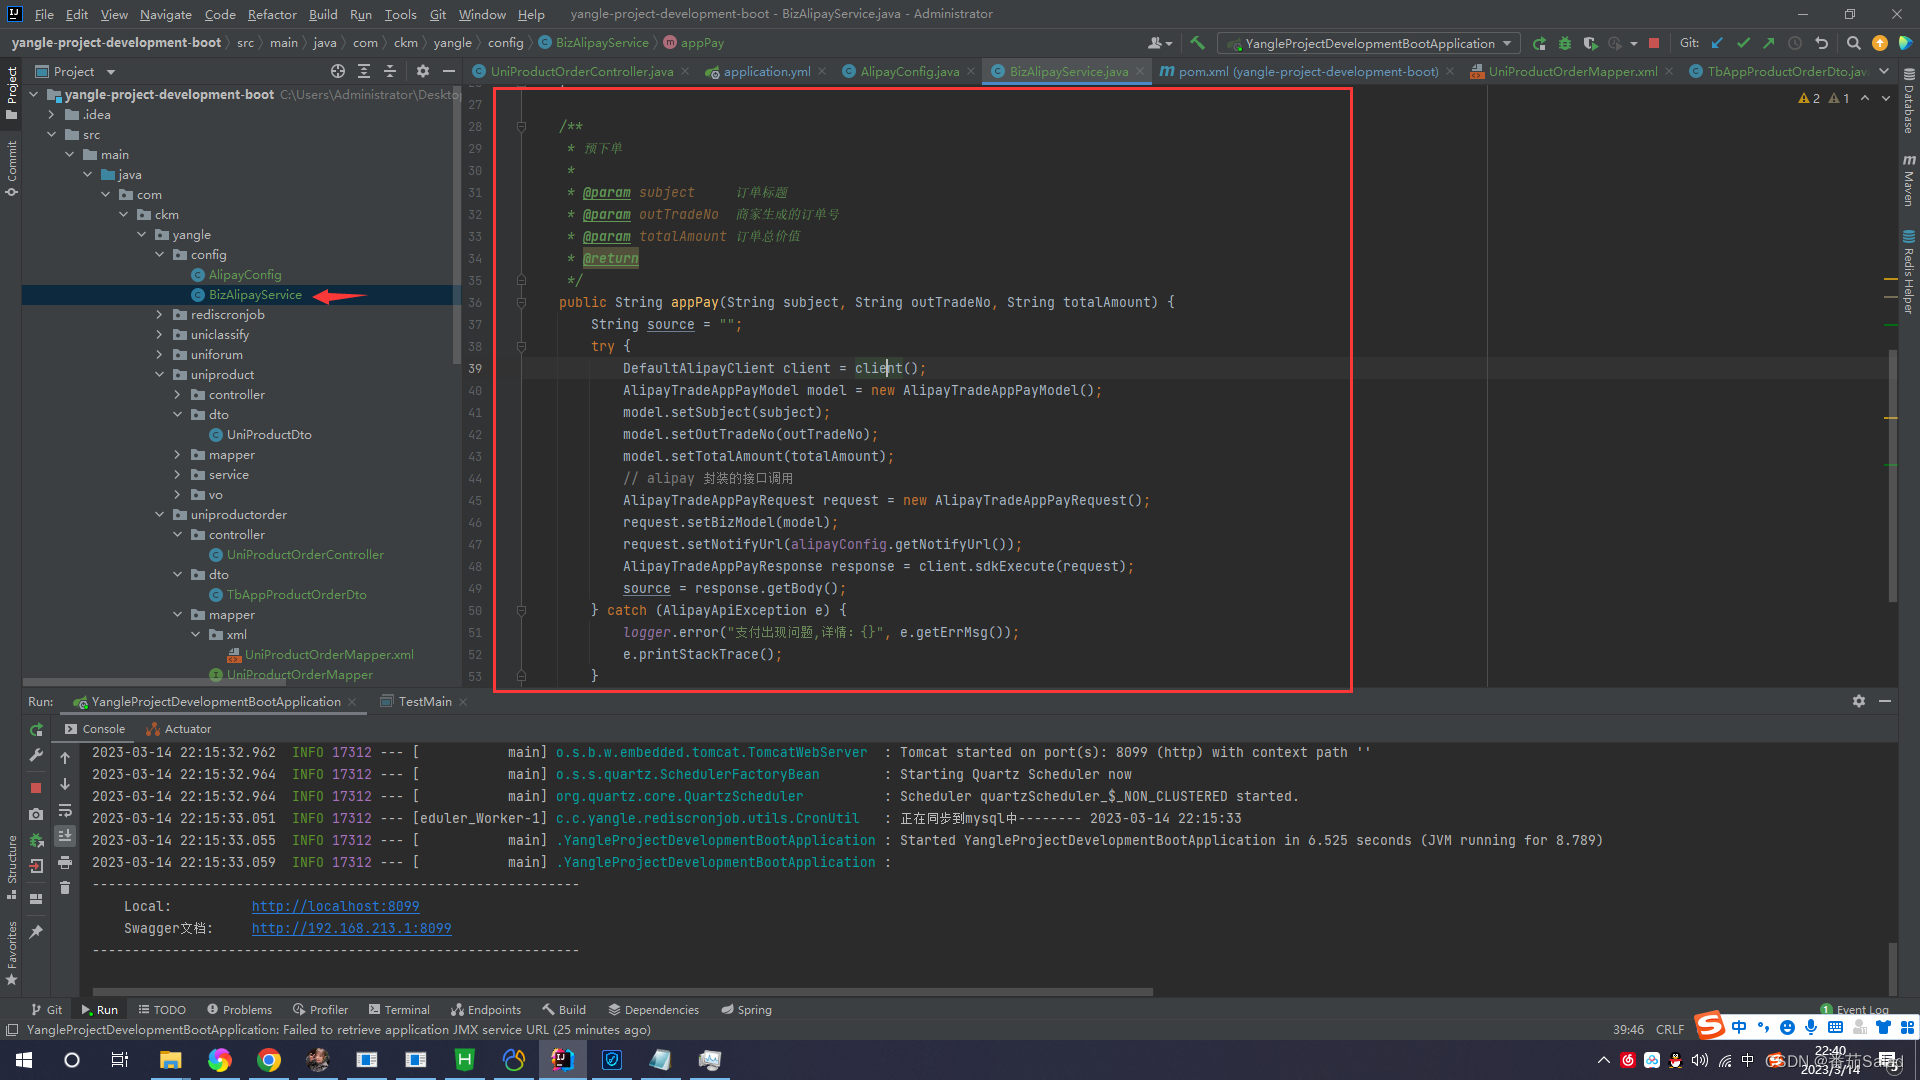
BizAlipayService类代码
import com.alipay.api.AlipayApiException;
import com.alipay.api.DefaultAlipayClient;
import com.alipay.api.domain.AlipayTradeAppPayModel;
import com.alipay.api.request.AlipayTradeAppPayRequest;
import com.alipay.api.response.AlipayTradeAppPayResponse;
import org.slf4j.Logger;
import org.slf4j.LoggerFactory;
import org.springframework.beans.factory.annotation.Autowired;
import org.springframework.stereotype.Service;

/**
 * 阿里云支付类
 */
@Service
public class BizAlipayService {

    private static Logger logger = LoggerFactory.getLogger(BizAlipayService.class);

    @Autowired
    AlipayConfig alipayConfig;

    private DefaultAlipayClient client() throws AlipayApiException {
        return new DefaultAlipayClient(alipayConfig);
    }

    /**
     * 预下单
     *
     * @param subject     订单标题
     * @param outTradeNo  商家生成的订单号
     * @param totalAmount 订单总价值
     * @return
     */
    public String appPay(String subject, String outTradeNo, String totalAmount) {
        String source = "";
        try {
            DefaultAlipayClient client = client();
            AlipayTradeAppPayModel model = new AlipayTradeAppPayModel();
            model.setSubject(subject);
            model.setOutTradeNo(outTradeNo);
            model.setTotalAmount(totalAmount);
            // alipay 封装的接口调用
            AlipayTradeAppPayRequest request = new AlipayTradeAppPayRequest();
            request.setBizModel(model);
            request.setNotifyUrl(alipayConfig.getNotifyUrl());
            AlipayTradeAppPayResponse response = client.sdkExecute(request);
            source = response.getBody();
        } catch (AlipayApiException e) {
            logger.error("支付出现问题,详情:{}", e.getErrMsg());
            e.printStackTrace();
        }
        return source;
    }
}
4、编写接口支付接口和回调接口

接口代码
@RestController
@CrossOrigin    // @CrossOrigin注解 解决uniapp跨域访问后端问题。
@RequestMapping("/productOrder")
public class UniProductOrderController {
    @Autowired
    private AlipayConfig alipayConfig;
    @Autowired
    private BizAlipayService alipayService;

    /**
     * 发起支付
     *
     * @return
     */
    @GetMapping("/pay")
    public Object pay() {
        System.out.println("正在测试支付宝支付···");
        String s = alipayService.appPay("测试支付", String.valueOf(System.currentTimeMillis()), new BigDecimal("0.01").toString());
        System.out.println(s);
        return s;
    }
    /**
     * 订单回调
     *
     * @return
     */
    @RequestMapping(method = RequestMethod.POST, value = "/notify")
    public String orderNotify(HttpServletRequest request) {
        Map<String, String> params = new HashMap<>();
        Map<String, String[]> requestParams = request.getParameterMap();
        for (String name : requestParams.keySet()) {
            String[] values = requestParams.get(name);
            String valueStr = "";
            for (int i = 0; i < values.length; i++) {
                valueStr = (i == values.length - 1) ? valueStr + values[i] : valueStr + values[i] + ",";
            }
            params.put(name, valueStr);
        }
        try {
            boolean flag = AlipaySignature.rsaCheckV1(params, alipayConfig.getAlipayPublicKey(), alipayConfig.getCharset(), alipayConfig.getSignType());
            if (flag) {
                System.out.println("支付回调信息:"+ params);
                return "success";
            } else {
                return "error";
            }
        } catch (AlipayApiException e) {
            System.out.println("支付宝错误回调:"+e.getErrMsg());
            e.printStackTrace();
            return "error";
        }
    }
}
三、UniApp前端代码
1、配置manifest.json的App模块开启支付

2、编写uni.request请求

代码
//发起支付
pay(){
	let that = this
	uni.request({
		url: getApp().globalData.myurl + "/productOrder/pay",
		data:{},
		method: 'GET',
		dataType: 'json',
		header: {
			'content-type': 'application/x-www-form-urlencoded'
		},
		success(res) {
			console.log(res);
			uni.requestPayment({
				provider: 'alipay',
				orderInfo: res.data,
				success(r) {
					uni.showToast({
						title:"支付成功",
						icon: "success"
					})
				},
				fail(e) {
					uni.showToast({
						title:"用户取消支付",
						icon: "error"
					})
				},
				complete: () => {
					console.log("payment结束")
				}
			})
		}
	})
},
四、支付功能展示
1、用户确认支付
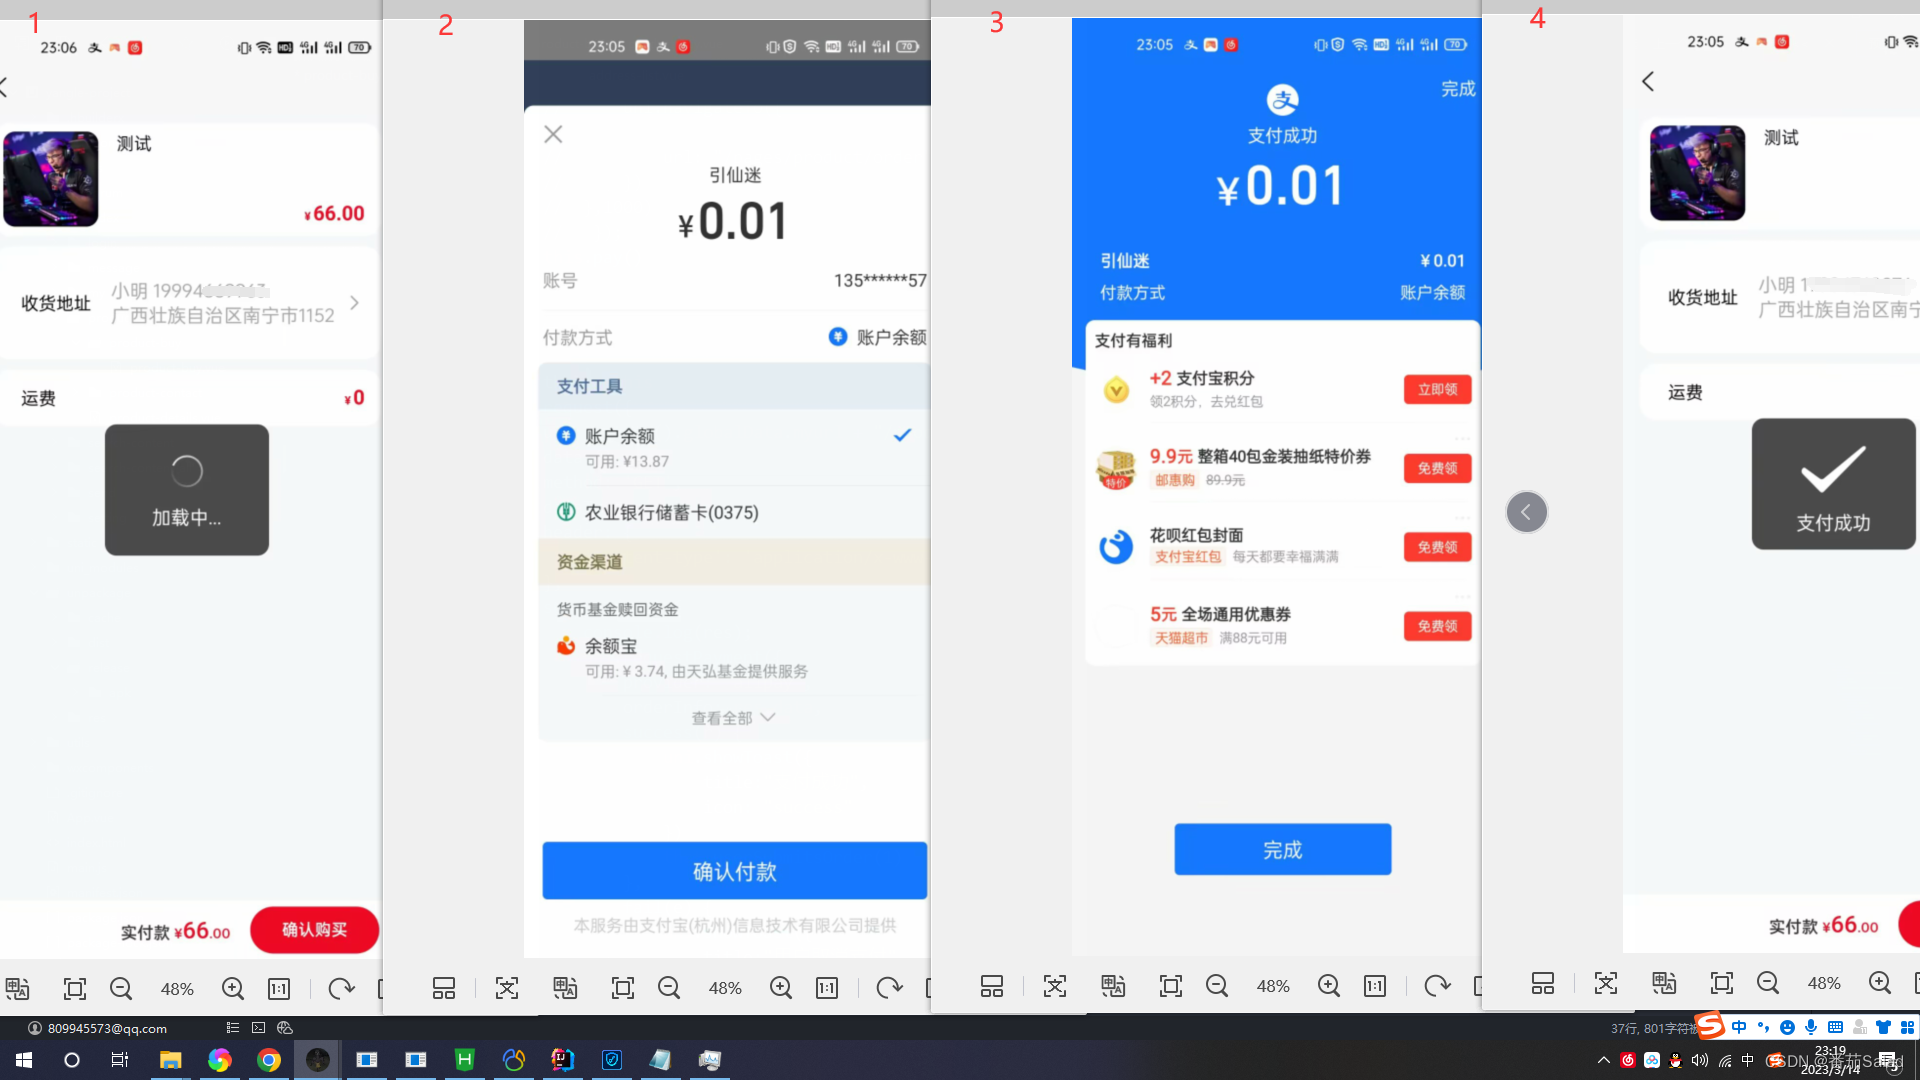
2、用户取消支付

五、退款功能
1、支付成功回调返回结果

返回结果:

返回结果里面的trade_no 一会退款需要用到这个!
2、在刚才的BizAlipayService.类中添加以下代码
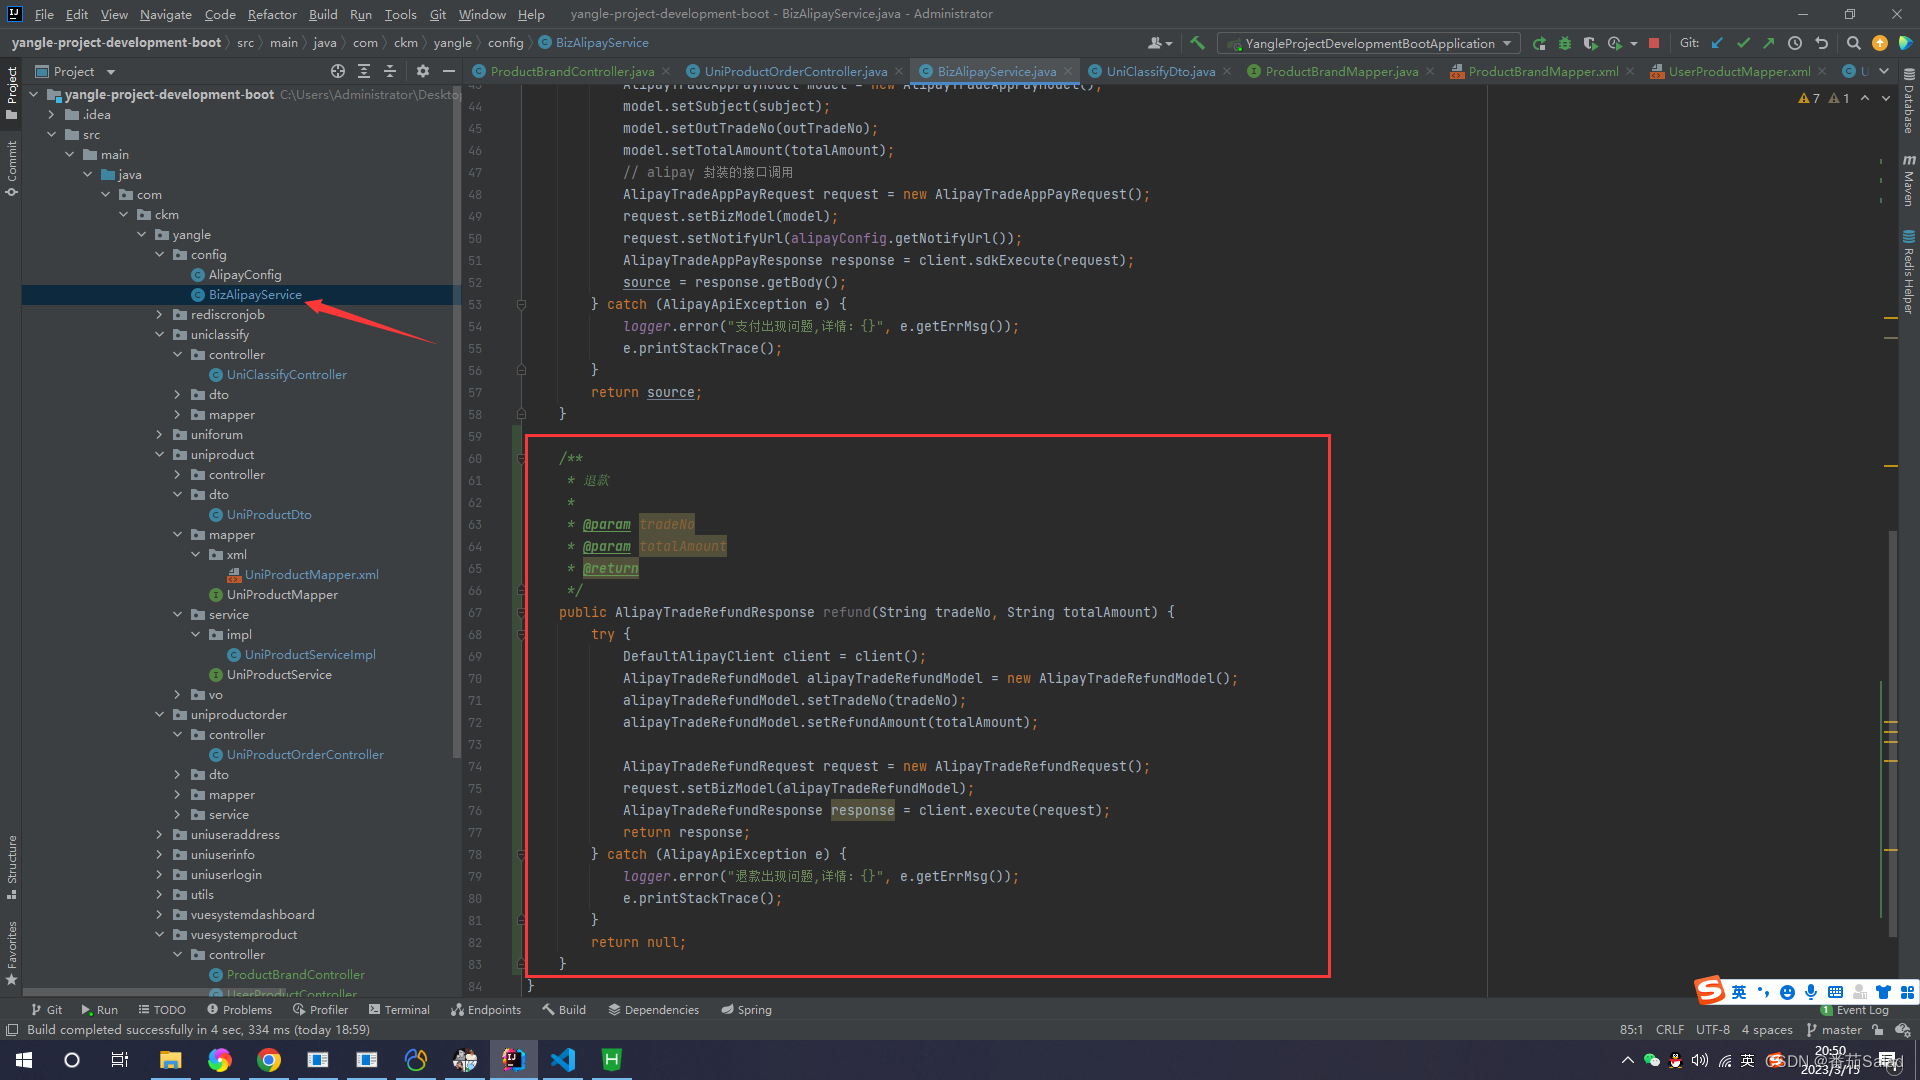
代码
/**
 * 退款
 *
 * @param tradeNo
 * @param totalAmount
 * @return
 */
public AlipayTradeRefundResponse refund(String tradeNo, String totalAmount) {
    try {
        DefaultAlipayClient client = client();
        AlipayTradeRefundModel alipayTradeRefundModel = new AlipayTradeRefundModel();
        alipayTradeRefundModel.setTradeNo(tradeNo);
        alipayTradeRefundModel.setRefundAmount(totalAmount);

        AlipayTradeRefundRequest request = new AlipayTradeRefundRequest();
        request.setBizModel(alipayTradeRefundModel);
        AlipayTradeRefundResponse response = client.execute(request);
        return response;
    } catch (AlipayApiException e) {
        logger.error("退款出现问题,详情:{}", e.getErrMsg());
        e.printStackTrace();
    }
    return null;
}
3、在接口中添加退款接口
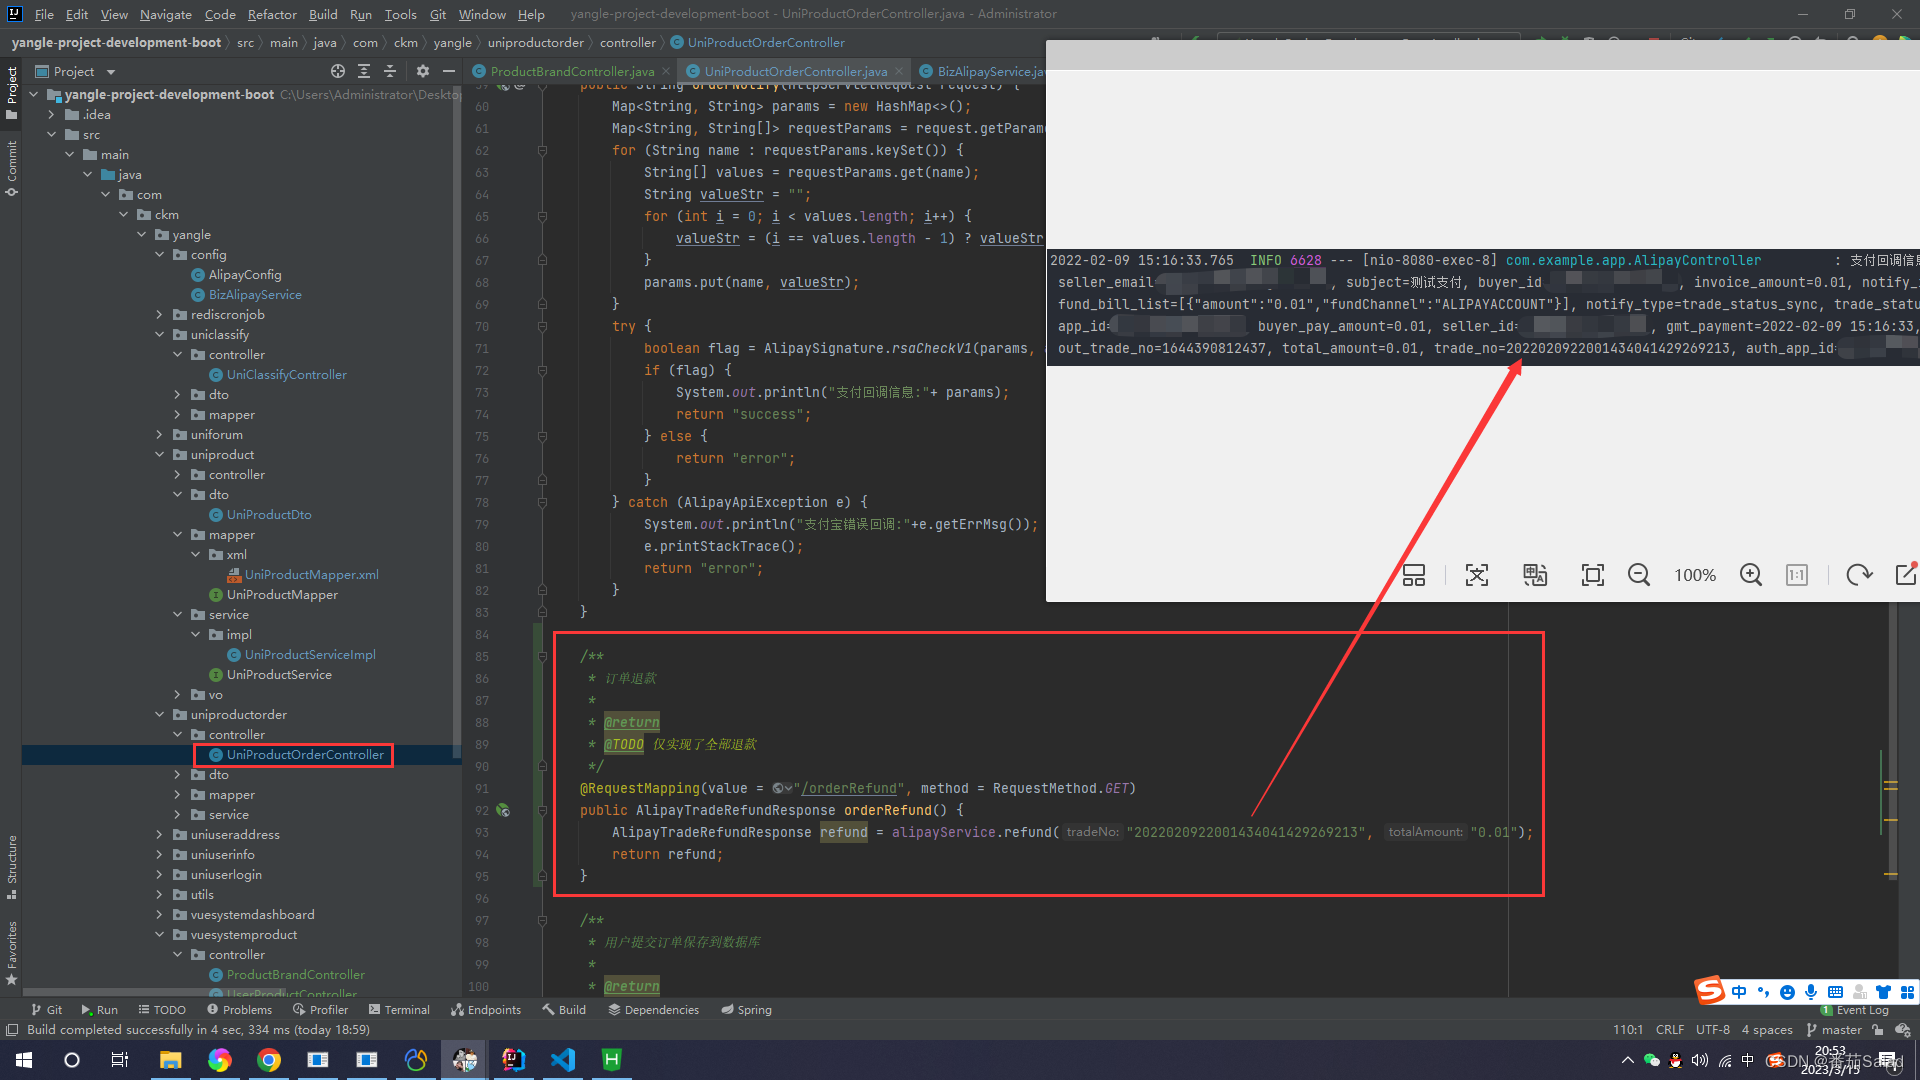
代码
/**
 * 订单退款
 *
 * @return
 * @TODO 仅实现了全部退款
 */
@RequestMapping(value = "/orderRefund", method = RequestMethod.GET)
public AlipayTradeRefundResponse orderRefund() {
    AlipayTradeRefundResponse refund = alipayService.refund("2022020922001434041429269213", "0.01");
    return refund;
}
六、支付成功后支付宝异步多次回调问题
- 当订单的状态发生改变后,支付宝通常会以异步的方式通知商家服务器。
- 商家服务器需要返回success这 7 个字符,如果不是,则支付宝则会不断重复通知商家服务器。
但是有时即使返回“success”,支付宝还是继续回发异步通知!!!
我们需要在本地加点验证来解决这个问题,根据当前订单编号去查他的状态,如果状态是0我们就去存储,如果状态是1了则不存!
本文仅供学习使用,本文参考博客园作者奔跑的砖头的文章感谢作者的详细说明以及代码 (*╯3╰) (*╯3╰) (*╯3╰)
