显示类控件
文章目录
- 1 QLabel
- 1.1 常用属性
- 1.2 例子1,设置文本 (textFormat)
- 1.3 例子2,设置widget背景图片 (pixmap和scaledContents)
- 1.4 例子3,设置对齐方式 (alignment)
- 1.5 例子4,设置自动换行,缩进和边距
- 1.5.1 设置换行 (wordWrap)
- 1.5.2 设置缩进 (indent)
- 1.5.3 设置边距 (margin)
- 1.6 例子5 设置伙伴 (buddy)
- 2. QLCDNumber
- 2.1 常用属性
- 2.2 例子1,倒计时
- 2.3 不用计时器?
- 3. QProgressBar
- 3.1 常用属性
- 3.2 例子1,漫无止境的进度条
- 4. QCalendarWidget
- 4.1 属性和信号
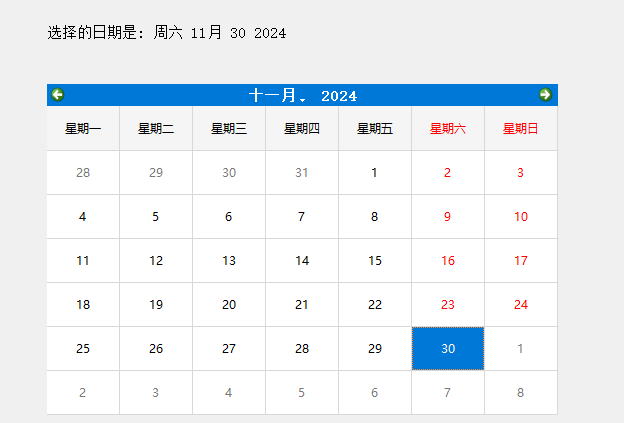
- 4.2 显示当前选中的的日期
1 QLabel
1.1 常用属性
| 属性 | 说明 |
|---|---|
| text | QLabel中的⽂本 |
| textFormat | ⽂本的格式. Qt::PlainText 纯⽂本 Qt::RichText 富⽂本(⽀持html标签) Qt::MarkdownText (markdown格式) Qt::AutoText 根据⽂本内容⾃动决定⽂本格式. |
| pixmap | QLabel 内部包含的图⽚. |
| scaledContents | 设为true表⽰内容⾃动拉伸填充 QLabel 设为false则不会⾃动拉伸 |
| alignment | 对⻬⽅式.可以设置⽔平和垂直⽅向如何对⻬. |
| wordWrap | 设为true内部的⽂本会⾃动换⾏.设为false则内部⽂本不会⾃动换⾏. |
| indent | 设置⽂本缩进.⽔平和垂直⽅向都⽣效. |
| margin | 内部⽂本和边框之间的边距.不同于于indent,但是是上下左右四个⽅向都同时有效.⽽indent最多只是两个⽅向有效(具体哪两个⽅向有效取决于alignment) |
| openExternalLinks | 是否允许打开⼀个外部的链接.(当QLabel⽂本内容包含url的时候涉及到) |
| buddy | 给QLabel关联⼀个"伙伴",这样点击QLabel时就能激活对应的伙伴.例如伙伴如果是⼀个QCheckBox,那么该QCheckBox就会被选中 |
1.2 例子1,设置文本 (textFormat)
现在widget.ui上放几个Qlabel
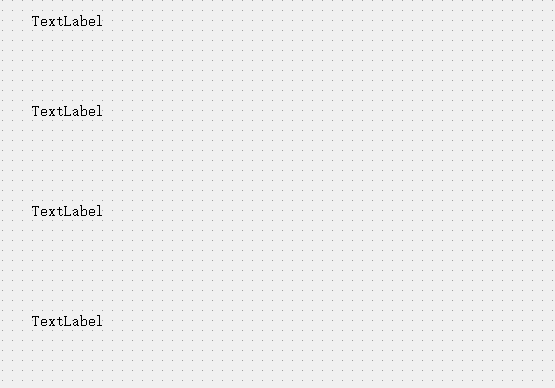
在构造函数使用void setTextFormat(Qt::TextFormat)和void setText(const QString &)
Widget::Widget(QWidget *parent)
    : QWidget(parent)
    , ui(new Ui::Widget)
{
    ui->setupUi(this);

    ui->label->setTextFormat(Qt::PlainText);
    ui->label_2->setTextFormat(Qt::RichText);
    ui->label_3->setTextFormat(Qt::MarkdownText);
    ui->label_4->setTextFormat(Qt::AutoText);

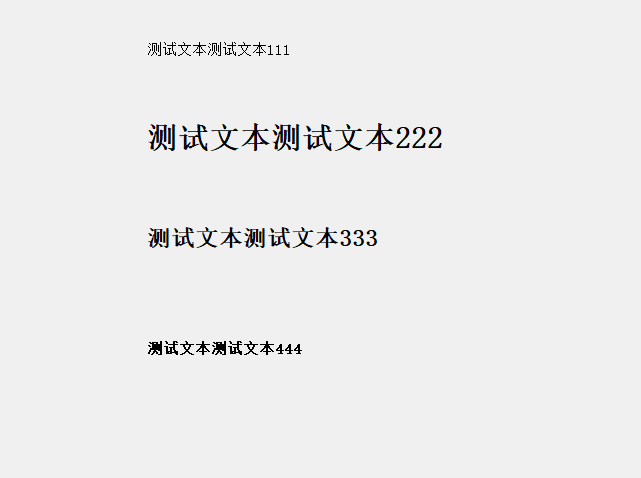
    ui->label->setText("测试文本测试文本111");
    ui->label_2->setText("<h1>测试文本测试文本222</h1>");
    ui->label_3->setText("## 测试文本测试文本333");
    ui->label_4->setText("<b>测试文本测试文本444</b>");
}
运行结果如下
1.3 例子2,设置widget背景图片 (pixmap和scaledContents)
创建resource.qrc,导入图片
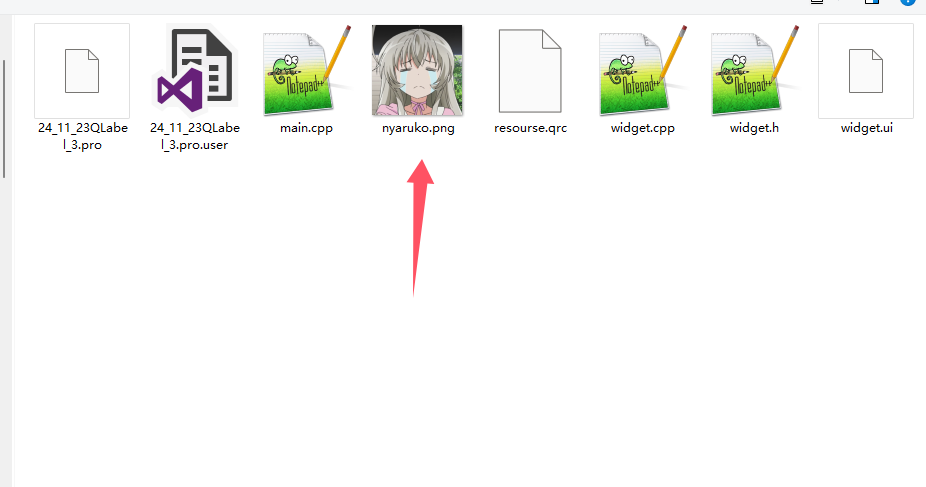
在widget.cpp的构造函数设置pixmap并设置图片的初始位置
Widget::Widget(QWidget *parent)
    : QWidget(parent)
    , ui(new Ui::Widget)
{
    ui->setupUi(this);
    // 创建lable和图片
    QLabel* label = new QLabel(this);
    QPixmap pic(":/nyaruko.png");

    // 设置label的图片和位置
    QRect pos = this->geometry();
    label->setPixmap(pic);
    label->setGeometry(0, 0, pos.width(), pos.height());
}
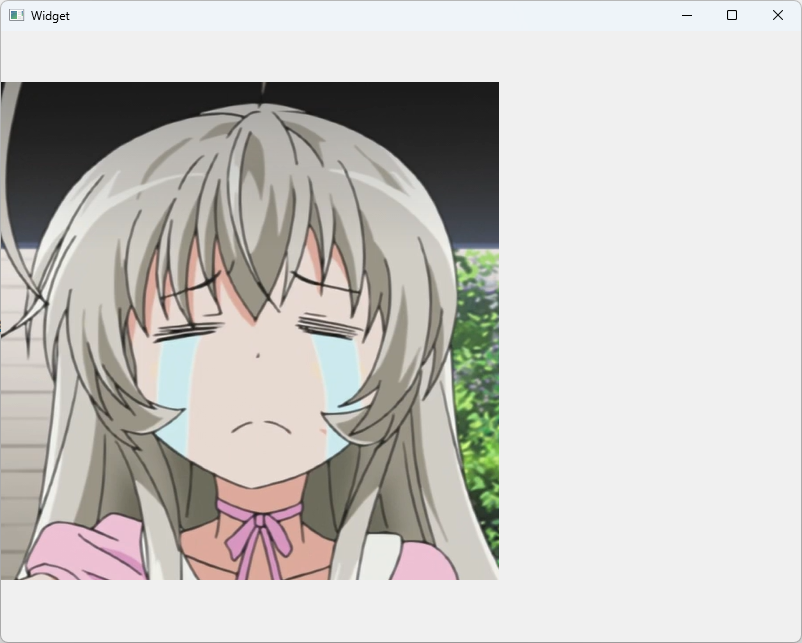
要想让图片铺满整个widget,可以使用void setScaledContents(bool)
label->setScaledContents(true);

此时如果调整窗口大小,图片不会跟着缩放,这是因为图片仅在构造函数那里初始化了一次。

如果想让图片跟着缩放,需要使用事件,在widget.cpp中重写resizeEvent函数
void Widget::resizeEvent(QResizeEvent *event)
{
    label->setGeometry(0, 0, event->size().width(), event->size().height());
}
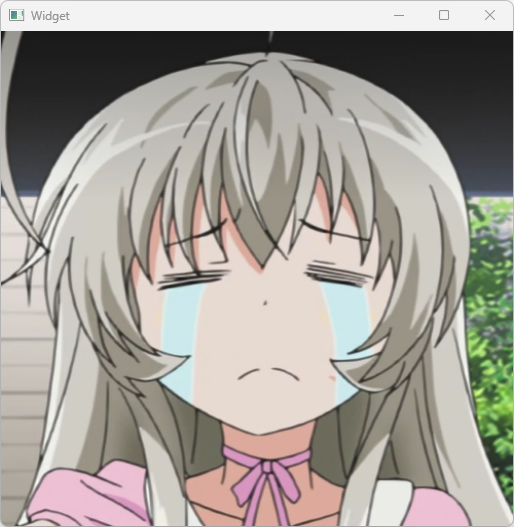
无论怎么拖动,都会填满整个widget
1.4 例子3,设置对齐方式 (alignment)
在widget.ui中拖入一个QLabel,设置frameShape为Box,更好观察
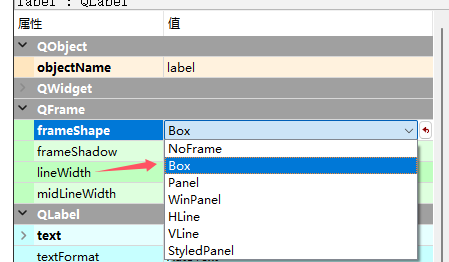

frameShape的可选项的介绍如下

在构造函数里使用void setAlignment(Qt::Alignment);方法
下面是Qt::Alignment的简单介绍(机翻)
enum Qt::AlignmentFlag
flags Qt::Alignment
这个枚举类型用于描述对齐方式。它包含水平和垂直标志,可以组合使用以产生所需的效果。TextElideMode枚举类型还可以在许多情况下用于微调对齐文本的外观。
水平标志如下:
| Constant | Value | Description |
|---|---|---|
| Qt::AlignLeft | 0x0001 | Aligns with the left edge. |
| Qt::AlignRight | 0x0002 | Aligns with the right edge. |
| Qt::AlignHCenter | 0x0004 | Centers horizontally in the available space. |
| Qt::AlignJustify | 0x0008 | Justifies the text in the available space. |
垂直标志如下:
| Constant | Value | Description |
|---|---|---|
| Qt::AlignTop | 0x0020 | Aligns with the top. |
| Qt::AlignBottom | 0x0040 | Aligns with the bottom. |
| Qt::AlignVCenter | 0x0080 | Centers vertically in the available space. |
| Qt::AlignBaseline | 0x0100 | Aligns with the baseline. |
一次只能使用一个水平标志。下面是二维标志:
| Constant | Value | Description |
|---|---|---|
| Qt::AlignCenter | AlignVCenter | AlignHCenter | Centers in both dimensions. |
一次最多只能使用一个水平和垂直标志。Qt::AlignCenter同时计算水平和垂直。
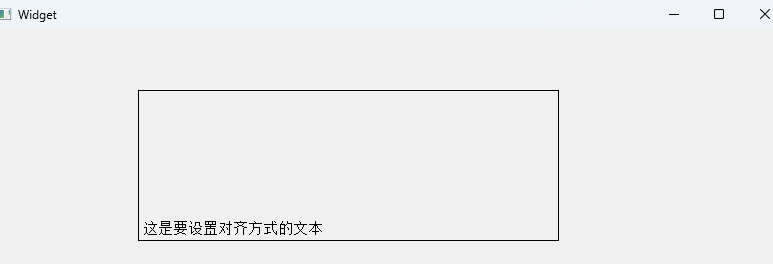
使用水平居中和垂直居中
Widget::Widget(QWidget *parent)
    : QWidget(parent)
    , ui(new Ui::Widget)
{
    ui->setupUi(this);
    ui->label->setText("这是要设置对齐方式的文本");
    ui->label->setAlignment(Qt::AlignCenter);
}
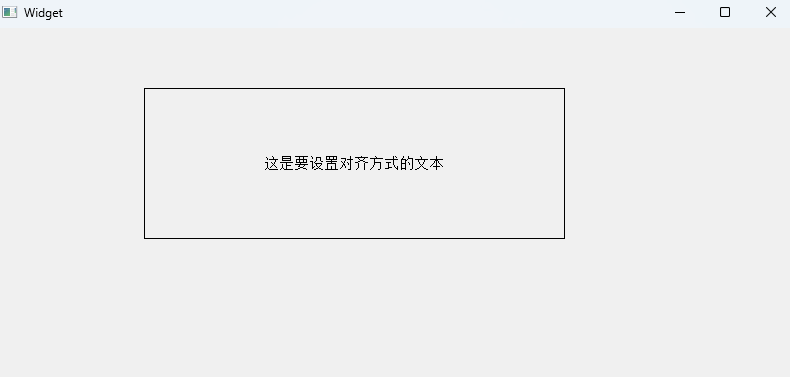
将文本放到左下角
ui->label->setAlignment(Qt::AlignLeft | Qt::AlignBottom);
1.5 例子4,设置自动换行,缩进和边距
1.5.1 设置换行 (wordWrap)
继续使用1.2中的widget.ui
设置自动换行setWordWrap(bool on)
Widget::Widget(QWidget *parent)
    : QWidget(parent)
    , ui(new Ui::Widget)
{
    ui->setupUi(this);
    ui->label->setText("这是要设置对齐方式的文本这是要设置对齐方式的文本这是要设置对齐方式的文本这是要设置对齐方式的文本这是要设置对齐方式的文本这是要设置对齐方式的文本这是要设置对齐方式的文本这是要设置对齐方式的文本");
    ui->label->setAlignment(Qt::AlignLeft | Qt::AlignTop);
    ui->label->setWordWrap(true);
}

1.5.2 设置缩进 (indent)
关于indent属性的介绍
indent : int
This property holds the label's text indent in pixels

If a label displays text, the indent applies to the left edge if alignment() is Qt::AlignLeft, to the right edge if alignment() is Qt::AlignRight, to the top edge if alignment() is Qt::AlignTop, and to the bottom edge if alignment() is Qt::AlignBottom.

If indent is negative, or if no indent has been set, the label computes the effective indent as follows: If frameWidth() is 0, the effective indent becomes 0. If frameWidth() is greater than 0, the effective indent becomes half the width of the "x" character of the widget's current font().

By default, the indent is -1, meaning that an effective indent is calculating in the manner described above.


缩进:整型
这个属性保存标签文本的缩进像素值。

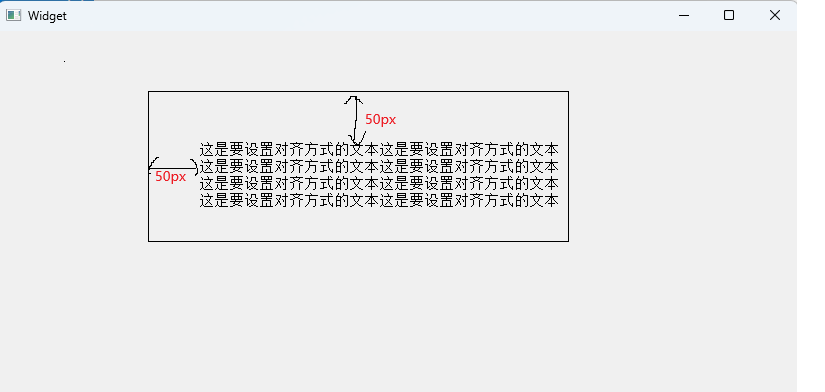
如果一个标签显示文本,如果对齐方式(alignment)是Qt::AlignLeft缩进适用于左边缘,如果对齐方式是Qt::AlignRight缩进适用于右边缘,如果对齐方式是Qt::AlignTop缩进适用于顶部边缘,如果对齐方式是Qt::AlignBottom搜进适用于底部边缘。

如果缩进是负数,或者没有设置缩进,标签会按照以下方式计算有效的缩进:如果frameWidth()为0,有效的缩进变为0。如果frameWidth()大于0,有效的缩进变为当前字体中“x”字符宽度的一半。

默认情况下,缩进是-1,这意味着有效的缩进是按照上述方式计算的。
设置缩进void setIndent(int),以像素为单位设置缩进
Widget::Widget(QWidget *parent)
    : QWidget(parent)
    , ui(new Ui::Widget)
{
    ui->setupUi(this);
    ui->label->setText("这是要设置对齐方式的文本这是要设置对齐方式的文本这是要设置对齐方式的文本这是要设置对齐方式的文本这是要设置对齐方式的文本这是要设置对齐方式的文本这是要设置对齐方式的文本这是要设置对齐方式的文本");
    ui->label->setAlignment(Qt::AlignLeft | Qt::AlignTop);
    ui->label->setWordWrap(true);
    ui->label->setIndent(50);
}
1.5.3 设置边距 (margin)
关于margin的介绍
margin : int
This property holds the width of the margin
The margin is the distance between the innermost pixel of the frame and the outermost pixel of contents.
The default margin is 0.

边距:整型
这个属性保存边距的宽度。
边距是指框架最内层像素与内容最外层像素之间的距离。
默认的边距是0。
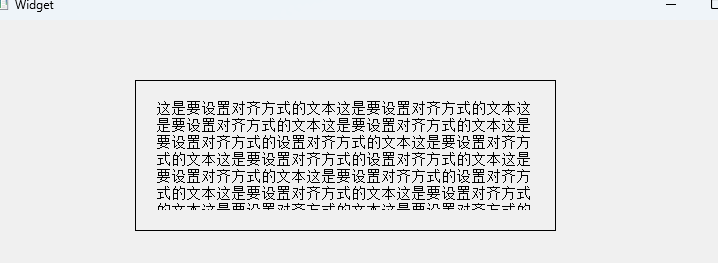
使用void setMargin(int)来设置
Widget::Widget(QWidget *parent)
    : QWidget(parent)
    , ui(new Ui::Widget)
{
    ui->setupUi(this);
    ui->label->setText("这是要设置对齐方式的文本这是要设置对齐方式的文本这是要设置对齐方式的文本这是要设置对齐方式的文本这是要设置对齐方式的设置对齐方式的文本这是要设置对齐方式的文本这是要设置对齐方式的设置对齐方式的文本这是要设置对齐方式的文本这是要设置对齐方式的设置对齐方式的文本这是要设置对齐方式的文本这是要设置对齐方式的文本这是要设置对齐方式的文本这是要设置对齐方式的文本这是要设置对齐方式的文本");
    ui->label->setAlignment(Qt::AlignLeft | Qt::AlignTop);
    ui->label->setWordWrap(true);
    // ui->label->setIndent(50);
    ui->label->setMargin(20);
}
四个方向都是20px,超出的地方不会显示
1.6 例子5 设置伙伴 (buddy)
在widget.ui中拖上两个QLabel和两个QRadioButton,Qlabel的内容要形如xxxxxx&[键盘上的按键]xxxxxxxx
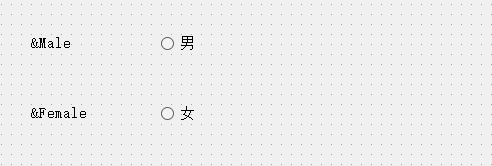

在widget.cpp的构造函数中使用void QLabel::setBuddy(QWidget *buddy)设置两个label的伙伴。
Widget::Widget(QWidget *parent)
    : QWidget(parent)
    , ui(new Ui::Widget)
{
    ui->setupUi(this);
    ui->label_male->setBuddy(ui->radioButton_male);
    ui->label_female->setBuddy(ui->radioButton_female);
}
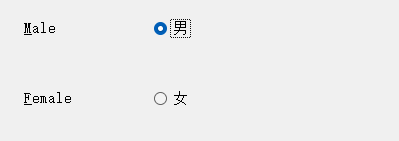
现在使用快捷键alt+m可以选中男,alt+f可选中女
2. QLCDNumber
2.1 常用属性
QLCDNumber用类似LCD的样式显示一个数字
下面是常用的属性
| 属性 | 说明 |
|---|---|
| intValue | QLCDNumber 显⽰的数字值(int). |
| value | QLCDNumber 显⽰的数字值(double). 和intValue是联动的. 例如给value设为1.5,intValue的值就是 设置value和intValue的⽅法名字为 display ,⽽不是 setValue 或者 setIntValue . |
| digitCount | 显⽰⼏位数字. |
| mode | 数字显⽰形式 1. QLCDNumber::Dec :⼗进制模式,显⽰常规的⼗进制数字。 2. QLCDNumber::Hex :⼗六进制模式,以⼗六进制格式显⽰数字。 3. QLCDNumber::Bin :⼆进制模式,以⼆进制格式显⽰数字。 4. QLCDNumber::Oct :⼋进制模式,以⼋进制格式显⽰数字 只有⼗进制的时候才能显⽰⼩数点后的内容. |
| segmentStyle | 设置显⽰⻛格. 1. QLCDNumber::Flat :平⾯的显⽰⻛格,数字呈现在⼀个平坦的表⾯上。 2. QLCDNumber::Outline :轮廓显⽰⻛格,数字具有清晰的轮廓和阴影效果。 3. QLCDNumber::Filled :填充显⽰⻛格,数字被填充颜⾊并与背景区分开 |
| smallDecimalPoint | 小数点的央视 |
2.2 例子1,倒计时
在widget.ui拖入一个LCDNumber
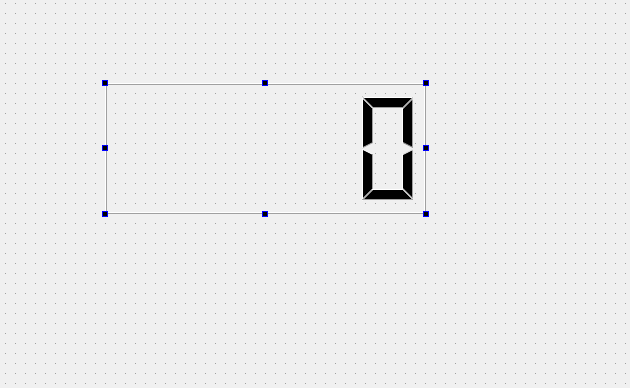
在设置初始值,设置计时器,连接槽函数
Widget::Widget(QWidget *parent)
    : QWidget(parent)
    , ui(new Ui::Widget)
{
    ui->setupUi(this);
    ui->lcdNumber->display(10);
    _timer = new QTimer(this);
    // 把QTimer的timeout信号连接到一个槽函数
    connect(_timer, &QTimer::timeout, this, &Widget::timeHandler);
    _timer->start(1000);        // 1000ms发送一次信号
}

Widget::~Widget()
{
    delete ui;
}

void Widget::timeHandler()
{
    int val = ui->lcdNumber->value();
    if(val <= 0) {
        // 当时间<=0时,停止计时
        _timer->stop();
    } else {
        // 继续计时
        ui->lcdNumber->display(val-1);
    }
}
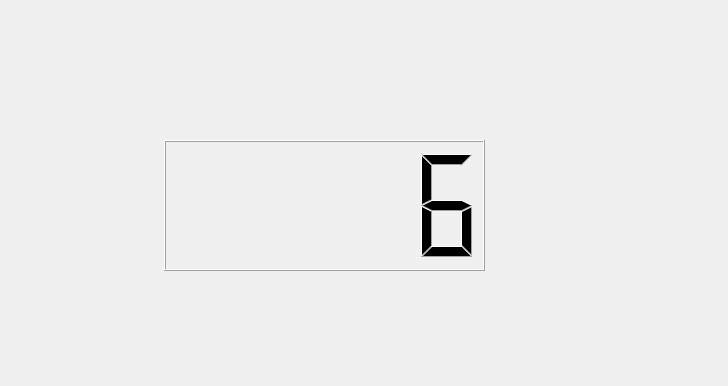
2.3 不用计时器?
如果不使用计时器,是否可以用循环+sleep的方式呢?
在构造函数写如下内容
Widget::Widget(QWidget *parent)
    : QWidget(parent)
    , ui(new Ui::Widget)
{
    ui->setupUi(this);
    ui->lcdNumber->display(10);
    int val = ui->lcdNumber->value();
    for (;;) {
        if(val <= 0) {
            // 当时间<=0时,跳出循环
            break;
        } else {
            // 更新时间
            ui->lcdNumber->display(--val);
        }
        std::this_thread::sleep_for(std::chrono::seconds(1));
    }
}
运行后发现程序并没有立刻显示出窗口,而是等了10s后,才显示出widget
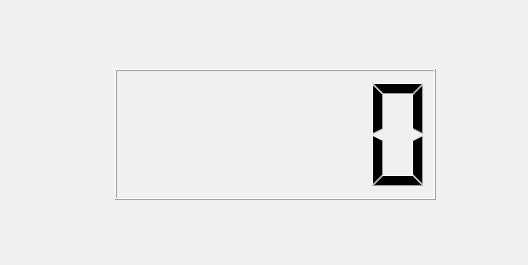
这是因为在main.cpp里,要等w构造结束后才能show()
int main(int argc, char *argv[])
{
    QApplication a(argc, argv);
    Widget w;
    w.show();
    return a.exec();
}
如果创建一个线程呢?继续修改widget.cpp
Widget::Widget(QWidget *parent)
    : QWidget(parent)
    , ui(new Ui::Widget)
{
    ui->setupUi(this);
    ui->lcdNumber->display(10);
    std::thread t([this](){
        int val = ui->lcdNumber->value();
        for (;;) {
            if(val <= 0) {
                // 当时间<=0时,跳出循环
                break;
            } else {
                // 更新时间
                ui->lcdNumber->display(--val);
            }
            std::this_thread::sleep_for(std::chrono::seconds(1));
        }
    });
}
编译没有问题,运行后会报错

这是因为 **Qt中规定,任何对于GUI上内容的操作,必须在主线程中完成。**像Widget构造函数,以及connect连接的slot函数,都是在主线程中调⽤的.⽽我们⾃⼰创建的线程则不是.当我们⾃⼰的线程中尝试对界⾯元素进⾏修改时, Qt程序往往会直接崩溃.
综上所述,使⽤定时器,是实现上述功能的最合理⽅案
3. QProgressBar
3.1 常用属性
| 属性 | 说明 |
|---|---|
| minimum | 进度条最⼩值 |
| maximum | 进度条最⼤值 |
| value | 进度条当前值 |
| alignment | ⽂本在进度条中的对⻬⽅式. Qt::AlignLeft :左对⻬ Qt::AlignRight :右对⻬ Qt::AlignCenter :居中对⻬ Qt::AlignJustify :两端对⻬ |
| textVisible | 进度条的数字是否可⻅. |
| orientation | 进度条的⽅向是⽔平还是垂直 |
| invertAppearance | 是否是朝反⽅向增⻓进度 |
| textDirection | ⽂本的朝向. |
| format | 展⽰的数字格式. %p :表⽰进度的百分⽐(0-100) %v :表⽰进度的数值(0-100) %m :表⽰剩余时间(以毫秒为单位) %t :表⽰总时间(以毫秒为单位) |
3.2 例子1,漫无止境的进度条
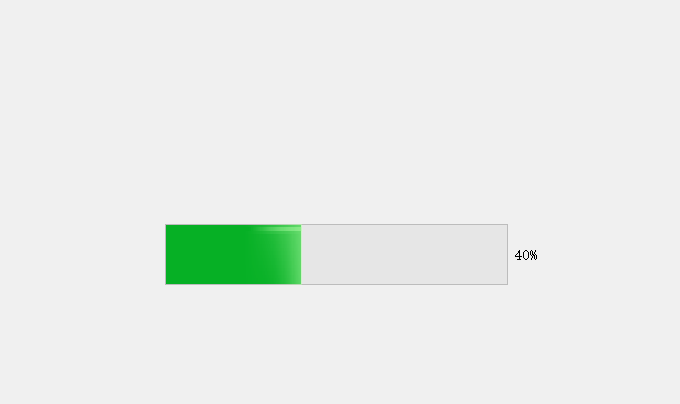
一个一直重复加载的进度条
在widet.ui中导入一个QProgessBar,widget.h内容如下
#ifndef WIDGET_H
#define WIDGET_H

#include <QWidget>
#include <QTimer>

QT_BEGIN_NAMESPACE
namespace Ui { class Widget; }
QT_END_NAMESPACE

class Widget : public QWidget
{
    Q_OBJECT

public:
    Widget(QWidget *parent = nullptr);
    ~Widget();
    void timerHandler();

private:
    Ui::Widget *ui;
    QTimer* timer;
};
#endif // WIDGET_H
widget.cpp内容如下
#include "widget.h"
#include "ui_widget.h"

Widget::Widget(QWidget *parent)
    : QWidget(parent)
    , ui(new Ui::Widget)
{
    ui->setupUi(this);
    // 初始化
    ui->progressBar->setValue(0);
    timer = new QTimer(this);
    // 信号槽
    connect(timer, &QTimer::timeout, this, &Widget::timerHandler);
    // 每100ms发送一次信号
    timer->start(100);
}

Widget::~Widget()
{
    delete ui;
}

void Widget::timerHandler()
{
    int val = ui->progressBar->value();
    if(val >= 100) {
        // 重新设置value
        ui->progressBar->setValue(0);
    } else {
        // 每次让val+5
        ui->progressBar->setValue(val+5);
    }
}
运行结果如下
问题:若将widget.h中的include <QTimer>移动到widget.cpp中,代码仍能正常运行。正常来说应该是找不到QTimer的,这是为什么呢?
解答:这是因为Qt设计了一个专门的头文件,该头文件包含了Qt所有类的“前置声明”。当我们包含其它的Qt文件的时候,都会间接的包含该头文件
形如
...;
class QTimer;
class QLbel;
class QLCDNumber;
...
这样即使widget.h中没有包含QTimer,但是包含了QWidget,该类间接包含了有前置声明的头文件,改头文件展开后,widget.h就能通过编译了。
这样设计的目的是为了减少include头文件的数量,进而加快编译代码的速度。
4. QCalendarWidget
4.1 属性和信号
| 属性 | 说明 |
|---|---|
| selectDate | 当前选中的⽇期 |
| minimumDate | 最⼩⽇期 |
| maximumDate | 最⼤⽇期 |
| firstDayOfWeek | 每周的第⼀天(也就是⽇历的第⼀列)是周⼏. |
| gridVisible | 是否显⽰表格的边框 |
| selectionMode | 是否允许选择⽇期 |
| navigationBarVisible | ⽇历上⽅标题是否显⽰ |
| horizontalHeaderFormat | ⽇历上⽅标题显⽰的⽇期格式 |
| verticalHeaderFormat | ⽇历第⼀列显⽰的内容格式 |
| dateEditEnabled | 是否允许⽇期被编辑 |
| 信号 | 说明 |
|---|---|
| selectionChanged() | 当选中的⽇期发⽣改变时发出 |
| activated(constQDate&) | 当双击⼀个有效的⽇期或者按下回⻋键时发出,形参是⼀个QDate类型,保存了选中的⽇期 |
| currentPageChanged(int, int) | 当年份⽉份改变时发出,形参表⽰改变后的新年份和⽉份 |
4.2 显示当前选中的的日期
在widet.ui中放置一个ClendarWidget和一个Label
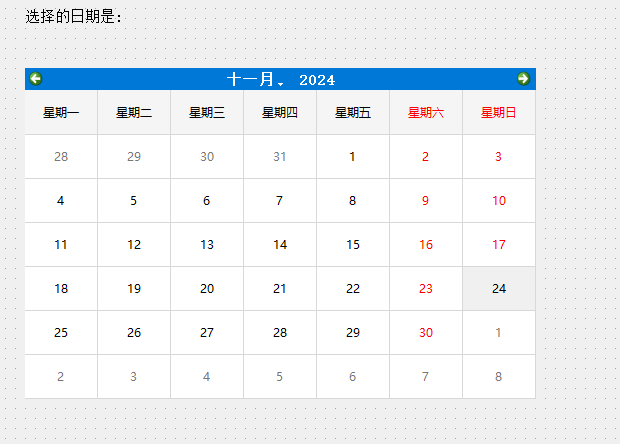
给日历的selectionChanged()信号添加槽函数,改变Lable的内容
void Widget::on_calendarWidget_selectionChanged()
{
    // 获取当前选择的日期
    QDate date = ui->calendarWidget->selectedDate();
    // 更改QLabel
    ui->label->setText("选择的日期是: " + date.toString());
}
