挑战用React封装100个组件【004】
项目地址
https://github.com/hismeyy/react-component-100
组件描述
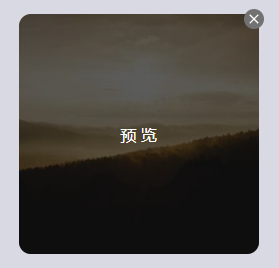
组件适用于展示图片的地方,提供了small,medium,large三种大小。可以删除图片,也可以全屏预览图片。
样式展示
前置依赖
今天我们的这个挑战需要用用到了 react-icons 依赖,因此,我们需要先安装它。
# 使用 npm
npm install react-icons

# 或者使用 yarn
yarn add react-icons
使用的话,大家可以看这个网站。大家进去可以找需要的图标。具体使用里面有介绍,非常简单。
react-icons 图标
好了,下面我们展示代码。
代码展示
Img.tsx
import { useState } from 'react'
import './Img.css'
import { MdClose } from 'react-icons/md';

interface ImgProps {
    src: string;
    alt: string;
    size?: 'small' | 'medium' | 'large';
    onClose?: () => void;
}

const Img = ({ src, alt, size = 'small', onClose }: ImgProps) => {
    const [showPreview, setShowPreview] = useState(false);
    const [visible, setVisible] = useState(true);

    const handleClose = () => {
        setVisible(false);
        if (onClose) {
            onClose();
        }
    };

    if (!visible) return null;

    return (
        <div className={`img-container img-${size}`}>
            <button className={`img-close img-close-${size}`} onClick={handleClose}><MdClose /></button>
            <div className={`img img-${size}`} onClick={() => setShowPreview(true)}>
                <img src={src} alt={alt} />
            </div>

            {showPreview && (
                <div className="img-preview-overlay" onClick={() => setShowPreview(false)}>
                    <div className="img-preview-content">
                        <img src={src} alt={alt} />
                    </div>
                </div>
            )}
        </div>
    )
}

export default Img
Img.css
.img-container {
    position: relative;
}

.img {
    overflow: hidden;
    display: flex;
    align-items: center;
    justify-content: center;
    cursor: pointer;
    border-radius: 5%;
}

.img-small {
    width: 80px;
    height: 80px;
    font-size: 10px;
}

.img-medium {
    width: 160px;
    height: 160px;
    font-size: 14px;
}

.img-large {
    width: 240px;
    height: 240px;
    font-size: 16px;
}

.img img {
    width: 100%;
    height: 100%;
    object-fit: cover;
    object-position: center;
}

.img::after {
    content: "预 览";
    display: flex;
    align-items: center;
    justify-content: center;
    color: #fff;
    position: absolute;
    top: 0;
    left: 0;
    width: 100%;
    height: 100%;
    background-color: rgba(0, 0, 0, 0.6);
    opacity: 0;
    border-radius: 5%;
    transition: opacity 0.3s ease;
}

.img:hover::after {
    opacity: 1;
}

.img-preview-overlay {
    position: fixed;
    top: 0;
    left: 0;
    width: 100vw;
    height: 100vh;
    background-color: rgba(0, 0, 0, 0.9);
    display: flex;
    align-items: center;
    justify-content: center;
    z-index: 1000;
    animation: fadeIn 0.3s ease;
}

.img-preview-content {
    max-width: 90%;
    max-height: 90vh;
    position: relative;
}

.img-preview-content img {
    max-width: 100%;
    max-height: 90vh;
    object-fit: contain;
}

@keyframes fadeIn {
    from {
        opacity: 0;
    }

    to {
        opacity: 1;
    }
}


.img-close {
    all: unset;
    background-color: rgb(114, 114, 114);
    border-radius: 50%;
    color: #fff;
    font-size: 20px;
    cursor: pointer;
    display: flex;
    align-items: center;
    justify-content: center;
    font-weight: bold;
    position: absolute;
    transition: all 0.3s ease;
    z-index: 5;
}

.img-close:hover {
    background-color: rgb(82, 82, 82);
    transform: scale(1.1);
}

.img-close-small {
    width: 10px;
    height: 10px;
    top: -2px;
    right: -2px;
    font-size: 10px;
}

.img-close-medium {
    width: 15px;
    height: 15px;
    top: -3px;
    right: -3px;
    font-size: 15px;
}

.img-close-large {
    width: 20px;
    height: 20px;
    top: -5px;
    right: -5px;
    font-size: 16px;
}
使用
App.tsx
import './App.css'
import Img from './components/img/img01/Img'

function App() {
  const handleImageClose = () => {
    console.log('图片被关闭了');
  };

  return (
    <>
      <Img
        src="https://picsum.photos/500/500"
        alt="Random image"
        size="large"
        onClose={handleImageClose}
      />
    </>
  );
}

export default App


