opencv图片的纠正透视转换函数的应用,水印的添加,轮廓的绘制
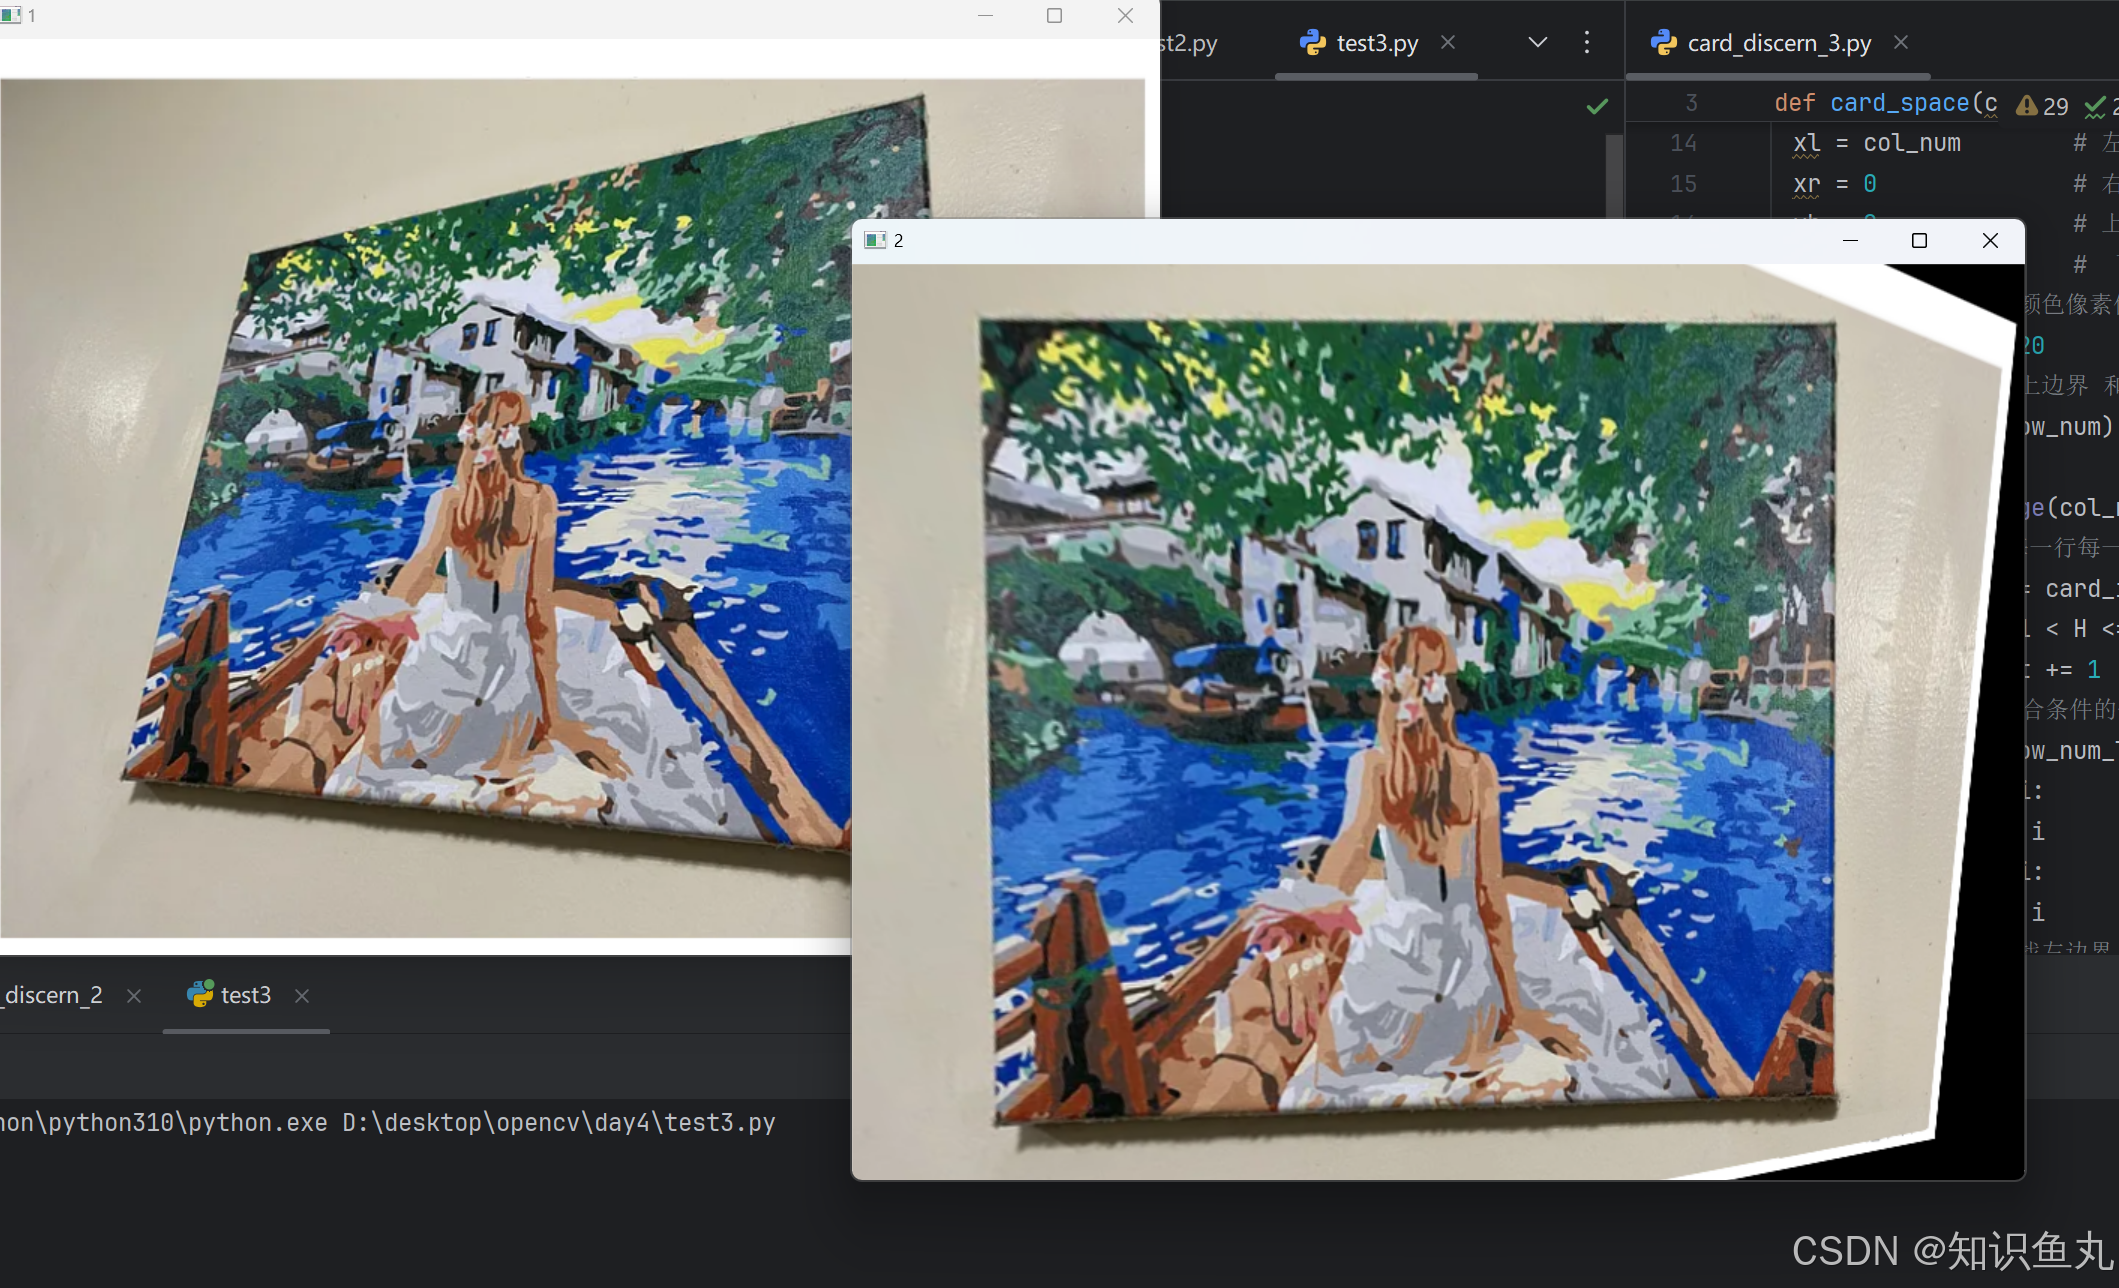
一、透视转换函数实现图片的纠正
代码如下:
import cv2
import numpy as np


img = cv2.imread('./picture.png')

p1=np.array([[175,142],[621,34],[85,484],[653,564]],dtype=np.float32)
p2=np.array([[min(p1[:,0]),min(p1[:,1])],
             [max(p1[:,0]),min(p1[:,1])],
             [min(p1[:,0]),max(p1[:,1])],
             [max(p1[:,0]),max(p1[:,1])]],dtype=np.float32)

M = cv2.getPerspectiveTransform(p1,p2)

img_Perspective=cv2.warpPerspective(img,M,(img.shape[1],img.shape[0]))

cv2.imshow('1',img)
cv2.imshow('2',img_Perspective)
cv2.waitKey(0)
p1,p2分别是四个源坐标点和目标坐标点
效果图象如下:
二、水印添加
原理:对logo图像进行掩膜制作之后与背景图与运算,之后再与logo使用add函数
import cv2

logo = cv2.imread('./girl.png')
logo2 = cv2.imread('./girl2.png')
img = cv2.imread('./background.png')

logo_gray = cv2.cvtColor(logo,cv2.COLOR_BGR2GRAY)
logo_gray2 = cv2.cvtColor(logo2,cv2.COLOR_BGR2GRAY)

_,logo_binary=cv2.threshold(logo_gray,3,255,cv2.THRESH_BINARY_INV)
_,logo_binary2=cv2.threshold(logo_gray2,1,255,cv2.THRESH_BINARY_INV)

ROI=img[100:100+logo.shape[0],100:100+logo.shape[1]]
ROI2=img[80:80+logo2.shape[0],500:500+logo2.shape[1]]

ROI_logo=cv2.bitwise_and(ROI,ROI,mask=logo_binary)
ROI_logo2=cv2.bitwise_and(ROI2,ROI2,mask=logo_binary2)

img_logo=cv2.add(ROI_logo,logo)
img_logo2=cv2.add(ROI_logo2,logo2)

img[100:100+logo.shape[0],100:100+logo.shape[1]]=img_logo
img[80:80+logo2.shape[0],500:500+logo2.shape[1]]= img_logo2

cv2.imshow('1',logo_binary)
cv2.imshow('2',ROI_logo)
cv2.imshow('3',img_logo)
cv2.imshow('4',img)
cv2.waitKey(0) 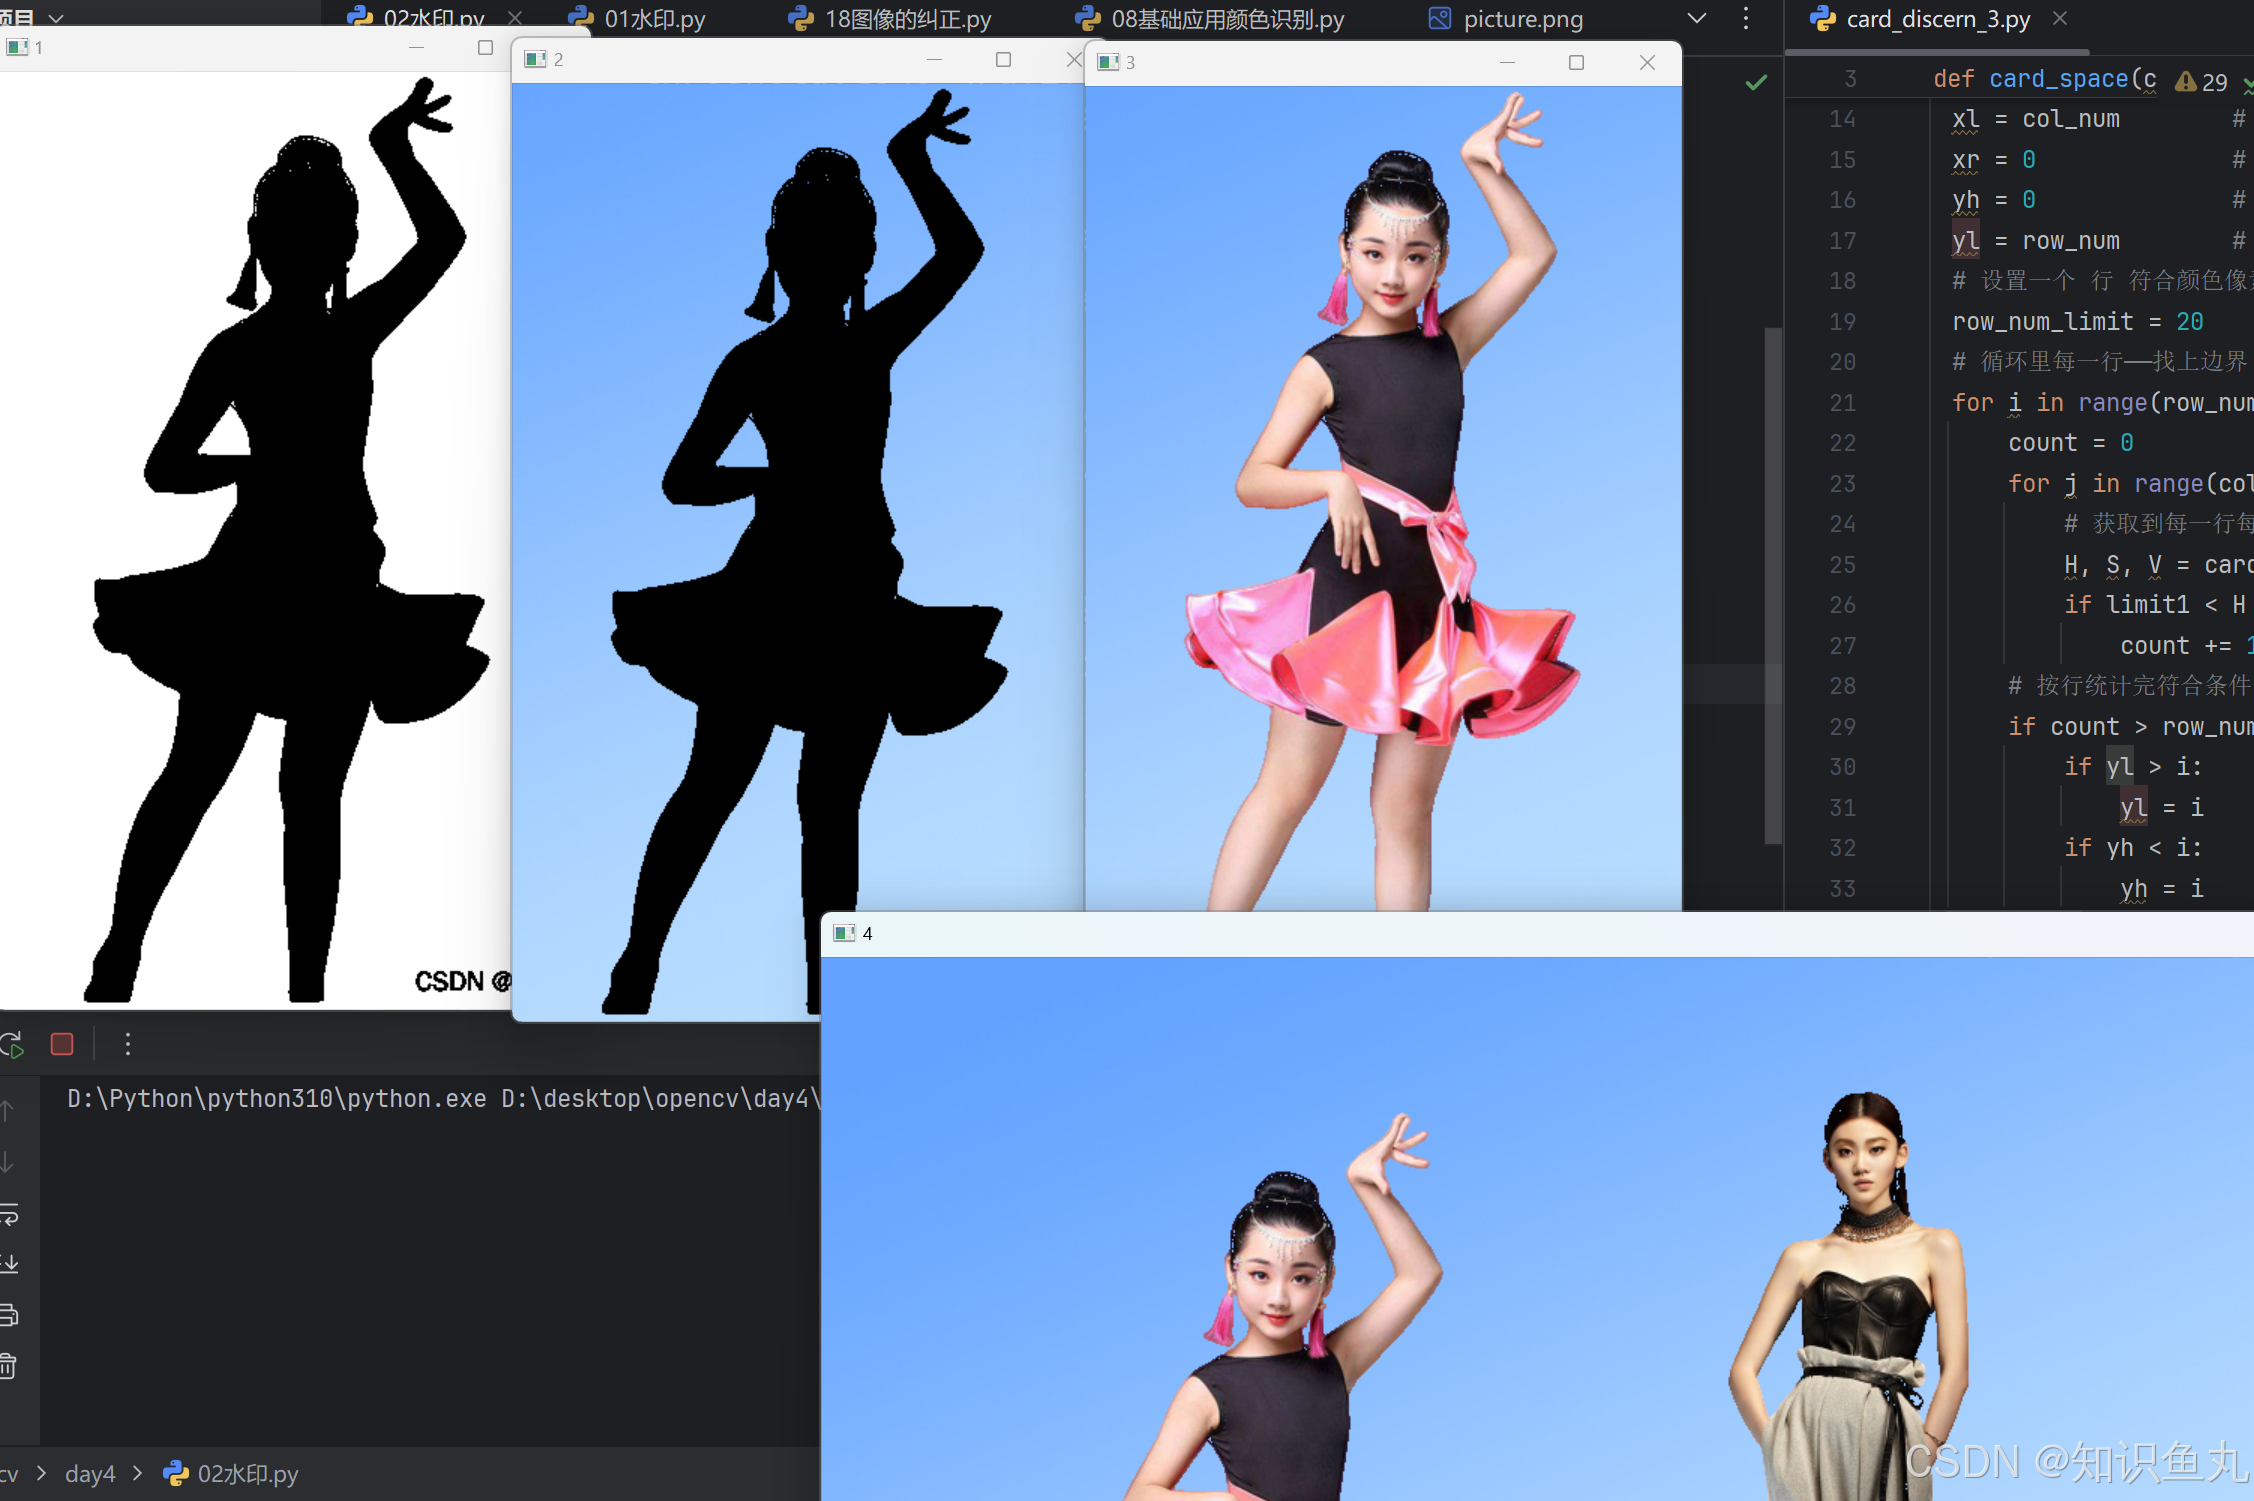
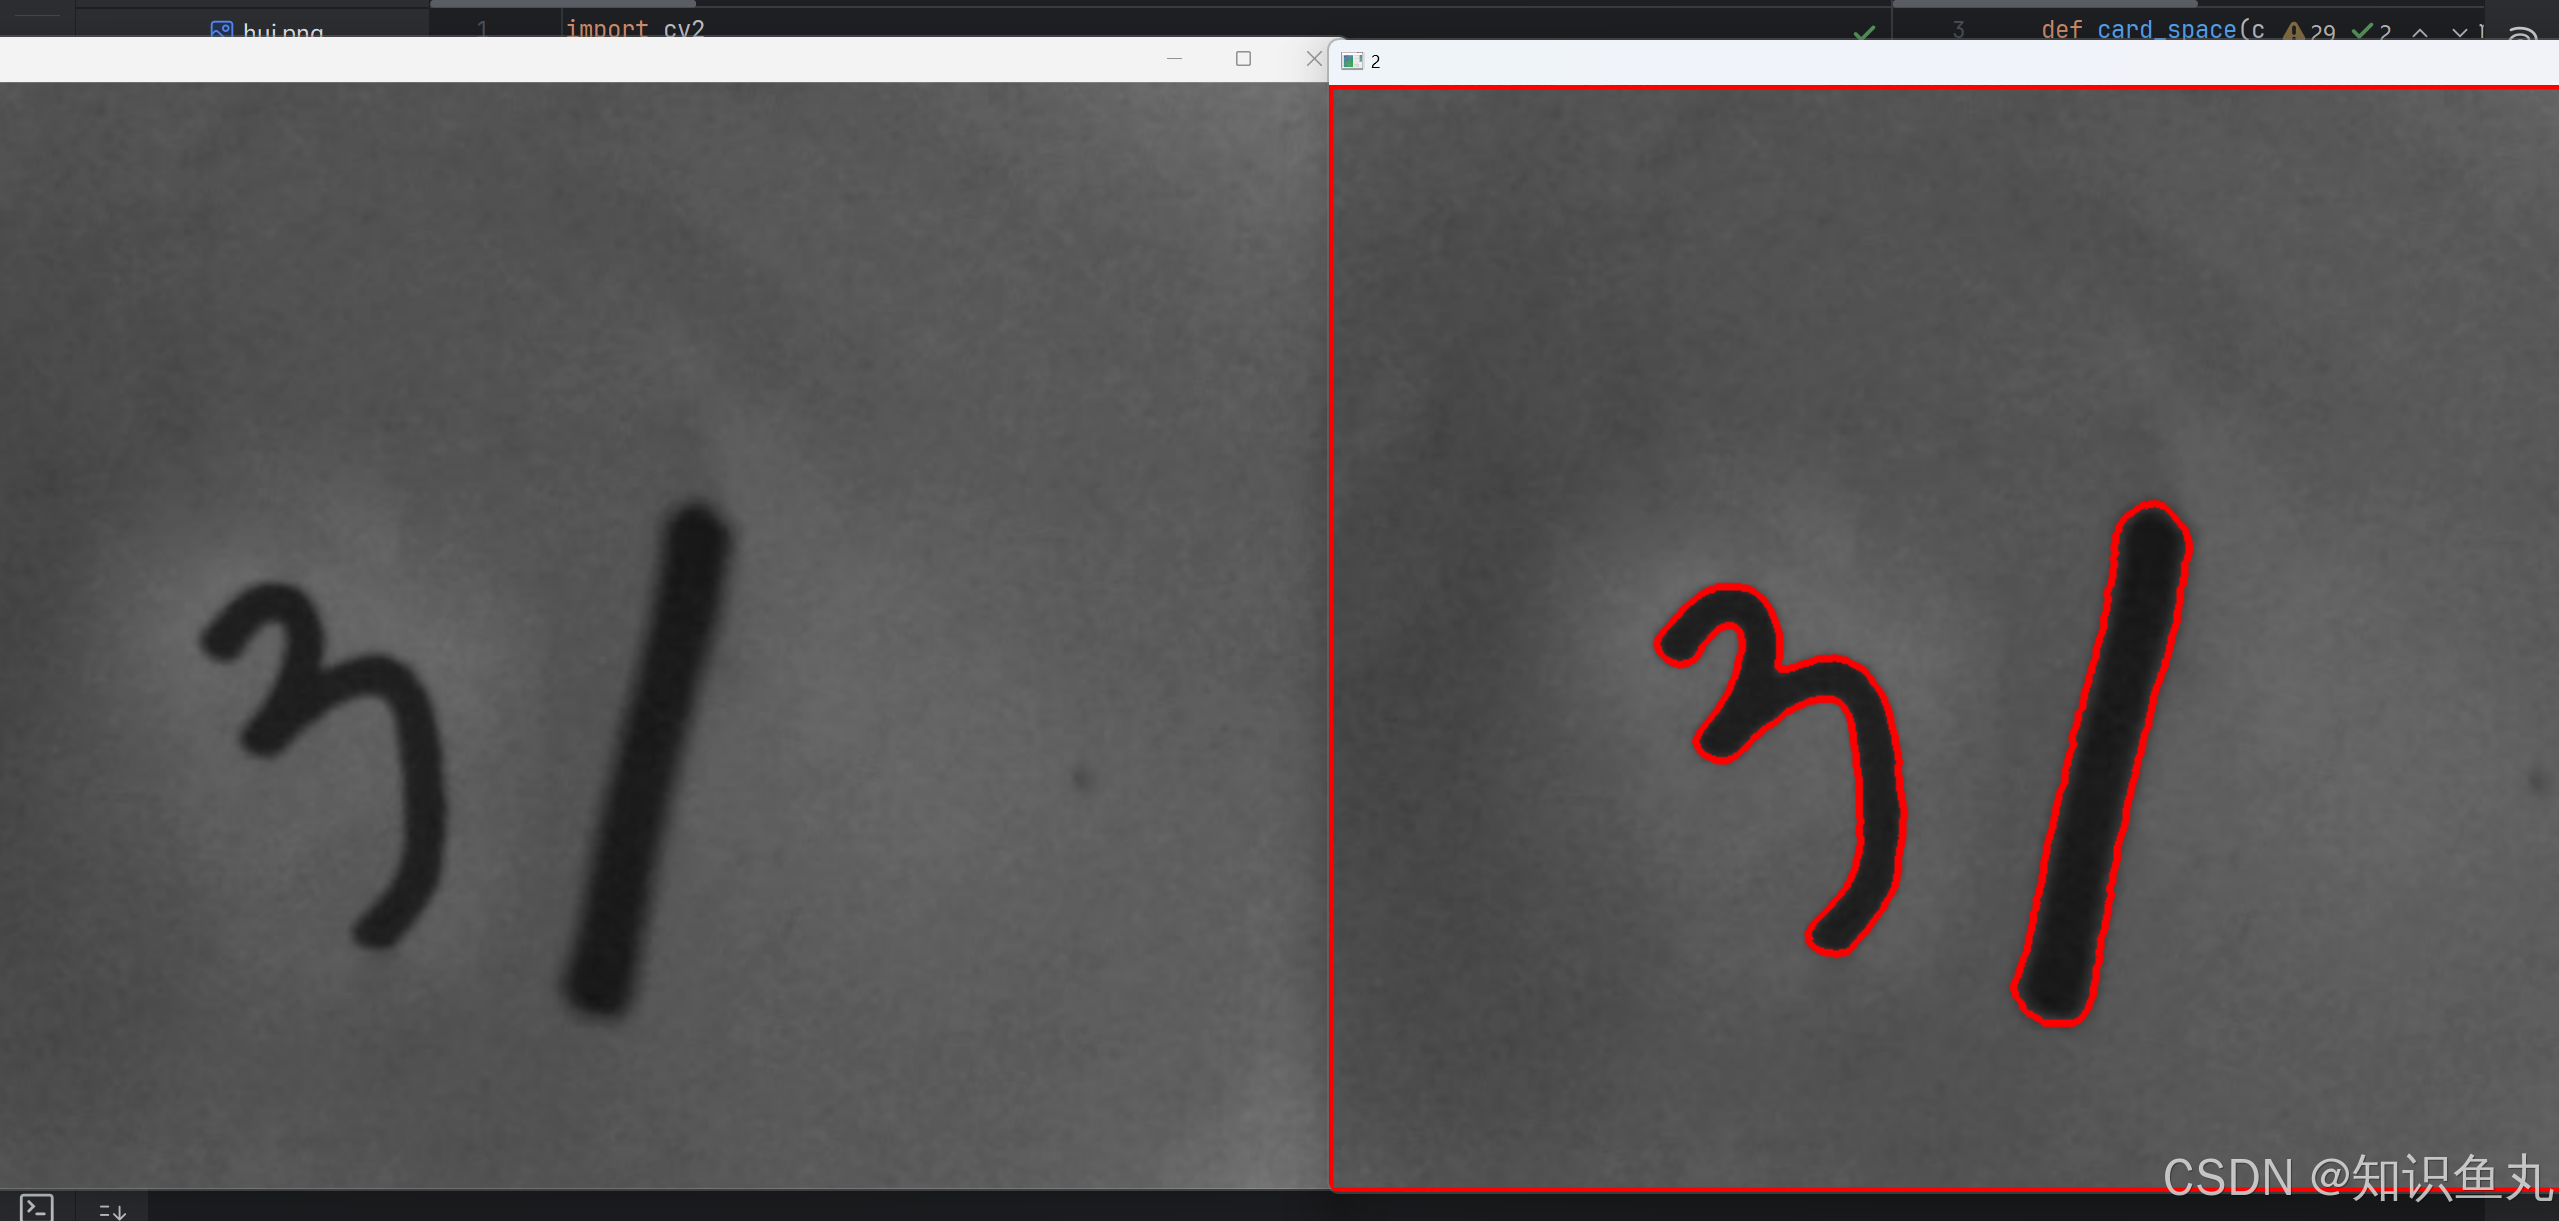
三、轮廓的绘制
原理: drawContours和findContours函数的使用,先使用findContours找到二值化的图像的轮廓,在根据需要画出指定的轮廓
import cv2

img = cv2.imread('./number.png')

img_gray=cv2.cvtColor(img,cv2.COLOR_BGR2GRAY)

_,img_binary=cv2.threshold(img_gray,125,255,cv2.THRESH_BINARY+cv2.THRESH_OTSU)

contours,hierarchy=cv2.findContours(img_binary,     #二值化的图
                                    cv2.RETR_LIST,  #查询轮廓方式
                                    cv2.CHAIN_APPROX_SIMPLE)        #保存轮廓坐标点的方式
img_copy=img.copy() #拷贝不然会修改图像
img_draw=cv2.drawContours(img_copy, #绘制的图像
                          contours, #轮廓的顶点坐标集
                          -1,#所有轮廓
                          (0,0,255),
                          3 #线条粗细
                             )

cv2.imshow('1',img)
cv2.imshow('2',img_draw)
cv2.waitKey(0)