【亚马逊云】基于Amazon EC2实例部署 NextCloud 云网盘并使用 Docker-compose 搭建 ONLYOFFICE 企业在线办公应用软件
文章目录
- 1. 部署EC2实例
- 2. 安装 Docker 服务
- 3. 安装docker-compose
- 4. 创建Docker-compose文件
- 5. 创建nginx.conf文件
- 6. 运行docker-compose命令开始部署
- 7. 访问ONLYOFFICE插件
- 8. 访问NextCloud云盘
- 9. 下载并启用ONLYOFFICE插件
- 10. 上传文件测试
- 11. 所遇问题
- 12. 参考链接
1. 部署EC2实例
[root@ecs-stwts nextcloud]# hostnamectl
   Static hostname: ecs-stwts
   Pretty hostname: ecs-sTWtS
         Icon name: computer-vm
           Chassis: vm
        Machine ID: bc974da2acac413f8e7ac7ddf7891424
           Boot ID: fb58f5174f674d5da11502f4380988a9
    Virtualization: kvm
  Operating System: CentOS Linux 7 (Core)
       CPE OS Name: cpe:/o:centos:centos:7
            Kernel: Linux 3.10.0-957.12.2.el7.x86_64
      Architecture: x86-64
[root@ecs-stwts nextcloud]# df -Th
Filesystem              Type      Size  Used Avail Use% Mounted on
devtmpfs                devtmpfs  3.8G     0  3.8G   0% /dev
tmpfs                   tmpfs     3.8G     0  3.8G   0% /dev/shm
tmpfs                   tmpfs     3.8G   17M  3.8G   1% /run
tmpfs                   tmpfs     3.8G     0  3.8G   0% /sys/fs/cgroup
/dev/mapper/centos-root xfs        47G   13G   35G  27% /
/dev/vda1               xfs      1014M  219M  796M  22% /boot
overlay                 overlay    47G   13G   35G  27% /var/lib/docker/overlay2/a3ea784feaae33cd04f6bdea0af15ab2270d05767b5fededde1afc0a460b27ab/merged
overlay                 overlay    47G   13G   35G  27% /var/lib/docker/overlay2/65cd58479d46993b807e92bcb45969f932b05ac8d26eb90e1e39ea4e445f38d7/merged
overlay                 overlay    47G   13G   35G  27% /var/lib/docker/overlay2/de1095dd24a9f3d90007e26cde66a169f6265deb452e2a35cf9dd7de4afb0ede/merged
overlay                 overlay    47G   13G   35G  27% /var/lib/docker/overlay2/5669acb1a761a678860edb12498a49d2b793d2cb293e42b2c774792ec22db59b/merged
tmpfs                   tmpfs     764M     0  764M   0% /run/user/0
[root@ecs-stwts nextcloud]# free -g
              total        used        free      shared  buff/cache   available
Mem:              7           1           0           0           5           5
Swap:             0           0           0
2. 安装 Docker 服务
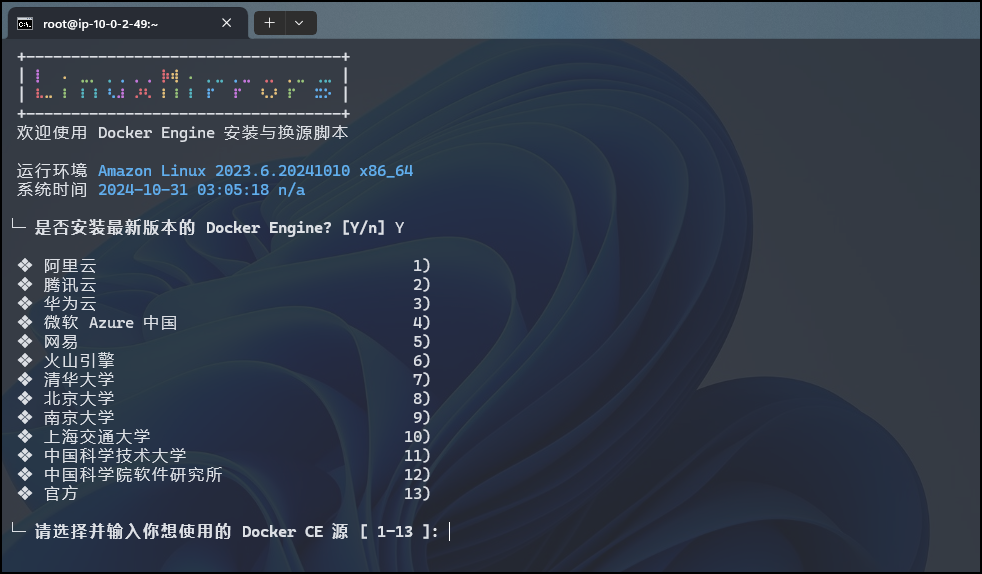
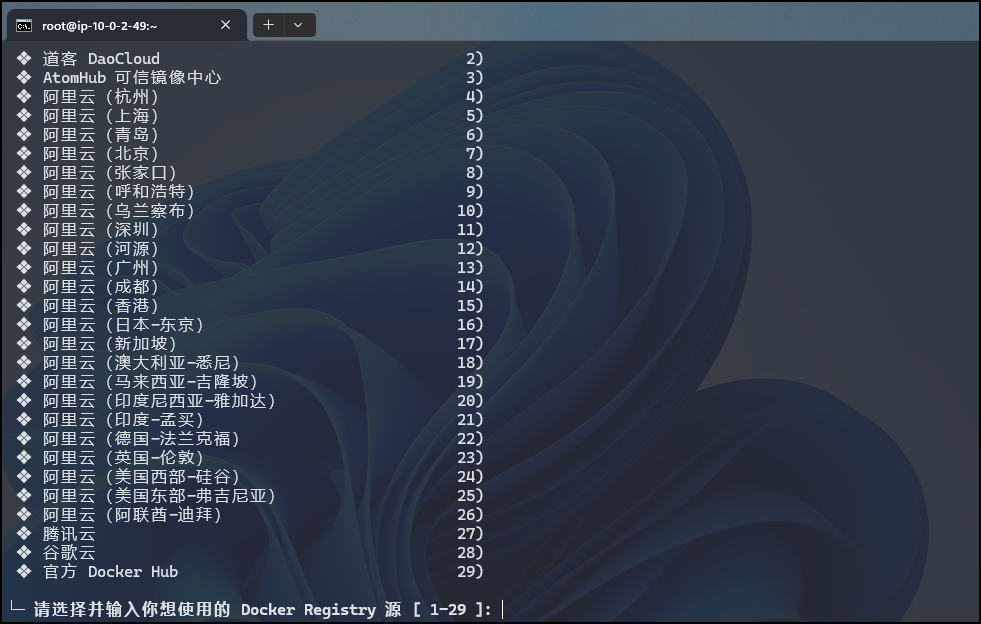
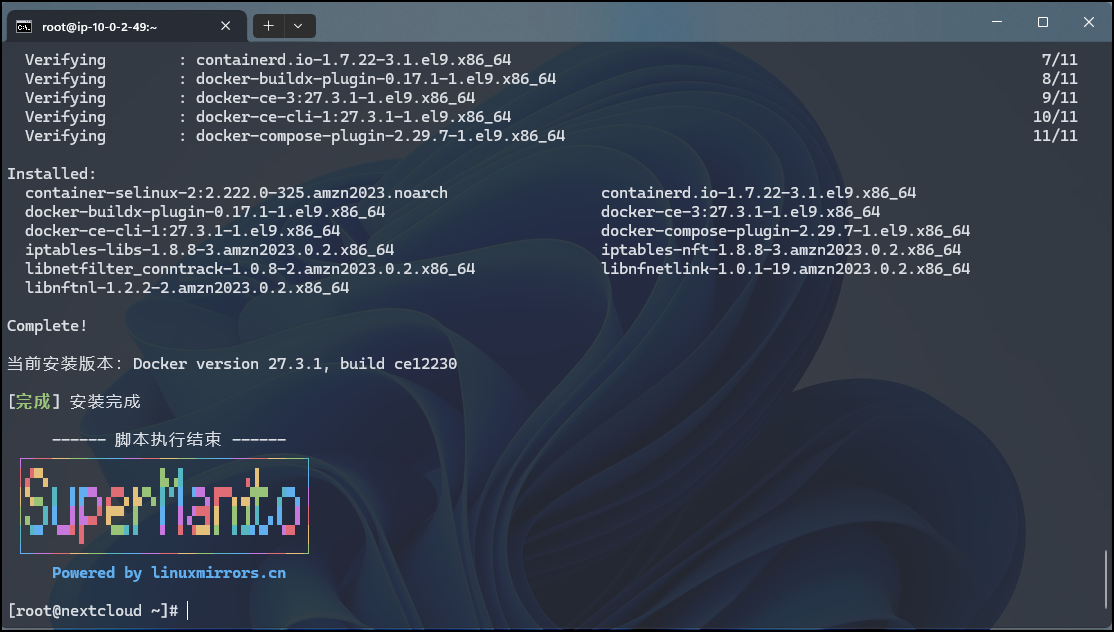
bash <(curl -sSL https://cdn.jsdelivr.net/gh/SuperManito/LinuxMirrors@main/DockerInstallation.sh)

[root@ecs-stwts nextcloud]# docker version
Client: Docker Engine - Community
 Version:           26.1.4
 API version:       1.45
 Go version:        go1.21.11
 Git commit:        5650f9b
 Built:             Wed Jun  5 11:32:04 2024
 OS/Arch:           linux/amd64
 Context:           default

Server: Docker Engine - Community
 Engine:
  Version:          26.1.4
  API version:      1.45 (minimum version 1.24)
  Go version:       go1.21.11
  Git commit:       de5c9cf
  Built:            Wed Jun  5 11:31:02 2024
  OS/Arch:          linux/amd64
  Experimental:     false
 containerd:
  Version:          1.6.33
  GitCommit:        d2d58213f83a351ca8f528a95fbd145f5654e957
 runc:
  Version:          1.1.12
  GitCommit:        v1.1.12-0-g51d5e94
 docker-init:
  Version:          0.19.0
  GitCommit:        de40ad0

3. 安装docker-compose
curl -L "https://github.com/docker/compose/releases/latest/download/docker-compose-$(uname -s)-$(uname -m)" -o /usr/local/bin/docker-compose && chmod +x /usr/local/bin/docker-compose
[root@ecs-stwts nextcloud]# docker-compose version
Docker Compose version v2.29.1
4. 创建Docker-compose文件
[root@ecs-stwts nextcloud]# cat docker-compose.yml
services:
  app:
    container_name: app-server
    image: nextcloud:fpm
    stdin_open: true
    tty: true
    restart: always
    expose:
      - '80'
      - '9000'
    networks:
      - onlyoffice
    volumes:
      - app_data:/var/www/html
  onlyoffice-document-server:
    container_name: onlyoffice-document-server
    image: onlyoffice/documentserver:latest
    stdin_open: true
    tty: true
    restart: always
    networks:
      - onlyoffice
    expose:
      - '80'
      - '443'
    volumes:
      - document_data:/var/www/onlyoffice/Data
      - document_log:/var/log/onlyoffice
    ports:
      - 2280:80     #此处是onlyoffice的端口:左侧的端口可以自定义
      - 4423:443
    environment:
      - JWT_ENABLED=true          #此处:是否打开秘钥认证
      - JWT_SECRET=xxxxxx     #此处:是onlyoffice的秘钥
  nginx:
    container_name: nginx-server
    image: nginx
    stdin_open: true
    tty: true
    restart: always
    ports:
      - 2380:80          #此处:nextcloud的端口 左侧的端口可以自定义
      - 4433:443
    networks:
      - onlyoffice
    volumes:
      - ./nginx.conf:/etc/nginx/nginx.conf
      - app_data:/var/www/html
  db:
    container_name: mariadb
    image: mariadb
    restart: always
    volumes:
      - mysql_data:/var/lib/mysql
    environment:
      - MYSQL_ROOT_PASSWORD=xxxxxx     #此处:初始化数据库信息
      - MYSQL_PASSWORD=xxxxxx          #此处:初始化数据库信息
      - MYSQL_DATABASE=nextcloud         #此处:初始化数据库信息
      - MYSQL_USER=nextcloud             #此处:初始化数据库信息
    networks:
      - onlyoffice
networks:
  onlyoffice:
    driver: 'bridge'
volumes:
  document_data:
  document_log:
  app_data:
  mysql_data:
5. 创建nginx.conf文件
[root@ecs-stwts nextcloud]# cat nginx.conf
user  www-data;
worker_processes  1;

error_log  /var/log/nginx/error.log warn;
pid        /var/run/nginx.pid;

events {
    worker_connections  1024;
}

http {

    upstream backend {
      server app-server:9000;
    }


    include       /etc/nginx/mime.types;
    default_type  application/octet-stream;

    log_format  main  '$remote_addr - $remote_user [$time_local] "$request" '
                      '$status $body_bytes_sent "$http_referer" '
                      '"$http_user_agent" "$http_x_forwarded_for"';

    access_log  /var/log/nginx/access.log  main;

    sendfile        on;
    #tcp_nopush     on;

    keepalive_timeout  65;

    map $http_host $this_host {
        "" $host;
        default $http_host;
    }

    map $http_x_forwarded_proto $the_scheme {
        default $http_x_forwarded_proto;
        "" $scheme;
    }

    map $http_x_forwarded_host $the_host {
       default $http_x_forwarded_host;
       "" $this_host;
    }

    server {
        listen 80;

        # Add headers to serve security related headers
        add_header Strict-Transport-Security "max-age=15768000; includeSubDomains; preload;";
        add_header X-Content-Type-Options nosniff;
        add_header X-XSS-Protection "1; mode=block";
        add_header X-Robots-Tag none;
        add_header X-Download-Options noopen;
        add_header X-Permitted-Cross-Domain-Policies none;

        root /var/www/html;
        client_max_body_size 10G; # 0=unlimited - set max upload size
        fastcgi_buffers 64 4K;

        gzip off;

        index index.php;
        error_page 403 /core/templates/403.php;
        error_page 404 /core/templates/404.php;

        rewrite ^/.well-known/carddav /remote.php/dav/ permanent;
        rewrite ^/.well-known/caldav /remote.php/dav/ permanent;

        location = /robots.txt {
            allow all;
            log_not_found off;
            access_log off;
        }

        location ~ ^/(build|tests|config|lib|3rdparty|templates|data)/ {
            deny all;
        }

        location ~ ^/(?:\.|autotest|occ|issue|indie|db_|console) {
            deny all;
        }

        location / {
            rewrite ^/remote/(.*) /remote.php last;
            rewrite ^(/core/doc/[^\/]+/)$ $1/index.html;
            try_files $uri $uri/ =404;
        }

        location ~* ^/ds-vpath/ {
                rewrite /ds-vpath/(.*) /$1  break;
                proxy_pass http://onlyoffice-document-server;
                proxy_redirect     off;

                client_max_body_size 100m;

                proxy_http_version 1.1;
                proxy_set_header Upgrade $http_upgrade;
                proxy_set_header Connection "upgrade";

                proxy_set_header Host $http_host;
                proxy_set_header X-Real-IP $remote_addr;
                proxy_set_header X-Forwarded-For $proxy_add_x_forwarded_for;
                proxy_set_header X-Forwarded-Host $the_host/ds-vpath;
                proxy_set_header X-Forwarded-Proto $the_scheme;
        }

        location ~ \.php(?:$|/) {
            fastcgi_split_path_info ^(.+\.php)(/.+)$;
            include fastcgi_params;
            fastcgi_param SCRIPT_FILENAME $document_root$fastcgi_script_name;
            fastcgi_param PATH_INFO $fastcgi_path_info;
            fastcgi_param HTTPS off;
            fastcgi_param modHeadersAvailable true; #Avoid sending the security headers twice
            fastcgi_pass backend;
            fastcgi_intercept_errors on;
        }

        # Adding the cache control header for js and css files
        # Make sure it is BELOW the location ~ \.php(?:$|/) { block
        location ~* \.(?:css|js)$ {
            add_header Cache-Control "public, max-age=7200";
            # Add headers to serve security related headers
            add_header Strict-Transport-Security "max-age=15768000; includeSubDomains; preload;";
            add_header X-Content-Type-Options nosniff;
            add_header X-Frame-Options "SAMEORIGIN";
            add_header X-XSS-Protection "1; mode=block";
            add_header X-Robots-Tag none;
            add_header X-Download-Options noopen;
            add_header X-Permitted-Cross-Domain-Policies none;
            # Optional: Don't log access to assets
            access_log off;
        }

        # Optional: Don't log access to other assets
        location ~* \.(?:jpg|jpeg|gif|bmp|ico|png|swf)$ {
            access_log off;
        }

    }
}
6. 运行docker-compose命令开始部署
docker-compose up -d

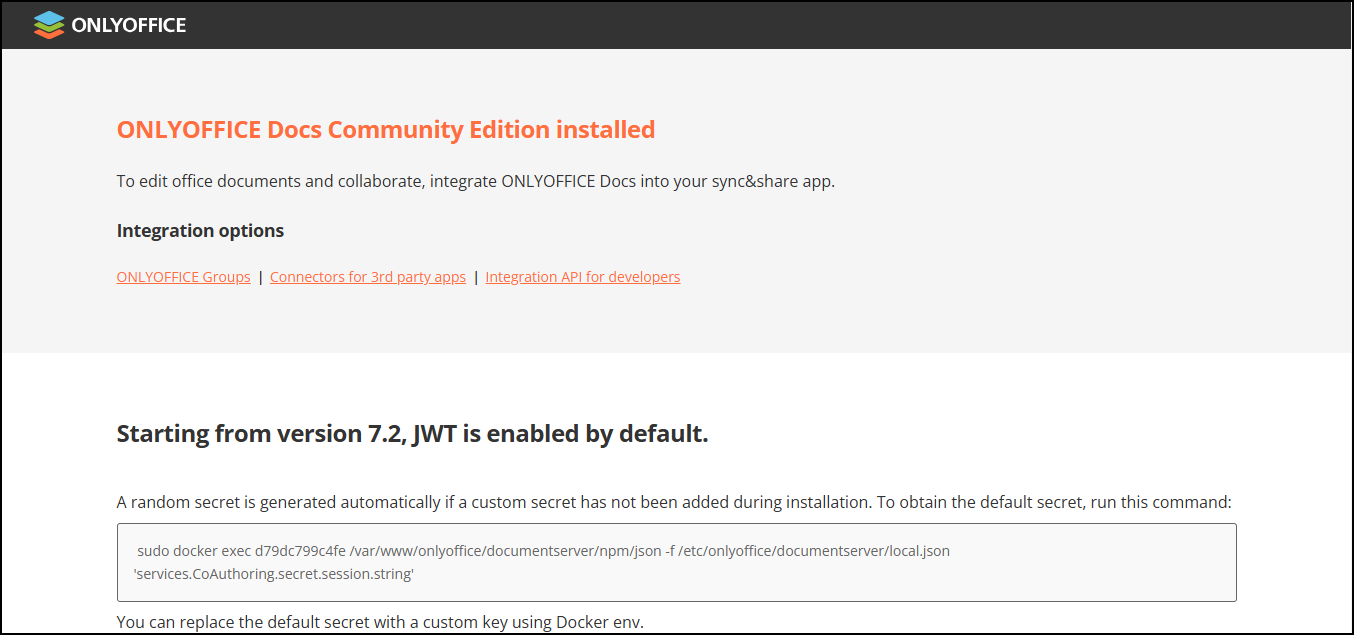
7. 访问ONLYOFFICE插件
成功以后需要打开自己相应的端口防火墙就可以web端访问了
http://ip:2280 #打开自己VPS的端口加ip进入web页面
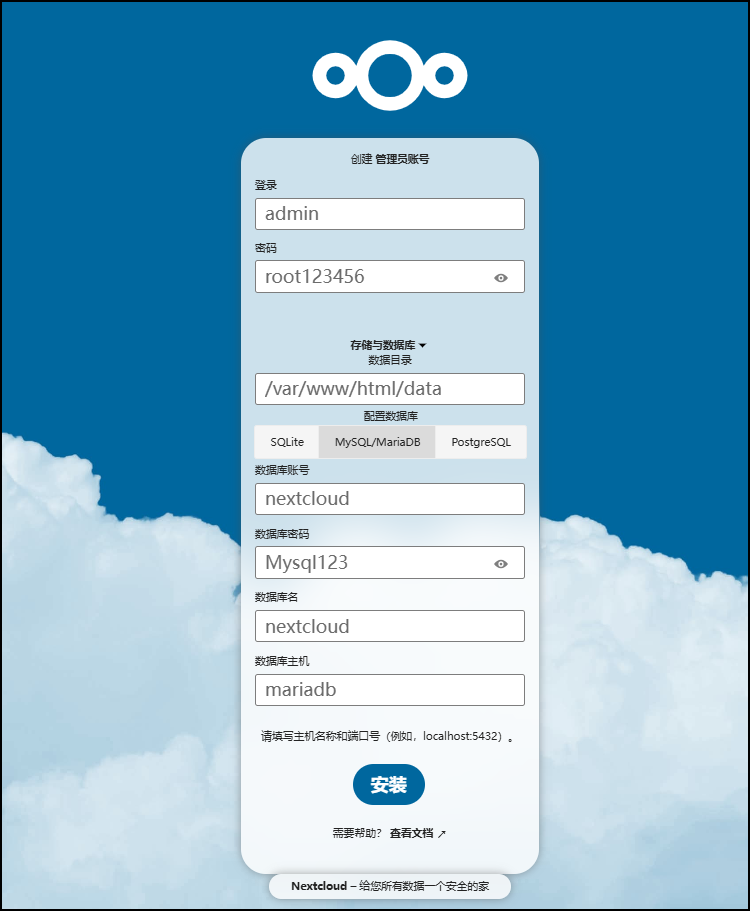
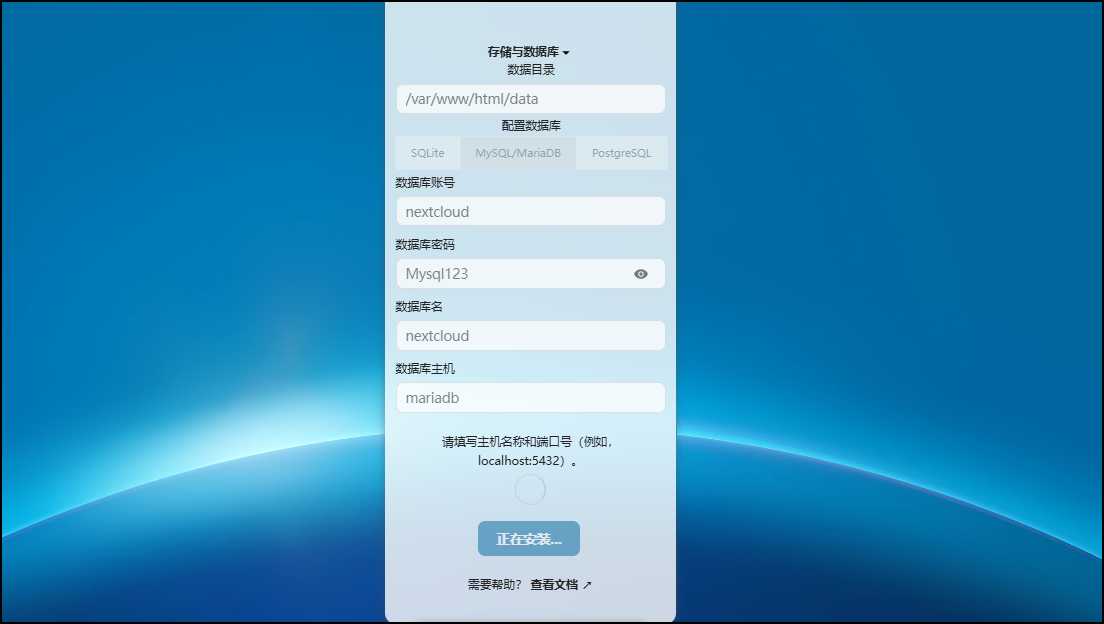
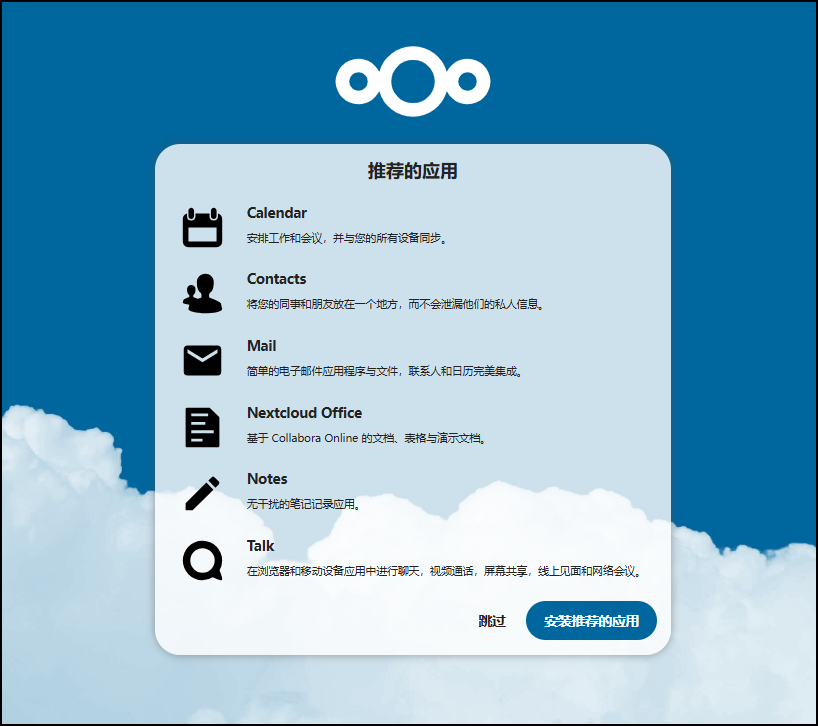
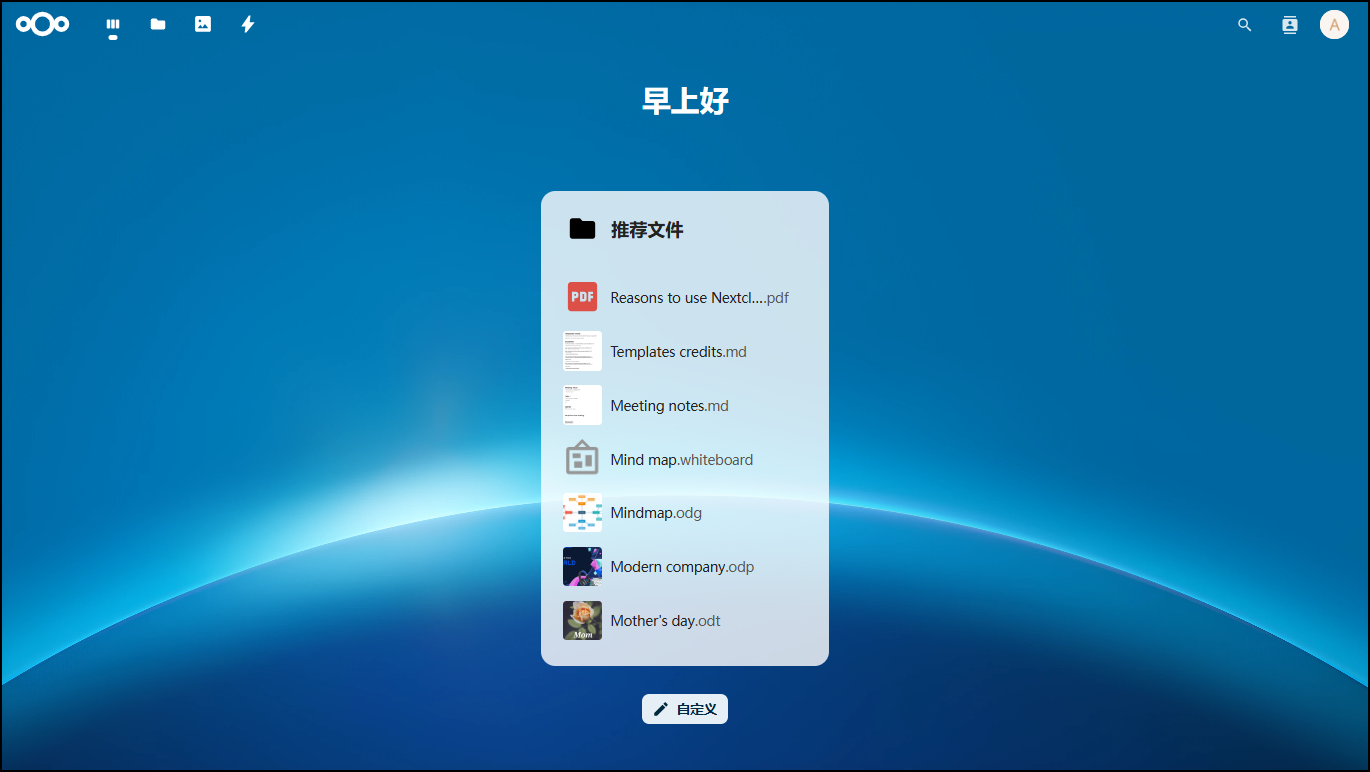
8. 访问NextCloud云盘
http://ip:2380 #打开自己VPS的端口加ip进入web页面
9. 下载并启用ONLYOFFICE插件
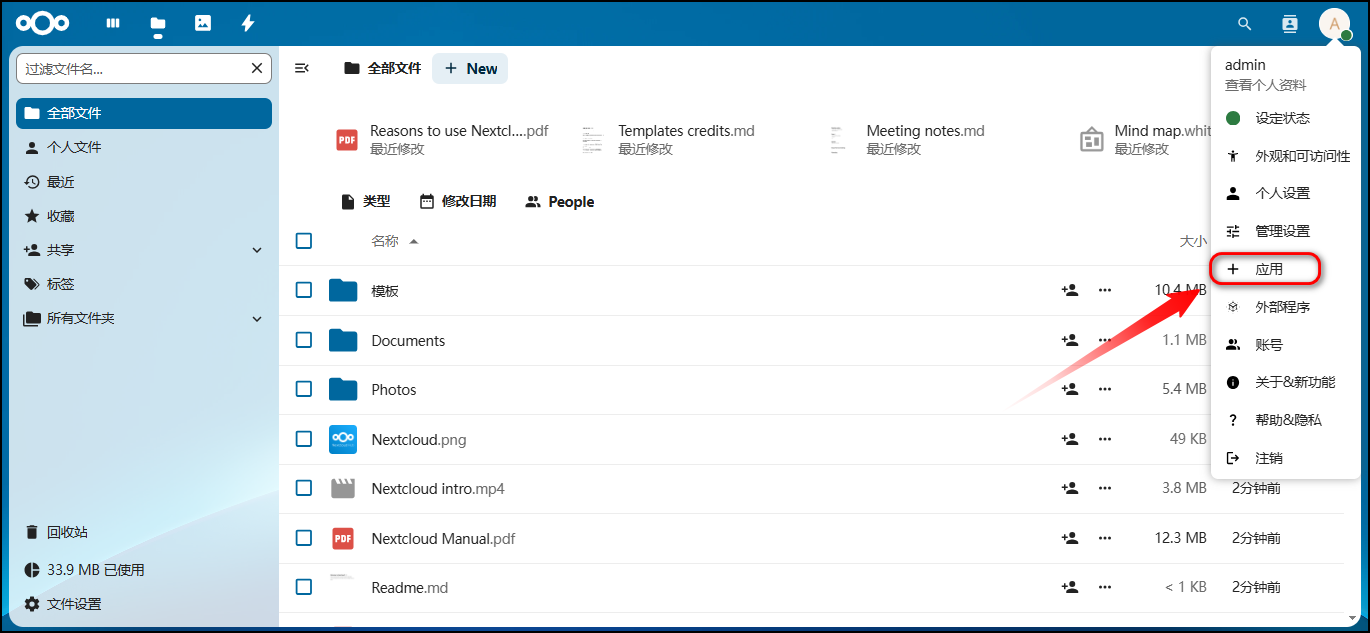
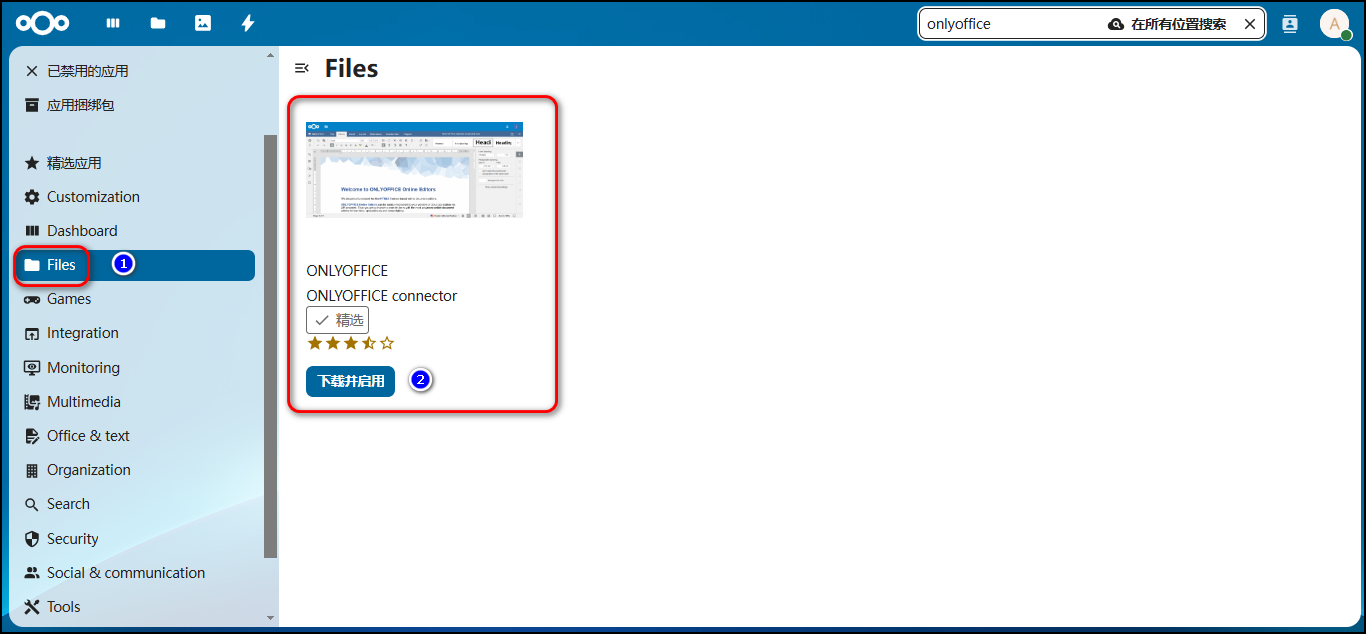
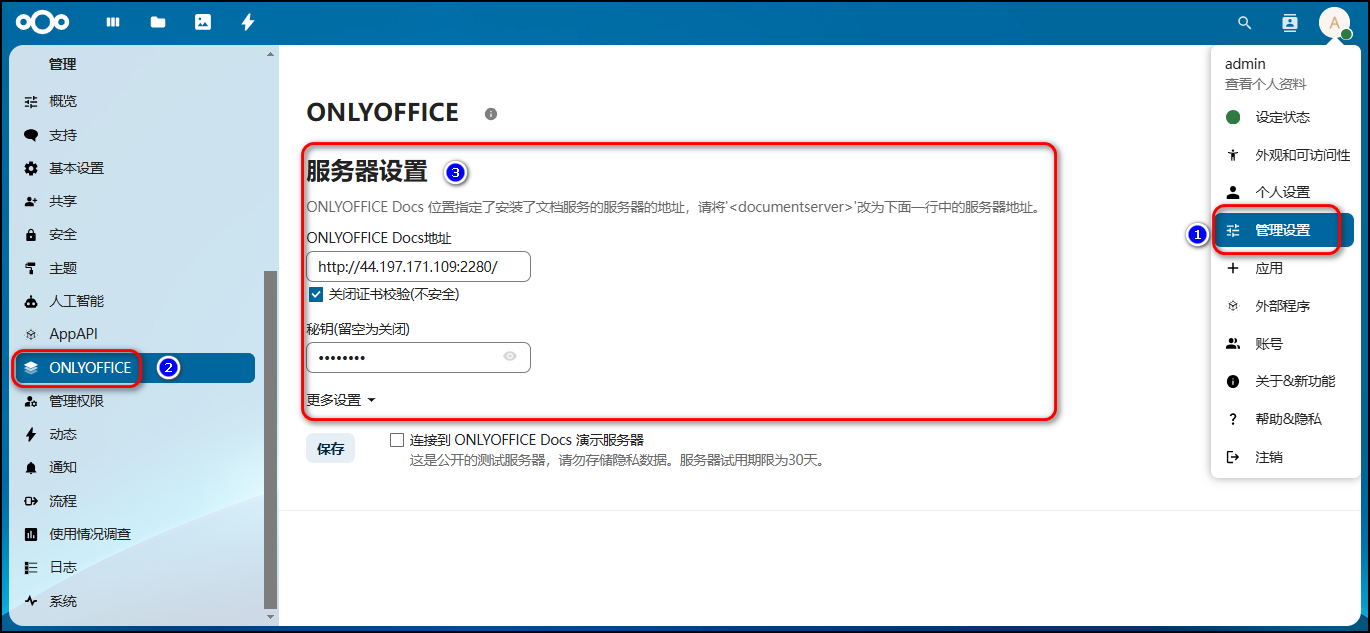
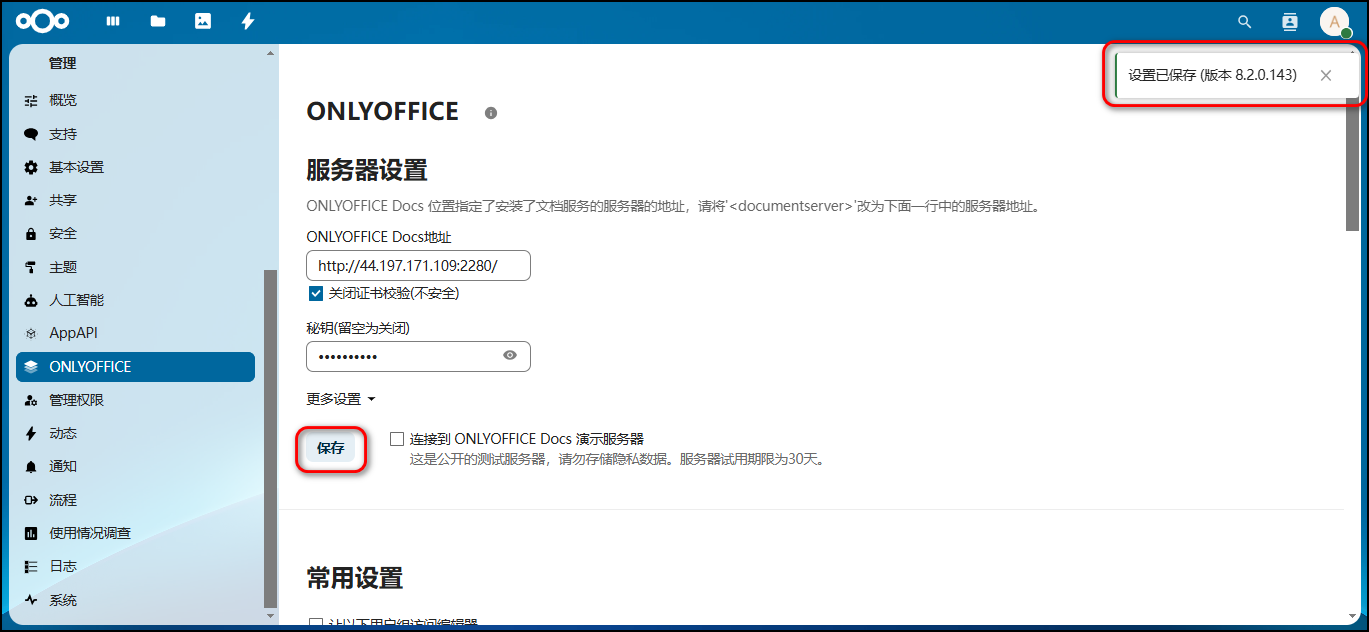
然后选择管理应用-ONLYOFFICE -填写如图信息即可。
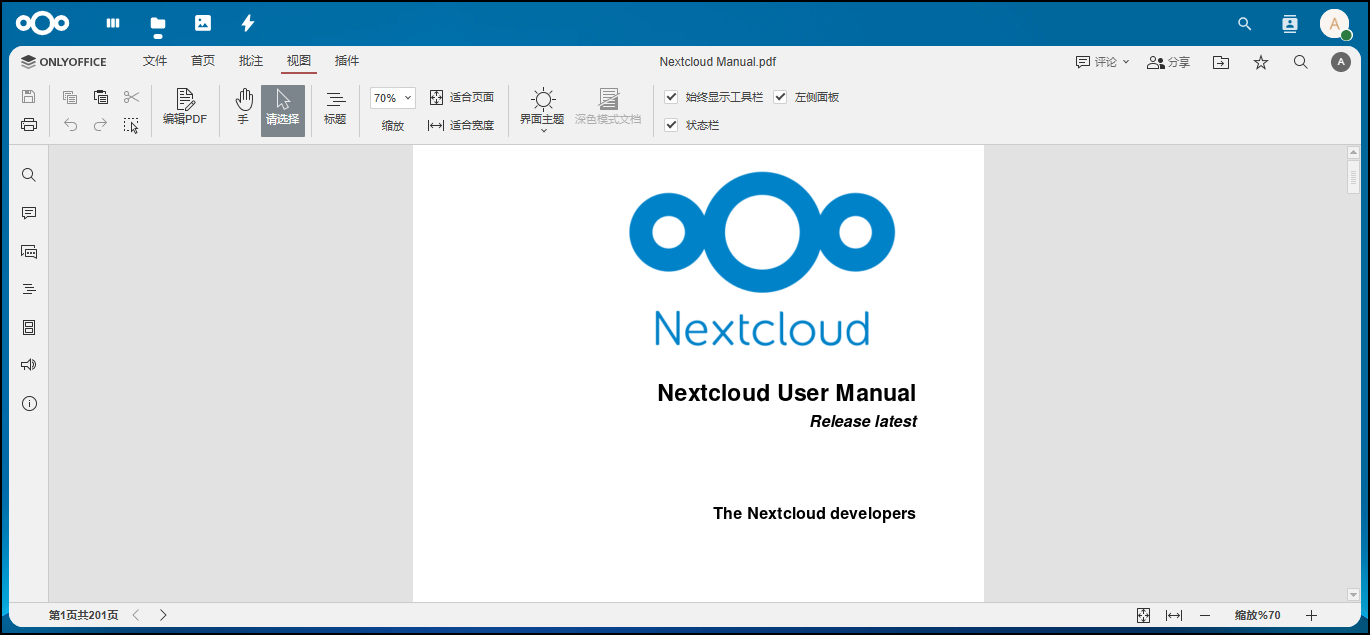
10. 上传文件测试
11. 所遇问题
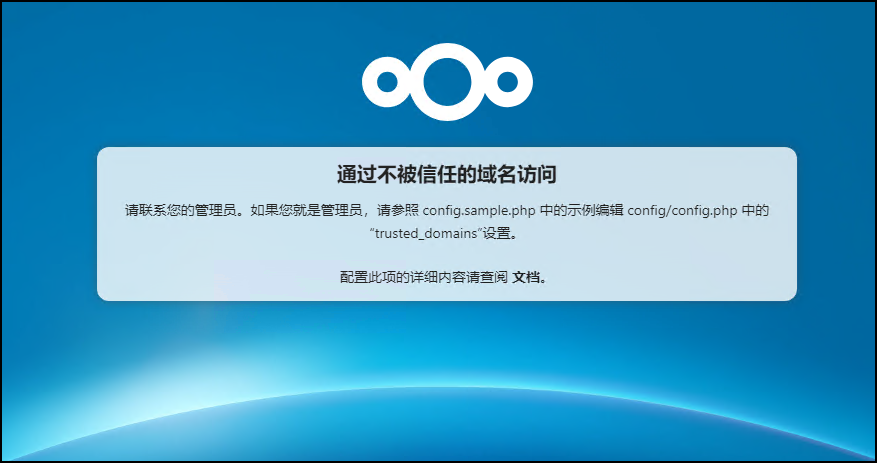
通过不被信任的域名访问
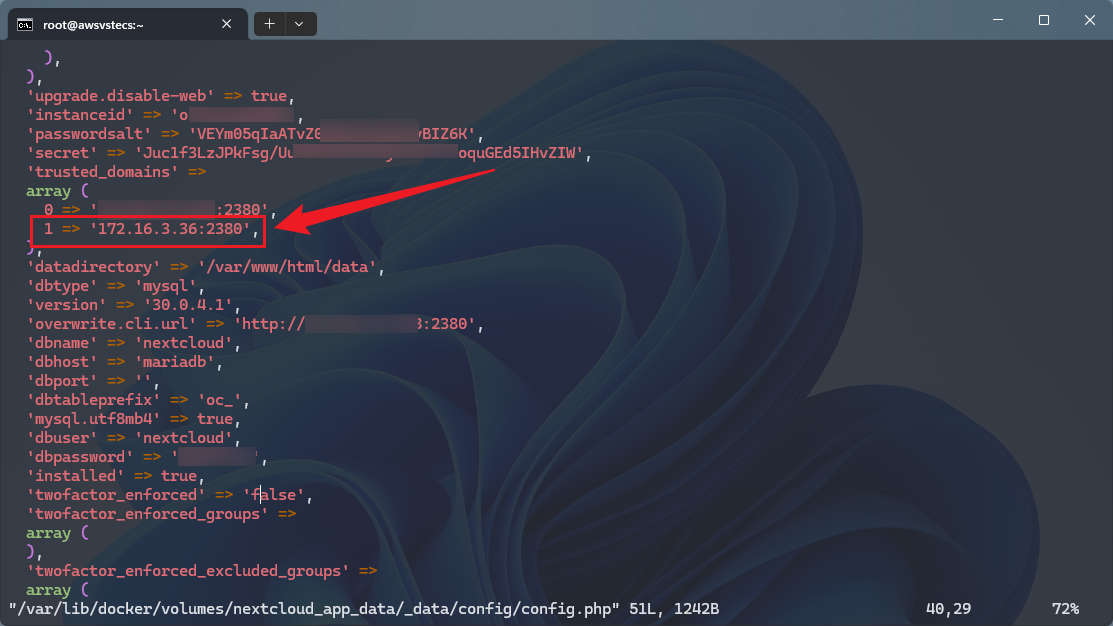
请联系您的管理员。如果您就是管理员,请参照 config.sample.php 中的示例编辑 config/config.php 中的“trusted_domains”设置。
配置此项的详细内容请查阅 文档。
[root@awsvstecs ~]# find / -name config.php
/var/lib/docker/volumes/nextcloud_app_data/_data/config/config.php
12. 参考链接
1️⃣(つェ⊂)咦,又回来了! (ywsj365.com)
2️⃣cker搭建nextcloud网盘-配合onlyoffice使用-实现在线编辑office-协同办公
3️⃣国内服务器如何解决docker无法拉取镜像的问题 (ywsj365.com)
4️⃣nextcloud/nextcloud-onlyoffice-mysql-domain-ssl.md at master · chendong12/nextcloud (github.com)
5️⃣docker-onlyoffice-nextcloud-mysql/nginx.conf at master · tvollscw/docker-onlyoffice-nextcloud-mysql (github.com)
6️⃣Docker实战:Docker安装nginx并配置SSL_docker nginx 配置ssl-CSDN博客
