云图库平台(四)——前端用户模块开发
目录
- 一、新建页面和路由
- 二、获取当前登录用户信息
- 三、用户登录页面
- 四、用户注册页面
- 五、用户注销
一、新建页面和路由
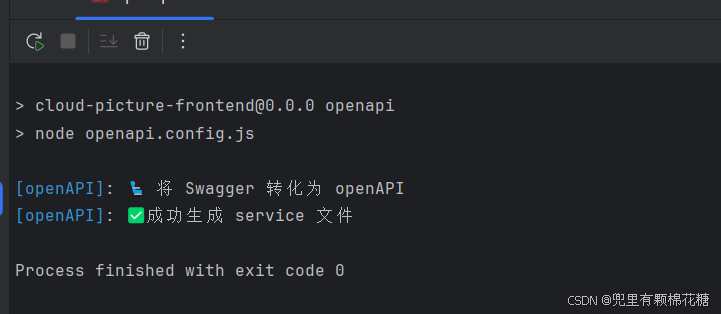
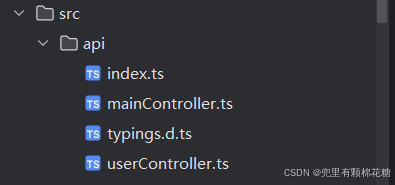
后端接口改变之后,前端openapi工具会重新生成代码,如下:


之后后端每次改动之后,我们都需要使用执行openapi命令来生成对应的接口。
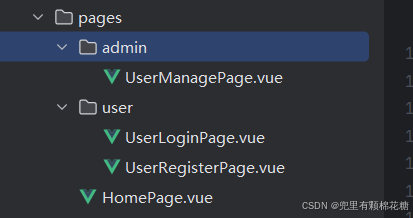
- 新建页面和路由

- 然后修改
router/index.ts中的路由配置:
routes: [
  {
    path: '/',
    name: '主页',
    component: HomePage,
  },
  {
    path: '/user/login',
    name: '用户登录',
    component: UserLoginPage,
  },
  {
    path: '/user/register',
    name: '用户注册',
    component: UserRegisterPage,
  },
  {
    path: '/admin/userManage',
    name: '用户管理',
    component: UserManagePage,
  },
],
现在我们开始开发一些功能和页面。
二、获取当前登录用户信息
之前在前端初始化过程中,已经在全局导航菜单(全局顶部栏)中添加了展示用户名称的逻辑,并且在全局状态管理器stores目录中定义了前端用户的登录信息存储在哪。后端已经完成了获取当前登录用户的接口,所以直接修改fetchLoginUser函数即可。
async function fetchLoginUser() {
const res = await getLoginUserUsingGet()
if (res.data.code === 0 && res.data.data) {
  loginUser.value = res.data.data
}
// // 测试用户登录,3 秒后登录
// setTimeout(() => {
//   loginUser.value = { userName: '用于展示登录用户信息', id: 1 }
// }, 3000)
}
三、用户登录页面
现在进行UserLoginPage.vue的页面开发,依然是借助Ant Design快速进行页面开发。基础页面代码如下(其中可以根据自己需求增加一定的前端校验):
<template>
  <div id="userLoginPage">
    <h2 class="title">鱼皮云图库 - 用户登录</h2>
    <div class="desc">企业级智能协同云图库</div>
    <a-form :model="formState" name="basic" autocomplete="off" @finish="handleSubmit">
      <a-form-item name="userAccount" :rules="[{ required: true, message: '请输入账号' }]">
        <a-input v-model:value="formState.userAccount" placeholder="请输入账号" />
      </a-form-item>
      <a-form-item
        name="userPassword"
        :rules="[
          { required: true, message: '请输入密码' },
          { min: 8, message: '密码不能小于 8 位' },
        ]"
      >
        <a-input-password v-model:value="formState.userPassword" placeholder="请输入密码" />
      </a-form-item>
      <div class="tips">
        没有账号?
        <RouterLink to="/user/register">去注册</RouterLink>
      </div>
      <a-form-item>
        <a-button type="primary" html-type="submit" style="width: 100%">登录</a-button>
      </a-form-item>
    </a-form>
  </div>
</template>
定义响应式变量来接收表单的值:
// 用于接收表单输入的值
const formState = reactive<API.UserLoginRequest>({
  userAccount: '',
  userPassword: '',
})
css美化样式:
<style scoped>
#userLoginPage {
  max-width: 360px;
  margin: 0 auto;
}

.title {
  text-align: center;
  margin-bottom: 16px;
}

.desc {
  text-align: center;
  color: #bbb;
  margin-bottom: 16px;
}

.tips {
  color: #bbb;
  text-align: right;
  font-size: 13px;
  margin-bottom: 16px;
}
</style>
编写表单提交执行的函数,登录成功后需要在全局状态中记录当前登录用户的信息并跳转到主页,代码如下:
const router = useRouter()
const loginUserStore = useLoginUserStore()

/**
 * 提交表单
 * @param values
 */
const handleSubmit = async (values: any) => {
  const res = await userLoginUsingPost(values)
  // 登录成功,把登录态保存到全局状态中
  if (res.data.code === 0 && res.data.data) {
    await loginUserStore.fetchLoginUser()
    message.success('登录成功')
    router.push({
      path: '/',
      replace: true,
    })
  } else {
    message.error('登录失败,' + res.data.message)
  }
}
登录成功页面效果如下:

四、用户注册页面
用户注册页面同样使用表单,这里我们直接复用用户登录页面的代码,然后小范围对代码进行调整即可。具体代码如下:
<template>
  <div id="userRegisterPage">
    <h2 class="title">鱼皮云图库 - 用户注册</h2>
    <div class="desc">企业级智能协同云图库</div>
    <a-form
      :model="formState"
      name="basic"
      label-align="left"
      autocomplete="off"
      @finish="handleSubmit"
    >
      <a-form-item name="userAccount" :rules="[{ required: true, message: '请输入账号' }]">
        <a-input v-model:value="formState.userAccount" placeholder="请输入账号" />
      </a-form-item>
      <a-form-item
        name="userPassword"
        :rules="[
          { required: true, message: '请输入密码' },
          { min: 8, message: '密码不能小于 8 位' },
        ]"
      >
        <a-input-password v-model:value="formState.userPassword" placeholder="请输入密码" />
      </a-form-item>
      <a-form-item
        name="checkPassword"
        :rules="[
          { required: true, message: '请输入确认密码' },
          { min: 8, message: '确认密码不能小于 8 位' },
        ]"
      >
        <a-input-password v-model:value="formState.checkPassword" placeholder="请输入确认密码" />
      </a-form-item>
      <div class="tips">
        已有账号?
        <RouterLink to="/user/login">去登录</RouterLink>
      </div>
      <a-form-item>
        <a-button type="primary" html-type="submit" style="width: 100%">注册</a-button>
      </a-form-item>
    </a-form>
  </div>
</template>
注册成功页面如下:

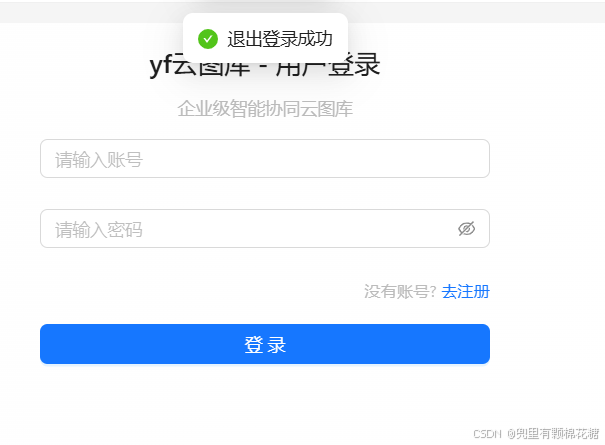
五、用户注销
大部分网站的用户注销(用户登录)是这样的:当鼠标悬停到用户头像的时候,会展示包含用户注销(也就是用户登录)功能的下拉菜单。
页面结构如下:
<div v-if="loginUserStore.loginUser.id">
  <a-dropdown>
    <ASpace>
      <a-avatar :src="loginUserStore.loginUser.userAvatar" />
      {{ loginUserStore.loginUser.userName ?? '无名' }}
    </ASpace>
    <template #overlay>
      <a-menu>
        <a-menu-item @click="doLogout">
          <LogoutOutlined />
          退出登录
        </a-menu-item>
      </a-menu>
    </template>
  </a-dropdown>
</div>
编写用户注销事件函数,代码如下:
// 用户注销
const doLogout = async () => {
  const res = await userLogoutUsingPost()
  console.log(res)
  if (res.data.code === 0) {
    loginUserStore.setLoginUser({
      userName: '未登录',
    })
    message.success('退出登录成功')
    await router.push('/user/login')
  } else {
    message.error('退出登录失败,' + res.data.message)
  }
}

本文就到这里吧,再见啦友友们。
