K8s Kubernetes集群部署
Kubernetes默认CRI(容器运行时)为Docker,因此先安装Docker。
安装Docker
//获取源
[root@master ~]# yum -y install wget
[root@master ~]# wget https://mirrors.aliyun.com/docker-ce/linux/centos/docker-ce.repo -O /etc/yum.repos.d/docker-ce.repo
[root@master ~]# yum -y install docker-ce
[root@master ~]# systemctl enable --now docker
Created symlink /etc/systemd/system/multi-user.target.wants/docker.service → /usr/lib/systemd/system/docker.service.
[root@master ~]# docker --version
Docker version 20.10.12, build e91ed57
[root@master ~]# ls /etc/docker/
key.json
//镜像加速
[root@master ~]# cat > /etc/docker/daemon.json << EOF
{
“registry-mirrors”: [“https://b9pmyelo.mirror.aliyuncs.com”],
“exec-opts”: [“native.cgroupdriver=systemd”],
“log-driver”: “json-file”,
“log-opts”: {
“max-size”: “100m”
},
“storage-driver”: “overlay2”
}
EOF
添加kubernetes阿里云YUM软件源
[root@master ~]# cat > /etc/yum.repos.d/kubernetes.repo << EOF
[kubernetes]
name=Kubernetes
baseurl=https://mirrors.aliyun.com/kubernetes/yum/repos/kubernetes-el7-x86_64
enabled=1
gpgcheck=0
repo_gpgcheck=0
gpgkey=https://mirrors.aliyun.com/kubernetes/yum/doc/yum-key.gpg https://mirrors.aliyun.com/kubernetes/yum/doc/rpm-package-key.gpg
EOF
[root@master ~]# yum clean all && yum makecache
安装kubeadm,kubelet和kubectl
//安装kubeadm,kubelet和kubectl,由于版本更新频繁,这里指定版本号部署
[root@master ~]# yum install -y kubelet-1.20.0 kubeadm-1.20.0 kubectl-1.20.0
[root@master ~]# systemctl enable kubelet
Created symlink /etc/systemd/system/multi-user.target.wants/kubelet.service → /usr/lib/systemd/system/kubelet.service.
[root@master ~]# systemctl status kubelet
● kubelet.service - kubelet: The Kubernetes Node Agent
Loaded: loaded (/usr/lib/systemd/system/kubelet.service; enabled; vendor preset: disabled)
Drop-In: /usr/lib/systemd/system/kubelet.service.d
└─10-kubeadm.conf
Active: inactive (dead)
Docs: https://kubernetes.io/docs/
[root@master ~]# kubeadm init --apiserver-advertise-address 192.168.129.250 --image-repository registry.aliyuncs.com/google_containers --kubernetes-version v1.20.0 --service-cidr 10.96.0.0/12 --pod-network-cidr 10.244.0.0/16
[init] Using Kubernetes version: v1.20.0
[preflight] Running pre-flight checks
[WARNING IsDockerSystemdCheck]: detected “cgroupfs” as the Docker cgroup driver. The recommended driver is “systemd”. Please follow the guide at https://kubernetes.io/docs/setup/cri/
[WARNING FileExisting-tc]: tc not found in system path
[WARNING SystemVerification]: this Docker version is not on the list of validated versions: 20.10.12. Latest validated version: 19.03
[preflight] Pulling images required for setting up a Kubernetes cluster
[preflight] This might take a minute or two, depending on the speed of your internet connection
[preflight] You can also perform this action in beforehand using ‘kubeadm config images pull’
[certs] Using certificateDir folder “/etc/kubernetes/pki”
[certs] Generating “ca” certificate and key
[certs] Generating “apiserver” certificate and key
[certs] apiserver serving cert is signed for DNS names [kubernetes kubernetes.default kubernetes.default.svc kubernetes.default.svc.cluster.local master] and IPs [10.96.0.1 192.168.129.250]
[certs] Generating “apiserver-kubelet-client” certificate and key
[certs] Generating “front-proxy-ca” certificate and key
[certs] Generating “front-proxy-client” certificate and key
[certs] Generating “etcd/ca” certificate and key
[certs] Generating “etcd/server” certificate and key
[certs] etcd/server serving cert is signed for DNS names [localhost master] and IPs [192.168.129.250 127.0.0.1 ::1]
[certs] Generating “etcd/peer” certificate and key
[certs] etcd/peer serving cert is signed for DNS names [localhost master] and IPs [192.168.129.250 127.0.0.1 ::1]
[certs] Generating “etcd/healthcheck-client” certificate and key
[certs] Generating “apiserver-etcd-client” certificate and key
[certs] Generating “sa” key and public key
[kubeconfig] Using kubeconfig folder “/etc/kubernetes”
[kubeconfig] Writing “admin.conf” kubeconfig file
[kubeconfig] Writing “kubelet.conf” kubeconfig file
[kubeconfig] Writing “controller-manager.conf” kubeconfig file
[kubeconfig] Writing “scheduler.conf” kubeconfig file
[kubelet-start] Writing kubelet environment file with flags to file “/var/lib/kubelet/kubeadm-flags.env”
[kubelet-start] Writing kubelet configuration to file “/var/lib/kubelet/config.yaml”
[kubelet-start] Starting the kubelet
[control-plane] Using manifest folder “/etc/kubernetes/manifests”
[control-plane] Creating static Pod manifest for “kube-apiserver”
[control-plane] Creating static Pod manifest for “kube-controller-manager”
[control-plane] Creating static Pod manifest for “kube-scheduler”
[etcd] Creating static Pod manifest for local etcd in “/etc/kubernetes/manifests”
[wait-control-plane] Waiting for the kubelet to boot up the control plane as static Pods from directory “/etc/kubernetes/manifests”. This can take up to 4m0s
[apiclient] All control plane components are healthy after 8.506240 seconds
[upload-config] Storing the configuration used in ConfigMap “kubeadm-config” in the “kube-system” Namespace
[kubelet] Creating a ConfigMap “kubelet-config-1.20” in namespace kube-system with the configuration for the kubelets in the cluster
[upload-certs] Skipping phase. Please see --upload-certs
[mark-control-plane] Marking the node master as control-plane by adding the labels “node-role.kubernetes.io/master=‘’” and “node-role.kubernetes.io/control-plane=‘’ (deprecated)”
[mark-control-plane] Marking the node master as control-plane by adding the taints [node-role.kubernetes.io/master:NoSchedule]
[bootstrap-token] Using token: akxmi3.rtm7hjgs7n9trljm
[bootstrap-token] Configuring bootstrap tokens, cluster-info ConfigMap, RBAC Roles
[bootstrap-token] configured RBAC rules to allow Node Bootstrap tokens to get nodes
[bootstrap-token] configured RBAC rules to allow Node Bootstrap tokens to post CSRs in order for nodes to get long term certificate credentials
[bootstrap-token] configured RBAC rules to allow the csrapprover controller automatically approve CSRs from a Node Bootstrap Token
[bootstrap-token] configured RBAC rules to allow certificate rotation for all node client certificates in the cluster
[bootstrap-token] Creating the “cluster-info” ConfigMap in the “kube-public” namespace
[kubelet-finalize] Updating “/etc/kubernetes/kubelet.conf” to point to a rotatable kubelet client certificate and key
[addons] Applied essential addon: CoreDNS
[addons] Applied essential addon: kube-proxy
Your Kubernetes control-plane has initialized successfully!
To start using your cluster, you need to run the following as a regular user:
mkdir -p $HOME/.kube
sudo cp -i /etc/kubernetes/admin.conf $HOME/.kube/config
sudo chown ( i d − u ) : (id -u): (id−u):(id -g) $HOME/.kube/config
Alternatively, if you are the root user, you can run:
export KUBECONFIG=/etc/kubernetes/admin.conf
You should now deploy a pod network to the cluster.
Run “kubectl apply -f [podnetwork].yaml” with one of the options listed at:
https://kubernetes.io/docs/concepts/cluster-administration/addons/
Then you can join any number of worker nodes by running the following on each as root:
#下面的命令写到文件保存起来
kubeadm join 192.168.129.250:6443 --token hglo7o.0ya3tbi82wqdjif4 \
–discovery-token-ca-cert-hash sha256:f6be891c6cd273a9283a6c05ca795811f7350afa2b5072990a294b7070ff9a4f
//把那条命令写入到文件中保存起来(以防万一)
[root@master ~]# vim init
kubeadm join 192.168.129.250:6443 --token hglo7o.0ya3tbi82wqdjif4 \
–discovery-token-ca-cert-hash sha256:f6be891c6cd273a9283a6c05ca795811f7350afa2b5072990a294b7070ff9a4f
[root@master ~]# docker images
REPOSITORY TAG IMAGE ID CREATED SIZE
registry.aliyuncs.com/google_containers/kube-proxy v1.20.0 10cc881966cf 12 months ago 118MB
registry.aliyuncs.com/google_containers/kube-scheduler v1.20.0 3138b6e3d471 12 months ago 46.4MB
registry.aliyuncs.com/google_containers/kube-apiserver v1.20.0 ca9843d3b545 12 months ago 122MB
registry.aliyuncs.com/google_containers/kube-controller-manager v1.20.0 b9fa1895dcaa 12 months ago 116MB
registry.aliyuncs.com/google_containers/etcd 3.4.13-0 0369cf4303ff 15 months ago 253MB
registry.aliyuncs.com/google_containers/coredns 1.7.0 bfe3a36ebd25 18 months ago 45.2MB
registry.aliyuncs.com/google_containers/pause 3.2 80d28bedfe5d 22 months ago 683kB
//设置环境变量
[root@master ~]# echo ‘export KUBECONFIG=/etc/kubernetes/admin.conf’ > /etc/profile.d/k8s.sh
[root@master ~]# source /etc/profile.d/k8s.sh
[root@master ~]# echo $KUBECONFIG
/etc/kubernetes/admin.conf
[root@master ~]# kubectl get nodes
NAME STATUS ROLES AGE VERSION
master Ready control-plane,master 76m v1.20.0 #要Ready(时间会有点长)
[root@master ~]# kubectl apply -f https://raw.githubusercontent.com/coreos/flannel/master/Documentation/kube-flannel.yml
The connection to the server raw.githubusercontent.com was refused - did you specify the right host or port? #出现此报错
//解决方案
[root@master ~]# cat /etc/hosts //添加如下内容
199.232.96.133 raw.githubusercontent.com
[root@master ~]# kubectl apply -f https://raw.githubusercontent.com/coreos/flannel/master/Documentation/kube-flannel.yml
podsecuritypolicy.policy/psp.flannel.unprivileged created
clusterrole.rbac.authorization.k8s.io/flannel created
clusterrolebinding.rbac.authorization.k8s.io/flannel created
serviceaccount/flannel created
configmap/kube-flannel-cfg created
daemonset.apps/kube-flannel-ds created
确保能访问到这个网站
quay.io

在node1与node2节点上执行
向集群添加新节点,执行在kubeadm init输出的kubeadm join命令:
//这里执行的就是我们刚才保存的init文件里面的内容
[root@node1 ~]# kubeadm join 192.168.129.250:6443 --token hglo7o.0ya3tbi82wqdjif4 --discovery-token-ca-cert-hash sha256:f6be891c6cd273a9283a6c05ca795811f7350afa2b5072990a294b7070ff9a4f
[preflight] Running pre-flight checks
[WARNING IsDockerSystemdCheck]: detected “cgroupfs” as the Docker cgroup driver. The recommended driver is “systemd”. Please follow the guide at https://kubernetes.io/docs/setup/cri/
[WARNING FileExisting-tc]: tc not found in system path
[WARNING SystemVerification]: this Docker version is not on the list of validated versions: 20.10.12. Latest validated version: 19.03
[WARNING Hostname]: hostname “node1” could not be reached
[WARNING Hostname]: hostname “node1”: lookup node1 on 192.168.129.2:53: no such host
[preflight] Reading configuration from the cluster…
[preflight] FYI: You can look at this config file with ‘kubectl -n kube-system get cm kubeadm-config -o yaml’
[kubelet-start] Writing kubelet configuration to file “/var/lib/kubelet/config.yaml”
[kubelet-start] Writing kubelet environment file with flags to file “/var/lib/kubelet/kubeadm-flags.env”
[kubelet-start] Starting the kubelet
[kubelet-start] Waiting for the kubelet to perform the TLS Bootstrap…
This node has joined the cluster:
-
Certificate signing request was sent to apiserver and a response was received.
-
The Kubelet was informed of the new secure connection details.
Run ‘kubectl get nodes’ on the control-plane to see this node join the cluster.
// 在node2上执行
[root@node2 ~]# kubeadm join 192.168.129.250:6443 --token hglo7o.0ya3tbi82wqdjif4 --discovery-token-ca-cert-hash sha256:f6be891c6cd273a9283a6c05ca795811f7350afa2b5072990a294b7070ff9a4f
[preflight] Running pre-flight checks
[WARNING IsDockerSystemdCheck]: detected “cgroupfs” as the Docker cgroup driver. The recommended driver is “systemd”. Please follow the guide at https://kubernetes.io/docs/setup/cri/
[WARNING FileExisting-tc]: tc not found in system path
[WARNING SystemVerification]: this Docker version is not on the list of validated versions: 20.10.12. Latest validated version: 19.03
[WARNING Hostname]: hostname “node2” could not be reached
[WARNING Hostname]: hostname “node2”: lookup node2 on 114.114.114.114:53: no such host
[preflight] Reading configuration from the cluster…
[preflight] FYI: You can look at this config file with ‘kubectl -n kube-system get cm kubeadm-config -o yaml’
[kubelet-start] Writing kubelet configuration to file “/var/lib/kubelet/config.yaml”
[kubelet-start] Writing kubelet environment file with flags to file “/var/lib/kubelet/kubeadm-flags.env”
[kubelet-start] Starting the kubelet
[kubelet-start] Waiting for the kubelet to perform the TLS Bootstrap…
This node has joined the cluster:
-
Certificate signing request was sent to apiserver and a response was received.
-
The Kubelet was informed of the new secure connection details.
Run ‘kubectl get nodes’ on the control-plane to see this node join the cluster.
// 查看节点的状态
[root@master ~]# kubectl get nodes
NAME STATUS ROLES AGE VERSION
master Ready control-plane,master 80m v1.20.0
node1 NotReady 69s v1.20.0 #等待状态变为Ready
node2 NotReady 52s v1.20.0 #等待状态变为Ready
[root@master ~]# kubectl get nodes
NAME STATUS ROLES AGE VERSION
master Ready control-plane,master 86m v1.20.0
node1 Ready 6m17s v1.20.0
node2 Ready 6m v1.20.0
[root@master ~]# kubectl get ns
NAME STATUS AGE
default Active 89m
kube-node-lease Active 89m
kube-public Active 89m
kube-system Active 89m
[root@master ~]# kubectl get pods -n kube-system -o wide
NAME READY STATUS RESTARTS AGE IP NODE NOMINATED NODE READINESS GATES
coredns-7f89b7bc75-qjjmz 1/1 Running 0 91m 10.244.0.3 master
coredns-7f89b7bc75-rvcdl 1/1 Running 0 91m 10.244.0.2 master
etcd-master 1/1 Running 0 91m 192.168.129.250 master
kube-apiserver-master 1/1 Running 0 91m 192.168.129.250 master
kube-controller-manager-master 1/1 Running 0 91m 192.168.129.250 master
kube-flannel-ds-7stlz 1/1 Running 0 12m 192.168.129.135 node1
kube-flannel-ds-7xthp 1/1 Running 0 58m 192.168.129.250 master
kube-flannel-ds-mzw2x 1/1 Running 0 11m 192.168.129.136 node2
kube-proxy-b8qnc 1/1 Running 0 91m 192.168.129.250 master
kube-proxy-gr294 1/1 Running 0 12m 192.168.129.135 node1
kube-proxy-mtgnd 1/1 Running 0 11m 192.168.129.136 node2
kube-scheduler-master 1/1 Running 0 91m 192.168.129.250 master
[root@master ~]# kubectl create deployment nginx --image=nginx //运行一个nginx的pod
deployment.apps/nginx created
[root@master ~]# kubectl expose deployment nginx --port=80 --type=NodePort //映射80端口
service/nginx exposed
[root@master ~]# kubectl get pods,svc
NAME READY STATUS RESTARTS AGE
pod/nginx-6799fc88d8-8hwr2 0/1 ContainerCreating 0 33s
NAME TYPE CLUSTER-IP EXTERNAL-IP PORT(S) AGE
service/kubernetes ClusterIP 10.96.0.1 443/TCP 87m
service/nginx NodePort 10.111.93.135 80:30274/TCP 24s
[root@master ~]# curl http://10.111.93.135
Welcome to nginx!
If you see this page, the nginx web server is successfully installed and
working. Further configuration is required.
For online documentation and support please refer to
nginx.org.
Commercial support is available at
nginx.com.
Thank you for using nginx.
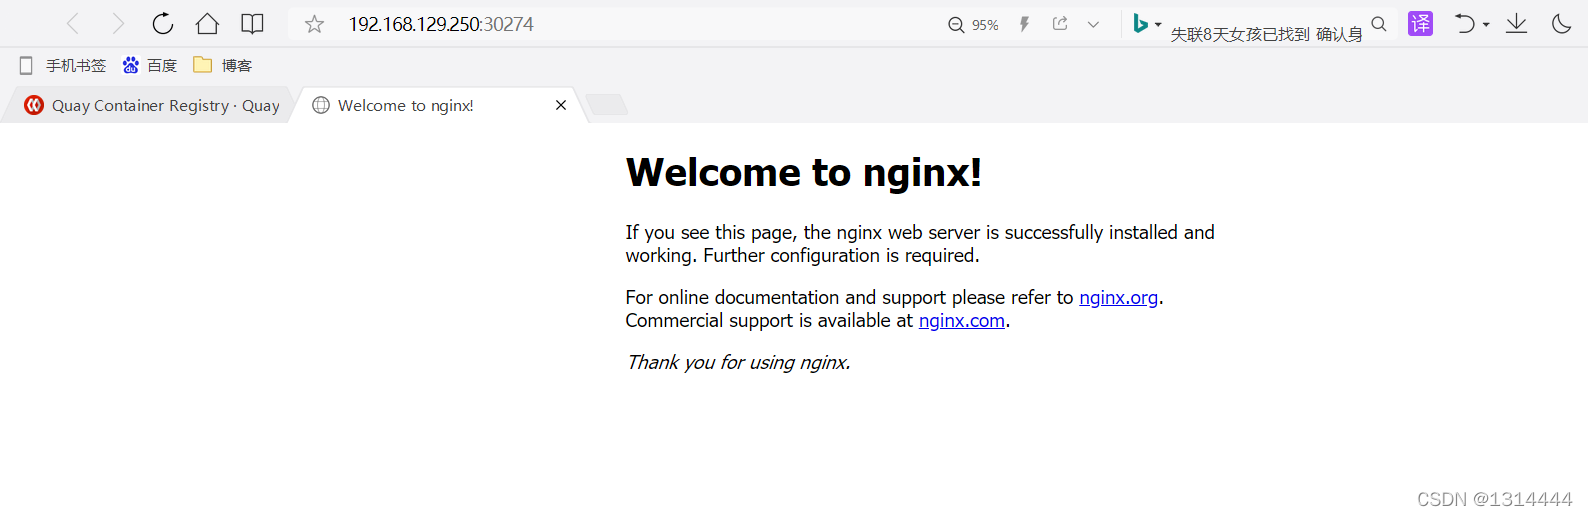
master ip+暴露的端口访问
[root@master ~]# kubectl get svc
NAME TYPE CLUSTER-IP EXTERNAL-IP PORT(S) AGE
kubernetes ClusterIP 10.96.0.1 443/TCP 103m
nginx NodePort 10.111.93.135 80:30274/TCP 16m
192.168.129.250:30274