python自动化测试之Pytest断言及Allure报告定制
一、断言
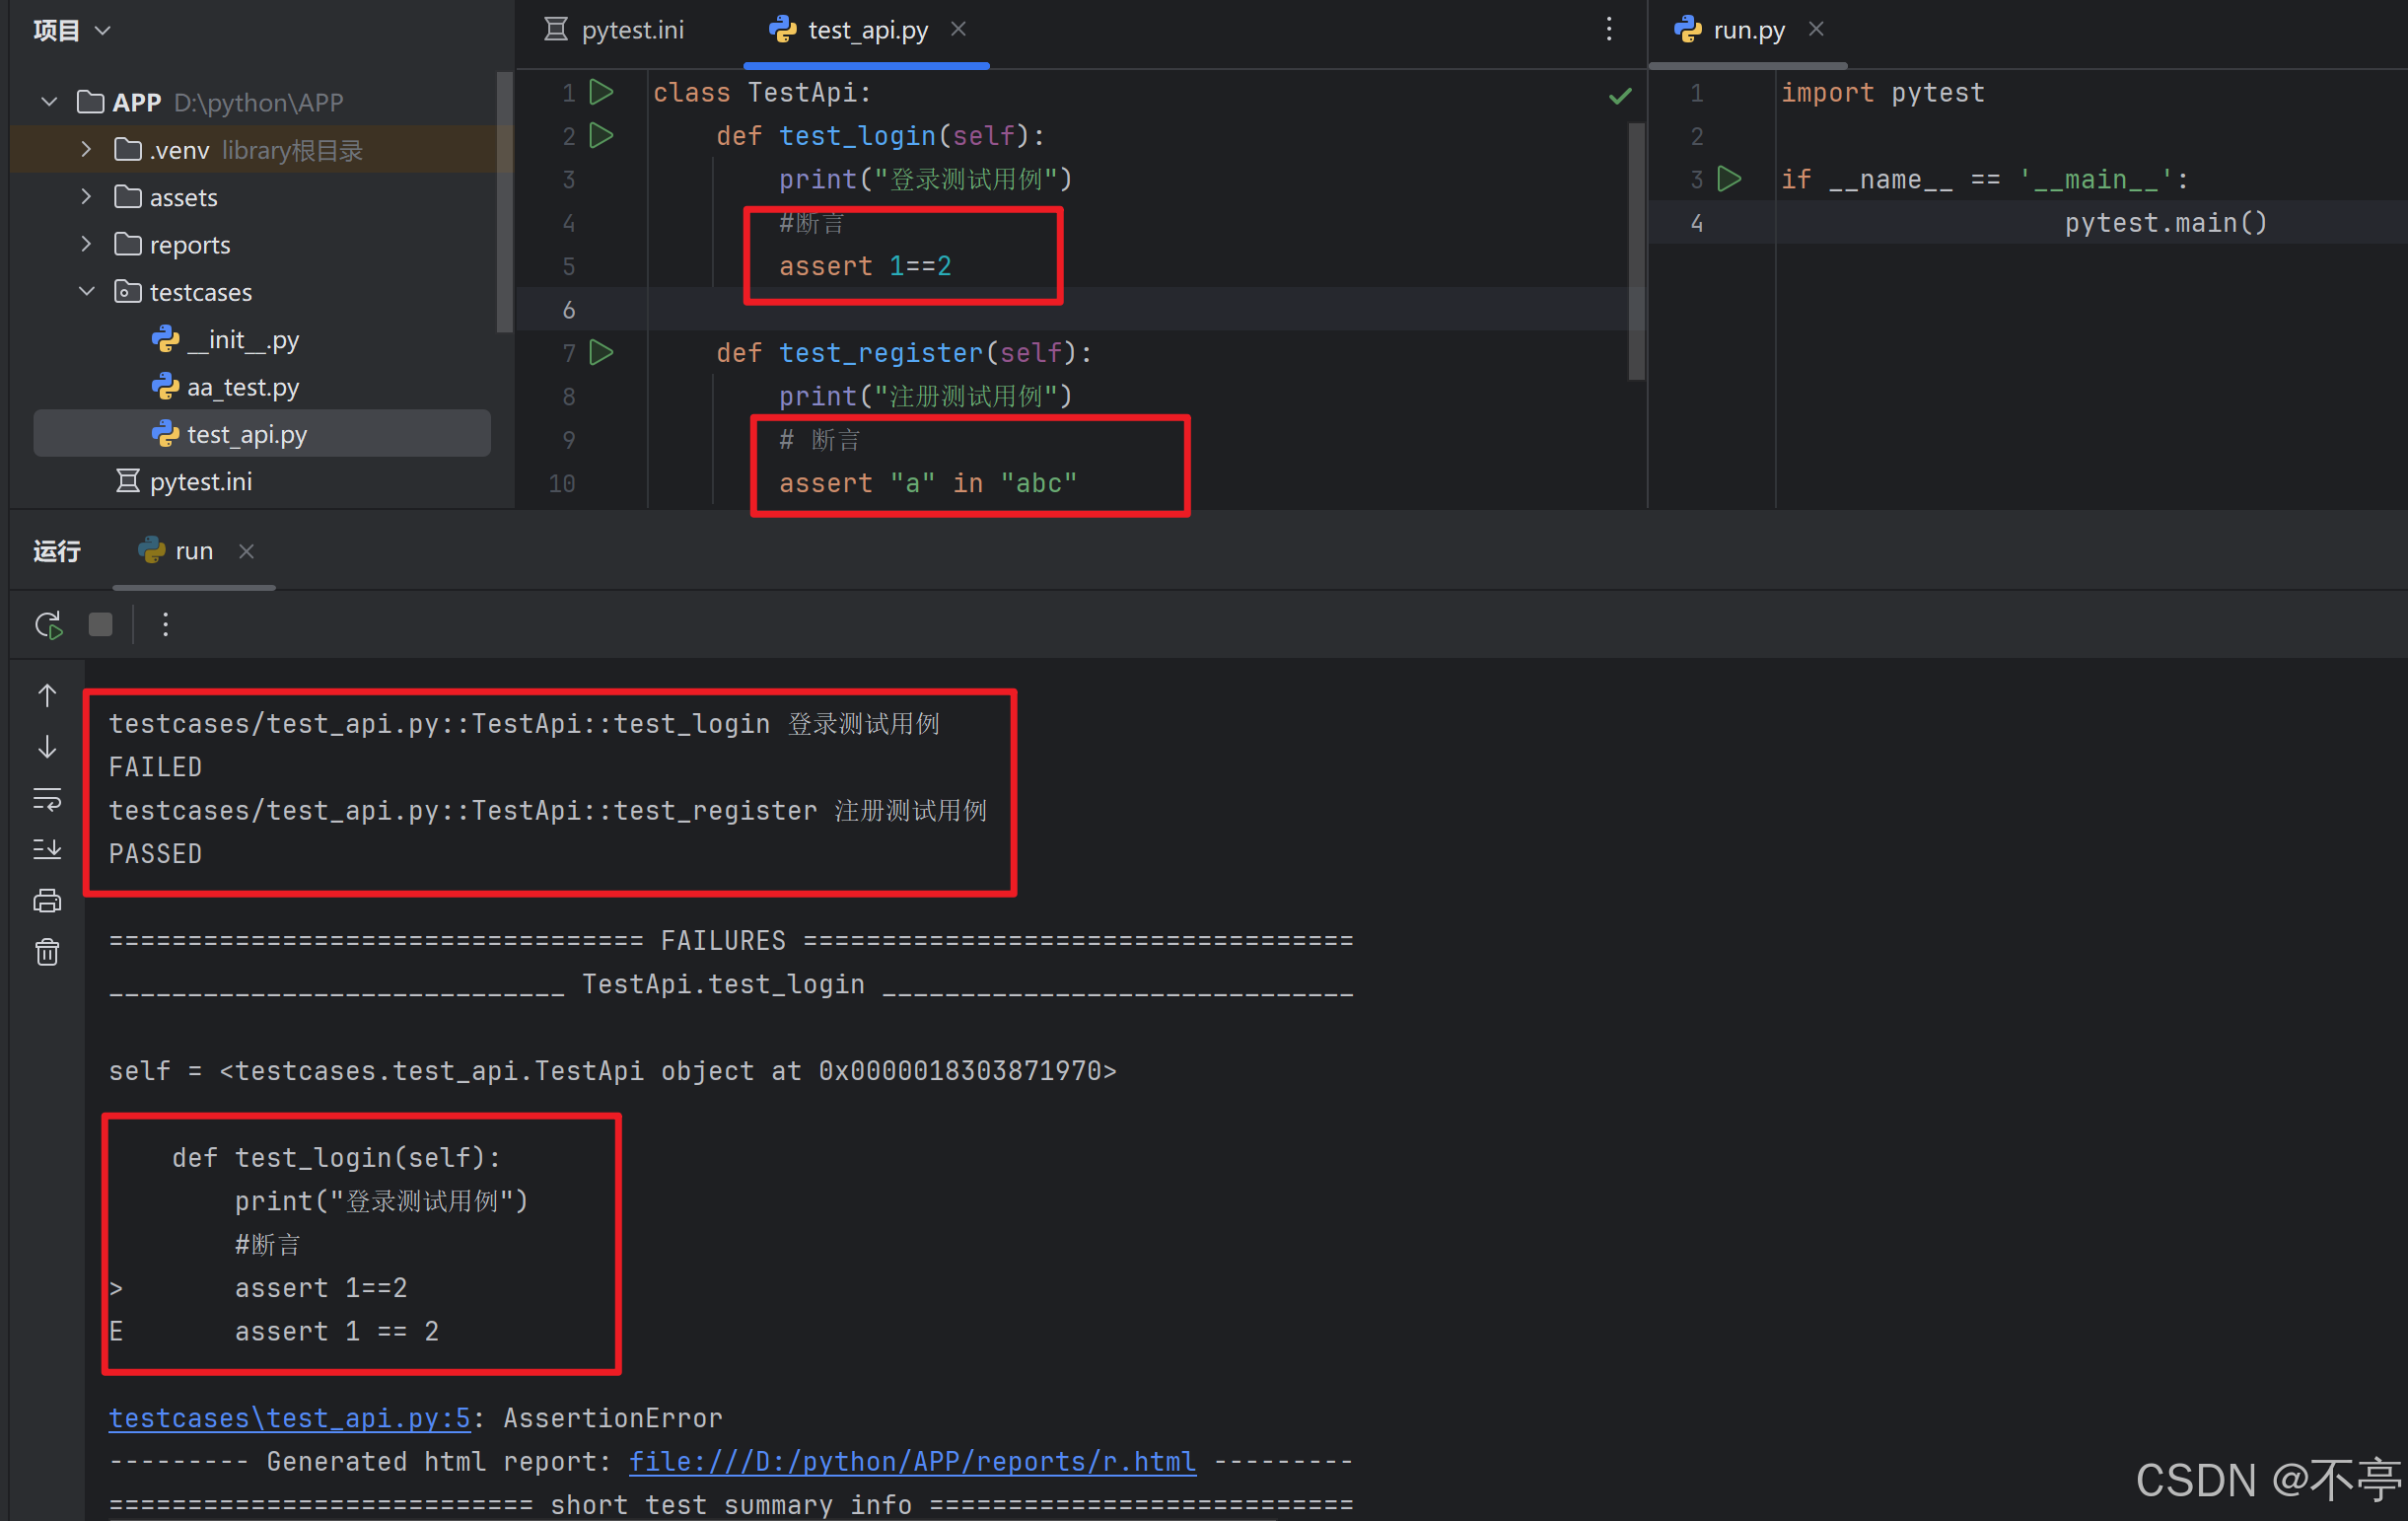
就是使用的python里面的原生的assert断言。
有两种写法:相等:assert a==b包含:assert "a" in "b"
二、pytest结合allure-pytest插件生成allure报告,企业级定制
1.安装allure环境
1.到官网下载allure,下载后解压,解压后配置path(环境变量加入:D:\allure-2.21.0\bin)路径。
下载地址:https://github.com/allure-framework/allure2/releases
在dos窗口和Pycharm(需要重启加载环境变量)中都需要验证:allure --version

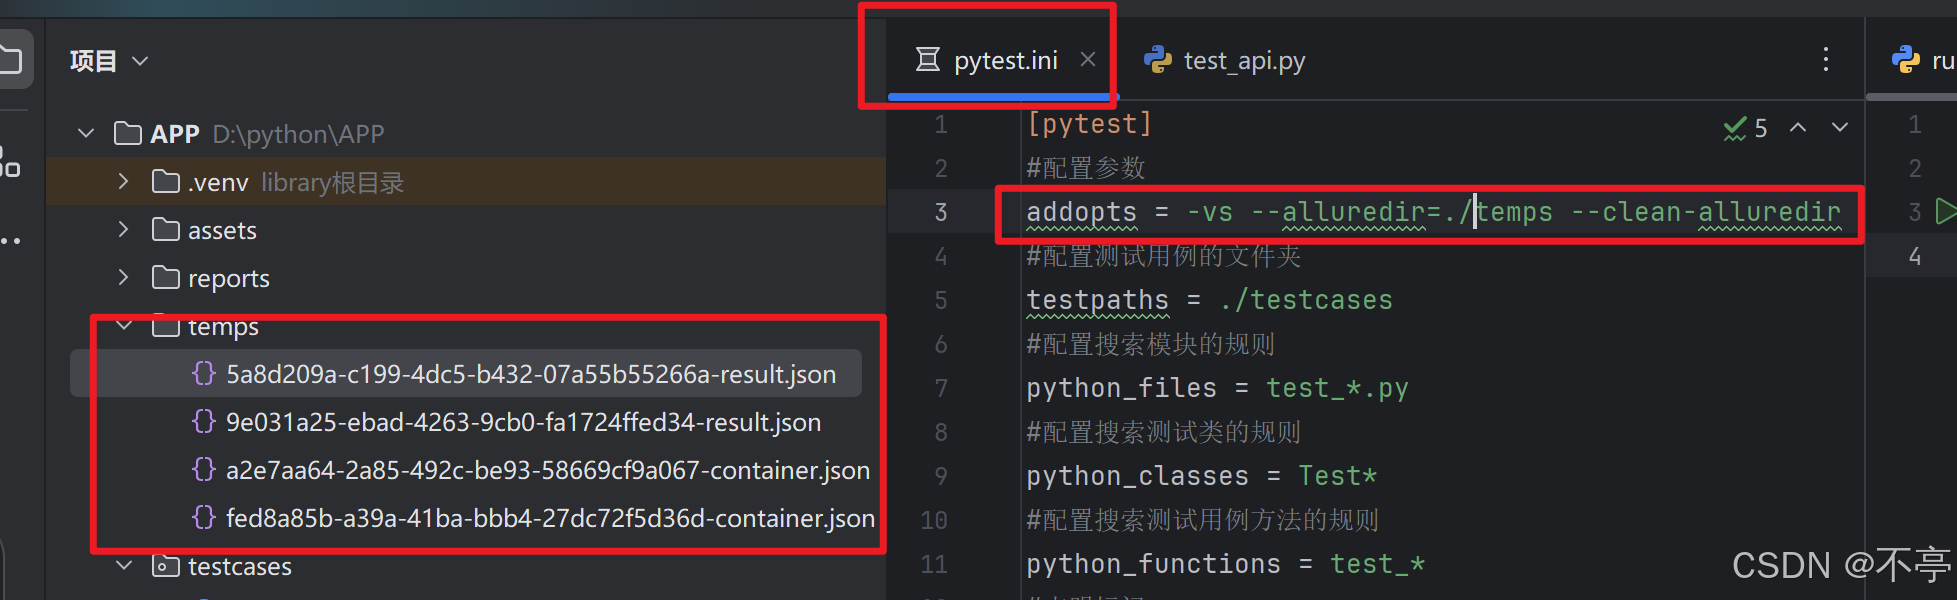
2.生成临时的json格式的报告
(一定要手写,不要复制粘贴)
addopts = -vs --alluredir=./temps --clean-alluredir其中--clean-alluredir是每次运行清空之前的文件的意思
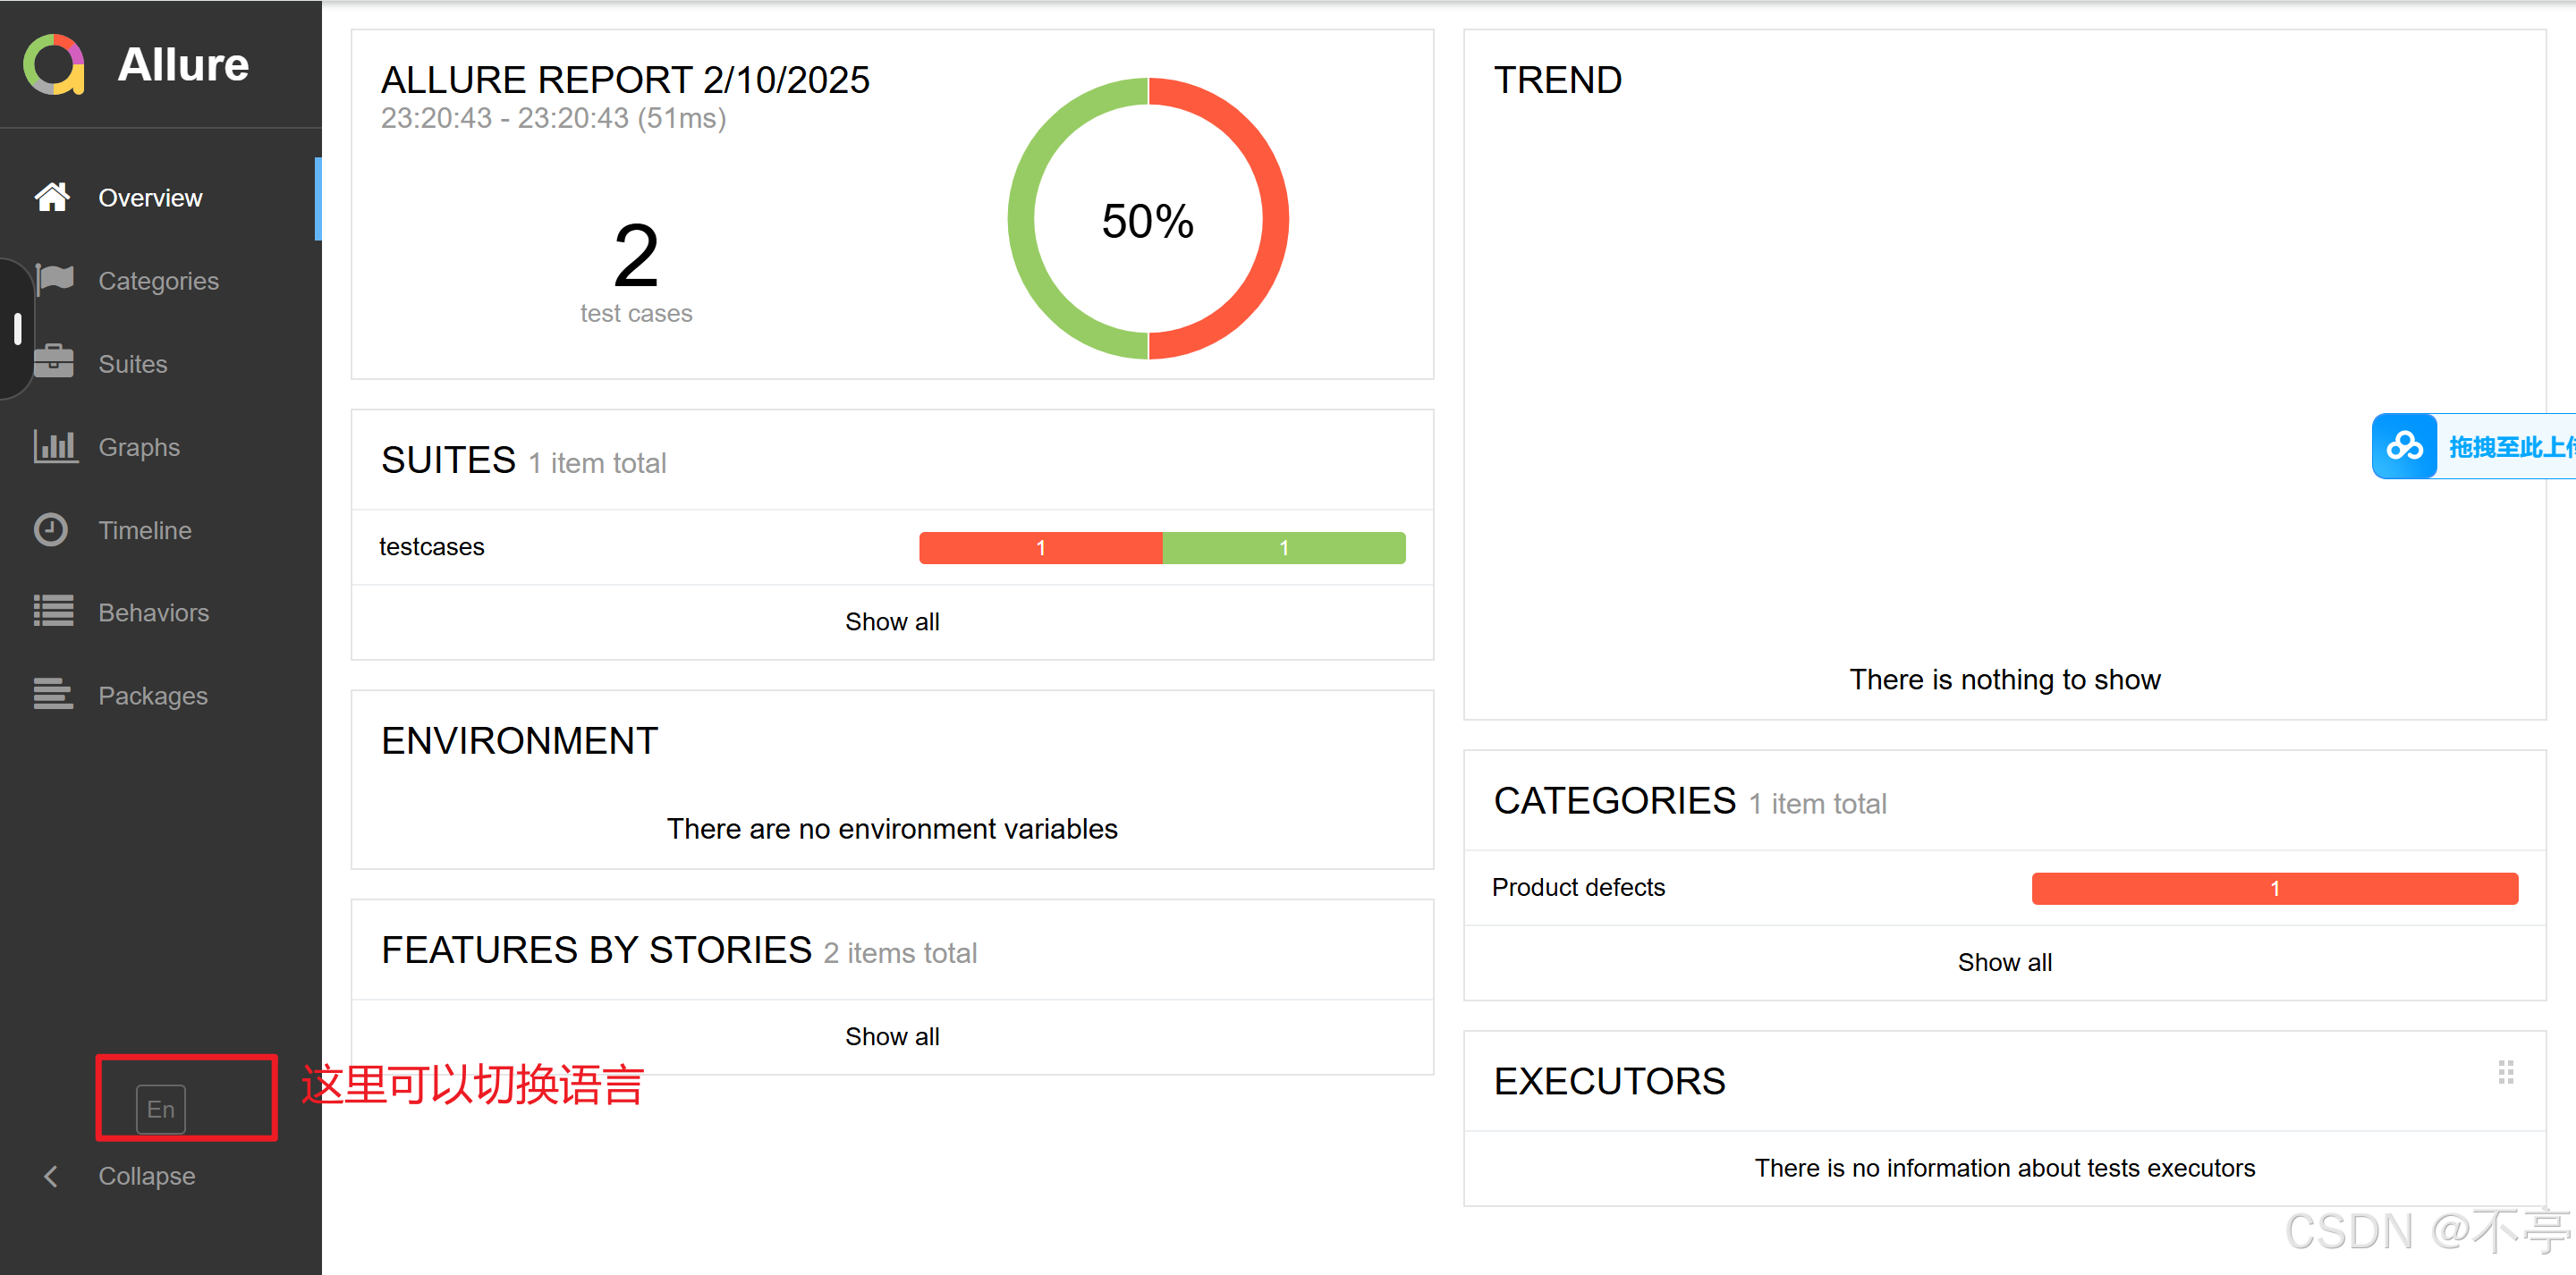
3.生成HTML的allure报告
(一定要手写,不要复制粘贴)
其中--clean是每次运行清空的意思./reports是报告生成后存放的路径./temps 临时json报告-o output输出
import os
import time

import pytest

if __name__ == '__main__':
                  pytest.main()
                  time.sleep(3)
                  os.system("allure generate ./temps -o ./reports --clean")
4.报告logo定制
(1)在D:\allure-2.21.0\config目录下配置自定义的logo插件
plugins:
- junit-xml-plugin
- xunit-xml-plugin
- trx-plugin
- behaviors-plugin
- packages-plugin
- screen-diff-plugin
- xctest-plugin
- jira-plugin
- xray-plugin
- custom-logo-plugin
重新运行并生成allue报告,生成之后去缓存刷新(Shift+F5)
(2)增加一个自己的logo文件并修改styles.css文件里面的样式
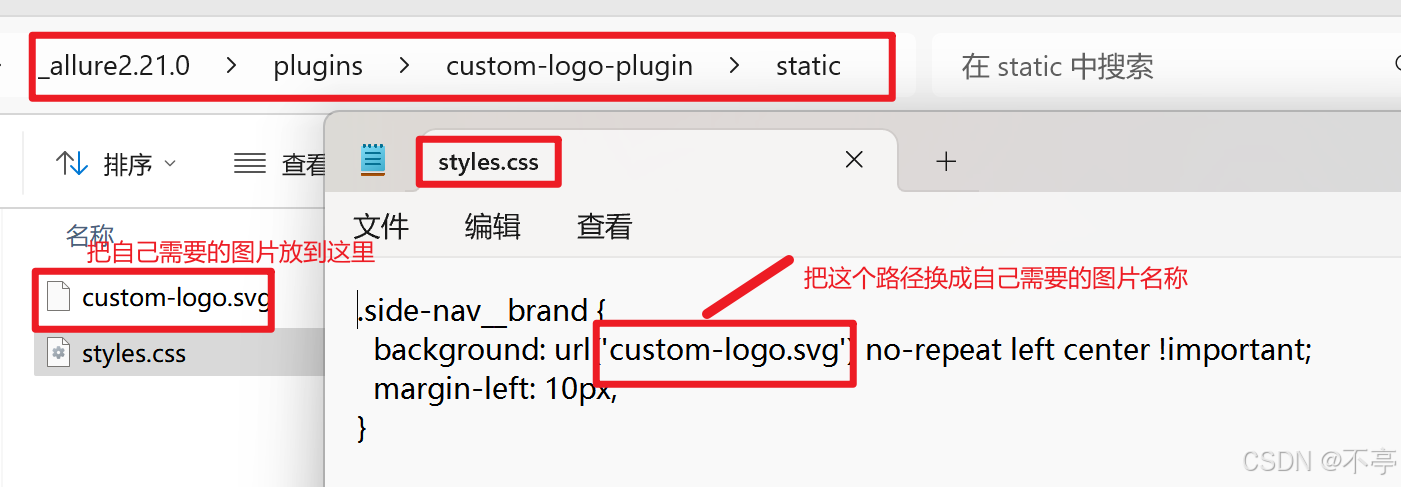
.side-nav__brand{
background: url('logo.png') no-repeat left center !important;
margin-left: 22px;
height: 90px;
background-size: contain !important;
}
.side-nav__brand-text{
display: none;
}通过修改这两个参数来调整图片的大小和位置:margin-left: 22px;height: 90px
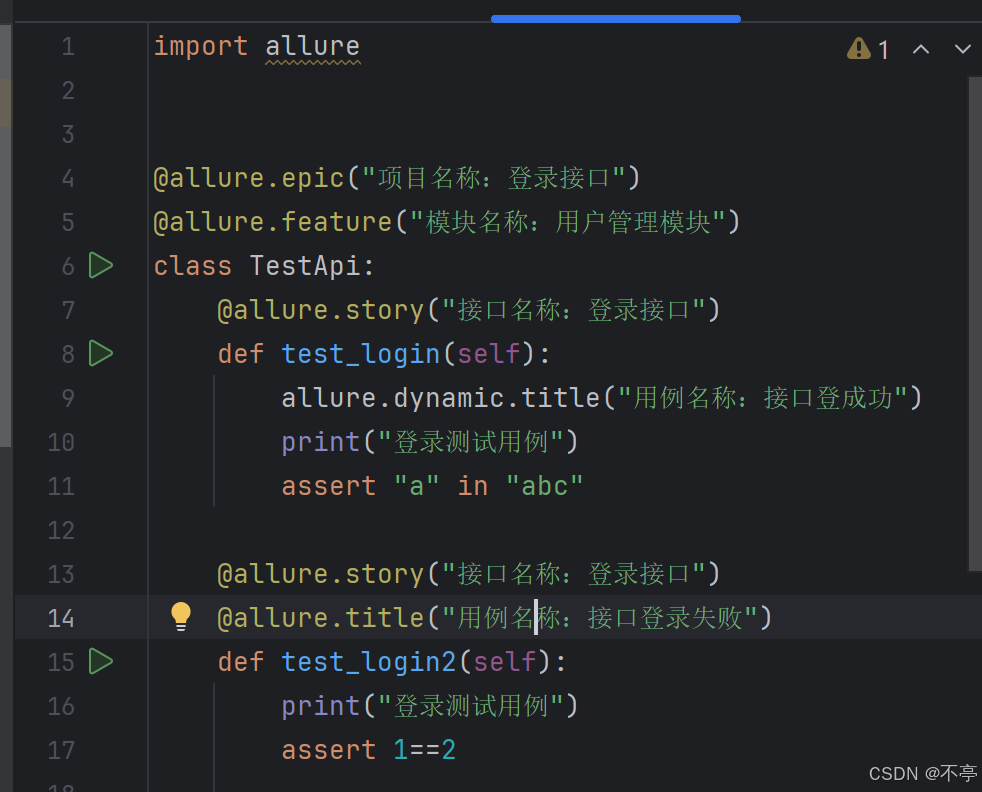
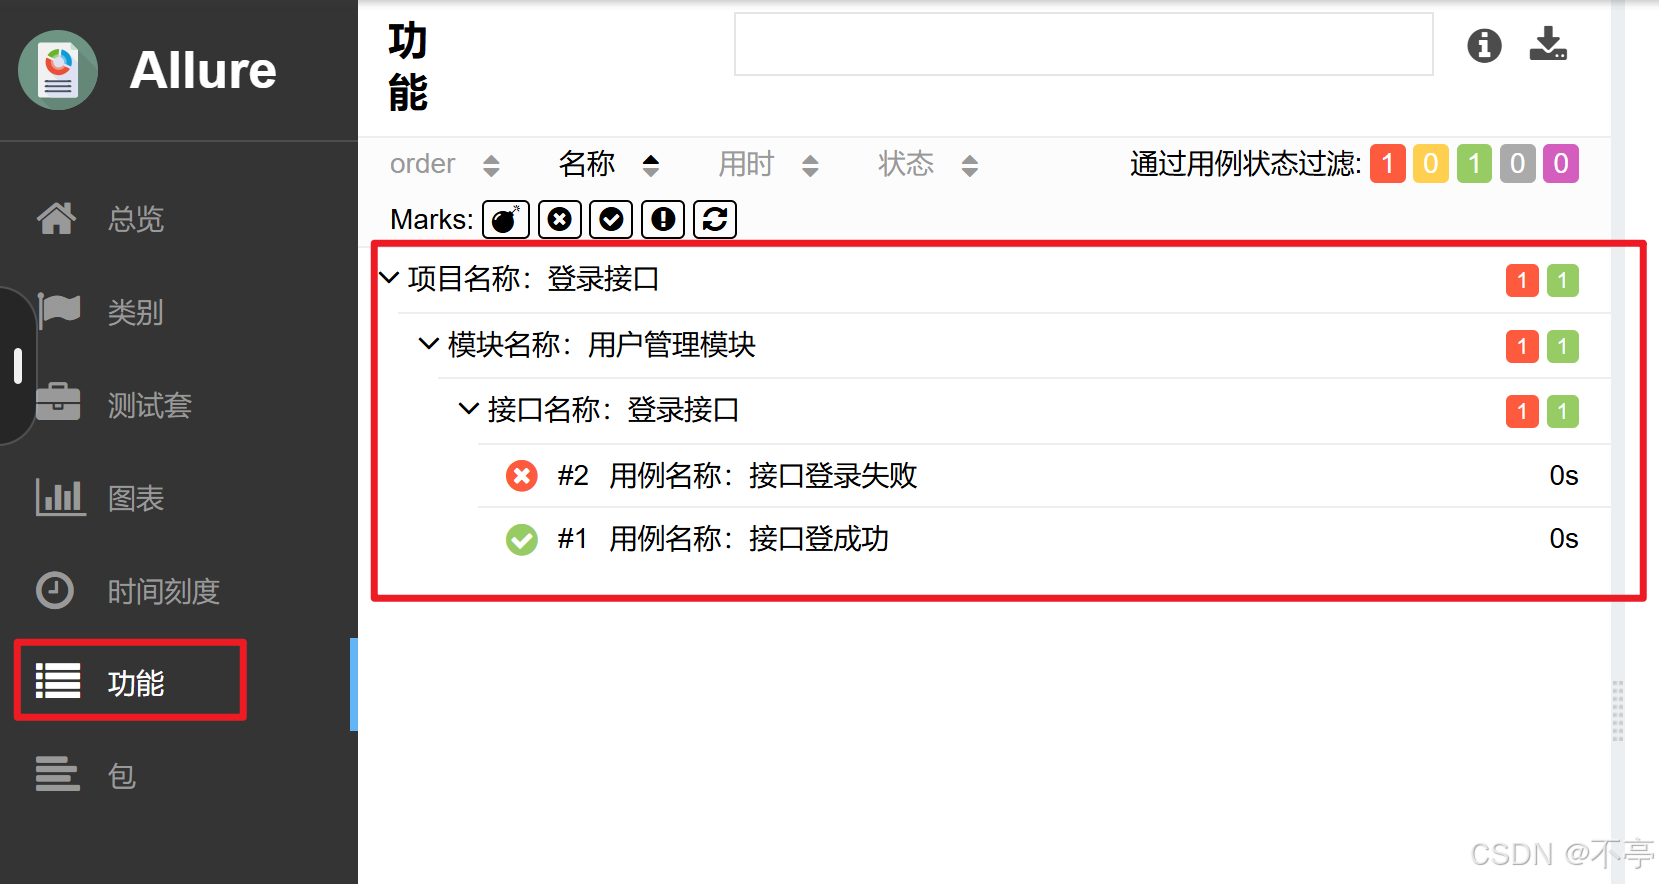
5.项目结构定制
左边:
- 项目名称:@allure.epic("")
- 模块名称:@allure.feature("")
- 接口名称:@allure.story("")
- 用例标题:有两种方式
@allure.title("")
allure.dynamic.title("")
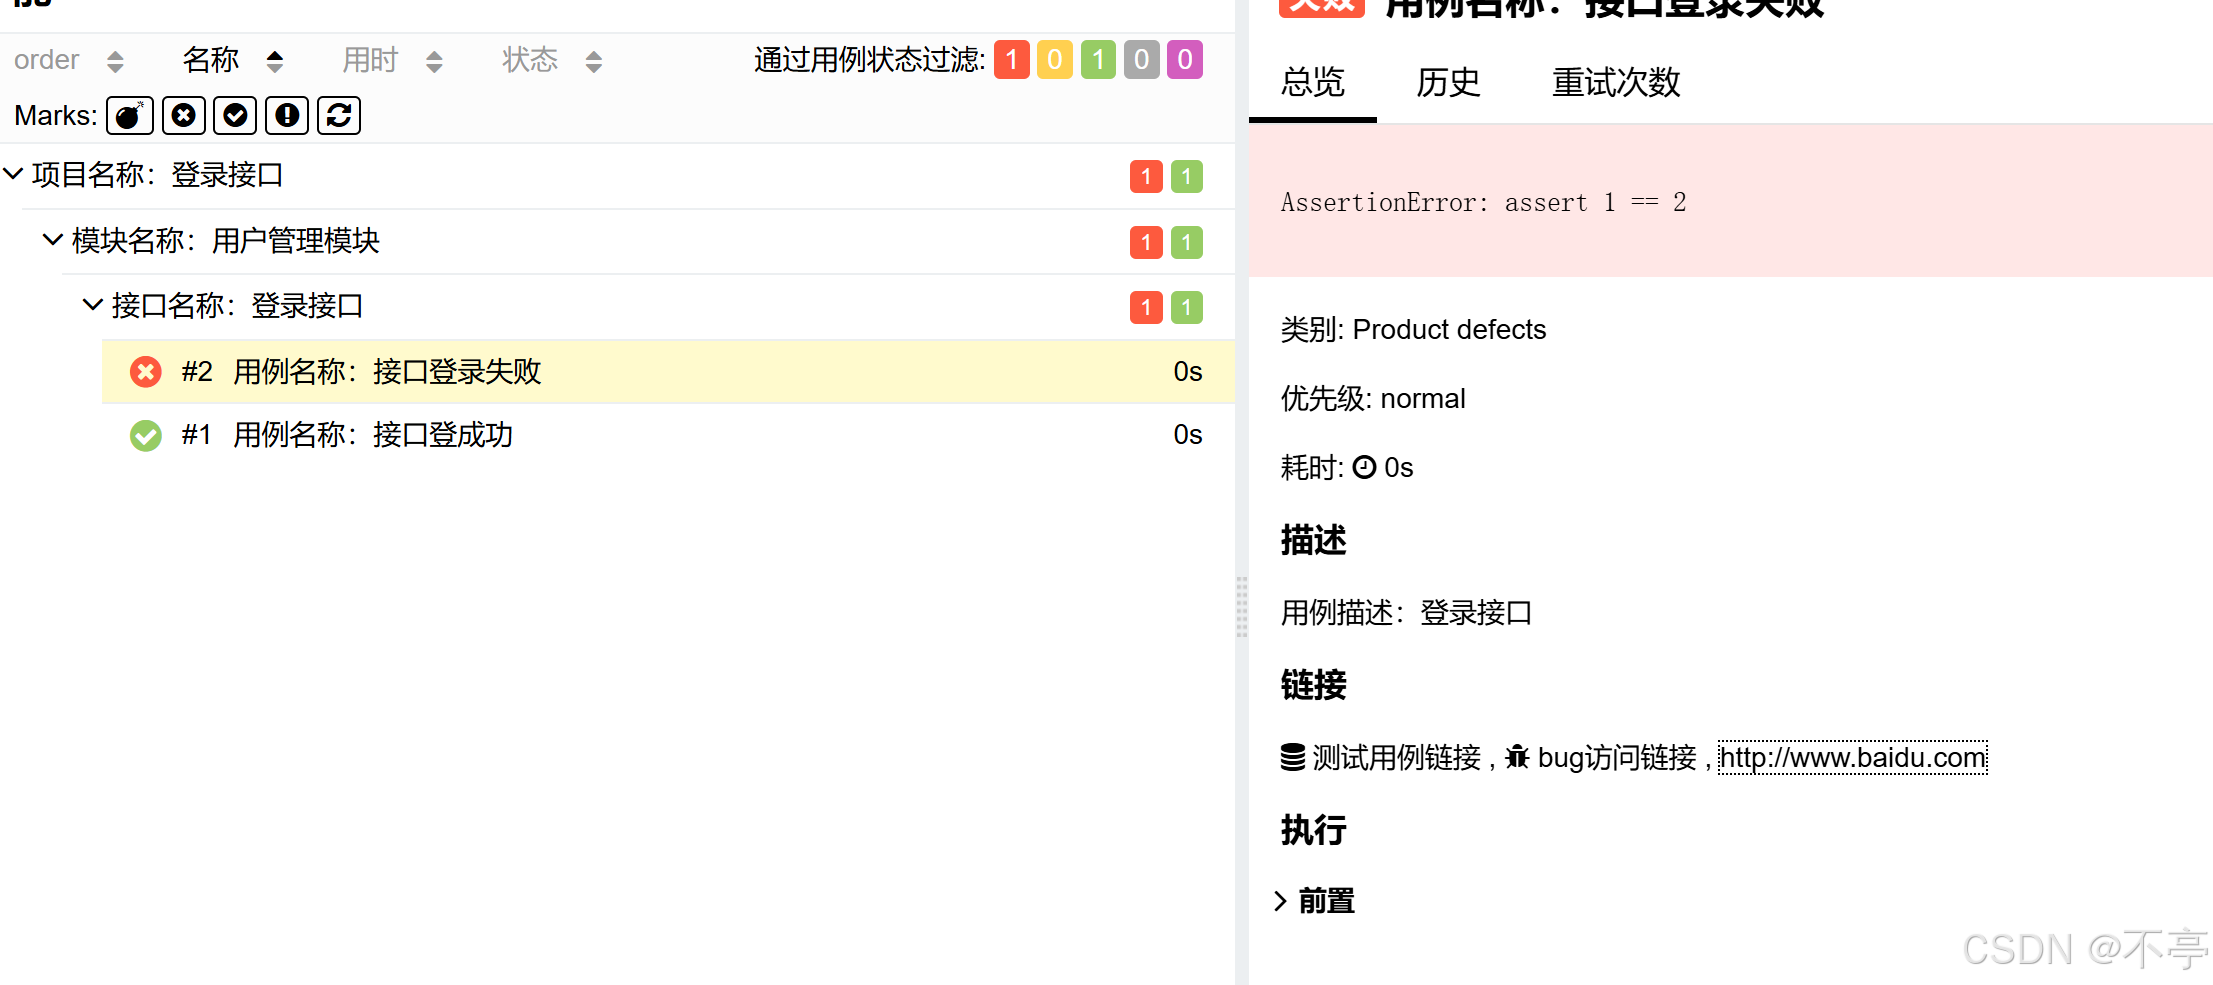
右边:
(1)测试用例严重级别:BLOCKER(致命),CRITICAL(严重),NORMAL(一般),MINOR(提
示),TRIVIAL(轻微)
@allure.severity(allure.severity_level.BLOCKER)
(2)测试用例的描述:有两种方式
    @allure.description("用例描述:登录接口")

    allure.dynamic.description("用例描述:登录接口")
(3)接口访问链接,BUG链接,测试用例链接
@allure.link("接口访问链接")
@allure.issue("bug链接")
@allure.testcase("测试用例链接")


#写法2
allure.dynamic.link("接口访问链接")
allure.dynamic.issue( "bug访问链接")
allure.dynamic.testcase("测试用例链接")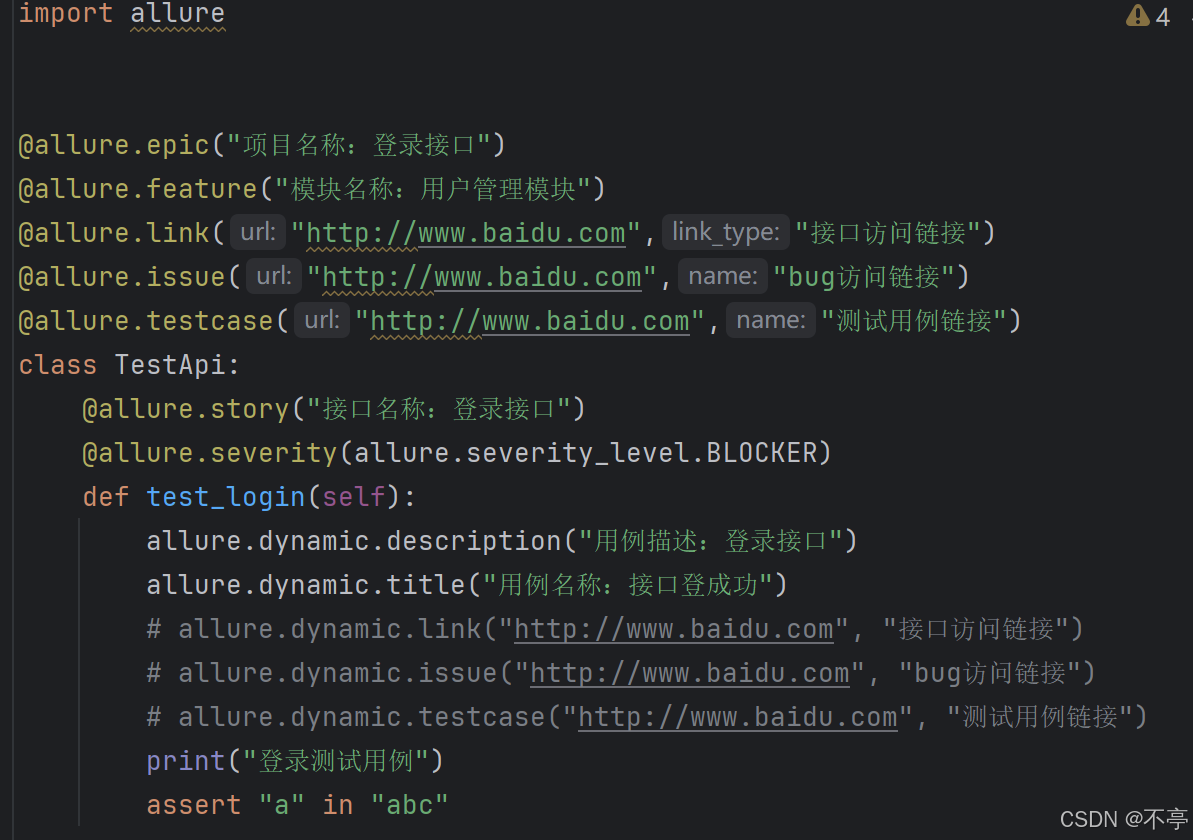
(4)测试用例的步骤
@allure.step()
或者
allure.step结合实际业务在循环中使用
def test_add_user(self):
 print("增加用户用例")
 for a in range(1,11):
 with allure.step("第"+str(a)+"步:接口地址:"):
 pass

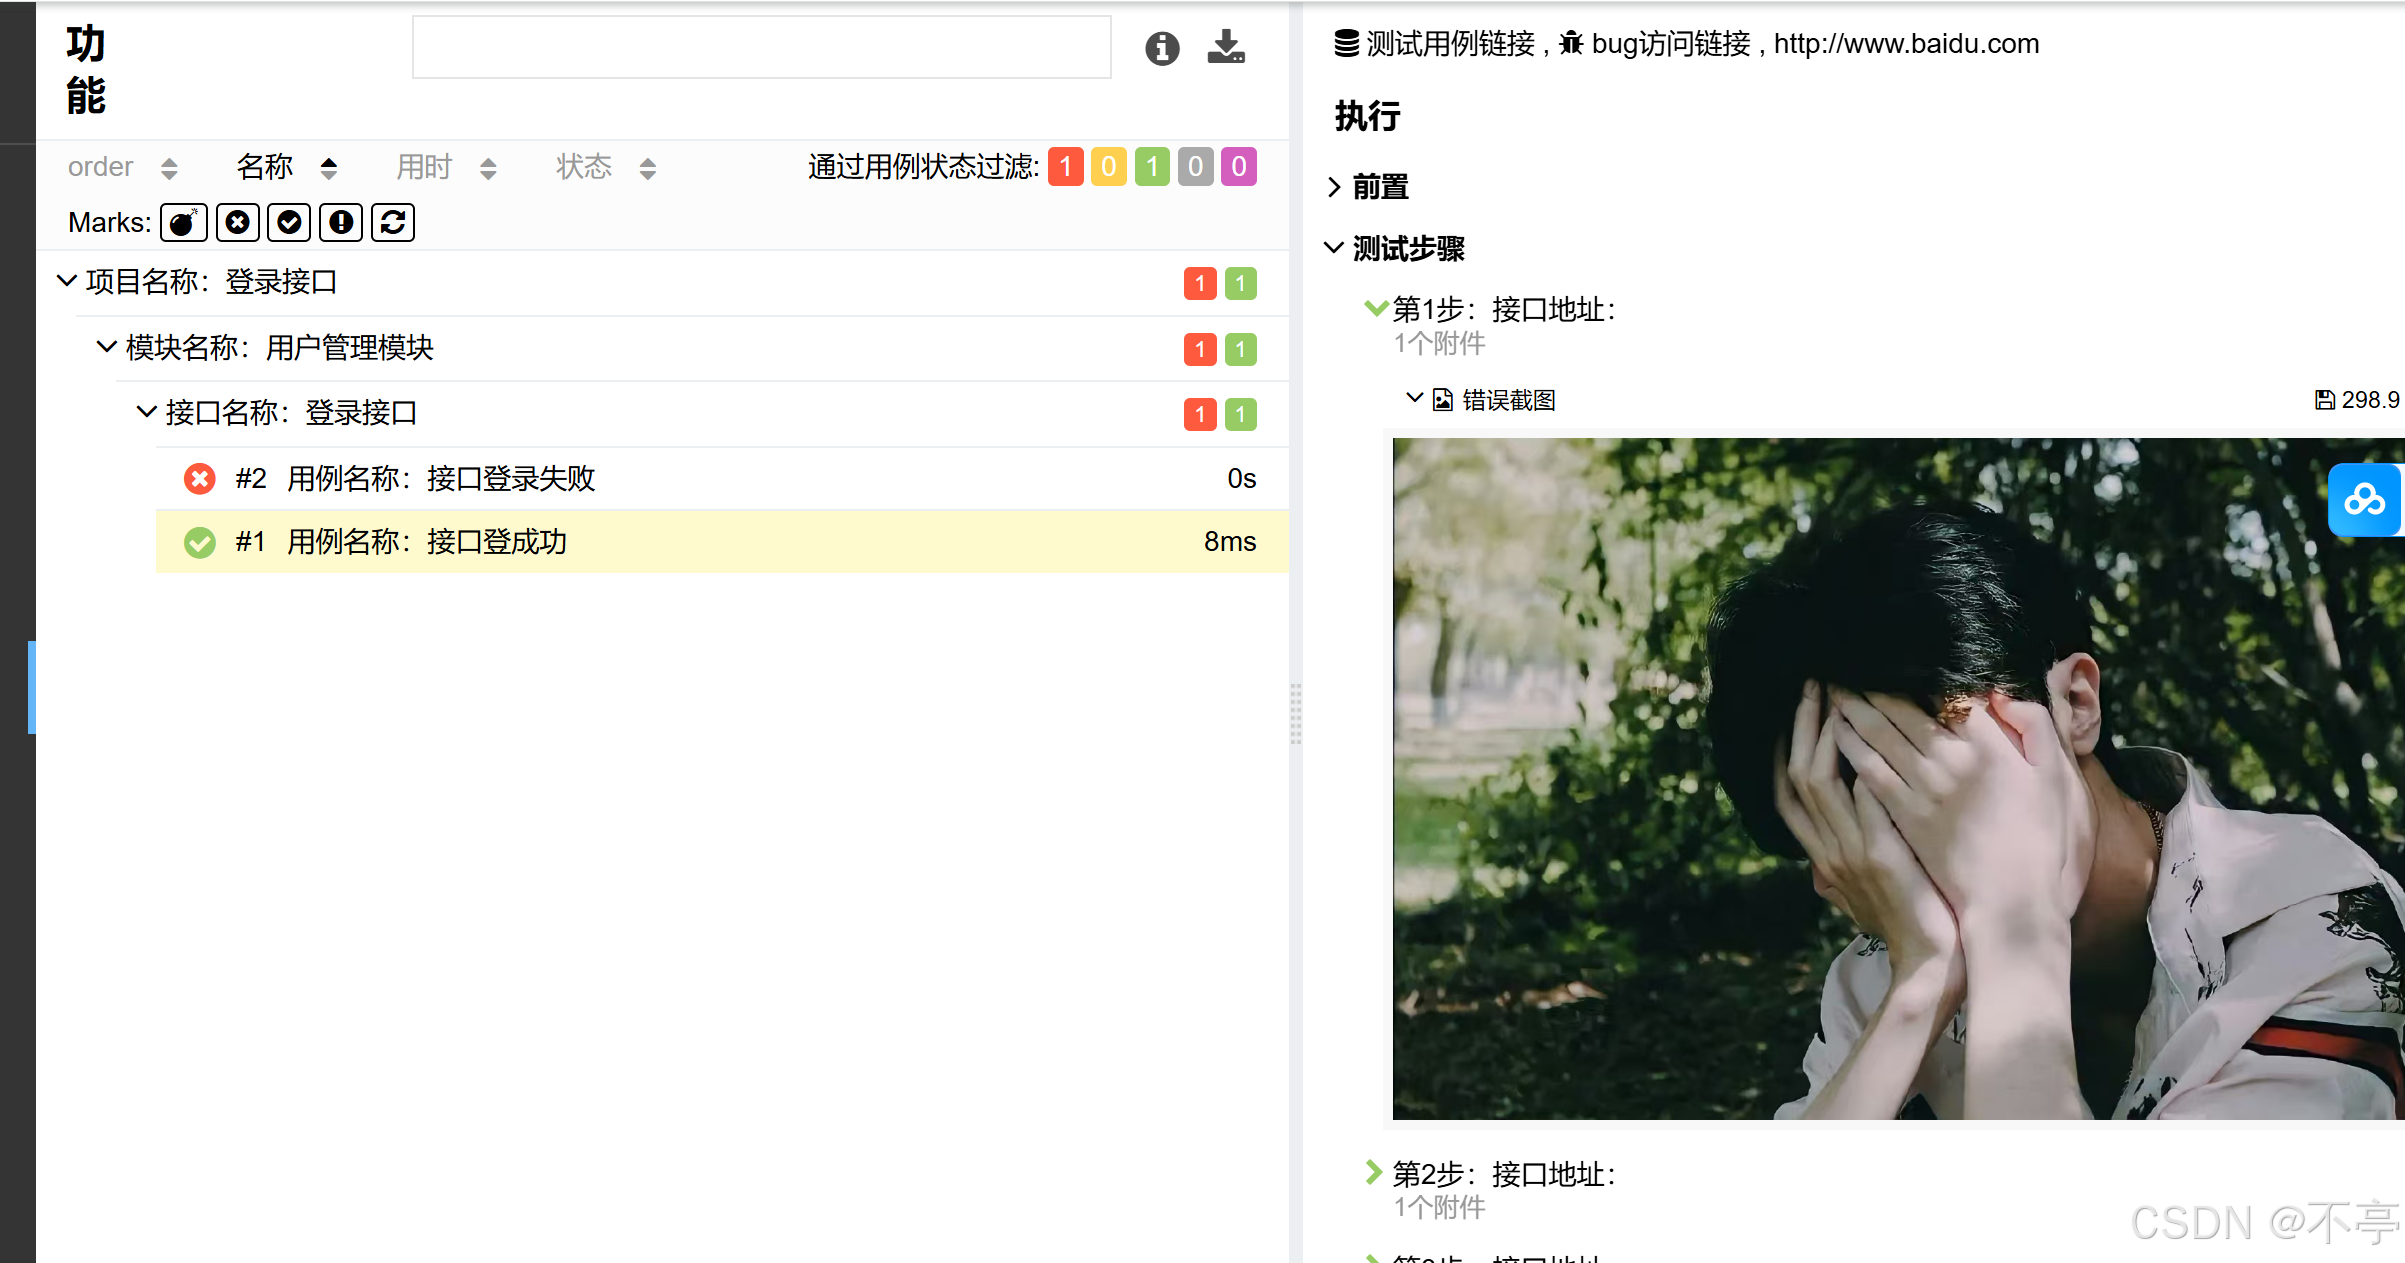
(5)测试用例步骤+附件:一般用于错误截图(一般用于web自动化测试)
        for a in range(1, 11):
            with allure.step("第" + str(a) + "步:接口地址:"):
        # 错误截图
                with open("C:\\Users\yunna\Pictures\微信图片_20240810140931.jpg", mode="rb") as f:
                    content = f.read()
                    allure.attach(body=content, name="错误截图",attachment_type=allure.attachment_type.PNG)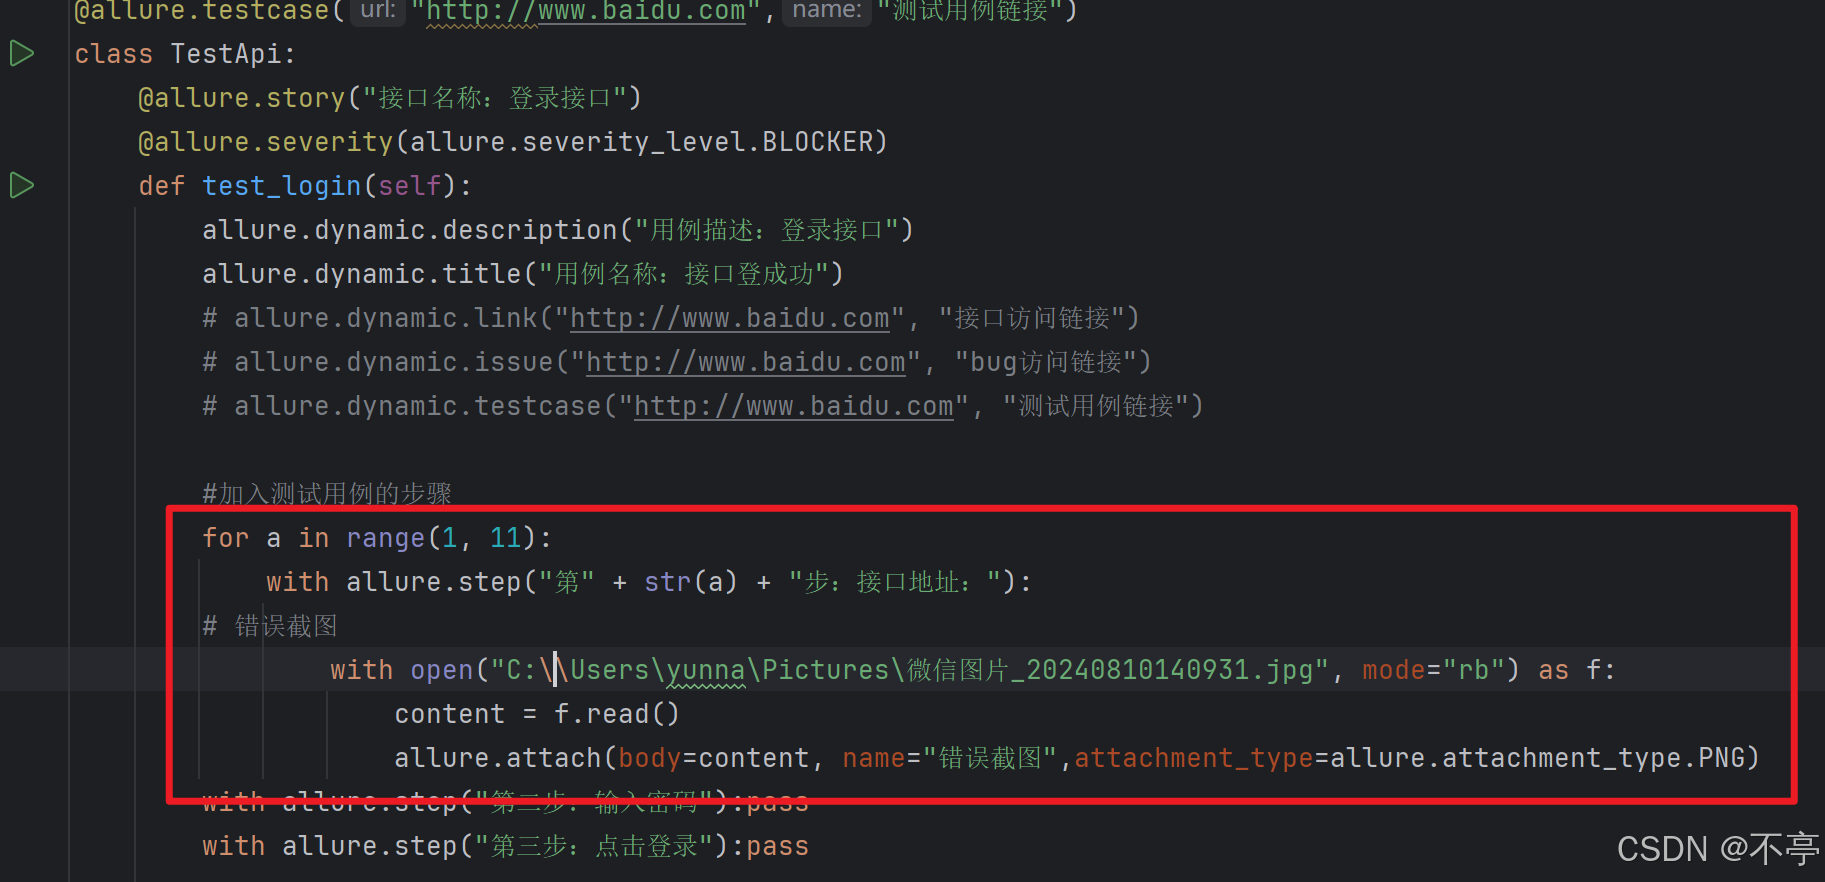
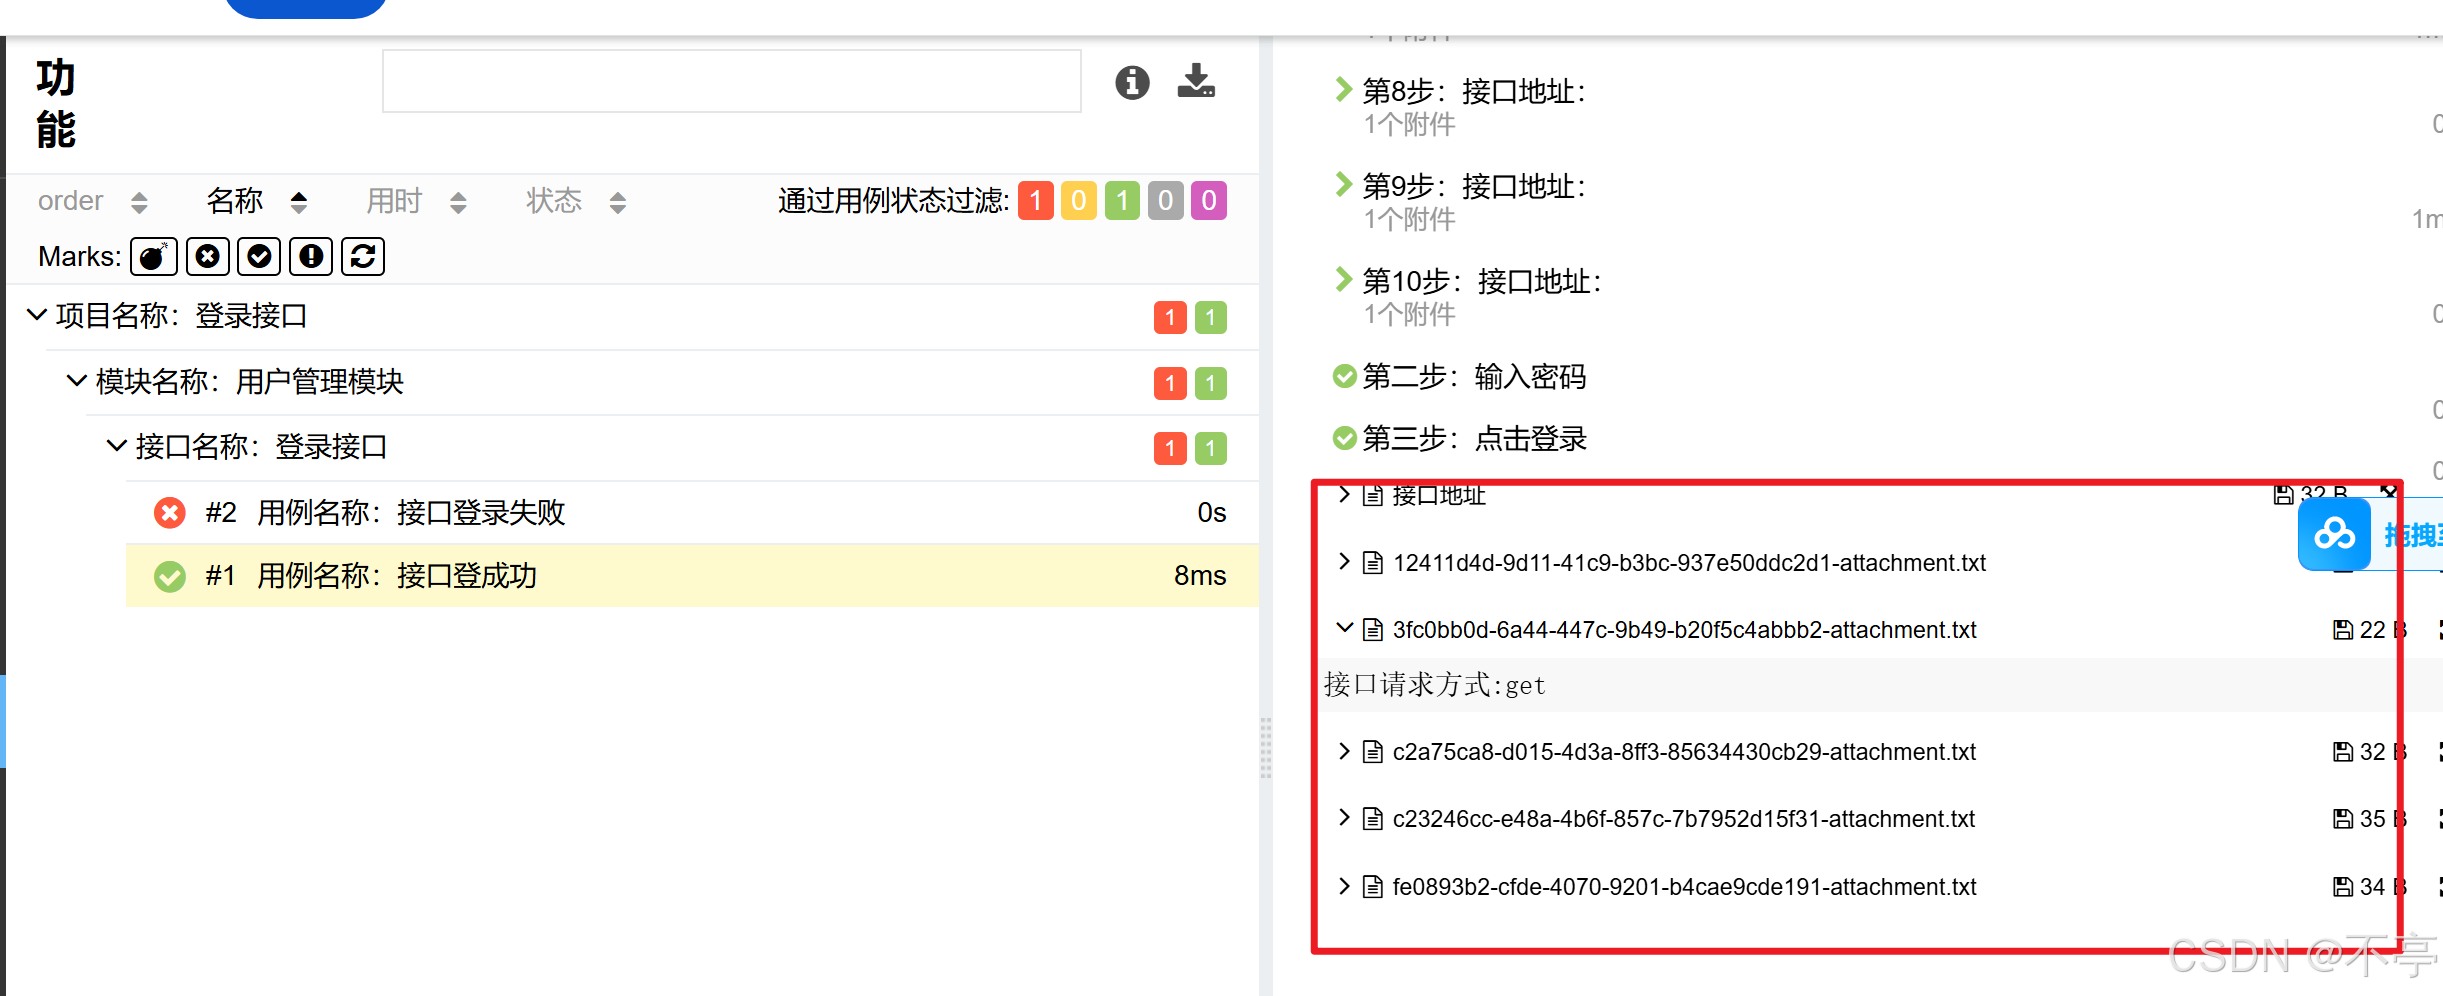
(6)文本内容的定制:一般应用于接口自动化
  # 接口自动化:文本
        # 请求四要素
        allure.attach("接口地址:https:www.baidu.com", name="接口地址",attachment_type=allure.attachment_type.TEXT)
        allure.attach("接口参数:一般从yaml中获取", attachment_type=allure.attachment_type.TEXT)
        allure.attach("接口请求方式:get", attachment_type=allure.attachment_type.TEXT)
        allure.attach("请求头:一般从yaml中获取", attachment_type=allure.attachment_type.TEXT)
        # 请求
        # 响应内容
        allure.attach("响应文本:一般从yaml中获取", attachment_type=allure.attachment_type.TEXT)
        allure.attach("接口执行接口:成功或失败", attachment_type=allure.attachment_type.TEXT)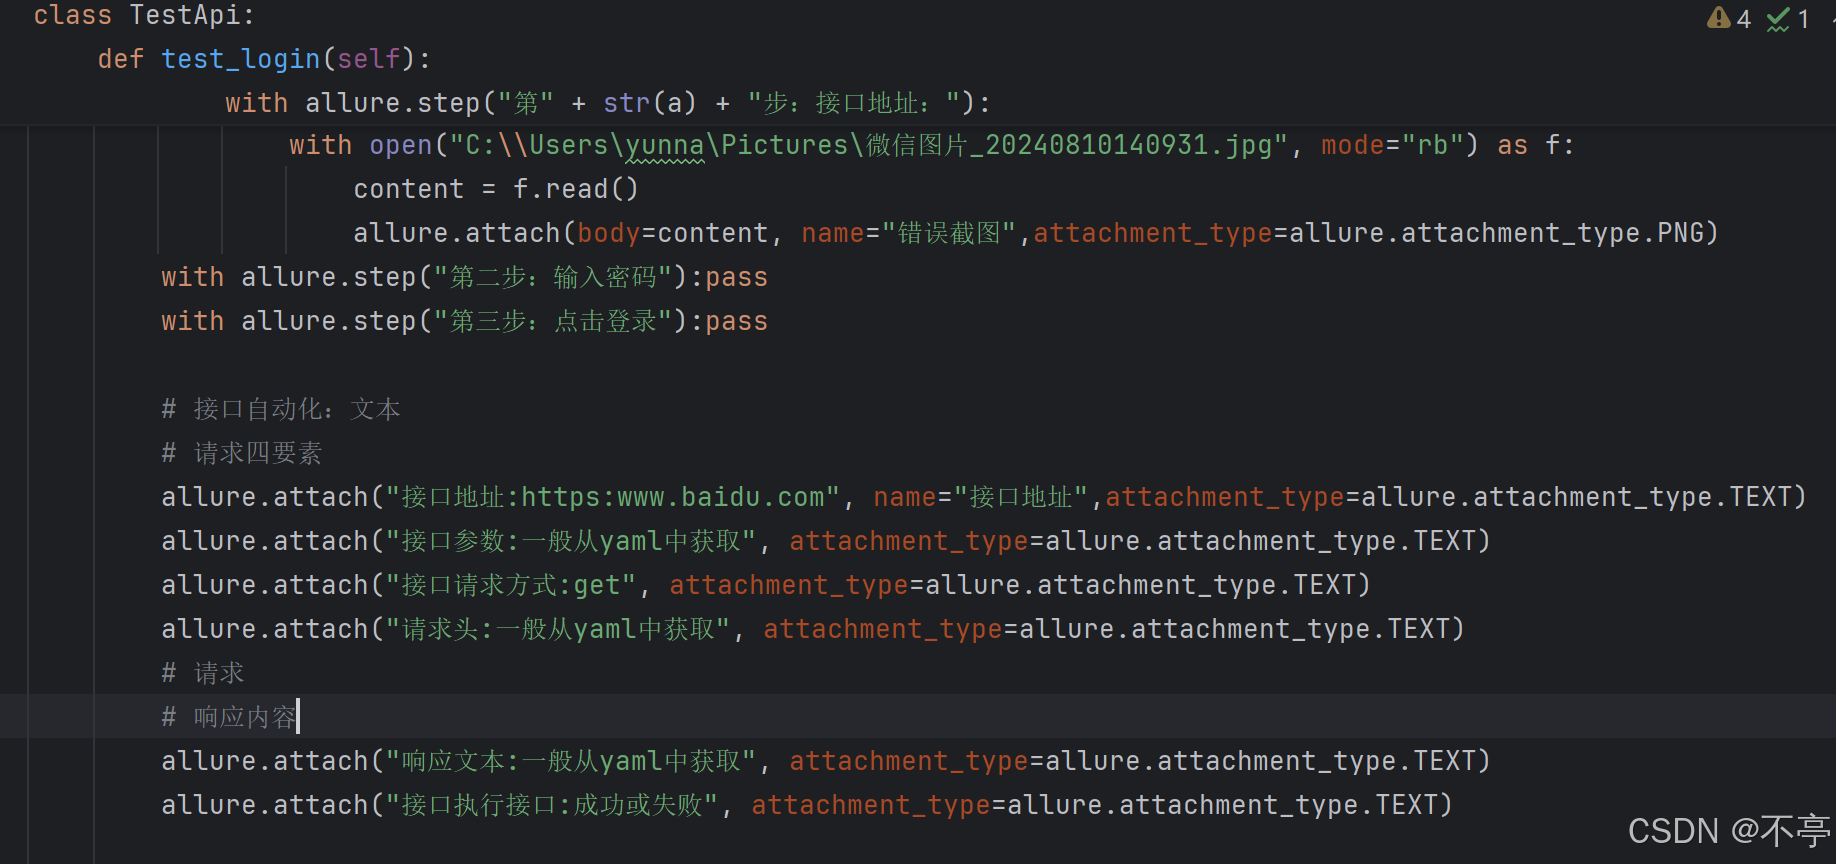
三、allure局域网查看
os.system("allure open ./reports")
