鸿蒙富文本实践
01
鸿蒙中的文本展示-Text组件
Text 组件的普通用法和其他语言一样,可以直接使用字符串Text('我是一段文本')
通过点语法设置文本样式:
Text('我是超长文本,超出的部分显示省略号。I am an extra long text, with ellipses displayed for any excess。')
  .width(250)
  .textOverflow({ overflow: TextOverflow.Ellipsis })
  .maxLines(1)
  .fontSize(12)
  .border({ width: 1 })
  .padding(10)
也可以将 Text 组件作为容器,添加 Span 、ImageSpan,针对每段文本设置不同的样式并且统一换行,ImageSpan 可以展示本地图片与网络图片:
Text() {
  Span('我是Span1,').fontSize(16).fontColor(Color.Grey)
    .decoration({ type: TextDecorationType.LineThrough, color: Color.Red })
  Span('我是Span2').fontColor(Color.Blue).fontSize(16)
    .fontStyle(FontStyle.Italic)
    .decoration({ type: TextDecorationType.Underline, color: Color.Black })
  Span(',我是Span3').fontSize(16).fontColor(Color.Grey)
    .decoration({ type: TextDecorationType.Overline, color: Color.Green })
}
.borderWidth(1)
.padding(10)
// xxx.ets
@Entry
@Component
struct SpanExample {
  build() {
    Flex({ direction: FlexDirection.Column, alignItems: ItemAlign.Center, justifyContent: FlexAlign.Center }) {
      Text() {
        Span('This is the Span and ImageSpan component').fontSize(25).textCase(TextCase.Normal)
          .decoration({ type: TextDecorationType.None, color: Color.Pink })
      }.width('100%').textAlign(TextAlign.Center)

      Text() {
        ImageSpan($r('app.media.icon'))
          .width('200px')
          .height('200px')
          .objectFit(ImageFit.Fill)
          .verticalAlign(ImageSpanAlignment.CENTER)
        Span('I am LineThrough-span')
          .decoration({ type: TextDecorationType.LineThrough, color: Color.Red }).fontSize(25)
        ImageSpan($r('app.media.icon'))
          .width('50px')
          .height('50px')
          .verticalAlign(ImageSpanAlignment.TOP)
        Span('I am Underline-span')
          .decoration({ type: TextDecorationType.Underline, color: Color.Red }).fontSize(25)
        ImageSpan($r('app.media.icon'))
          .size({ width: '100px', height: '100px' })
          .verticalAlign(ImageSpanAlignment.BASELINE)
        Span('I am Underline-span')
          .decoration({ type: TextDecorationType.Underline, color: Color.Red }).fontSize(25)
        ImageSpan($r('app.media.icon'))
          .width('70px')
          .height('70px')
          .verticalAlign(ImageSpanAlignment.BOTTOM)
        Span('I am Underline-span')
          .decoration({ type: TextDecorationType.Underline, color: Color.Red }).fontSize(50)
      }
      .width('100%')
      .textIndent(50)
    }.width('100%').height('100%').padding({ left: 0, right: 0, top: 0 })
  }
}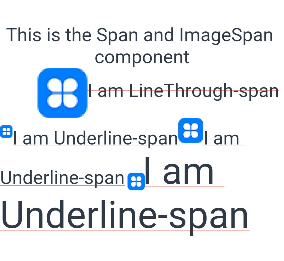
这样通过 Span、ImageSpan 混排就实现了基础的图文混排。
02
表情图片自动匹配
对于实际中的实操,往往不是固定写好的混排代码,而是需要针对后端下发的数据自动进行转译。比如带表情的文本。
项目中的自定义表情一般会以配置表的形式进行管理:
{"imageName":"icon_emotion_1","description":"[微笑]","id":44},{"imageName":"icon_emotion_2","description":"[嘻嘻]","id":43}用特殊格式的字符串,如:"[微笑]"、"[嘻嘻]",来分别对应相应的表情图片。
而后端下发的数据则只是一段包含表情关键字的普通文本,并且没有额外下发表情文本的位置信息,如:"第一次见面她帮他出头,他被她拽拽的气质吸引,对她一见钟情,多年后重逢续写故事[色]这该死的羁绊~",转换后为:
这样就需要将文本切块,把本文中的表情关键字提取出来。上面的文本就转换为:"第一次见面她帮他出头,他被她拽拽的气质吸引,对她一见钟情,多年后重逢续写故事"、"[色]"、"这该死的羁绊~"。切块的过程采用正则匹配方式。
首先,需要将表情配置表中的所有关键字整合加工为正则匹配字符串:"[微笑]|[嘻嘻]|[哭笑]...",这样只要目标文本中包含任意一个关键字,都可以获得匹配结果。在加工正则字符串的过程中,同时将表情关键字与图片名组装为键值对表:["[微笑]":"icon_emotion_1","[嘻嘻]":"icon_emotion_2",...],用以后续获取转译图片。
鸿蒙中的正则匹配代码:
let reg = RegExp(EmoticonManager.getInstance().emojiRegExpStr,'g') //正则匹配串
let result: IterableIterator<RegExpMatchArray> = content.matchAll(reg)//可迭代匹配结果
let next = result.next()//第一个结果
while (next.done == false) {
 let matchArr: RegExpMatchArray = next.value

  //分割字符串

 next = result.next() //下一个结果
}
注意项:RegExp(xxx,'g') ,'g' 代表贪婪模式,会返回所有匹配结果,不然只会获取第一个匹配结果。
最终将文本 "第一次见面她帮他出头,他被她拽拽的气质吸引,对她一见钟情,多年后重逢续写故事[色]这该死的羁绊~" 转换为数据模型数组:
[
 [
  content: "第一次见面她帮他出头,他被她拽拽的气质吸引,对她一见钟情,多年后重逢续写故事",
  type: Text,
  resource: NULL
 ],
 [
  content: "[色]",
  type: Emoji,
  resource: xxxx
 ],
 [
  content: "这该死的羁绊~",
  type: Text,
  resource: NULL
 ]
]
再在 Text 组件中遍历组装:
Text(){
 ForEach(this.model.getDecodedContentArr(), (element: CommentTextModel) => {
  if (element.type == CommentTextType.Text) {
      Span(element.content)
        .onClick(() => {
         this.openCommentInput()
       })
    }
    if (element.type == CommentTextType.Emoji && element.resource != null) {
      ImageSpan(element.resource)
        .width(EmoticonManager.emojiSideLengthForFontSize(this.contentFontSize))
        .height(EmoticonManager.emojiSideLengthForFontSize(this.contentFontSize))
        .verticalAlign(ImageSpanAlignment.CENTER)
        .onClick(() => {
         this.openCommentInput()
       })
    }
  })
}
这样就完成了字符串到带图富文本的自动转换。
2.1 表情配置管理
想要实现表情图片自动匹配,首先就需要先有表情图片,要有对应的表情配置表,项目中的表情配置分程序内置默认配置与线上后台下发配置。
2.1.1 本地配置
我们采用字符串的形式,将配置表保存到管理类的静态属性中:
export class LocalEmoticon {
  static readonly data = '{"emoticons":[{"imageName":"icon_emotion_1","description":"[微笑]","id":44},{"imageName":"icon_emotion_2","description":"[嘻嘻]","id":43},{"imageName":"icon_emotion_3","description":"[笑哭]","id":42}, ... ]}'
}
这样读取字符串后直接映射就可以得到序列化好的类型数据:
let jsonString = LocalEmoticon.data
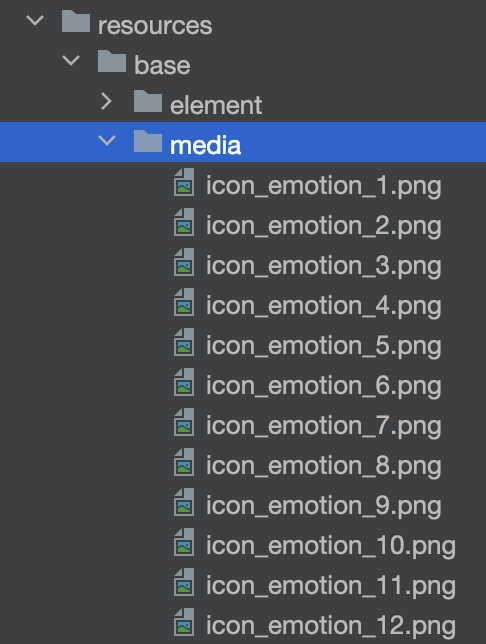
const model = plainToClass(EmoticonConfigModel,JSON.parse(jsonString))表情图片文件直接放置在 resources -> base -> media 文件夹中,获取的时候直接通过:
let str = 'app.media.' + imageName
let resourceStr = $r(str)
获取 ResourceStr ,这里选取 media 文件夹是因为 r 可以
2.1.2 线上配置
线上配置会下发配置表数据以及对应的图片压缩包下载地址,配置表和本地配置一样读取并序列化就可以,但是图片文件需要先下载到沙盒文件夹中再访问。
鸿蒙中下载文件需要使用 request.downloadFile ,下载到指定的文件夹目录后再使用 zlib.decompressFile 解压缩到图片存储目录。
读取的时候拼接出文件地址,再通过 fileUri 获取文件 uri 字符串就可以:
let path = EmoticonManager.getInstance().folderPath() + '/' + imageName
return fileUri.getUriFromPath(path)
这样无论是本地配置还是线上配置获取到的图片资源都统一成了 ResourceStr 类型,直接丢给 ImageSpan 就可以加载出对应图片。
03
富文本输入框
输入框选用 RichEditor 组件。RichEditor 通过绑定 RichEditorController 来控制布局样式和插入富文本内容。

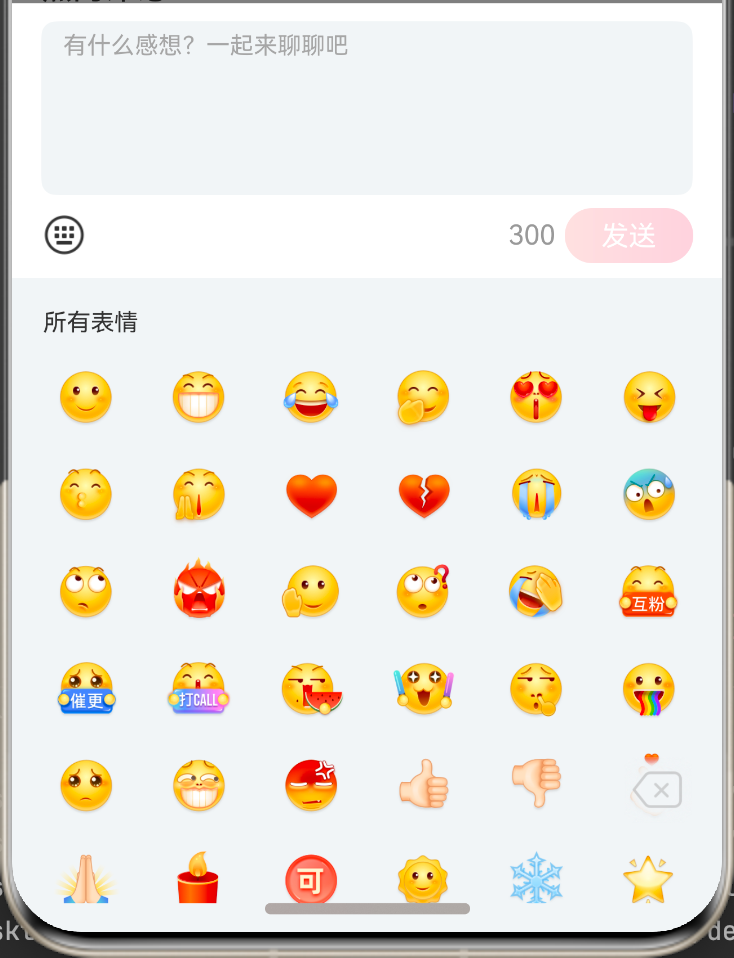
3.1 自定义表情面板
通过 customKeyboard 传入自定义组件,并在点击事件中通过 RichEditorController 来控制输入框的插入和删除:
RichEditor({controller:this.editorController})
.key(this.editorKey)
.customKeyboard(this.useCustomKeyboard ? this.emojiKeyboard():undefined)
//自定义键盘实体
@Builder emojiKeyboard() {
EmojiKeyboard({
currentWidth:this.currentWidth,
emojiOnClick: (model) => { this.emojiOnClick(model) },
deleteOnClick: () => { this.emojiOnDelete() }})
.backgroundColor('#F2F5F7')
.width('100%')
.height(this.emojiKeyboardHeight)
.onAreaChange((oldValue:Area,newValue:Area) => {
if (typeof newValue.width === 'number') {
this.currentWidth = newValue.width as number
}
})
}
//插入图片
emojiOnClick(model: EmoticonModel) {
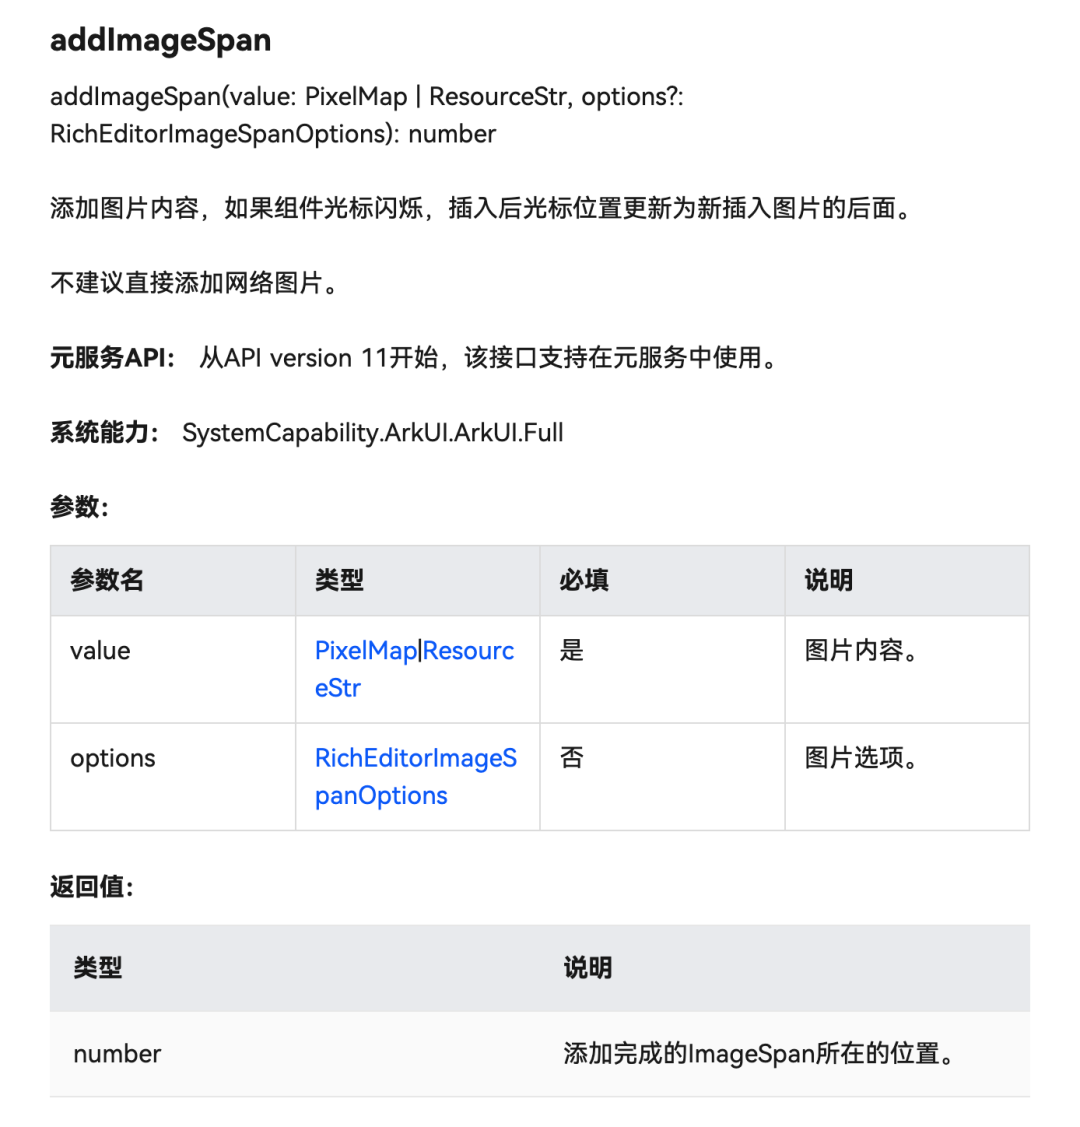
this.editorController.addImageSpan(
EmoticonManager.getInstance().getPixelMap(model.description),
{imageStyle: {
size:[EmoticonManager.emojiSideLengthForFontSize(this.fontSize),
EmoticonManager.emojiSideLengthForFontSize(this.fontSize)],
verticalAlign:ImageSpanAlignment.CENTER },
offset: this.editorController.getCaretOffset() })
}
//删除按钮点击
emojiOnDelete() {
const currentIndex = this.editorController.getCaretOffset() //获取光标位置
if (currentIndex > 0) {
this.editorController.deleteSpans({start:currentIndex-1,end:currentIndex})//从光标位置向前删除
}
}
3.2 获取已输入内容
想要将输入的富文本作为评论发送出去,还需要拿到转译之前的原始字符串,但是鸿蒙不是像 iOS 一样给文字挂载样式挂载图片。iOS 这种给图文挂载样式的实现原始文字一直都在,直接获取就可以了。鸿蒙的输入框中的文字是文字组件,图片是图片组件,而且图片组件里面只有图片相关的属性,没有关联文字的地方。只能先获取所有组件,再反向转译。获取全部组件是通过 RichEditorController 的 getSpans API 。
但是从上面的截图可以看到 getSpans 所获取到的数组,内容物是联合类型,转译之前就需要先判断。鸿蒙没有像iOS isKindOfClass 一样的判断方法,由于 RichEditorImageSpanResult 比 RichEditorTextSpanResult 多了一个 imageStyle 属性,鸿蒙官方推荐使用判断该属性是不是 undefined 的方式来区分类型:
if (typeof (element as RichEditorImageSpanResult)['imageStyle'] != 'undefined')区分出类型之后,文字组件 RichEditorTextSpanResult 直接获取 .value 就可以获取到文字。图片组件 RichEditorImageSpanResult 就麻烦一些,首先通过 .valueResourceStr 可以获取到图片的资源路径 resource:///icon_emotion_8.png ,刨除协议头 resource:/// 与文件后缀 .png ,就得到了图片名 icon_emotion_8,通过配置表可以匹配到对应的表情关键字"[鼓掌]"。这样按照顺序将文字组装起来,就实现了富文本的反向转译。