TenserRT(一)模型部署简介
第一章:模型部署简介 — mmdeploy 0.12.0 文档
pytorch.onnx.export方法参数详解,以及onnxruntime-gpu推理性能测试_胖胖大海的博客-CSDN博客
我们来谈谈ONNX的日常 - Oldpan的个人博客
初识模型部署
训练:网络结构(深度学习框架定义)+网络参数(训练)
优化:模型结构+参数--优化-->中间表示
运行:面向硬件的高性能编程框架(CUDA)
部署第一个模型
创建pytorch模型
# 安装 ONNX Runtime, ONNX, OpenCV
pip install onnxruntime onnx opencv-python
import os
import cv2
import numpy as np
import requests
import torch
import torch.onnx
from torch import nn
# 超分辨率
class SuperResolutionNet(nn.Module):
def __init__(self, upscale_factor):
super().__init__()
self.upscale_factor = upscale_factor#放缩因子
self.img_upsampler = nn.Upsample(#上采样
scale_factor=self.upscale_factor,#上采样比例
mode='bicubic',#双线性插值
align_corners=False)#
self.conv1 = nn.Conv2d(3,64,kernel_size=9,padding=4)
self.conv2 = nn.Conv2d(64,32,kernel_size=1,padding=0)
self.conv3 = nn.Conv2d(32,3,kernel_size=5,padding=2)
self.relu = nn.ReLU()
def forward(self, x):
x = self.img_upsampler(x)
out = self.relu(self.conv1(x))
out = self.relu(self.conv2(out))
out = self.conv3(out)
return out
# Download checkpoint and test image
urls = ['https://download.openmmlab.com/mmediting/restorers/srcnn/srcnn_x4k915_1x16_1000k_div2k_20200608-4186f232.pth',
'https://raw.githubusercontent.com/open-mmlab/mmediting/master/tests/data/face/000001.png']
names = ['srcnn.pth', 'face.png']
for url, name in zip(urls, names):
if not os.path.exists(name):
open(name, 'wb').write(requests.get(url).content)#保存参数和图像
def init_torch_model():
torch_model = SuperResolutionNet(upscale_factor=3)#放大三倍
state_dict = torch.load('srcnn.pth')['state_dict']#载入state_dict
# Adapt the checkpoint
for old_key in list(state_dict.keys()):#遍历state_dict
new_key = '.'.join(old_key.split('.')[1:])#重新编辑名称
state_dict[new_key] = state_dict.pop(old_key)#改写名称
torch_model.load_state_dict(state_dict)#网络模型载入参数
torch_model.eval()# 评估模式
return torch_model#返回评估网络
model = init_torch_model()#初始化预测评估网络模型
input_img = cv2.imread('face.png').astype(np.float32)#opencv读取图片,转换为float32
# HWC to NCHW
input_img = np.transpose(input_img, [2, 0, 1])#将HWC通道转换为CHW
input_img = np.expand_dims(input_img, 0)#增加dims,为NCHW,这样网络就可以在HW上卷积,C为RGB
# Inference
torch_output = model(torch.from_numpy(input_img)).detach().numpy()
# NCHW to HWC
torch_output = np.squeeze(torch_output, 0)#NCHW -> CHW
torch_output = np.clip(torch_output, 0, 255)# clip
torch_output = np.transpose(torch_output, [1, 2, 0]).astype(np.uint8)# CHW -> HCW
# Show image
cv2.imwrite("face_torch.png", torch_output)# save中间表示——ONNX

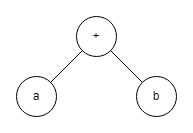
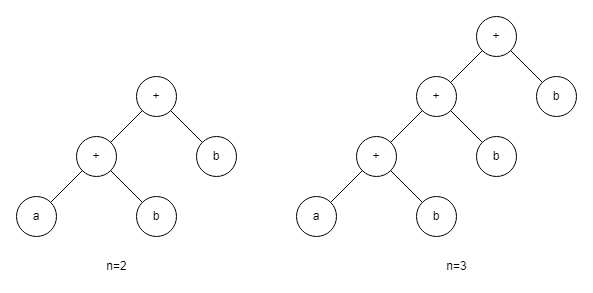
神经网络描述的是数据计算过程,结构可以用计算图表示。如a+b
一些框架通过“先编译,后执行”的静态图来加速计算过程。
静态图难以描述控制流(if-else和for) ,因为不同的控制语句产生不同的计算图。这

这就不是静态图了 。ONNX(Open Neural Network Exchange)是 Facebook 和微软在2017年共同发布的,用于标准描述计算图的一种格式。作为深度学习框架到推理引擎的中间表示。
import torch
from tensorrtdemo.torch_inference import init_torch_model
x = torch.randn(1, 3, 256, 256)#随机产生一个大小固定的输入
model = init_torch_model()#获取带参数的模型
with torch.no_grad():#上下文管理器,禁止梯度计算,在网络推断中可以节省显存
    torch.onnx.export(
        model,#带参模型
        x,#随机的输入形式
        "srcnn.onnx",#存储的onnx文件
        opset_version=11,# opset版本是指onnx定义的算子集合
        input_names=['input'],#输入对象名称
        output_names=['output'])#输出对象名称
PyTorch 提供了一种叫做追踪(trace)的模型转换方法:给定一组输入,再实际执行一遍模型,即把这组输入对应的计算图记录下来,保存为 ONNX 格式。
Netron download | SourceForge.net
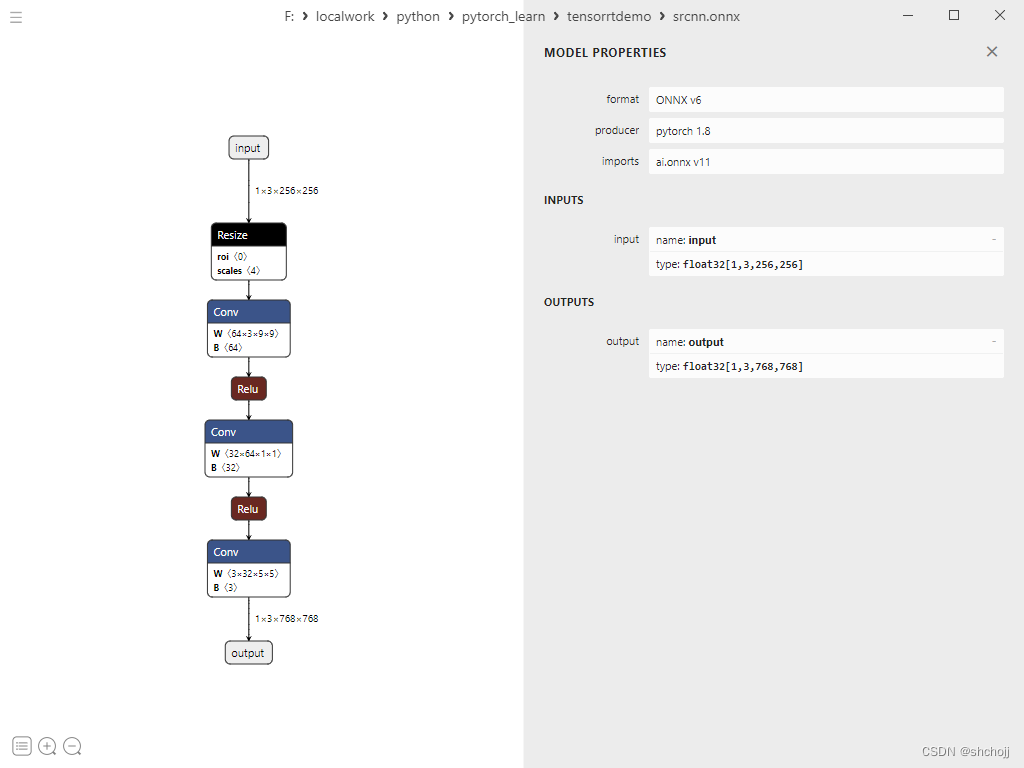
netron可以查看onnx和参数文件,onnx利用protobuf序列化数据结构协议存储神经网络权重信息。

查看模型版本、输入、输出名称和数据类型


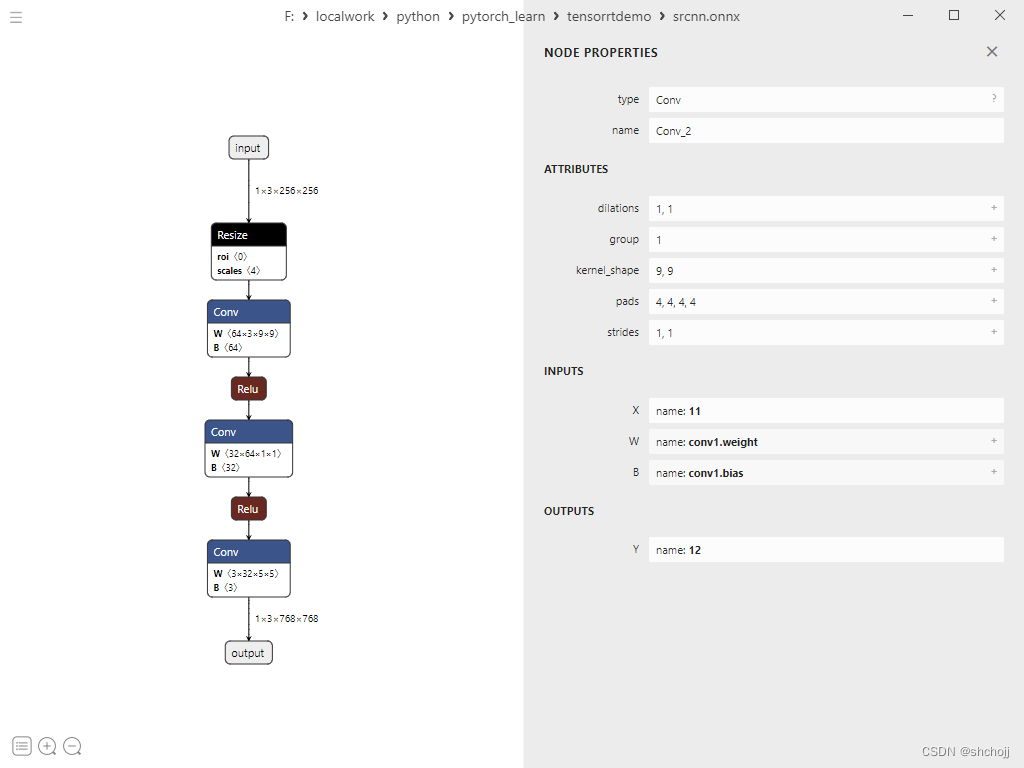
点击算子节点 :
- 算子属性(attribute),如对卷积算子来说,属性包括卷积核大小(kernel_shape)、卷积步长(strides)等。
- 图结构信息,包含算子节点在计算图中的名称(Conv_2)、邻边的信息(inputs(X):11、outputs(Y):12)
- 权重信息:卷积核的权重(conv1.weight)和卷积后的偏差(conv1.bias),点击后面的“+”可以看到具体的数值。
推理引擎——ONNX Runtime
ONNX Runtime是微软维护的一个跨平台机器学习推理加速器(推理引擎)。
import onnxruntime
import cv2
import numpy as np
input_img = cv2.imread('face.png').astype(np.float32)#读取数据,并转换数据类型
# HWC to NCHW
input_img = np.transpose(input_img, [2, 0, 1])#坐标轴转置
input_img = np.expand_dims(input_img, 0)#扩展数组的形状。

ort_session = onnxruntime.InferenceSession("srcnn.onnx")#输入ONNX,获取ONNX Runtime推理器
ort_inputs = {'input': input_img}#输入值字典,key为张量名,value为numpy类型的张量值
ort_output = ort_session.run(['output'], ort_inputs)[0]#网络推理(输出张量名列表,输入值字典),输入输出张量名称要和torch.onnx.export中设置的输入输出名称对应
ort_output = np.squeeze(ort_output, 0)#移除长度为1的轴
ort_output = np.clip(ort_output, 0, 255)#剪辑(限制)数组中的值。
ort_output = np.transpose(ort_output, [1, 2, 0]).astype(np.uint8)#坐标轴转置,并转换数据类型
cv2.imwrite("face_ort.png", ort_output)#保存
总结
- 模型部署:将训练好的模型在特定环境中运行的过程,以解决模型框架兼容性差和模型运行速度慢。
- 流水线:深度学习框架-中间表示(ONNX)-推理引擎
- 计算图:深度学习模型是一个计算图,模型部署就是将模型转换成计算图,没有控制流(分支语句和循环)的计算图。
- ONNX:pytorch可以直接导出ONNX。
- 推理引擎:ONNX Runtime是ONNX模型的原生推理引擎,可以直接在python API中完成模型推理。
