SpringMVC(四)域对象共享数据
pageContext:表示的是jsp页面的范围
HttpServletRequest:表示的是一次请求的范围
HttpSession:表示的是一次会话的范围
ServletContext:表示的是整个应用的范围
一、向请求域中共享数据:
1.1使用ServletAPI向request域对象共享数据
 @RequestMapping("testServletAPI")
    public String testServletAPI(HttpServletRequest request){
        request.setAttribute("testScope","hello,servletAPI");
        return  "success";
    }
1.2使用ModelAndView向request域对象共享数据
package com.rgf.controller;

import org.springframework.stereotype.Controller;
import org.springframework.web.bind.annotation.RequestMapping;
import org.springframework.web.servlet.ModelAndView;
@Controller
public class TestScopeController {
    @RequestMapping("test/mav")
    public ModelAndView testMav(){
        /**
         * ModelAndView包含Model和View的功能
         * Model主要用于向请求域共享数据
         * View主要用于设置逻辑视图,实现页面跳转
         */
        ModelAndView mav = new ModelAndView();
        //向请求域共享数据
        mav.addObject("testRequestScope","Hello,ModelAndView");
        //设置逻辑视图,实现页面跳转
        mav.setViewName("success");
        return mav;
    }
}
我们设置在跳转页面进行获取数据:
<!DOCTYPE html>
<html lang="en" xmlns:th="http://www.thymeleaf.org">
<head>
    <meta charset="UTF-8">
    <title>首页</title>
</head>
<body>
<h1>success.html</h1>
<p th:text="${testRequestScope}"></p>
</body>
</html>
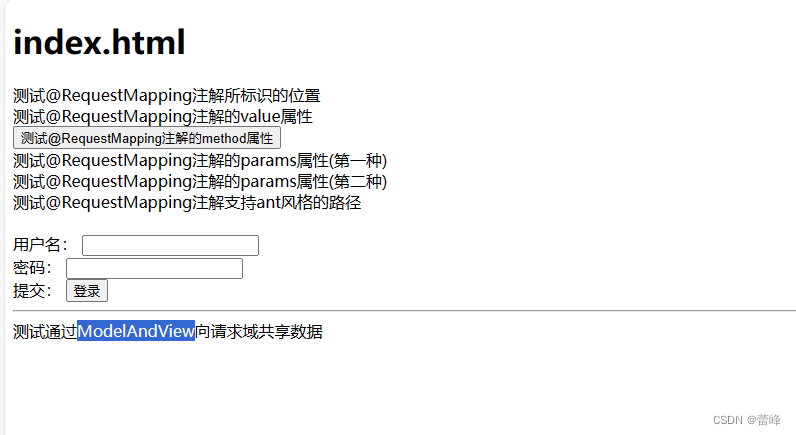
同时我们在首页中输入如下所示:
<!DOCTYPE html>
<html lang="en" xmlns:th="http://www.thymeleaf.org">
<head>
    <meta charset="UTF-8">
    <title>首页</title>
</head>
<body>
<h1>index.html</h1>
<a th:href="@{/hello}">测试@RequestMapping注解所标识的位置</a><br>
<a th:href="@{/abc}">测试@RequestMapping注解的value属性</a>
<form th:action="@{/hello}" method="post">
    <input type="submit" value="测试@RequestMapping注解的method属性">
</form>
<a th:href="@{/hello?username=admin}">测试@RequestMapping注解的params属性(第一种)</a><br>
<a th:href="@{/hello(username='admin')}">测试@RequestMapping注解的params属性(第二种)</a><br>
<a th:href="@{/aaa/test/ant(username='admin')}">测试@RequestMapping注解支持ant风格的路径</a><br>
<br>
<form th:action="@{/param/servletAPI}" method="post">
    用户名: <input type="text" name="username"><br>
    密码:   <input type="password" name="password"><br>
    提交: <input type="submit" value="登录"><br>
</form>
<a th:href="@{/param/servletAPI}"></a>
<hr>
<a th:href="@{/test/mav}">测试通过ModelAndView向请求域共享数据</a>
</body>
</html>
我们进行运行:
我们点击ModelAndView的链接,跳转之后,如下所示:
success.html
Hello,ModelAndView
1.3使用Model向请求域共享数据
我们进行如下操作:
 @RequestMapping("/test/model")
    public String testModel(Model model){
        model.addAttribute("testRequestScope","hello,Model");
        return  "success";

    }
我们的返回success界面:
<!DOCTYPE html>
<html lang="en">
<head>
    <meta charset="UTF-8">
    <title>首页</title>
</head>
<body>
<h1>success.html</h1>
<p th:text="${testRequestScope}"></p>
</body>
</html>
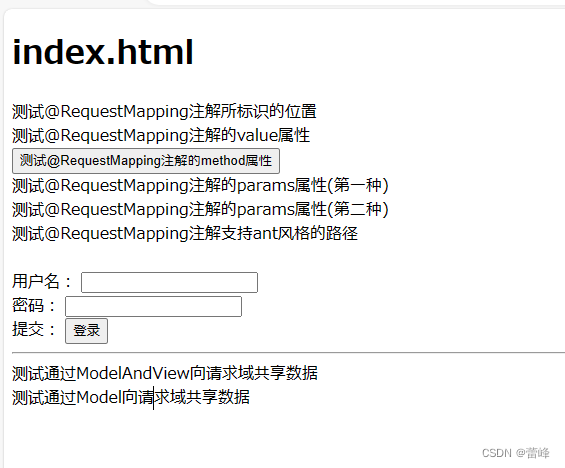
我们的首页如下所示:
<!DOCTYPE html>
<html lang="en" xmlns:th="http://www.thymeleaf.org">
<head>
    <meta charset="UTF-8">
    <title>首页</title>
</head>
<body>
<h1>index.html</h1>
<a th:href="@{/hello}">测试@RequestMapping注解所标识的位置</a><br>
<a th:href="@{/abc}">测试@RequestMapping注解的value属性</a>
<form th:action="@{/hello}" method="post">
    <input type="submit" value="测试@RequestMapping注解的method属性">
</form>
<a th:href="@{/hello?username=admin}">测试@RequestMapping注解的params属性(第一种)</a><br>
<a th:href="@{/hello(username='admin')}">测试@RequestMapping注解的params属性(第二种)</a><br>
<a th:href="@{/aaa/test/ant(username='admin')}">测试@RequestMapping注解支持ant风格的路径</a><br>
<br>
<form th:action="@{/param/servletAPI}" method="post">
    用户名: <input type="text" name="username"><br>
    密码:   <input type="password" name="password"><br>
    提交: <input type="submit" value="登录"><br>
</form>
<a th:href="@{/param/servletAPI}"></a>
<hr>
<a th:href="@{/test/mav}">测试通过ModelAndView向请求域共享数据</a>
<a th:href="@{/test/model}">测试通过Model向请求域共享数据</a>
</body>
</html>
登陆首页点击链接之后:
我们点击链接之后进入到成功界面:
该成功界面展示如下所示:
hello,Model
1.4使用ModelMap向请求域共享数据
我们设置如下所示:
 @RequestMapping("/test/modelMap")
    public String testModelMap(ModelMap modelMap){
        modelMap.addAttribute("testRequestScope","hello,ModelMap");
        return  "success";

    }
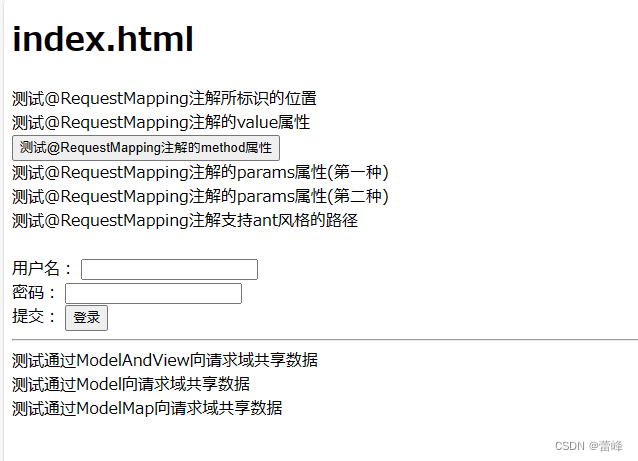
首页设置如下所示:
<!DOCTYPE html>
<html lang="en" xmlns:th="http://www.thymeleaf.org" xmlns="http://www.w3.org/1999/html">
<head>
    <meta charset="UTF-8">
    <title>首页</title>
</head>
<body>
<h1>index.html</h1>
<a th:href="@{/hello}">测试@RequestMapping注解所标识的位置</a><br>
<a th:href="@{/abc}">测试@RequestMapping注解的value属性</a>
<form th:action="@{/hello}" method="post">
    <input type="submit" value="测试@RequestMapping注解的method属性">
</form>
<a th:href="@{/hello?username=admin}">测试@RequestMapping注解的params属性(第一种)</a><br>
<a th:href="@{/hello(username='admin')}">测试@RequestMapping注解的params属性(第二种)</a><br>
<a th:href="@{/aaa/test/ant(username='admin')}">测试@RequestMapping注解支持ant风格的路径</a><br>
<br>
<form th:action="@{/param/servletAPI}" method="post">
    用户名: <input type="text" name="username"><br>
    密码:   <input type="password" name="password"><br>
    提交: <input type="submit" value="登录"><br>
</form>
<a th:href="@{/param/servletAPI}"></a>
<hr>
<a th:href="@{/test/mav}">测试通过ModelAndView向请求域共享数据</a><br>
<a th:href="@{/test/model}">测试通过Model向请求域共享数据</a><br>
<a th:href="@{/test/modelMap}">测试通过ModelMap向请求域共享数据</a><br>
</body>
</html>
成功界面如下所示:
<!DOCTYPE html>
<html lang="en">
<head>
    <meta charset="UTF-8">
    <title>首页</title>
</head>
<body>
<h1>success.html</h1>
<p th:text="${testRequestScope}"></p>
</body>
</html>
登陆首页点击链接之后:
我们的成功界面返回如下所示:
hello,ModelMap
1.5使用map向请求域共享数据
  @RequestMapping("/test/map")
    public String testMap(Map<String,Object> map){
        map.put("testRequestScope","hello,Map");
        return  "success";

    }
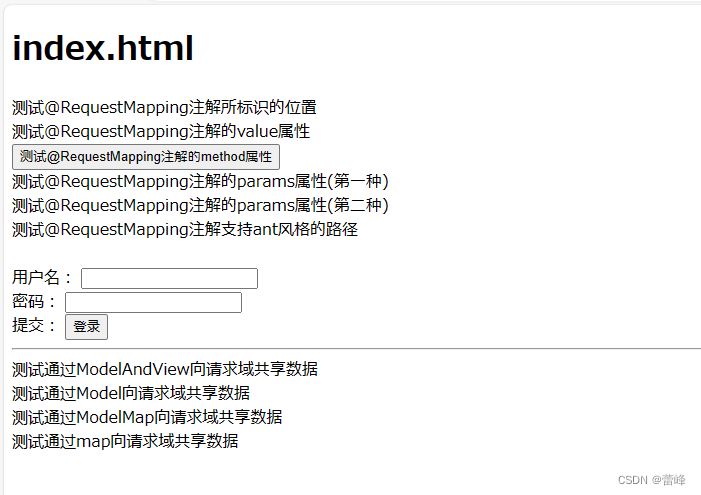
首页如下所示:
<!DOCTYPE html>
<html lang="en" xmlns:th="http://www.thymeleaf.org" xmlns="http://www.w3.org/1999/html">
<head>
    <meta charset="UTF-8">
    <title>首页</title>
</head>
<body>
<h1>index.html</h1>
<a th:href="@{/hello}">测试@RequestMapping注解所标识的位置</a><br>
<a th:href="@{/abc}">测试@RequestMapping注解的value属性</a>
<form th:action="@{/hello}" method="post">
    <input type="submit" value="测试@RequestMapping注解的method属性">
</form>
<a th:href="@{/hello?username=admin}">测试@RequestMapping注解的params属性(第一种)</a><br>
<a th:href="@{/hello(username='admin')}">测试@RequestMapping注解的params属性(第二种)</a><br>
<a th:href="@{/aaa/test/ant(username='admin')}">测试@RequestMapping注解支持ant风格的路径</a><br>
<br>
<form th:action="@{/param/servletAPI}" method="post">
    用户名: <input type="text" name="username"><br>
    密码:   <input type="password" name="password"><br>
    提交: <input type="submit" value="登录"><br>
</form>
<a th:href="@{/param/servletAPI}"></a>
<hr>
<a th:href="@{/test/mav}">测试通过ModelAndView向请求域共享数据</a><br>
<a th:href="@{/test/model}">测试通过Model向请求域共享数据</a><br>
<a th:href="@{/test/modelMap}">测试通过ModelMap向请求域共享数据</a><br>
<a th:href="@{/test/map}">测试通过map向请求域共享数据</a><br>
</body>
</html>
点击首页链接:
跳转到成功界面展示如下所示:
hello,Map
我们通过如下所示查看后三种方式的关系:
package com.rgf.controller;

import org.springframework.stereotype.Controller;
import org.springframework.ui.Model;
import org.springframework.ui.ModelMap;
import org.springframework.web.bind.annotation.RequestMapping;
import org.springframework.web.servlet.ModelAndView;

import java.util.Map;

@Controller
/**
 * 向域对象共享数据:
 * 1.通过ModelAndView向请求域共享数据
 * 使用ModelAndView时,可以使用其Model功能向请求域共享数据
 * 使用View功能设置逻辑视图,但是控制方法一定要将ModelAndView作为方法的返回值
 * 2.使用Model向请求域共享数据
 * 3.使用ModelMap向请求域共享数据
 * 4.使用map向请求域共享数据
 *
 */
public class TestScopeController {
    @RequestMapping("test/mav")
    public ModelAndView testMav(){
        /**
         * ModelAndView包含Model和View的功能
         * Model主要用于向请求域共享数据
         * View主要用于设置逻辑视图,实现页面跳转
         */
        ModelAndView mav = new ModelAndView();
        //向请求域共享数据
        mav.addObject("testRequestScope","Hello,ModelAndView");
        //设置逻辑视图,实现页面跳转
        mav.setViewName("success");
        return mav;
    }


    @RequestMapping("/test/model")
    public String testModel(Model model){
        //org.springframework.validation.support.BindingAwareModelMap
        System.out.println(model.getClass().getName());
        model.addAttribute("testRequestScope","hello,Model");
        return  "success";

    }

    @RequestMapping("/test/modelMap")
    public String testModelMap(ModelMap modelMap){
        //org.springframework.validation.support.BindingAwareModelMap
        System.out.println(modelMap.getClass().getName());
        modelMap.addAttribute("testRequestScope","hello,ModelMap");
        return  "success";

    }

    @RequestMapping("/test/map")
    public String testMap(Map<String,Object> map){
        //org.springframework.validation.support.BindingAwareModelMap
        System.out.println(map.getClass().getName());
        map.put("testRequestScope","hello,Map");
        return  "success";

    }
}
我们发现所输出的类为同一个,我们来查看其中的关系:
org.springframework.validation.support.BindingAwareModelMap
连续按键两次shift进行查找类:
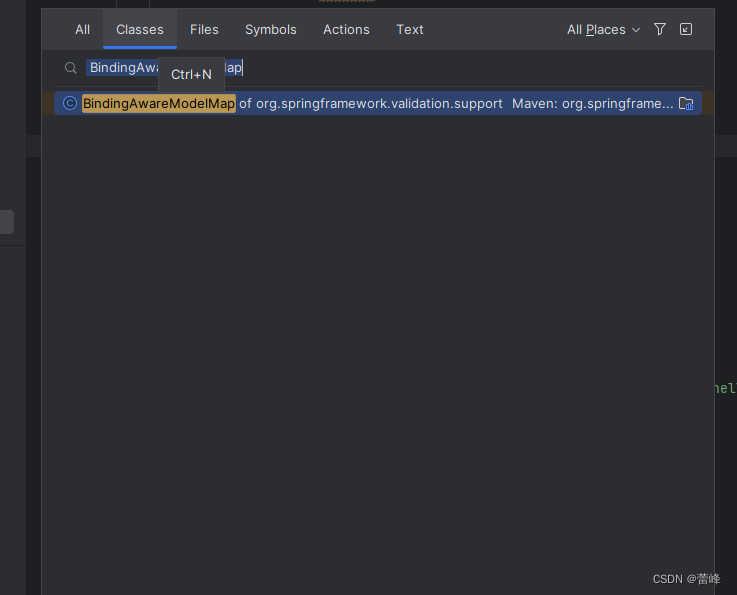
我们进行查看该类的继承关系:
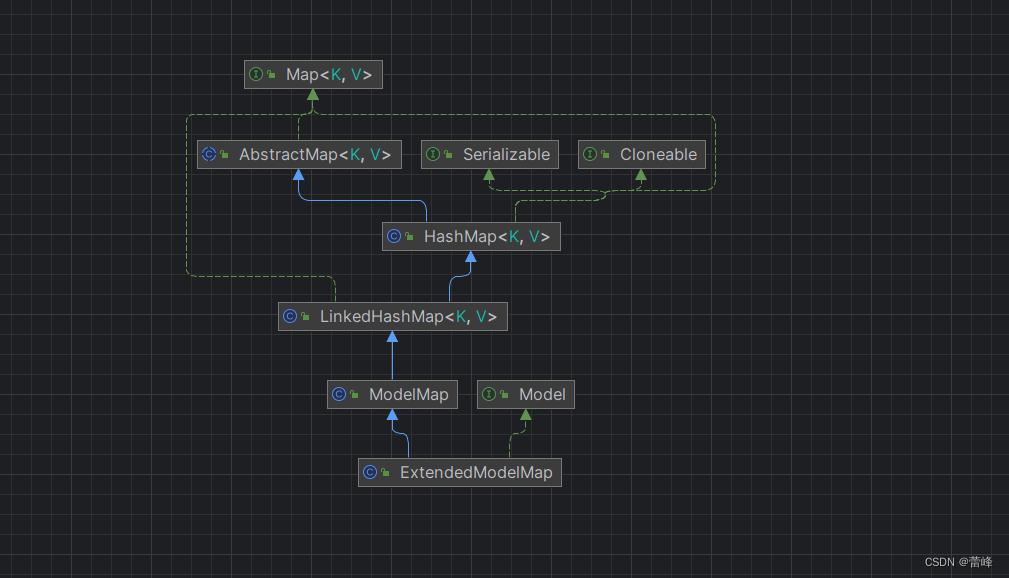
我们总结如下所示:
package com.rgf.controller;

import org.springframework.stereotype.Controller;
import org.springframework.ui.Model;
import org.springframework.ui.ModelMap;
import org.springframework.web.bind.annotation.RequestMapping;
import org.springframework.web.servlet.ModelAndView;

import java.util.Map;

@Controller
/**
 * 向域对象共享数据:
 * 1.通过ModelAndView向请求域共享数据
 * 使用ModelAndView时,可以使用其Model功能向请求域共享数据
 * 使用View功能设置逻辑视图,但是控制方法一定要将ModelAndView作为方法的返回值
 * 2.使用Model向请求域共享数据
 * 3.使用ModelMap向请求域共享数据
 * 4.使用map向请求域共享数据
 * 5.Model和ModelMap和map的关系
 * 其实在底层中,这些类型的形参最终都是通过BindingAwareModelMap创建
 * public class BindingAwareModelMap extends ExtendedModelMap{}
 * public class ExtendedModelMap extends ModelMap implements Model {}
 * public class ModelMap extends LinkedHashMap<String, Object> {}
 * public class LinkedHashMap<K,V>   extends HashMap<K,V>   implements Map<K,V>  {}
 *
 */
public class TestScopeController {
    @RequestMapping("test/mav")
    public ModelAndView testMav(){
        /**
         * ModelAndView包含Model和View的功能
         * Model主要用于向请求域共享数据
         * View主要用于设置逻辑视图,实现页面跳转
         */
        ModelAndView mav = new ModelAndView();
        //向请求域共享数据
        mav.addObject("testRequestScope","Hello,ModelAndView");
        //设置逻辑视图,实现页面跳转
        mav.setViewName("success");
        return mav;
    }


    @RequestMapping("/test/model")
    public String testModel(Model model){
        //org.springframework.validation.support.BindingAwareModelMap
        System.out.println(model.getClass().getName());
        model.addAttribute("testRequestScope","hello,Model");
        return  "success";

    }

    @RequestMapping("/test/modelMap")
    public String testModelMap(ModelMap modelMap){
        //org.springframework.validation.support.BindingAwareModelMap
        System.out.println(modelMap.getClass().getName());
        modelMap.addAttribute("testRequestScope","hello,ModelMap");
        return  "success";

    }

    @RequestMapping("/test/map")
    public String testMap(Map<String,Object> map){
        //org.springframework.validation.support.BindingAwareModelMap
        System.out.println(map.getClass().getName());
        map.put("testRequestScope","hello,Map");
        return  "success";

    }
}
二、向session域共享数据、向application域共享数据
可以使用servletAPI实现向session域共享数据,比较简便。
 @RequestMapping("/param/servletAPI")
    public  String getParamByServletAPI(HttpServletRequest request){
        HttpSession session = request.getSession();
        String username = request.getParameter("username");
        String password=request.getParameter("password");
        System.out.println("username:"+username+",password:"+password);
        return "success";
    }
package com.rgf.controller;
import org.springframework.stereotype.Controller;
import org.springframework.ui.Model;
import org.springframework.ui.ModelMap;
import org.springframework.web.bind.annotation.RequestMapping;
import org.springframework.web.servlet.ModelAndView;
import javax.servlet.ServletContext;
import javax.servlet.http.HttpServletRequest;
import javax.servlet.http.HttpSession;
import java.util.Map;
@Controller
/**
* 向域对象共享数据:
* 1.通过ModelAndView向请求域共享数据
* 使用ModelAndView时,可以使用其Model功能向请求域共享数据
* 使用View功能设置逻辑视图,但是控制方法一定要将ModelAndView作为方法的返回值
* 2.使用Model向请求域共享数据
* 3.使用ModelMap向请求域共享数据
* 4.使用map向请求域共享数据
* 5.Model和ModelMap和map的关系
* 其实在底层中,这些类型的形参最终都是通过BindingAwareModelMap创建
* public class BindingAwareModelMap extends ExtendedModelMap{}
* public class ExtendedModelMap extends ModelMap implements Model {}
* public class ModelMap extends LinkedHashMap<String, Object> {}
* public class LinkedHashMap<K,V> extends HashMap<K,V> implements Map<K,V> {}
*
*/
public class TestScopeController {
@RequestMapping("test/mav")
public ModelAndView testMav(){
/**
* ModelAndView包含Model和View的功能
* Model主要用于向请求域共享数据
* View主要用于设置逻辑视图,实现页面跳转
*/
ModelAndView mav = new ModelAndView();
//向请求域共享数据
mav.addObject("testRequestScope","Hello,ModelAndView");
//设置逻辑视图,实现页面跳转
mav.setViewName("success");
return mav;
}
@RequestMapping("/test/model")
public String testModel(Model model){
//org.springframework.validation.support.BindingAwareModelMap
System.out.println(model.getClass().getName());
model.addAttribute("testRequestScope","hello,Model");
return "success";
}
@RequestMapping("/test/modelMap")
public String testModelMap(ModelMap modelMap){
//org.springframework.validation.support.BindingAwareModelMap
System.out.println(modelMap.getClass().getName());
modelMap.addAttribute("testRequestScope","hello,ModelMap");
return "success";
}
@RequestMapping("/test/map")
public String testMap(Map<String,Object> map){
//org.springframework.validation.support.BindingAwareModelMap
System.out.println(map.getClass().getName());
map.put("testRequestScope","hello,Map");
return "success";
}
@RequestMapping("/test/session")
public String testSession(HttpSession session){
session.setAttribute("testSessionScope","hello,Session");
return "success";
}
@RequestMapping("/test/application")
public String testApplication(HttpSession session){
ServletContext servletContext = session.getServletContext();
servletContext.setAttribute("testApplicationScope","hello,Application");
return "success";
}
}
<!DOCTYPE html>
<html lang="en" xmlns:th="http://www.thymeleaf.org" xmlns="http://www.w3.org/1999/html">
<head>
    <meta charset="UTF-8">
    <title>首页</title>
</head>
<body>
<h1>index.html</h1>
<a th:href="@{/hello}">测试@RequestMapping注解所标识的位置</a><br>
<a th:href="@{/abc}">测试@RequestMapping注解的value属性</a>
<form th:action="@{/hello}" method="post">
    <input type="submit" value="测试@RequestMapping注解的method属性">
</form>
<a th:href="@{/hello?username=admin}">测试@RequestMapping注解的params属性(第一种)</a><br>
<a th:href="@{/hello(username='admin')}">测试@RequestMapping注解的params属性(第二种)</a><br>
<a th:href="@{/aaa/test/ant(username='admin')}">测试@RequestMapping注解支持ant风格的路径</a><br>
<br>
<form th:action="@{/param/servletAPI}" method="post">
    用户名: <input type="text" name="username"><br>
    密码:   <input type="password" name="password"><br>
    提交: <input type="submit" value="登录"><br>
</form>
<a th:href="@{/param/servletAPI}"></a>
<hr>
<a th:href="@{/test/mav}">测试通过ModelAndView向请求域共享数据</a><br>
<a th:href="@{/test/model}">测试通过Model向请求域共享数据</a><br>
<a th:href="@{/test/modelMap}">测试通过ModelMap向请求域共享数据</a><br>
<a th:href="@{/test/map}">测试通过map向请求域共享数据</a><br>
<a th:href="@{/test/session}">测试向会话域共享数据</a><br>
<a th:href="@{/test/application}">测试向应用域共享数据</a><br>
</body>
</html>
<!DOCTYPE html>
<html lang="en">
<head>
<meta charset="UTF-8">
<title>首页</title>
</head>
<body>
<h1>success.html</h1>
<!--获取请求域中的数据-->
<p th:text="${testRequestScope}"></p>
<!--获取会话域中的数据-->
<p th:text="${session.testSessionScope}"></p>
<!--获取应用域中的数据-->
<p th:text="${application.testApplicationScope}"></p>
</body>
</html>我们来进行测试:
我们运行之后进行点击:
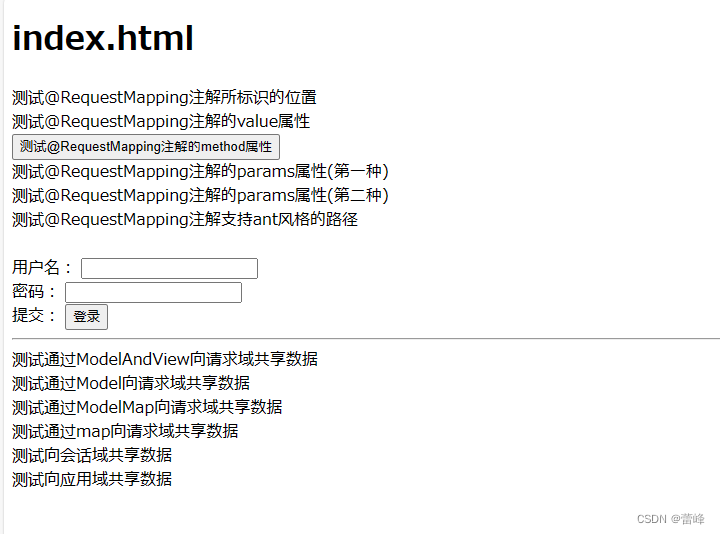
我们进行点击,点击测试向会话域共享数据的时候出现:hello,Session
我们进行点击,点击测试向应用域(当前我们服务器运行的整个过程中)共享数据的时候出现:
hello,Session
hello,Application
一次会话是浏览器开启到浏览器关闭的过程。未关闭浏览器则会一直存在。
我们将网址复制下来之后,再次运行之后仍然会出现hello,application.
我们重新编译的时候则会清空session和application里面的值。
如果重新运行不清空session和application值,我们需要这么进行设置:
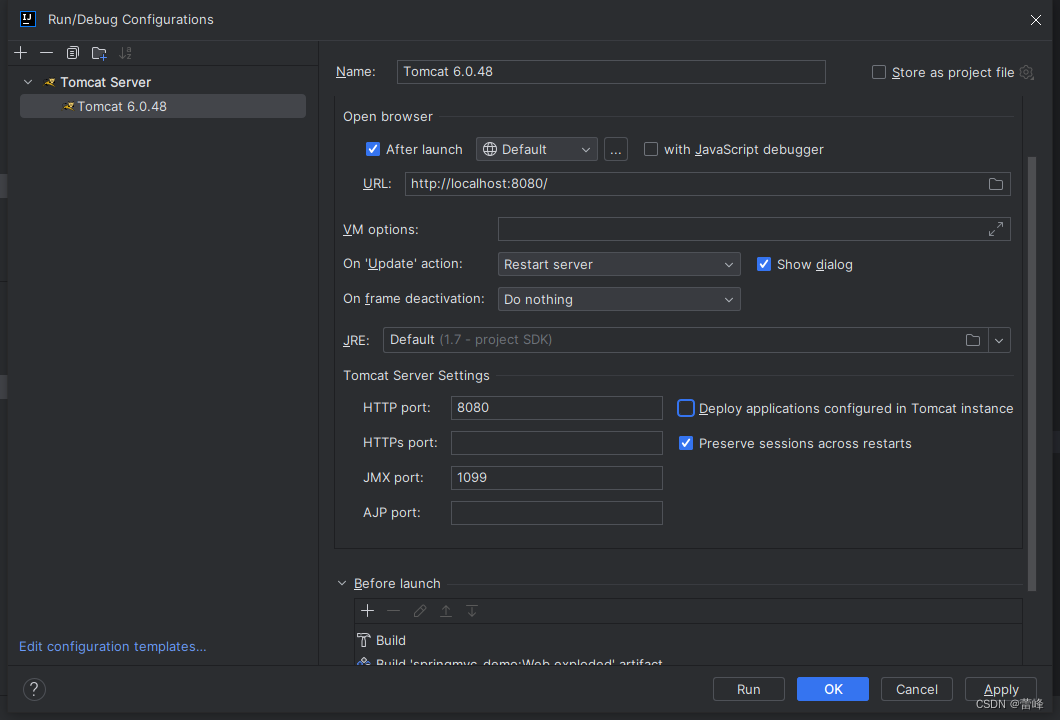
选择之后则会使用session的钝化和活化功能。
session的钝化和活化:
session的钝化
当前的服务器关闭之后,session中的数据会被钝化到我们当前的磁盘文件上,钝化到tomcat里面的work目录来存放sesion的钝化文件的,还有我们的jsp所翻译成的servlet.当前服务器重新启动后,会把钝化文件中的数据重新加载到session中。所以服务器关闭的话,只要浏览器不关闭,session就可以钝化和活化。哪怕服务器关掉,session中的数据也不会消失。
当服务器正常关闭时,还存活着的session(在设置时间内没有销毁) 会随着服务器的关闭被以文件(“SESSIONS.ser”)的形式存储在tomcat 的work 目录下,这个过程叫做Session 的钝化。session的活化
当服务器再次正常开启时,服务器会找到之前的“SESSIONS.ser” 文件,从中恢复之前保存起来的Session 对象,这个过程叫做Session的活化。
如果在session中共享的是一个实体类类型的数据,必须将实体类实现一个序列化的接口。如果在session中共享的是一个user对象,必须实现序列化的接口。(钝化是一个序列化的过程)

