【深度学习实验】图像处理(四):PIL——自定义图像数据增强操作(图像合成;图像融合(高斯掩码))
文章目录
- 一、实验介绍
- 二、实验环境
- 1. 配置虚拟环境
- 2. 库版本介绍
- 三、实验内容
- 0. 导入必要的库
- 1. PIL基础操作
- 2~4. 随机遮挡、随机擦除、线性混合
- 5. 图像合成
- 5.1 原理
- 5.2 实现
- 5.3 效果展示
- 6. 图像融合
- 6.1 原理
- 6.2 实现
- 6.3 效果展示
一、实验介绍
在深度学习任务中,数据增强是提高模型泛化能力的关键步骤之一。通过对训练集进行变换和扩充,可以有效地增加数据量,引入样本之间的差异,使模型更好地适应不同的输入。
本实验将继续实现自定义图像数据增强操作,具体包括图像合成(粘贴组合)、图像融合(创建高斯掩码融合两个图像)
二、实验环境
1. 配置虚拟环境
conda create -n Image python=3.9
conda activate Image
conda install pillow numpy
2. 库版本介绍
| 软件包 | 本实验版本 |
|---|---|
| numpy | 1.21.5 |
| python | 3.9.13 |
| pillow | 9.2.0 |
三、实验内容
0. 导入必要的库
import numpy as np
from PIL import Image
1. PIL基础操作
【深度学习实验】图像处理(一):Python Imaging Library(PIL)库:图像读取、写入、复制、粘贴、几何变换、图像增强、图像滤波
【深度学习实验】图像处理(二):PIL 和 PyTorch(transforms)中的图像处理与随机图片增强
2~4. 随机遮挡、随机擦除、线性混合
【深度学习实验】图像处理(三):PIL——自定义图像数据增强操作(随机遮挡、擦除、线性混合)
5. 图像合成
5.1 原理
-
输入图像:
-
图像1
\text{图像1}
图像1

-
图像2
\text{图像2}
图像2
-
图像1
\text{图像1}
图像1
-
遮挡和选择:
- 遮挡图像1中的区域
x
x
x:
- 随机选择要遮挡的图像1中的区域 x x x(引入了训练数据的变异性)
- 从图像2中选择对应区域
y
y
y:
- 选择与图像1中被遮挡区域 x x x 相对应的图像2中的区域 y y y
- 遮挡图像1中的区域
x
x
x:
-
粘贴:
- 将
y
y
y 粘贴到图像1中的
x
x
x 位置:
- 将从图像2中选择的区域 y y y 粘贴到图像1中被遮挡的区域 x x x 的位置(模拟了一种图像混合的效果)
- 将
y
y
y 粘贴到图像1中的
x
x
x 位置:
-
输出:
- 返回增强后的图像1,其中现在包含了粘贴的区域 y y y。
5.2 实现
class Combine(object):
    def __init__(self,x_start, y_start, x_end, y_end):
        self.x_start = x_start
        self.y_start = y_start
        self.x_end = x_end
        self.y_end = y_end

    def __call__(self, img1, img2):
        # Masking out a region x of image1
        img1_array = np.array(img1)
        img1_array[self.y_start:self.y_end, self.x_start:self.x_end] = 0
        img1_masked =  Image.fromarray(img1_array.astype('uint8')).convert('RGB')

        # Selecting a region y of the same as x from image2
        region_y = img2.crop((self.x_start, self.y_start, self.x_end, self.y_end))

        # Pasting region y on the location of x of image1
        img1_masked.paste(region_y, (self.x_start, self.y_start))

        return img1_masked
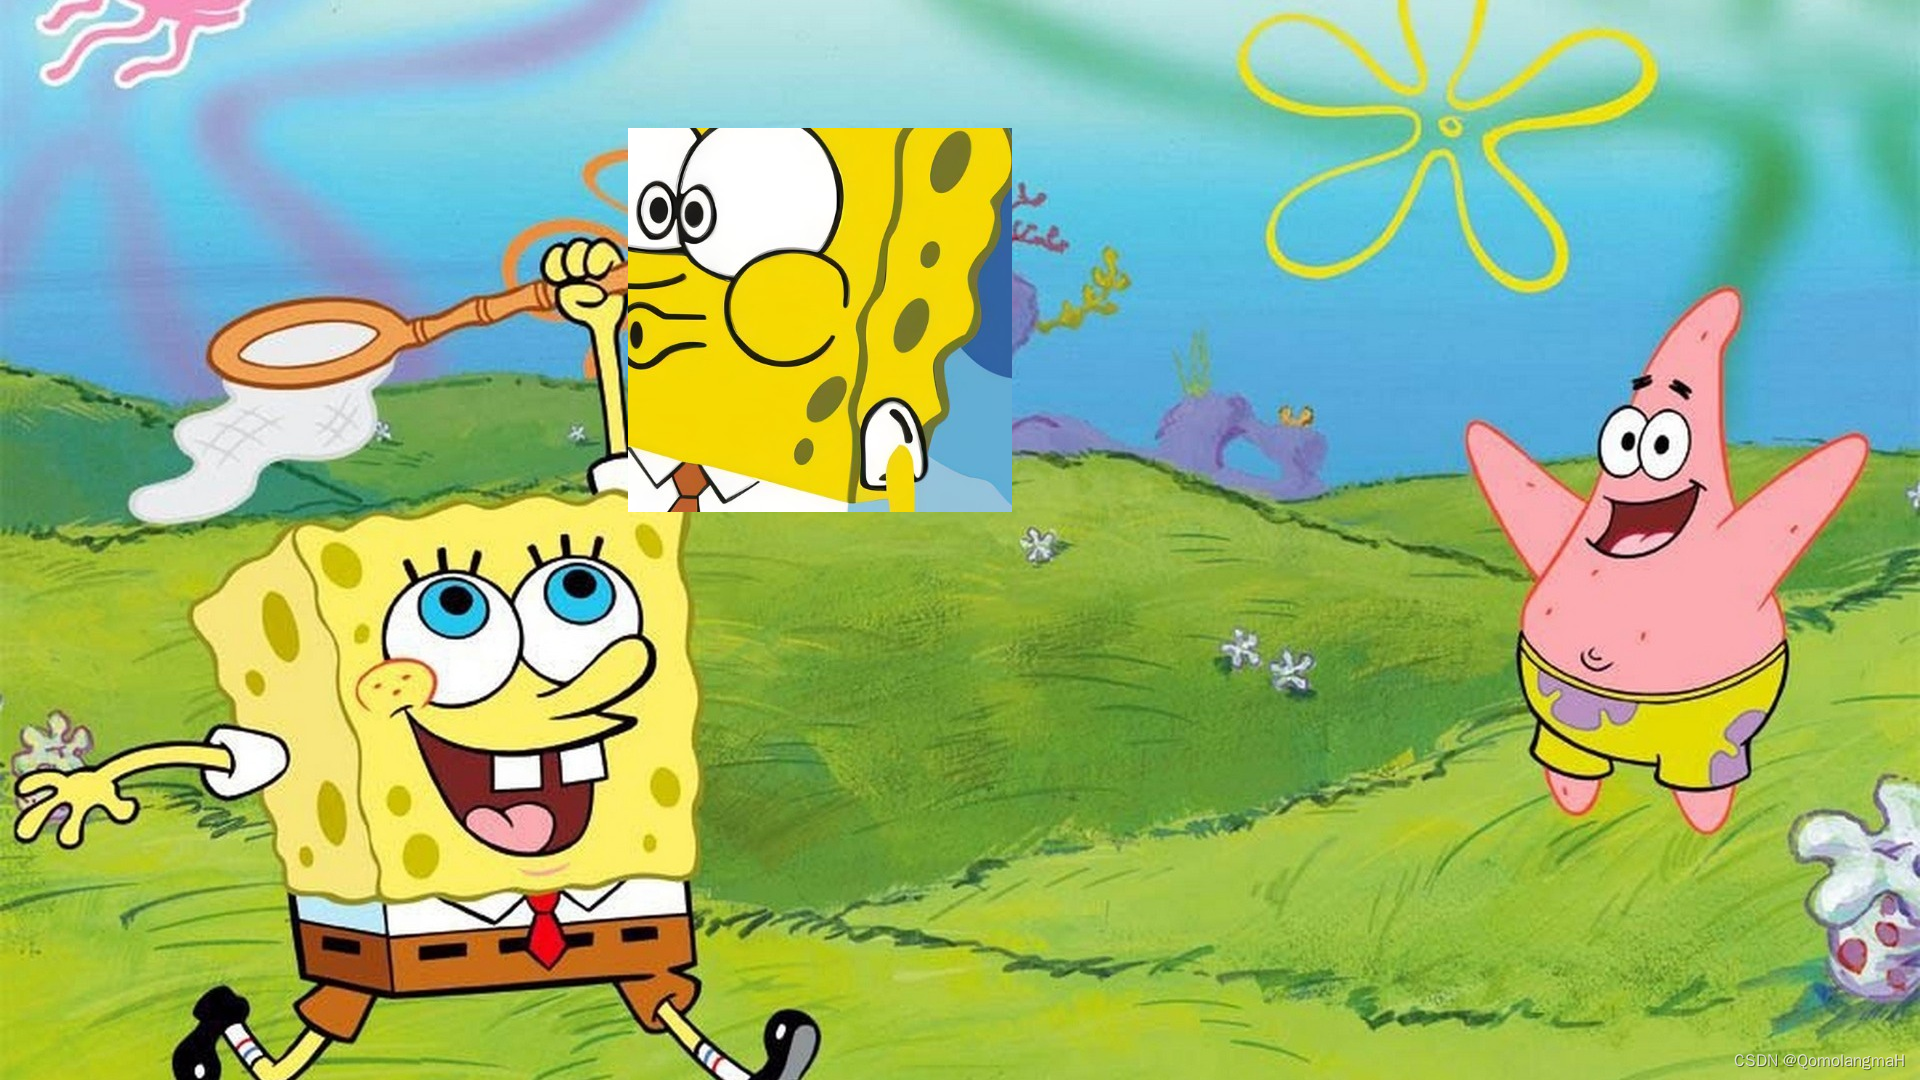
5.3 效果展示
img1 = Image.open('3.png').convert('RGB')
img2 = Image.open('2.png').convert('RGB')
combine = Combine(628, 128, 1012, 512)
img = combine(img1,img2)
img.save('./combine_image.png')
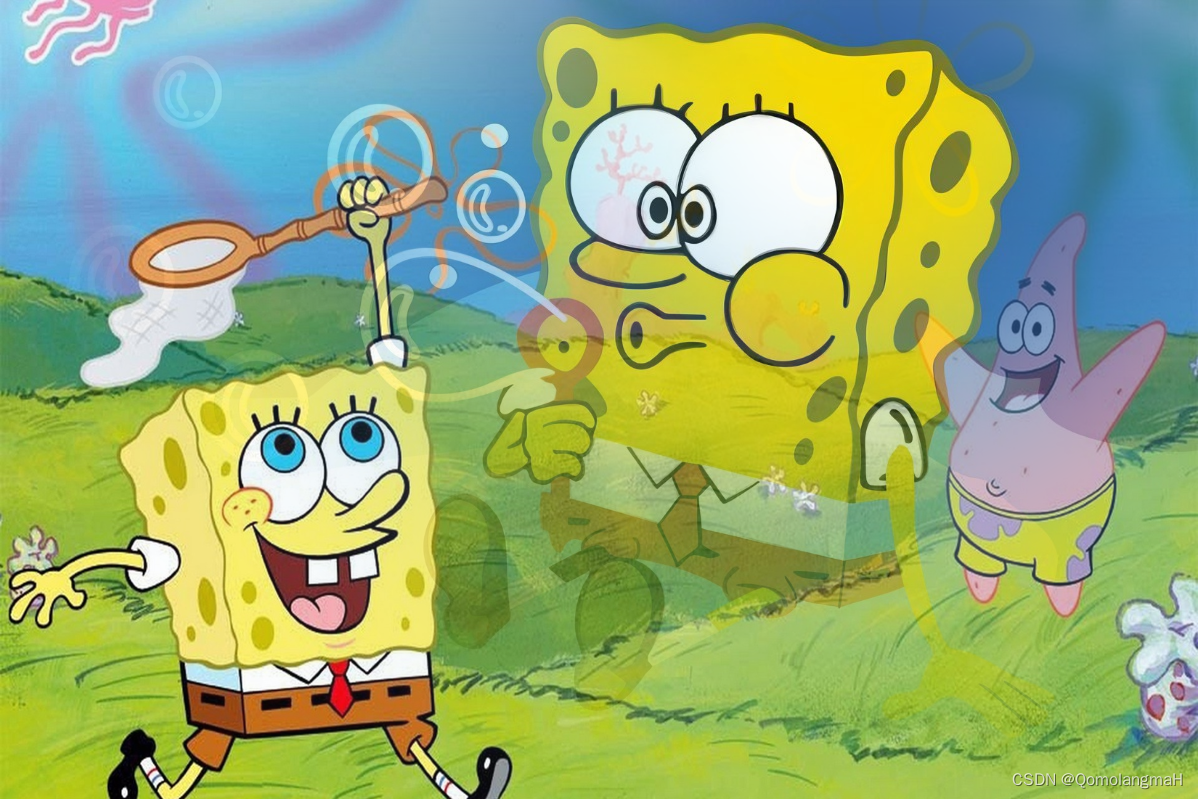
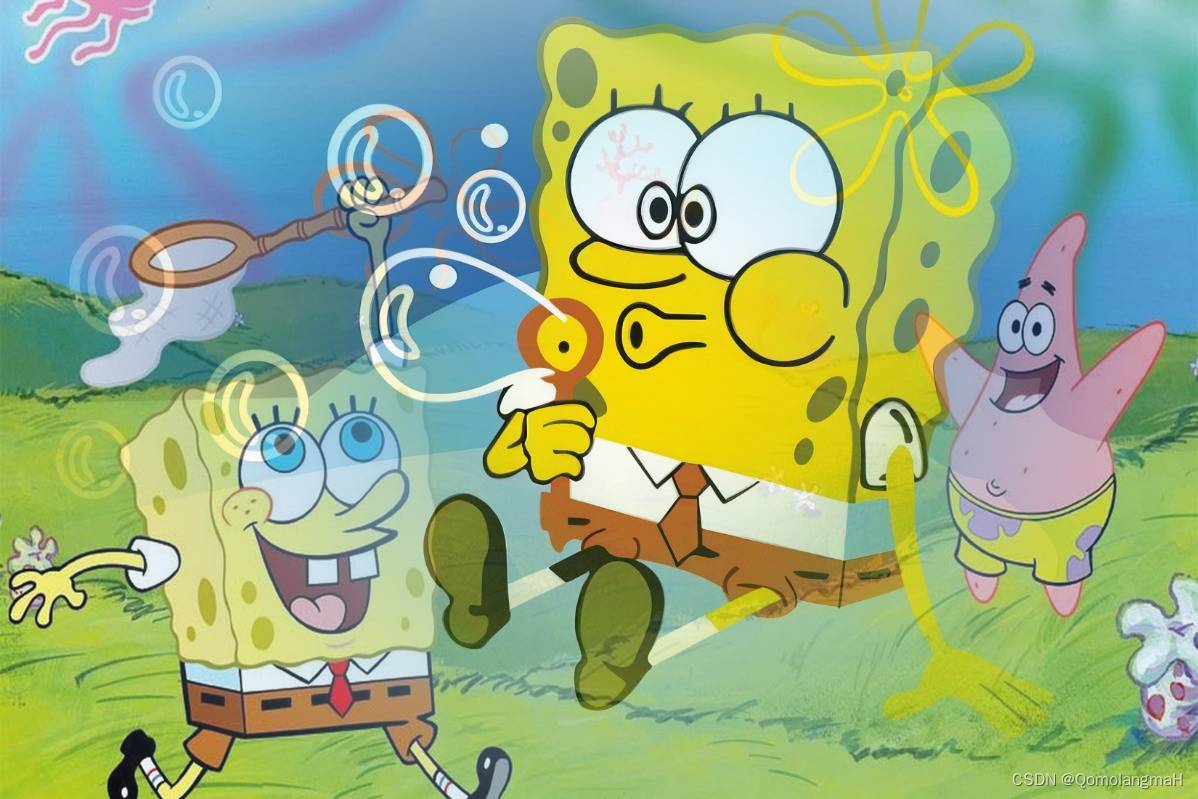
6. 图像融合
6.1 原理
通过高斯核函数创建掩码,以在两个图像之间进行融合。
- 调整样本 x j x_j xj(2.jpg)的大小以匹配样本 x i x_i xi(1.jpg);
- 在 x i x_i xi(或 x j x_j xj)内选择一个随机位置 C C C;
- 使用二维标准高斯核函数创建掩码 G G G,确保其中心与位置 C C C 对齐,并且其大小与 x i x_i xi 相匹配;
- 使用 G G G 修改 x i x_i xi,并使用 1 − G 1-G 1−G 修改 x j x_j xj;
- 将得到的修改组合在一起,得到 x ^ \hat x x^;
- 返回 x ^ \hat x x^。
6.2 实现
class Gaussian(object):
    def __init__(self, sigma):
        # 混合参数
        self.sigma = sigma

    def __call__(self, img1, img2):
        # Choose a random position, labeled as $C$, within $x_i$ (or $x_j$)
        self.size = img1.shape[1], img1.shape[0]
        print(self.size)
        x = np.random.randint(0, img1.shape[1])
        y = np.random.randint(0, img1.shape[0])
        position_c = (x, y)
        print(position_c)

        # Create mask $G$ using a 2D standard Gaussian kernel function,
        # ensuring its center aligns with position $C$, and the size of $G$ matches that of $x_i$

        mask_g = self.gaussian_mask(position_c)
        # print(mask_g.shape)
        mask_g = np.expand_dims(mask_g, axis=2)
        mask_g = np.repeat(mask_g, 3, axis=2)
        # print(mask_g.shape)

        # Use $G$ to modify $x_i$ and use $1-G$ to modify $x_j$
        # Combine the resulting modifications together as $\hat x$
        hat_x = img1 * mask_g + img2 * (1 - mask_g)
        return hat_x

    def gaussian_mask(self, center):
        x, y = np.meshgrid(np.arange(0, self.size[0]), np.arange(0, self.size[1]))
        d = np.sqrt((x - center[0]) ** 2 + (y - center[1]) ** 2)
        gaussian_mask = np.exp(-(d ** 2 / (2.0 * self.sigma ** 2)))
        return gaussian_mask
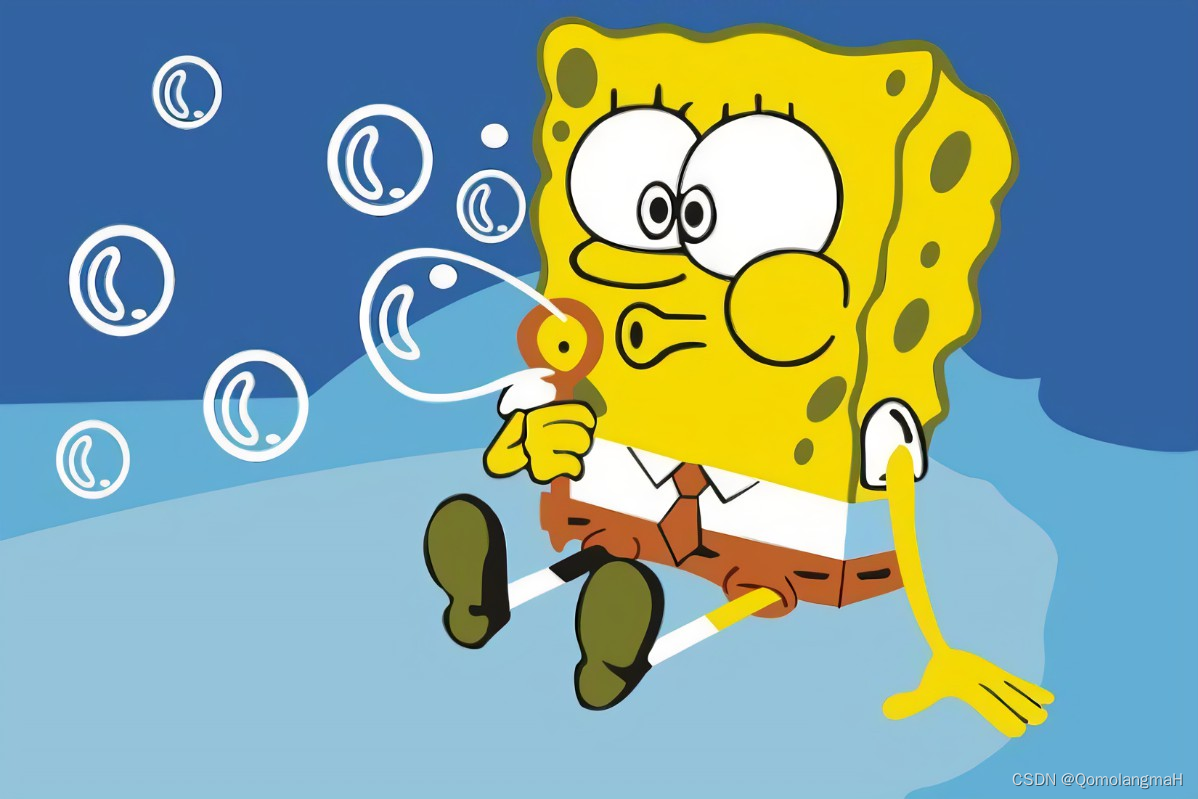
6.3 效果展示
# Input two images, which are image1 (1.jpg) and image2 (2.jpg)
img1 = Image.open('2.png').convert('RGB')
img2 = Image.open('3.png').convert('RGB')
# Adjust the size of Sample $x_j$ (2.jpg) to match Sample $x_i$ (1.jpg)
img2 = img2.resize(img1.size, Image.Resampling.BICUBIC)
img1 = np.array(img1)
img2 = np.array(img2)
gaussian = Gaussian(300)
img = gaussian(img1,img2)
img = Image.fromarray(img.astype('uint8')).convert('RGB')
img.save('./gaussian_image.png')