定时器的使用及实现
在Java中,定时器(Timer)是一个用于执行任务的工具类。它可以安排任务在指定的时间点执行,或者按照指定的时间间隔周期性地执行。
1. Timer类
Timer类位于java.util包中,它提供了一种简单而便利的方式来安排以后的任务执行。Timer类的核心思想是创建一个后台线程,在指定的时间点执行任务或者按照指定的时间间隔周期性地执行任务。以下是Timer类的几个重要概念:
- Timer对象:通过Timer timer = new Timer();语句创建一个Timer对象,用于安排任务的执行。
- TimerTask对象:TimerTask是一个抽象类,表示要执行的任务。通常需要创建一个继承自TimerTask的具体任务类,并重写其中的run()方法,定义要执行的任务逻辑。
安排任务的执行
使用Timer类安排任务的执行通常需要以下步骤:
- 创建Timer对象:通过Timer timer = new Timer();语句创建一个Timer对象。
- 创建任务:创建一个继承自TimerTask类的具体任务类,重写其中的run()方法,定义要执行的任务逻辑。
- 安排任务执行:使用schedule()方法安排任务的执行。可以通过指定任务、延迟时间和执行周期等参数来安排任务的执行时间和频率。例如:timer.schedule(task, delay, period);
具体任务类需要重写TimerTask类中的run()方法,定义要执行的任务逻辑。例如:
class MyTask extends TimerTask {
    public void run() {
        // 执行具体的任务逻辑
        System.out.println("Hello");
    }
}
最后,调用timer.schedule()方法启动定时器,将任务安排到定时器中进行执行。
public class ThreadDemo25 {
    public static void main(String[] args) {
        Timer timer = new Timer();
        TimerTask t = new TimerTask() {
            @Override
            public void run() {
                System.out.println("Ting");
            }
        };

        //3000ms后执行 t
        timer.schedule(t, 3000);
    }
}
一个Timer可以加入多个任务:
public class ThreadDemo25 {
    public static void main(String[] args) {
        Timer timer = new Timer();
        timer.schedule(new TimerTask() {
            @Override
            public void run() {
                System.out.println("C");
            }
        }, 3000);

        timer.schedule(new TimerTask() {
            @Override
            public void run() {
                System.out.println("B");
            }
        }, 2000);

        timer.schedule(new TimerTask() {
            @Override
            public void run() {
                System.out.println("A");
            }
        }, 1000);
    }
}
注意:Timer对象会创建一个线程,并且这个线程是一个前台线程。
注意:Timer这个线程不会主动结束,除非调用 cansel 方法
2. 实现一个Timer类
思考一下 Timer 需要包含哪些内容
1. 需要有一个能数组/队列来存储要执行的任务
2. 需要一个线程负责执行任务
由于,每个任务执行的时间不同,我们可以让先执行的任务排在前面,每次只用看第一个任务是否到达执行时间即可,所以我们可以使用一个优先级队列来存储任务。
class MyTimer {
    //存储用于执行的任务
    private PriorityQueue<> q = new PriorityQueue<>();
    //负责执行的线程
    Thread t = null;

    public MyTimer() {
        //在构造方法中实现并运行线程
        t = new Thread(() -> {

        });
        t.start();
    }

    public void schedule(Runnable runnable, int daley) {
        //用来添加任务,和执行的时间
    }
}
我们已经有了Timer的大概框架,我们还需要实现一个MyTimerTask 来关联任务和执行时间,放在我们的优先级队列中:
class MyTimerTask implements Comparable<MyTimerTask> {
    //执行任务的时间,这里约定为一个毫秒级时间戳
    private long time;
    //任务,这里也可以直接实现Runnab接口
    private Runnable runnable;

    public MyTimerTask(Runnable runnable, int daley) {
        this.runnable = runnable;
        //将相对时间转化为时间戳
        time = System.currentTimeMillis() + daley;
    }

    public long getTime() {
        return time;
    }

    //在这里提供执行任务的方法
    public void run() {
        runnable.run();
    }

    //由于我们的MyTimerTask 是需要放在优先级队列中的,所以需要可比较
    //于是我们可以实现Comparable接口,以执行间隔时间比较大小
    @Override
    public int compareTo(MyTimerTask o) {
        return (int)(this.time - o.time);
    }
}
现在我们可以进一步实现schedule方法:
   public void schedule(Runnable runnable, int daley) {
        MyTimerTask task = new MyTimerTask(runnable, daley);
        q.offer(task);//添加到队列中
    }
现在我们只需要实现MyTimer中具体的线程 t 即可:
        public MyTimer() {
            t = new Thread(() -> {
                while(true) {
                    //队列为空
                    if (q.isEmpty()) {
                        continue;
                    }

                    MyTimerTask run = q.peek();
                    long CurTime = System.currentTimeMillis();

                    if (run.getTime() <= CurTime) {
                        q.poll();
                        //开始执行
                        run.run();
                    }else {
                        //还未到执行时间
                        continue;
                    }
                }
            });
            t.start();
        }
在上述代码中我们实现了 t 线程的大概框架,我们发现,t 线程中存在一个 poll 操作,而上面的schedule方法中存在 offer 操作,并且这个操作是在 main线程中完成的,两个线程都在对同一个队列进行读写操作,可能会有线程安全问题,所以我们 需要给,t线程中和 schedule 方法中都加上锁。
    public void schedule(Runnable runnable, int daley) {
        MyTimerTask task = new MyTimerTask(runnable, daley);
        synchronized (locker) {
            q.offer(task);
        }
    }
    public MyTimer() {
        t = new Thread(() -> {
            while(true) {
                synchronized (locker) {
                    //队列为空
                    if (q.isEmpty()) {
                        continue;
                    }

                    MyTimerTask run = q.peek();
                    long CurTime = System.currentTimeMillis();

                    if (run.getTime() <= CurTime) {
                        q.poll();
                        //开始执行
                        run.run();
                    }else {
                        //还未到执行时间
                        countine;
                    }
                }
            }
        });
        t.start();
    }
与此同时,如果队列为空,t 线程中会直接 coutine 进入下一次 循环,这个循环速度是非常快的,有可能 ,t 线程释放锁之后有拿到锁了,导致线程饿死,所以我们 这里可以使用 wait 等待,并在schedule 中 添加任务成功后,调用notify,同理:如果某个任务的执行时间没到,也会一直循环,所以我们可以把下面 else 中的 continue 换成 notify :
    public void schedule(Runnable runnable, int daley) {
        MyTimerTask task = new MyTimerTask(runnable, daley);
        synchronized (locker) {
            q.offer(task);
            locker.notify();
        }
    }
public MyTimer() {
t = new Thread(() -> {
while(true) {
synchronized (locker) {
//队列为null阻塞等待
while (q.isEmpty()) {
try {
locker.wait();
} catch (InterruptedException e) {
throw new RuntimeException(e);
}
}
MyTimerTask run = q.peek();
long CurTime = System.currentTimeMillis();
if (run.getTime() <= CurTime) {
q.poll();
//开始执行
run.run();
}else {
//还未到执行时间,等待notify唤醒,或者到执行时间
try {
locker.wait(run.getTime() - CurTime);
} catch (InterruptedException e) {
throw new RuntimeException(e);
}
}
}
}
});
t.start();
}
分析一遍上面代码:进入 t 线程,如果队列为 空 ,阻塞等待,直到调用 schedule 添加任务后 notify 取消阻塞,然后进入下面,判断是否到了执行时间,如果到了就出队列,然后执行,没到执行时间则阻塞等待,直到到达执行时间,或者添加了新任务 调用notify 取消阻塞,注意这里:添加新任务后,这个任务的执行时间可能为当前队列中最早的,所以要进入下一次循环重新peek,确保拿到的一定是队列中最早执行的任务。
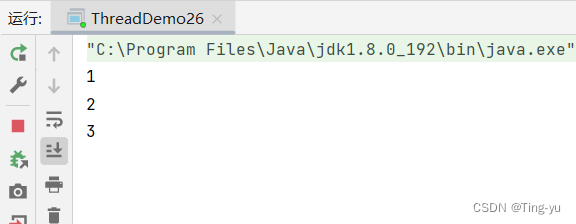
下面来看一下整体代码和执行效果:
class MyTimer {
    //存储用于执行的任务
    private PriorityQueue<MyTimerTask> q = new PriorityQueue<>();
    //负责执行的线程
    Thread t = null;
    Object locker = new Object();
    public MyTimer() {
        t = new Thread(() -> {
            while(true) {
                synchronized (locker) {
                    //队列为null阻塞等待
                    while (q.isEmpty()) {
                        try {
                            locker.wait();
                        } catch (InterruptedException e) {
                            throw new RuntimeException(e);
                        }
                    }

                    MyTimerTask run = q.peek();
                    long CurTime = System.currentTimeMillis();

                    //未到执行时间阻塞等待
                    if (run.getTime() <= CurTime) {
                        q.poll();
                        //开始执行
                        run.run();
                    }else {
                        //还未到执行时间,等待notify唤醒,或者到执行时间
                        try {
                            locker.wait(run.getTime() - CurTime);
                        } catch (InterruptedException e) {
                            throw new RuntimeException(e);
                        }
                    }
                }
            }
        });
        t.start();
    }

    public void schedule(Runnable runnable, int daley) {
        MyTimerTask task = new MyTimerTask(runnable, daley);
        synchronized (locker) {
            q.offer(task);
            locker.notify();
        }
    }
}

class MyTimerTask implements Comparable<MyTimerTask> {
    //执行任务的时间
    private long time;
    //任务
    private Runnable runnable;

    public MyTimerTask(Runnable runnable, int daley) {
        this.runnable = runnable;
        time = System.currentTimeMillis() + daley;
    }
    public long getTime() {
        return time;
    }
    public void run() {
        runnable.run();
    }

    @Override
    public int compareTo(MyTimerTask o) {
        return (int)(this.time - o.time);
    }
}
public class ThreadDemo26 {
    public static void main(String[] args) {
        MyTimer timer = new MyTimer();

        timer.schedule(() -> {
            System.out.println("3");
        }, 3000);

        timer.schedule(() -> {
            System.out.println("2");
        }, 2000);

        timer.schedule(() -> {
            System.out.println("1");
        }, 1000);
    }
} 
