(注解配置AOP)学习Spring的第十七天
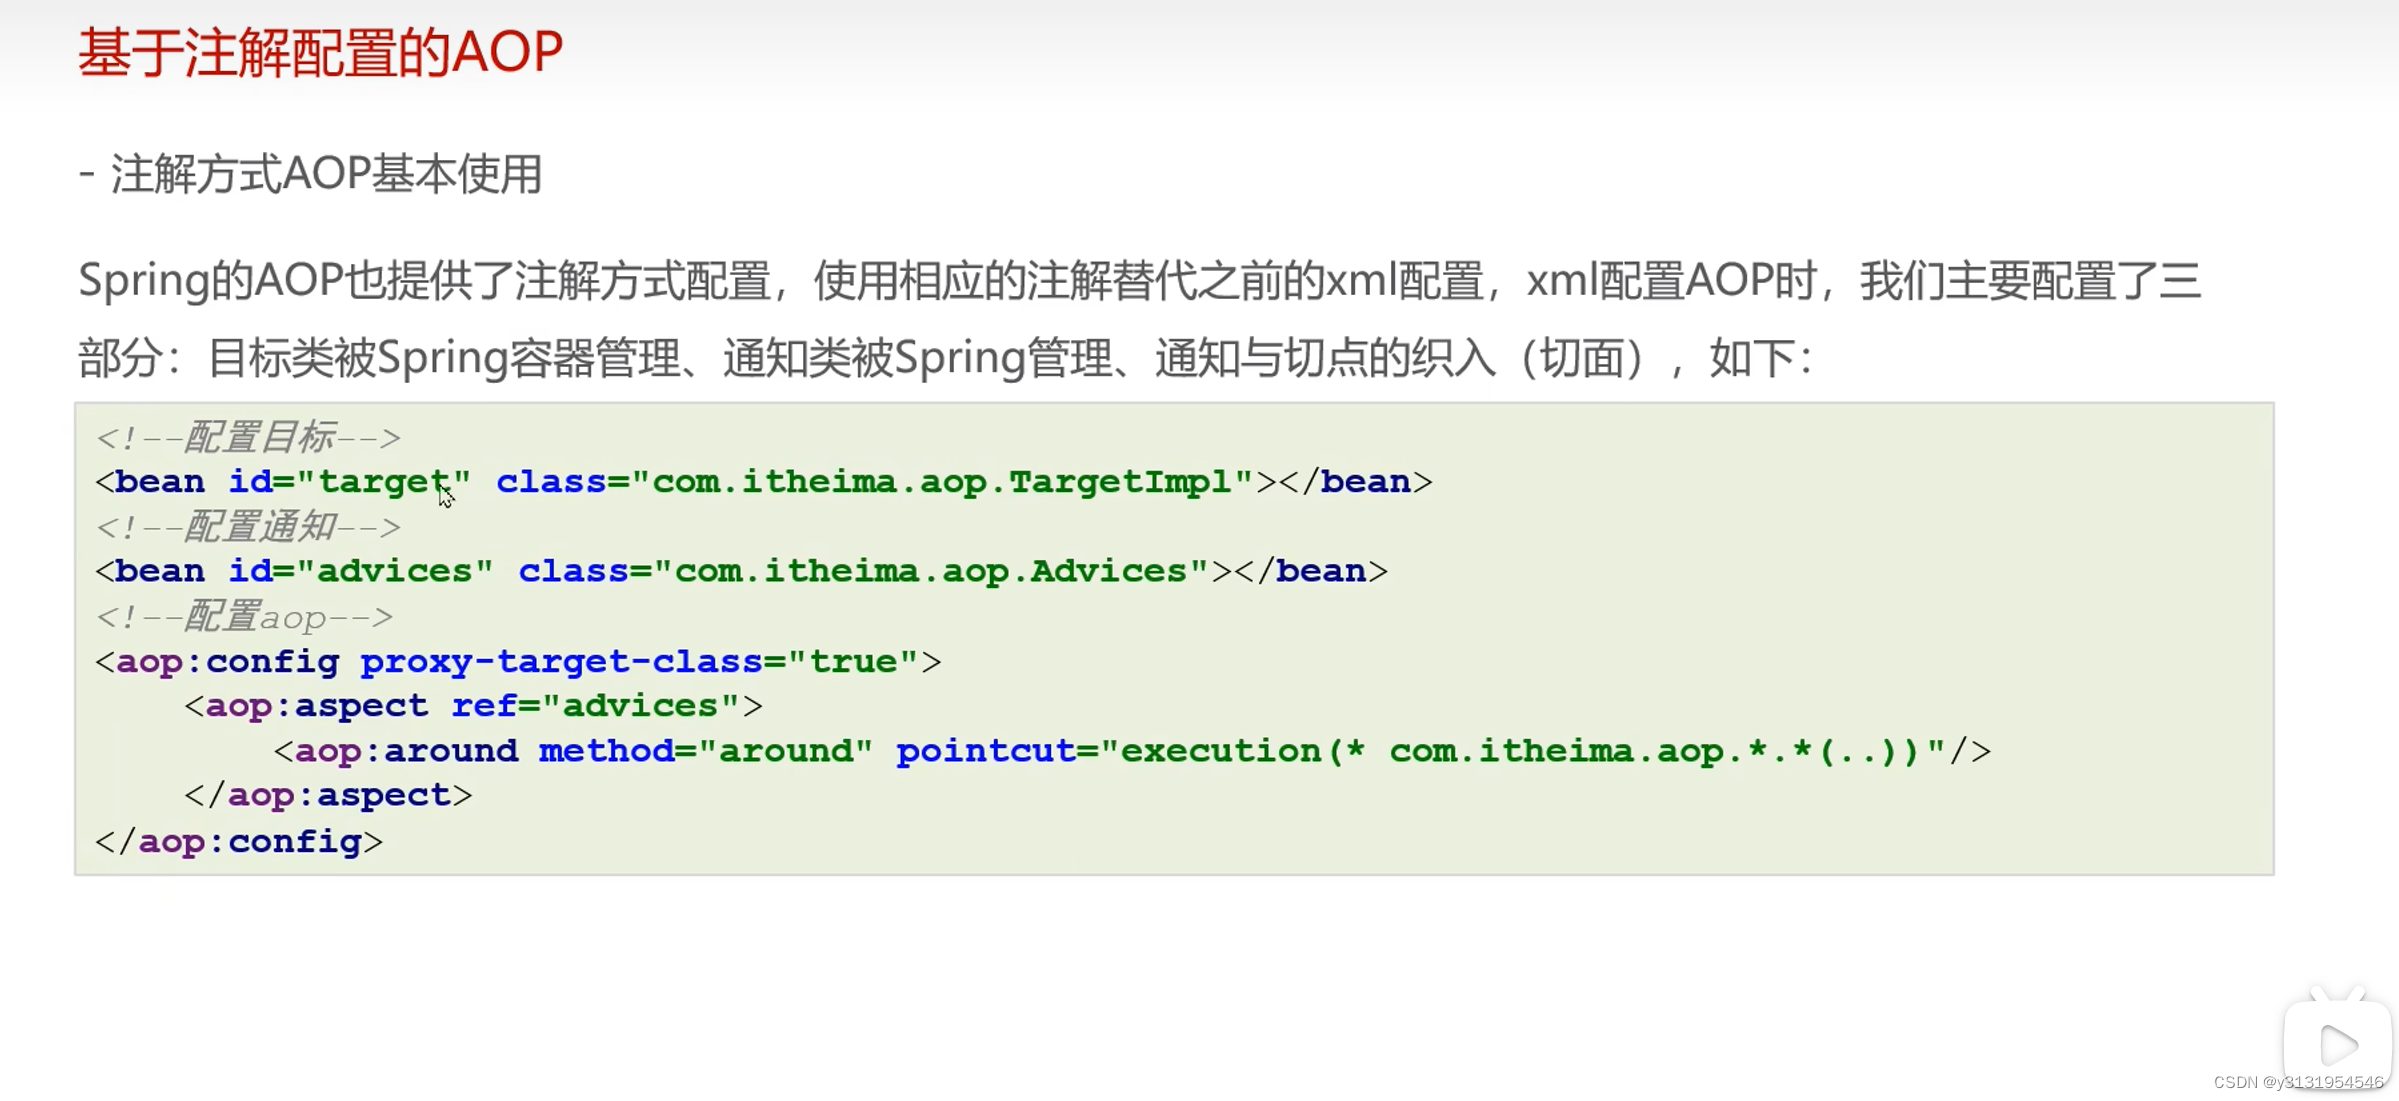
基于注解配置的AOP

来看注解式开发 :
先把目标与通知放到Spring里管理 :
@Service("userService")
public class UserServiceImpl implements UserService {
    @Override
    public void show1() {
        System.out.println("show1......");
    }

    @Override
    public void show2() {
        System.out.println("show2......");
    }
}
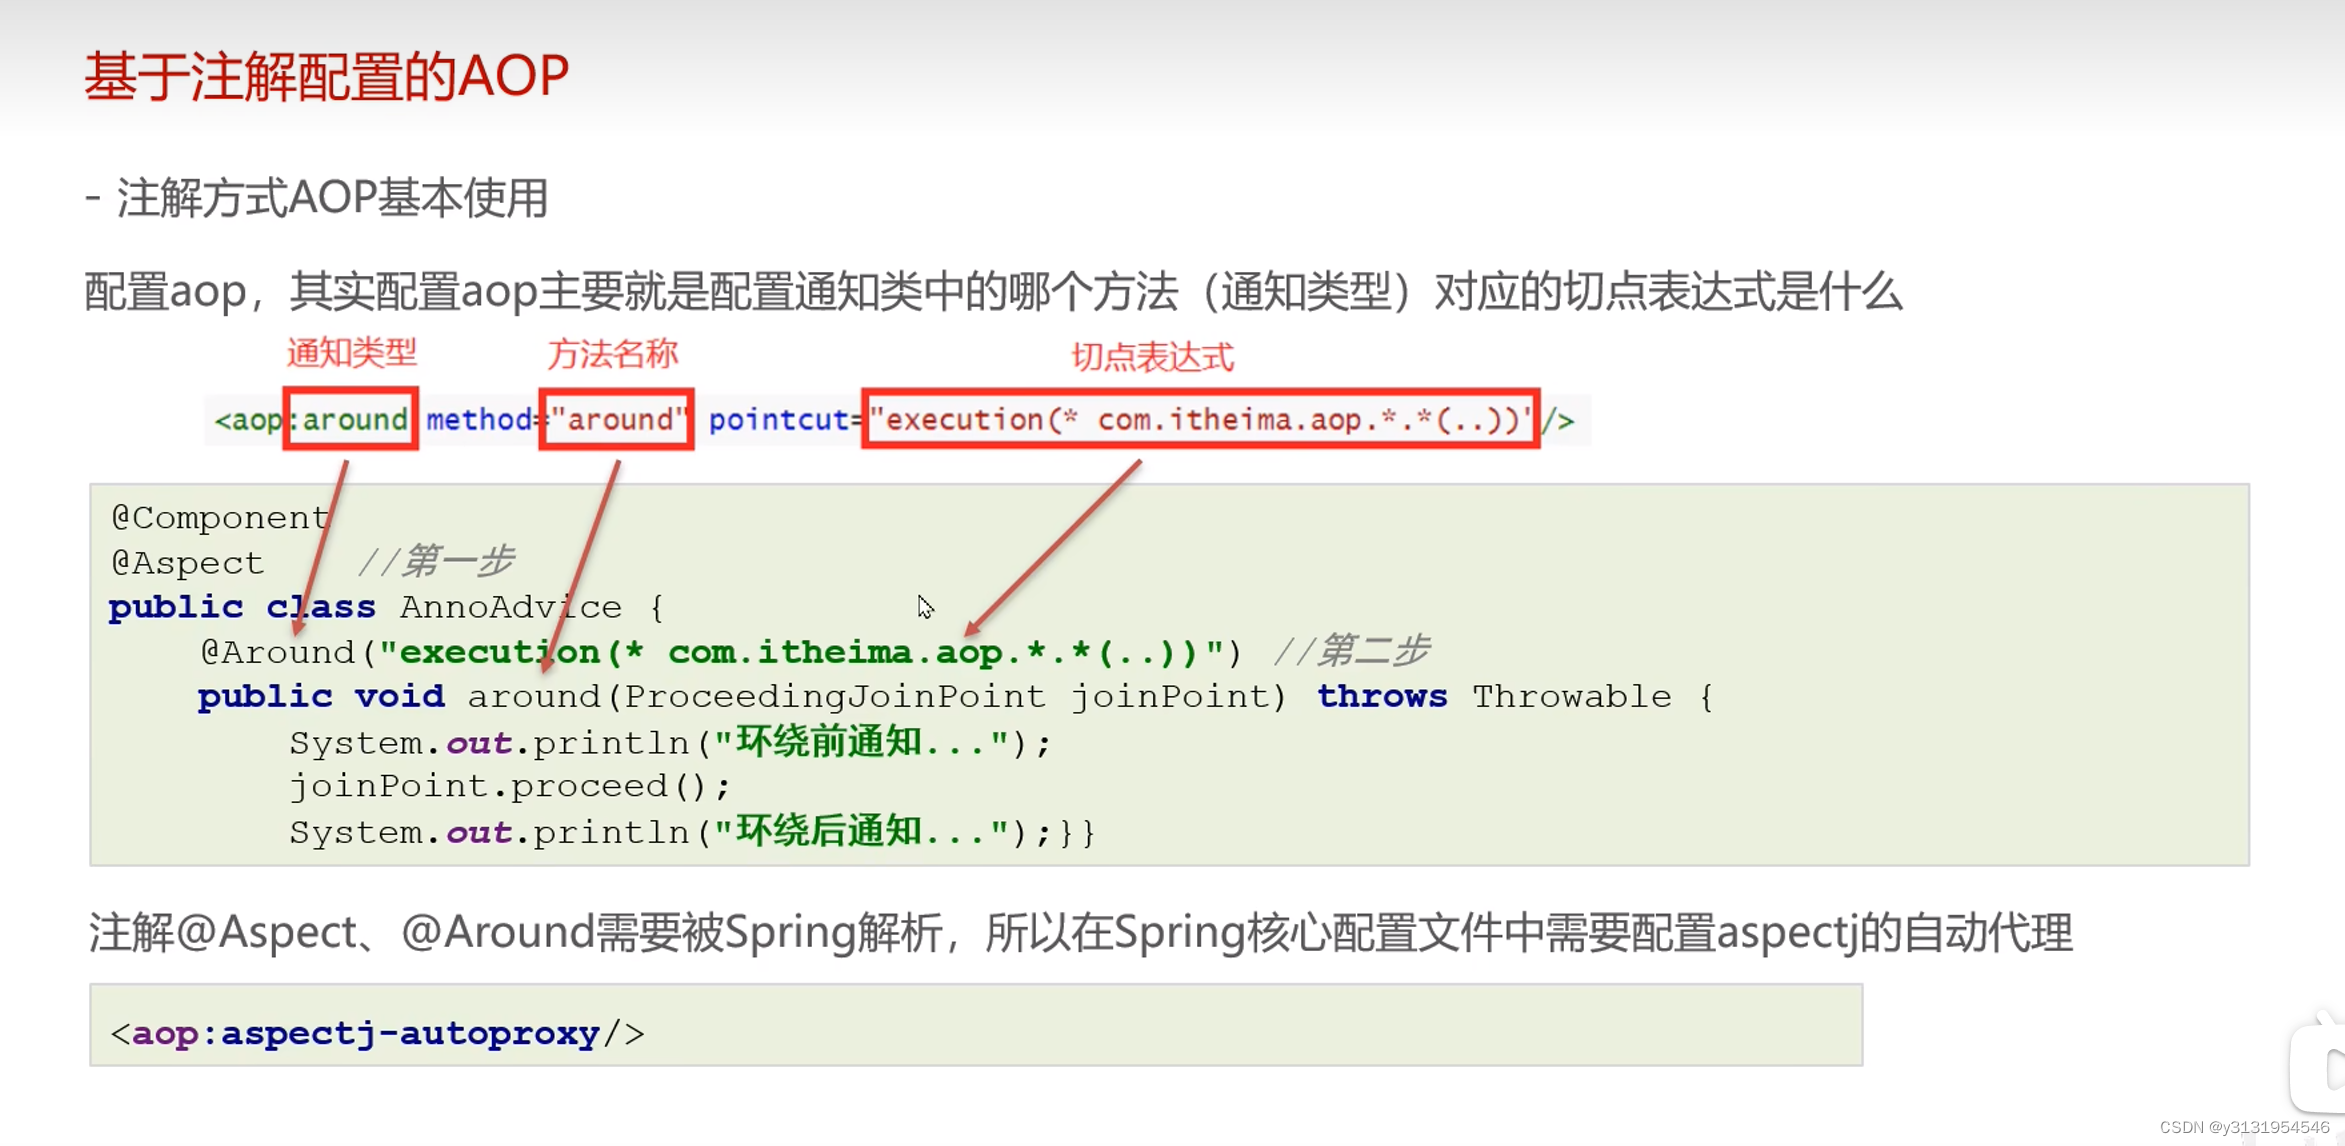
看这个通知 ,加@Aspect开始编辑织入 , @Before()里放的是切入点配置:
@Component
@Aspect
public class MyAdvice {
    //  <aop:before method="beforeAdvice" pointcut-ref="execution(* com.itheima.service.impl.*.*(..))"/>
    @Before("execution(* com.itheima.service.impl.*.*(..))")
    public void beforeAdvice() {

        System.out.println("前置的增强....");
    }

}
还需xml配置扫描注解的代码 ,如下 :
<?xml version="1.0" encoding="UTF-8"?>
<beans xmlns="http://www.springframework.org/schema/beans"
       xmlns:xsi="http://www.w3.org/2001/XMLSchema-instance"
       xmlns:context="http://www.springframework.org/schema/context"
       xmlns:aop="http://www.springframework.org/schema/aop"
       xsi:schemaLocation="
       http://www.springframework.org/schema/beans
       http://www.springframework.org/schema/beans/spring-beans.xsd
       http://www.springframework.org/schema/context
       http://www.springframework.org/schema/context/spring-context.xsd
       http://www.springframework.org/schema/aop
       http://www.springframework.org/schema/aop/spring-aop.xsd
       ">

    <!--组件扫描-->
    <context:component-scan base-package="com.itheima"/>

    <!--使用注解配置AOP,需要开启AOP自动代理-->
    <aop:aspectj-autoproxy/>


    </beans>
如此 , 注解配置就完成了
下图是整体配置信息对比

二 . 切点表达式的抽取
用@Poincut代替了
execution(* com.itheima.service.impl.*.*(..)) , 是操作更加方便
代码如下 :
 @Pointcut("execution(* com.itheima.service.impl.*.*(..))")
    public void myPoincut(){}


    //  <aop:before method="beforeAdvice" pointcut-ref="execution(* com.itheima.service.impl.*.*(..))"/>
    @Before("MyAdvice.myPoincut()")
    public void beforeAdvice() {

        System.out.println("前置的增强....");
    }
三 .代替xml配置方式
新建一个SpringConfig配置类来管理扫描注解
代码如下
@Configuration
@ComponentScan("com.itheima")    // <context:component-scan base-package="com.itheima"/>
@EnableAspectJAutoProxy   //<aop:aspectj-autoproxy/>
public class SpringConfig {


}