使用 SpringBoot+Thymeleaf 模板引擎进行 Web 开发
目录
一、什么是 Thymeleaf 模板引擎
二、Thymeleaf 模板引擎的 Maven 坐标
三、配置 Thymeleaf
四、访问页面
五、访问静态资源
六、Thymeleaf 使用示例
七、Thymeleaf 常用属性
前言
在现代 Web 开发中,模板引擎被广泛用于将动态内容渲染到静态页面中。Thymeleaf 是一种流行的模板引擎,特别适用于 Spring Boot 项目。它能够在服务器端渲染 HTML 页面,同时支持与业务逻辑分离的开发模式,提高了开发效率。
一、什么是 Thymeleaf 模板引擎
模板引擎主要用于解决前端显示和后端业务数据的分离。通过模板引擎,可以将动态数据填充到静态页面中,如 HTML 或 XML 格式,从而实现视图与数据的分离。这样,不仅提升了开发效率,还使得代码更易于重用,保持了良好的设计模式。

二、Thymeleaf 模板引擎的 Maven 坐标
在 Spring Boot 项目中使用 Thymeleaf,我们需要在 pom.xml 文件中添加以下 Maven 依赖:
<dependency>
    <groupId>org.springframework.boot</groupId>
    <artifactId>spring-boot-starter-thymeleaf</artifactId>
</dependency>

<dependency>
    <groupId>net.sourceforge.nekohtml</groupId>
    <artifactId>nekohtml</artifactId>
    <version>1.9.22</version>
</dependency>
三、配置 Thymeleaf
在 application.yml 或 application.properties 文件中,我们可以进行一些常见的配置来定制 Thymeleaf 的行为:
spring:
  thymeleaf:
    cache: false  # 关闭页面缓存,便于开发时查看更改
    encoding: UTF-8  # 设置模板编码
    prefix: classpath:/templates/  # 模板文件所在的目录
    suffix: .html  # 模板文件后缀
    mode: HTML5  # 设置模板模式为 HTML5
四、访问页面

在 Spring Boot 中,我们通过 Controller 层来映射请求和返回视图。以下是一个基本的 Controller 示例:
import org.springframework.stereotype.Controller;
import org.springframework.web.bind.annotation.RequestMapping;

@Controller
public class IndexController {

    @RequestMapping("/")
    public String index(){
        return "index";  // 返回模板名称,Thymeleaf 会根据配置寻找 templates/index.html
    }
}
五、访问静态资源

在 Spring Boot 中,我们可以通过配置来访问静态资源(如 CSS、JS 文件、图片等)。以下是如何在 application.yml 文件中配置静态资源的访问路径:
spring:
  mvc:
    static-path-pattern: /static/**
在 HTML 页面中引用静态资源时,可以使用相对路径:
<link rel="stylesheet" href="../static/css/mystyle.css"/>
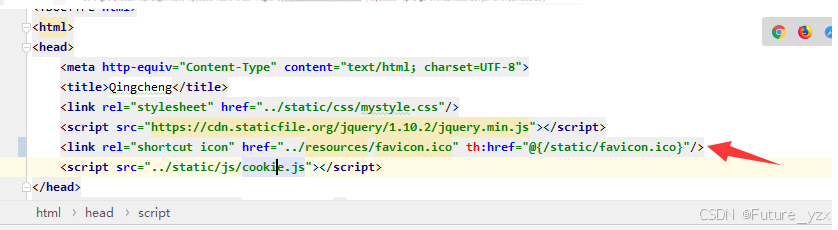
此外,当访问页面时,可能会遇到缺少图标(如 favicon.ico)的问题,报以下错误:

在页面头部加入以下代码来解决:
<link rel="shortcut icon" href="../resources/favicon.ico" th:href="@{/static/favicon.ico}"/>
六、Thymeleaf 使用示例
在 Java 控制器中,我们可以通过 Model 或 ModelMap 向 Thymeleaf 模板传递数据。以下是一个基本的示例,展示了如何向模板传递一个字符串并显示在 HTML 页面中:
Controller 层
@RequestMapping("/hello")
public String hello(Model model){
    model.addAttribute("msg", "Hello");
    return "hello";  // 返回模板名称 "hello.html"
}
HTML 模板(hello.html)
<!DOCTYPE html>
<html lang="en" xmlns:th="http://www.thymeleaf.org">
<body>
    <h1>Hello</h1>
    <div th:text="${msg}"></div>  <!-- 显示 "Hello" -->
</body>
</html>
七、Thymeleaf 常用属性
Thymeleaf 提供了许多属性来简化 HTML 内容的渲染,以下是一些常用的属性和示例:
1. th:text 和 th:utext
th:text:设置元素的文本内容,并会自动转义 HTML 标签。th:utext:设置元素的文本内容,但不转义 HTML 标签。
示例:
@RequestMapping("thymeleaf")
public String thymeleaf(ModelMap map){
    map.put("thText", "th:text设置文本内容 <b>加粗</b>");
    map.put("thUText", "th:utext 设置文本内容 <b>加粗</b>");
    map.put("thValue", "thValue 设置当前元素的value值");
    return "thymeleaf";
}
HTML 模板(thymeleaf.html)
<p th:text="${thText}"></p>  <!-- 输出 "th:text设置文本内容 <b>加粗</b>" -->
<p th:utext="${thUText}"></p>  <!-- 输出 "th:utext 设置文本内容 <b>加粗</b>",<b>加粗</b>会被渲染为加粗文本 -->
<input type="text" th:value="${thValue}">  <!-- 设置输入框的默认值 -->
2. th:each(循环)
th:each用于遍历集合,并动态渲染每一项。
示例:
@RequestMapping("/thymeleaf")
public String listUser(Model model) {
    List<Person> userList = new ArrayList<>();
    for (int i = 0; i < 10; i++) {
        userList.add(new Person(i, "张三" + i, 20 + i, '男'));
    }
    model.addAttribute("users", userList);
    return "thymeleaf";
}
HTML 模板(thymeleaf.html)
<div>
    <ul>
        <li th:each="user : ${users}">
            <span th:text="${user.id}"></span>-
            <span th:text="${user.name}"></span>-
            <span th:text="${user.age}"></span>-
            <span th:text="${user.sex}"></span>
        </li>
    </ul>
</div>
3. th:if(条件判断)
th:if用于根据条件渲染元素。
示例:
@RequestMapping("/thymeleaf")
public String listUser(Model model) {
    model.addAttribute("size", 3);
    return "thymeleaf";
}
HTML 模板(thymeleaf.html)
<div th:if="${size} eq 3">
  <div>你好</div>
</div>
Thymeleaf 还支持多种条件判断,如 eq(等于)、gt(大于)、lt(小于)等运算符。
总结
通过本文,我们了解到 Thymeleaf 的基本使用方法和常用功能,包括如何集成到 Spring Boot 项目中,如何在模板中渲染动态数据,以及如何使用 Thymeleaf 提供的多种标签进行页面渲染。Thymeleaf 提供了一种简洁且强大的方式来处理前端页面渲染,尤其适合与 Spring Boot 框架结合使用。
希望本文章对你深入理解 Thymeleaf 模板引擎有所帮助。欢迎随时交流!