Python+Yolov8目标识别特征检测
Yolov8目标识别特征检测
如需安装运行环境或远程调试,见文章底部个人QQ名片,由专业技术人员远程协助!
前言
这篇博客针对<<Yolov8目标识别特征检测>>编写代码,代码整洁,规则,易读。 学习与应用推荐首选。
文章目录
一、所需工具软件
二、使用步骤
1. 引入库
2. 识别图像特征
3. 参数设置
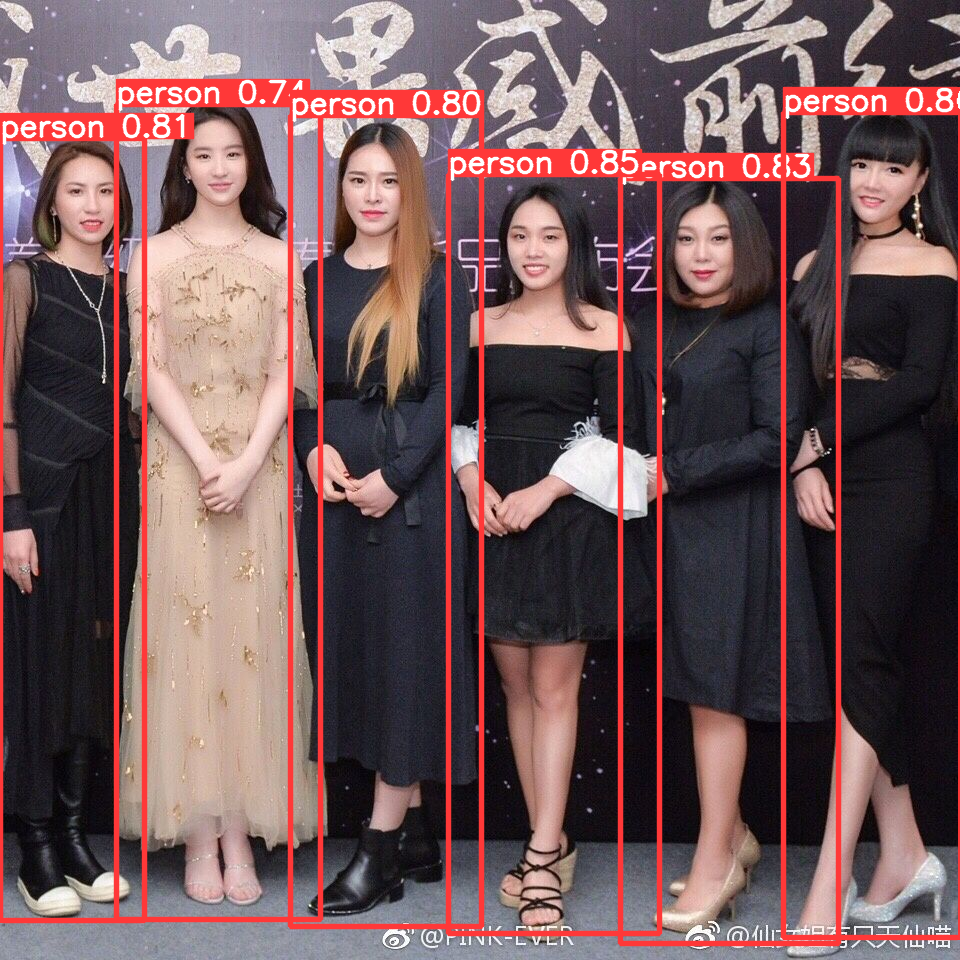
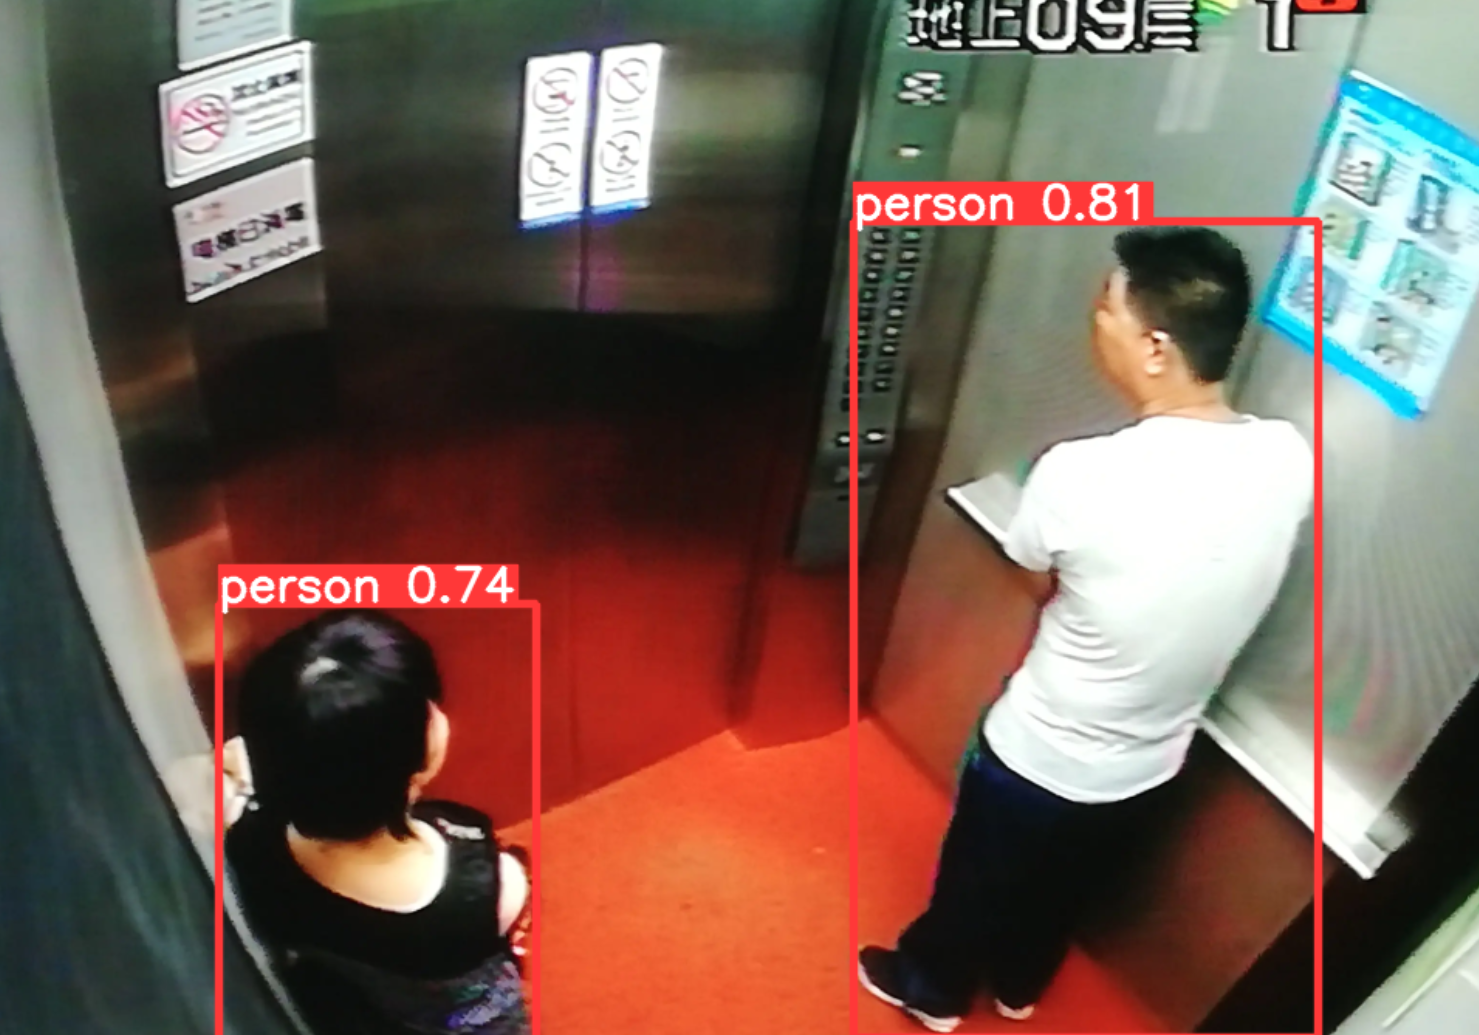
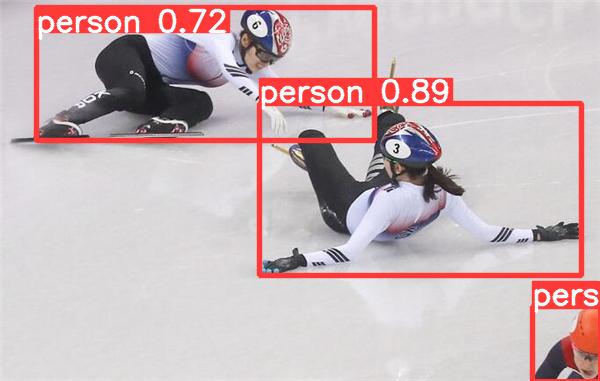
4. 运行结果
三、在线协助
一、所需工具软件
1. Pycharm, Python
2. Yolov8, OpenCV
二、使用步骤
1.引入库
代码如下(示例):
import torch

from ultralytics.yolo.engine.predictor import BasePredictor
from ultralytics.yolo.engine.results import Results
from ultralytics.yolo.utils import DEFAULT_CFG, ROOT, ops
from ultralytics.yolo.utils.plotting import Annotator, colors, save_one_box
2.识别图像特征
代码如下(示例):
class DetectionPredictor(BasePredictor):

    def get_annotator(self, img):
        return Annotator(img, line_width=self.args.line_thickness, example=str(self.model.names))

    def preprocess(self, img):
        img = torch.from_numpy(img).to(self.model.device)
        img = img.half() if self.model.fp16 else img.float()  # uint8 to fp16/32
        img /= 255  # 0 - 255 to 0.0 - 1.0
        return img

    def postprocess(self, preds, img, orig_img):
        preds = ops.non_max_suppression(preds,
                                        self.args.conf,
                                        self.args.iou,
                                        agnostic=self.args.agnostic_nms,
                                        max_det=self.args.max_det,
                                        classes=self.args.classes)

        results = []
        for i, pred in enumerate(preds):
            orig_img = orig_img[i] if isinstance(orig_img, list) else orig_img
            shape = orig_img.shape
            pred[:, :4] = ops.scale_boxes(img.shape[2:], pred[:, :4], shape).round()
            results.append(Results(boxes=pred, orig_img=orig_img, names=self.model.names))
        return results

    def write_results(self, idx, results, batch):
        p, im, im0 = batch
        log_string = ''
        if len(im.shape) == 3:
            im = im[None]  # expand for batch dim
        self.seen += 1
        imc = im0.copy() if self.args.save_crop else im0
        if self.source_type.webcam or self.source_type.from_img:  # batch_size >= 1
            log_string += f'{idx}: '
            frame = self.dataset.count
        else:
            frame = getattr(self.dataset, 'frame', 0)
        self.data_path = p
        self.txt_path = str(self.save_dir / 'labels' / p.stem) + ('' if self.dataset.mode == 'image' else f'_{frame}')
        log_string += '%gx%g ' % im.shape[2:]  # print string
        self.annotator = self.get_annotator(im0)

        det = results[idx].boxes  # TODO: make boxes inherit from tensors
        if len(det) == 0:
            return log_string
        for c in det.cls.unique():
            n = (det.cls == c).sum()  # detections per class
            log_string += f"{n} {self.model.names[int(c)]}{'s' * (n > 1)}, "

        # write
        for d in reversed(det):
            cls, conf = d.cls.squeeze(), d.conf.squeeze()
            if self.args.save_txt:  # Write to file
                line = (cls, *(d.xywhn.view(-1).tolist()), conf) \
                    if self.args.save_conf else (cls, *(d.xywhn.view(-1).tolist()))  # label format
                with open(f'{self.txt_path}.txt', 'a') as f:
                    f.write(('%g ' * len(line)).rstrip() % line + '\n')
            if self.args.save or self.args.save_crop or self.args.show:  # Add bbox to image
                c = int(cls)  # integer class
                name = f'id:{int(d.id.item())} {self.model.names[c]}' if d.id is not None else self.model.names[c]
                label = None if self.args.hide_labels else (name if self.args.hide_conf else f'{name} {conf:.2f}')
                self.annotator.box_label(d.xyxy.squeeze(), label, color=colors(c, True))
            if self.args.save_crop:
                save_one_box(d.xyxy,
                             imc,
                             file=self.save_dir / 'crops' / self.model.model.names[c] / f'{self.data_path.stem}.jpg',
                             BGR=True)

        return log_string
3.参数定义
代码如下(示例):
if __name__ == '__main__':
    parser = argparse.ArgumentParser()
    parser.add_argument('--weights', nargs='+', type=str, default='yolov5_best_road_crack_recog.pt', help='model.pt path(s)')
    parser.add_argument('--img-size', type=int, default=640, help='inference size (pixels)')
    parser.add_argument('--conf-thres', type=float, default=0.25, help='object confidence threshold')
    parser.add_argument('--iou-thres', type=float, default=0.45, help='IOU threshold for NMS')
    parser.add_argument('--view-img', action='store_true', help='display results')
    parser.add_argument('--save-txt', action='store_true', help='save results to *.txt')
    parser.add_argument('--classes', nargs='+', type=int, default='0', help='filter by class: --class 0, or --class 0 2 3')
    parser.add_argument('--agnostic-nms', action='store_true', help='class-agnostic NMS')
    parser.add_argument('--augment', action='store_true', help='augmented inference')
    parser.add_argument('--update', action='store_true', help='update all models')
    parser.add_argument('--project', default='runs/detect', help='save results to project/name')
    parser.add_argument('--name', default='exp', help='save results to project/name')
    parser.add_argument('--exist-ok', action='store_true', help='existing project/name ok, do not increment')
    opt = parser.parse_args()
4.运行结果如下


三、在线协助:
如需安装运行环境或远程调试,见文章底部个人 QQ 名片,由专业技术人员远程协助!
1)远程安装运行环境,代码调试
2)Qt, C++, Python入门指导
3)界面美化
4)软件制作
博主推荐文章:https://blog.csdn.net/alicema1111/article/details/123851014
个人博客主页:https://blog.csdn.net/alicema1111?type=blog
博主所有文章点这里:https://blog.csdn.net/alicema1111?type=blog
