Sentinel入门使用
目录
- 快速开始
- demo
- @SentinelResource
- 引入sentinel控制台
- 集成spring cloud
- 创建父工程
- sentinel工程
- spring-cloud工程
- client微服务工程
- server微服务工程
- 测试
- 总结
快速开始
demo
<dependency>
	<groupId>com.alibaba.csp</groupId>
	<artifactId>sentinel-core</artifactId>
	<version>1.8.4</version>
</dependency>
- SentinelController
@RestController
@Slf4j
public class SentinelController {

    private static final String RESOURCE = "hello";

    @GetMapping("/hello")
    public String test(String name) {
        try (Entry entry = SphU.entry(RESOURCE)){
            log.info("hello {}", name);
            return "hello " + name;
        } catch (BlockException e) {
            log.error("blocked by sentinel!", e);
            return "blocked by sentinel!";
        }

    }

    @PostConstruct
    public void initFlowRules() {
        List<FlowRule> rules = new ArrayList<>();
        FlowRule rule = new FlowRule();
        //设置受保护的资源
        rule.setResource(RESOURCE);
        //设置流控规则
        rule.setGrade(RuleConstant.FLOW_GRADE_QPS);
        //设置受保护的资源阈值
        rule.setCount(2);
        rules.add(rule);
        FlowRuleManager.loadRules(rules);
    }
}
代码中一个方法时测试接口,一个是项目启动时给sentinel设置流控规则的初始化方法,该规则是给"hello"资源设置QPS为2。
- 测试
一秒内连续刷新3次及以上,请求将被拦截。

@SentinelResource
注解的优势在于不侵入业务代码,非常友好。客户端引入依赖来支持注解的形式进行流控:
<dependency>
	<groupId>com.alibaba.csp</groupId>
	<artifactId>sentinel-annotation-aspectj</artifactId>
	<version>1.8.4</version>
</dependency>
- 代码改造:
引入注解的切面实现
@Configuration
public class SentinelAspectConfiguration {

    @Bean
    public SentinelResourceAspect sentinelResourceAspect() {
        return new SentinelResourceAspect();
    }
}
业务代码通过@SentinelResource注解实现流控
@RestController
@Slf4j
public class SentinelAspectController {

    private static final String RESOURCE = "hello2";

    @SentinelResource(value = RESOURCE, blockHandler = "handleException", fallback = "fallbackException")
    @GetMapping("/hello2")
    public String test(String name) {
        return "hello " + name;
    }

    public String handleException(String name, BlockException e) {
        return "blocked by sentinel!";
    }

    public String fallbackException(String name, Throwable t) {
        return "fallback by sentinel!";
    }

}
注意引入了新资源必须在@PostConstrut初始化方法中新增新的流控规则:
		FlowRule rule2 = new FlowRule();
        //设置受保护的资源
        rule2.setResource(RESOURCE2);
        //设置流控规则
        rule2.setGrade(RuleConstant.FLOW_GRADE_QPS);
        //设置受保护的资源阈值
        rule2.setCount(2);
        rules.add(rule2);
- 测试

引入sentinel控制台
官方下载源码使用maven命令编译可生成sentinel-dashboard.jar包,通过java -jar可直接启动。
通过localhost:8080访问

客户端引入传输模块,将流控信息发送到sentinel控制台。
<dependency>
		<groupId>com.alibaba.csp</groupId>
		<artifactId>sentinel-transport-simple-http</artifactId>
		<version>1.8.4</version>
</dependency>
客户端启动时,设置VM options参数:-Dcsp.sentinel.dashboard.server=localhost:8080指定sentinel服务端IP和port。再次访问hello2资源,客户端会将流控的请求和通过的请求等信息发送到sentinel控制台,实现秒级的实时监控。

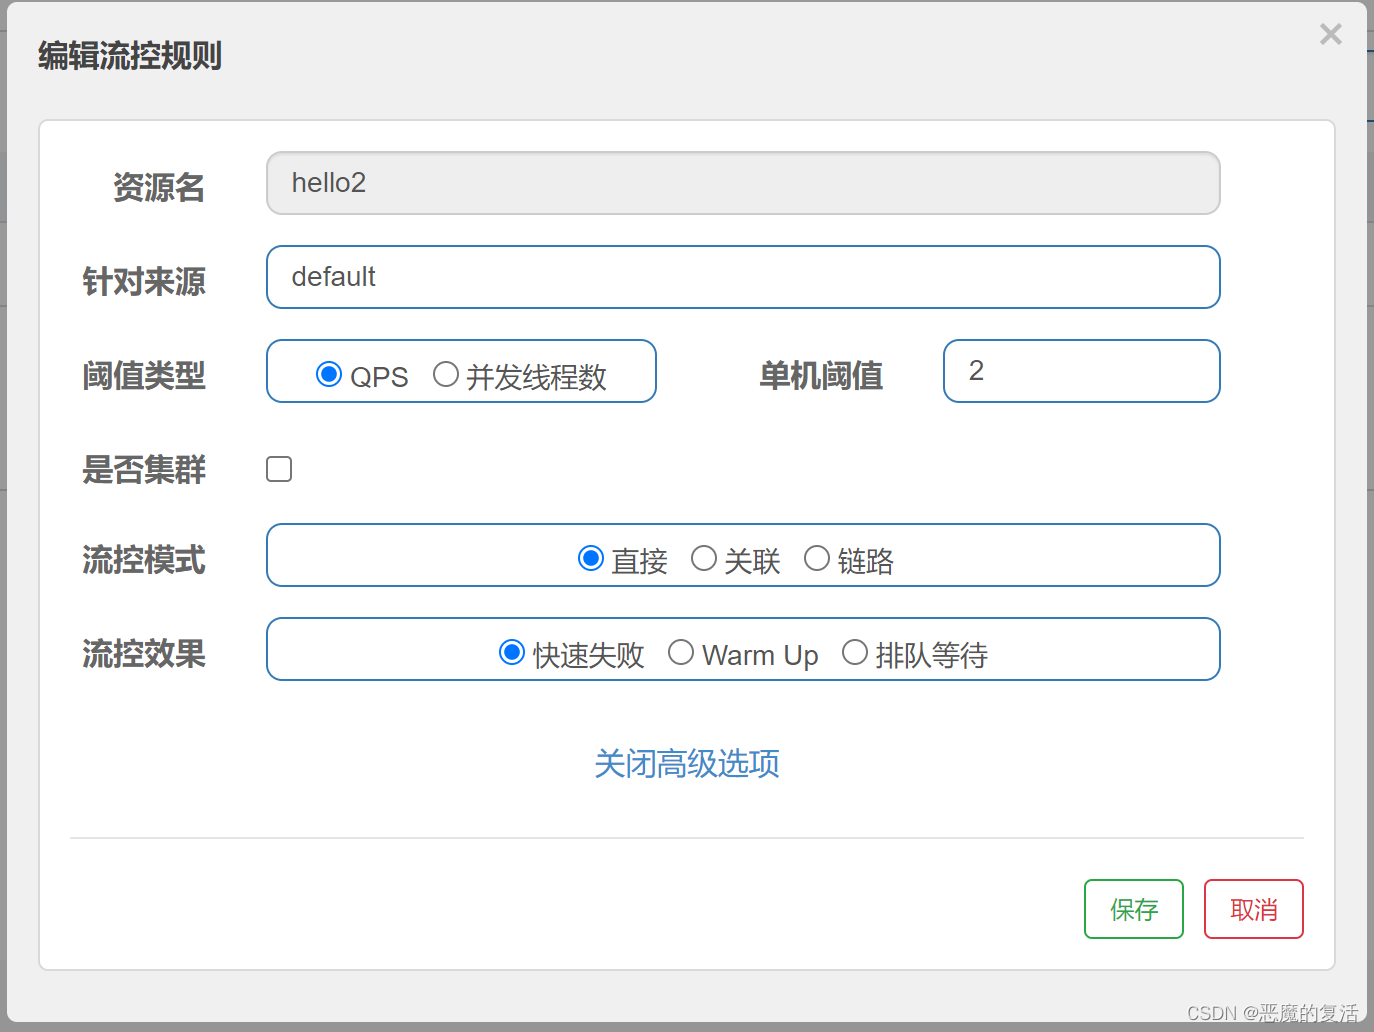
dashboard中流控规则资源名如图(hello和hello2),它们是客户端通过http发送给sentinel的dashBoard服务端。也可以通过右上角的“新增流控规则”来新增需要被流控的资源,以及点击编辑来修改流控规则


集成spring cloud
创建父工程
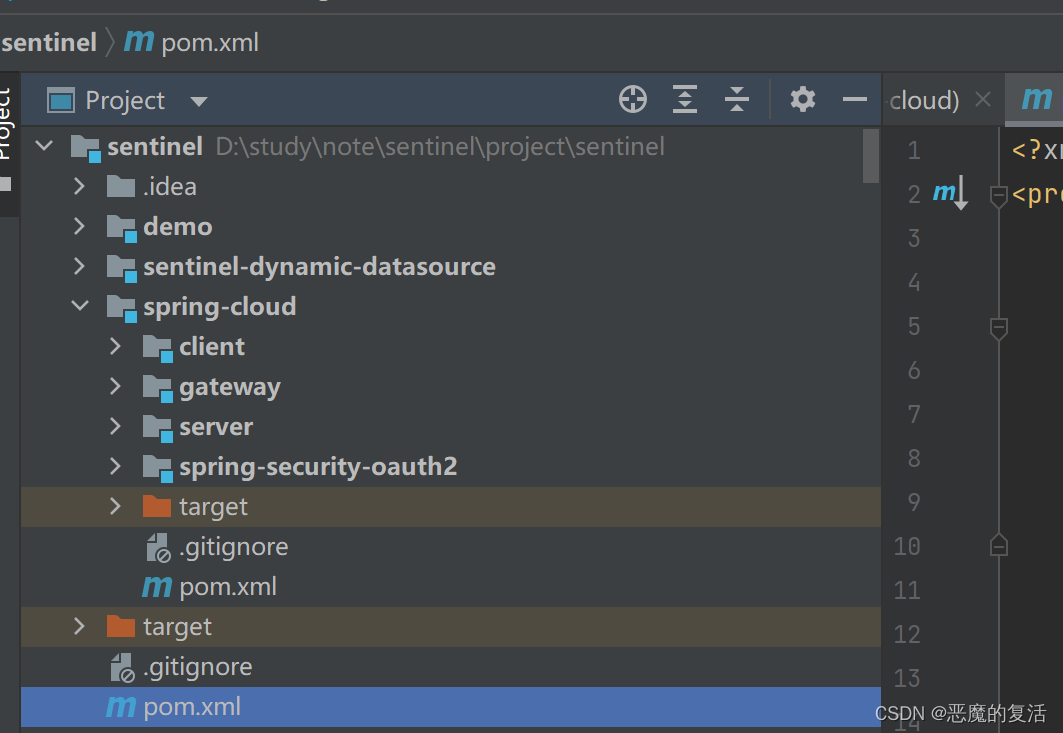
工程目录如下,sentinel为根目录,spring-cloud包含client和server,client和server作为微服务测试工程。

sentinel工程
在sentinel中引入父依赖和spring-cloud-alibaba的依赖管理
<parent>
	<groupId>org.springframework.cloud</groupId>
	<artifactId>spring-cloud-build</artifactId>
	<version>2.3.5.RELEASE</version>
	<relativePath/>
</parent>
<dependencyManagement>
	<dependencies>
		<dependency>
			<groupId>com.alibaba.cloud</groupId>
			<artifactId>spring-cloud-alibaba-dependencies</artifactId>
			<version>2.2.8.RELEASE</version>
			<type>pom</type>
			<scope>import</scope>
		</dependency>
	</dependencies>
</dependencyManagement>
顺便了解下scope=import的含义:import只能在dependencyManagement定义,maven的工程只支持单继承,有时候为了打破这个规则,那么import就派上用场了,它可以让当前工程拥有父工程的所依赖的包。
spring-cloud工程
spring-cloud工程包含四个子工程,只关注client和server。在spring-cloud的pom文件中加入spring-boot依赖管理和spring-cloud依赖管理,他们就是子工程公共的依赖包。
<properties>
    <java.version>1.8</java.version>
    <spring-cloud.version>Hoxton.SR8</spring-cloud.version>
</properties>
<dependencyManagement>
    <dependencies>
        <!-- Spring Dependencies -->
        <dependency>
            <groupId>org.springframework.boot</groupId>
            <artifactId>spring-boot-dependencies</artifactId>
            <version>${spring-boot.version}</version>
            <type>pom</type>
            <scope>import</scope>
        </dependency>

        <dependency>
            <groupId>org.springframework.cloud</groupId>
            <artifactId>spring-cloud-dependencies</artifactId>
            <version>${spring-cloud.version}</version>
            <type>pom</type>
            <scope>import</scope>
        </dependency>
    </dependencies>
</dependencyManagement>
client微服务工程
- pom.xml
sentinel集成spring cloud需要依赖spring-cloud提供的sentinel starter包,同时还需要依赖nacos注册微服务。
	<dependencies>
        <dependency>
            <groupId>org.springframework.boot</groupId>
            <artifactId>spring-boot-starter</artifactId>
        </dependency>

        <dependency>
            <groupId>com.alibaba.cloud</groupId>
            <artifactId>spring-cloud-starter-alibaba-sentinel</artifactId>
        </dependency>

        <dependency>
            <groupId>com.alibaba.cloud</groupId>
            <artifactId>spring-cloud-starter-alibaba-nacos-discovery</artifactId>
        </dependency>

        <dependency>
            <groupId>org.springframework.boot</groupId>
            <artifactId>spring-boot-starter-actuator</artifactId>
        </dependency>

        <dependency>
            <groupId>org.springframework.cloud</groupId>
            <artifactId>spring-cloud-starter-openfeign</artifactId>
        </dependency>

        <dependency>
            <groupId>org.springframework.boot</groupId>
            <artifactId>spring-boot-starter-web</artifactId>
        </dependency>
    </dependencies>
- application.properties
spring.application.name=sentinel-test-client
spring.cloud.nacos.discovery.server-addr=127.0.0.1:8848
spring.cloud.nacos.username=nacos
spring.cloud.nacos.password=nacos
server.port=18088
spring.cloud.sentinel.transport.dashboard=127.0.0.1:8080
#开启feign对sentinel的支持
feign.sentinel.enabled=true
spring.main.allow-bean-definition-overriding=true
spring.cloud.sentinel.web-context-unify=false
- UserController
@RestController
@Slf4j
public class UserController {

    @Resource
    private UserFeign userFeign;

    @GetMapping("/client/getUser")
    public User getUser(@RequestParam String id, HttpServletRequest request) throws InterruptedException {
        log.info("X-Request-color: {}", request.getHeader("X-Request-color"));
        return userFeign.findUserById(id);
    }
}
- UserFeign
@FeignClient(value = "sentinel-test-server", fallback = UserFeignFallback.class, configuration = FeignConfiguration.class)
public interface UserFeign {

    @GetMapping("/user/findUserById/{id}")
    User findUserById(@PathVariable("id") String id);
}
server微服务工程
- pom.xml
<dependencies>
        <dependency>
            <groupId>org.springframework.boot</groupId>
            <artifactId>spring-boot-starter</artifactId>
        </dependency>

        <dependency>
            <groupId>com.alibaba.cloud</groupId>
            <artifactId>spring-cloud-starter-alibaba-sentinel</artifactId>
        </dependency>

        <dependency>
            <groupId>com.alibaba.cloud</groupId>
            <artifactId>spring-cloud-starter-alibaba-nacos-discovery</artifactId>
        </dependency>

        <dependency>
            <groupId>org.springframework.boot</groupId>
            <artifactId>spring-boot-starter-web</artifactId>
        </dependency>
    </dependencies>
- application.properties
spring.application.name=sentinel-test-server
spring.cloud.nacos.discovery.server-addr=127.0.0.1:8848
spring.cloud.nacos.username=nacos
spring.cloud.nacos.password=nacos
server.port=18087
spring.cloud.sentinel.transport.dashboard=127.0.0.1:8080
- UserController
@RestController
@Slf4j
public class UserController {
    @GetMapping("/user/findUserById/{id}")
    public User getUser(@PathVariable String id) throws InterruptedException {
        User user = new User();
        user.setAge("23");
        user.setId(id);
        user.setName("rick");
        return user;
    }
}
测试
对客户端资源进行流控
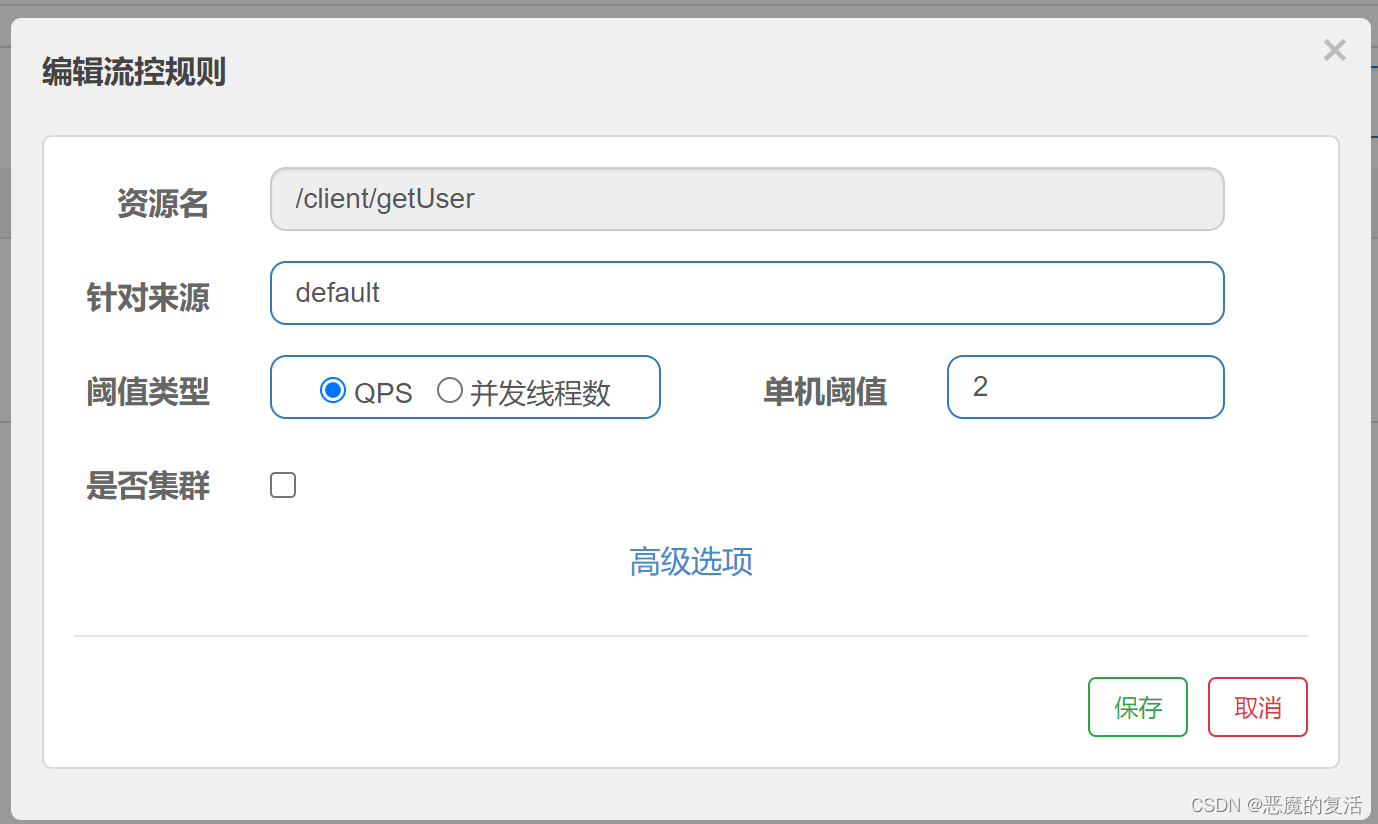
在sentinel的dashboard新增flow流控规则,设置资源名为/client/getUser的PQS为2.

连续刷新http://localhost:18088/client/getUser?id=1,被流控了。

对服务端资源流控,删除客户端流控规则,新增服务端流控规则。

测试服务端流控效果,由于服务端返回的是字符串,所以client工程服务降级,返回feign的fallback,fallback定义的是空的user对象。

总结
首先我们通过案例演示了sentinel的具体功能和效果。再来看它到底是什么,相对来讲更容易理解,sentinel相关文档可参考官方文档
参考官方文档:
sentinel的功能
- 流量控制
在快速开始中,演示了流控规则中对资源进行QPS的流控,sentinel还支持控制并发线程数的限流。sentinel提供一个更强大的功能:流控效果,支持直接拒绝/预热/排队等待的功能 - 熔断降级
在分布式系统中,无论是什么架构,必然会遇到服务不可用甚至服务雪崩的问题。
Hystrix通过线程池隔离的方式解决服务不可用时导致服务雪崩的问题,从而做到彻底隔离资源,但是坏处显而易见增加了线程之间切换的成本。
Sentinel通过统计并发线程数来减少不稳定资源对其他资源的影响。当某个资源不稳定时如响应时间变长,当线程数堆积到一定数量后到达控制的并发线程数,那么就直接拒绝访问。等待响应结束后,其他线程才能访问该资源 - 系统负载保护
当系统负载较高的时候,如果还持续让请求进入,可能会导致系统崩溃,无法响应。对此,sentinel提供了对应的保护机制,使系统的入口流量和系统负载达到一个平衡。
